You can share your OneDrive or SharePoint Online files directly in a Webex App space. Everyone in the space can access the latest version of the files.
You can choose a file directly from OneDrive or SharePoint Online. After you share the file in your space, people can edit the file directly from Webex App. More than one person can edit the file at the same time and they can see all the updates.
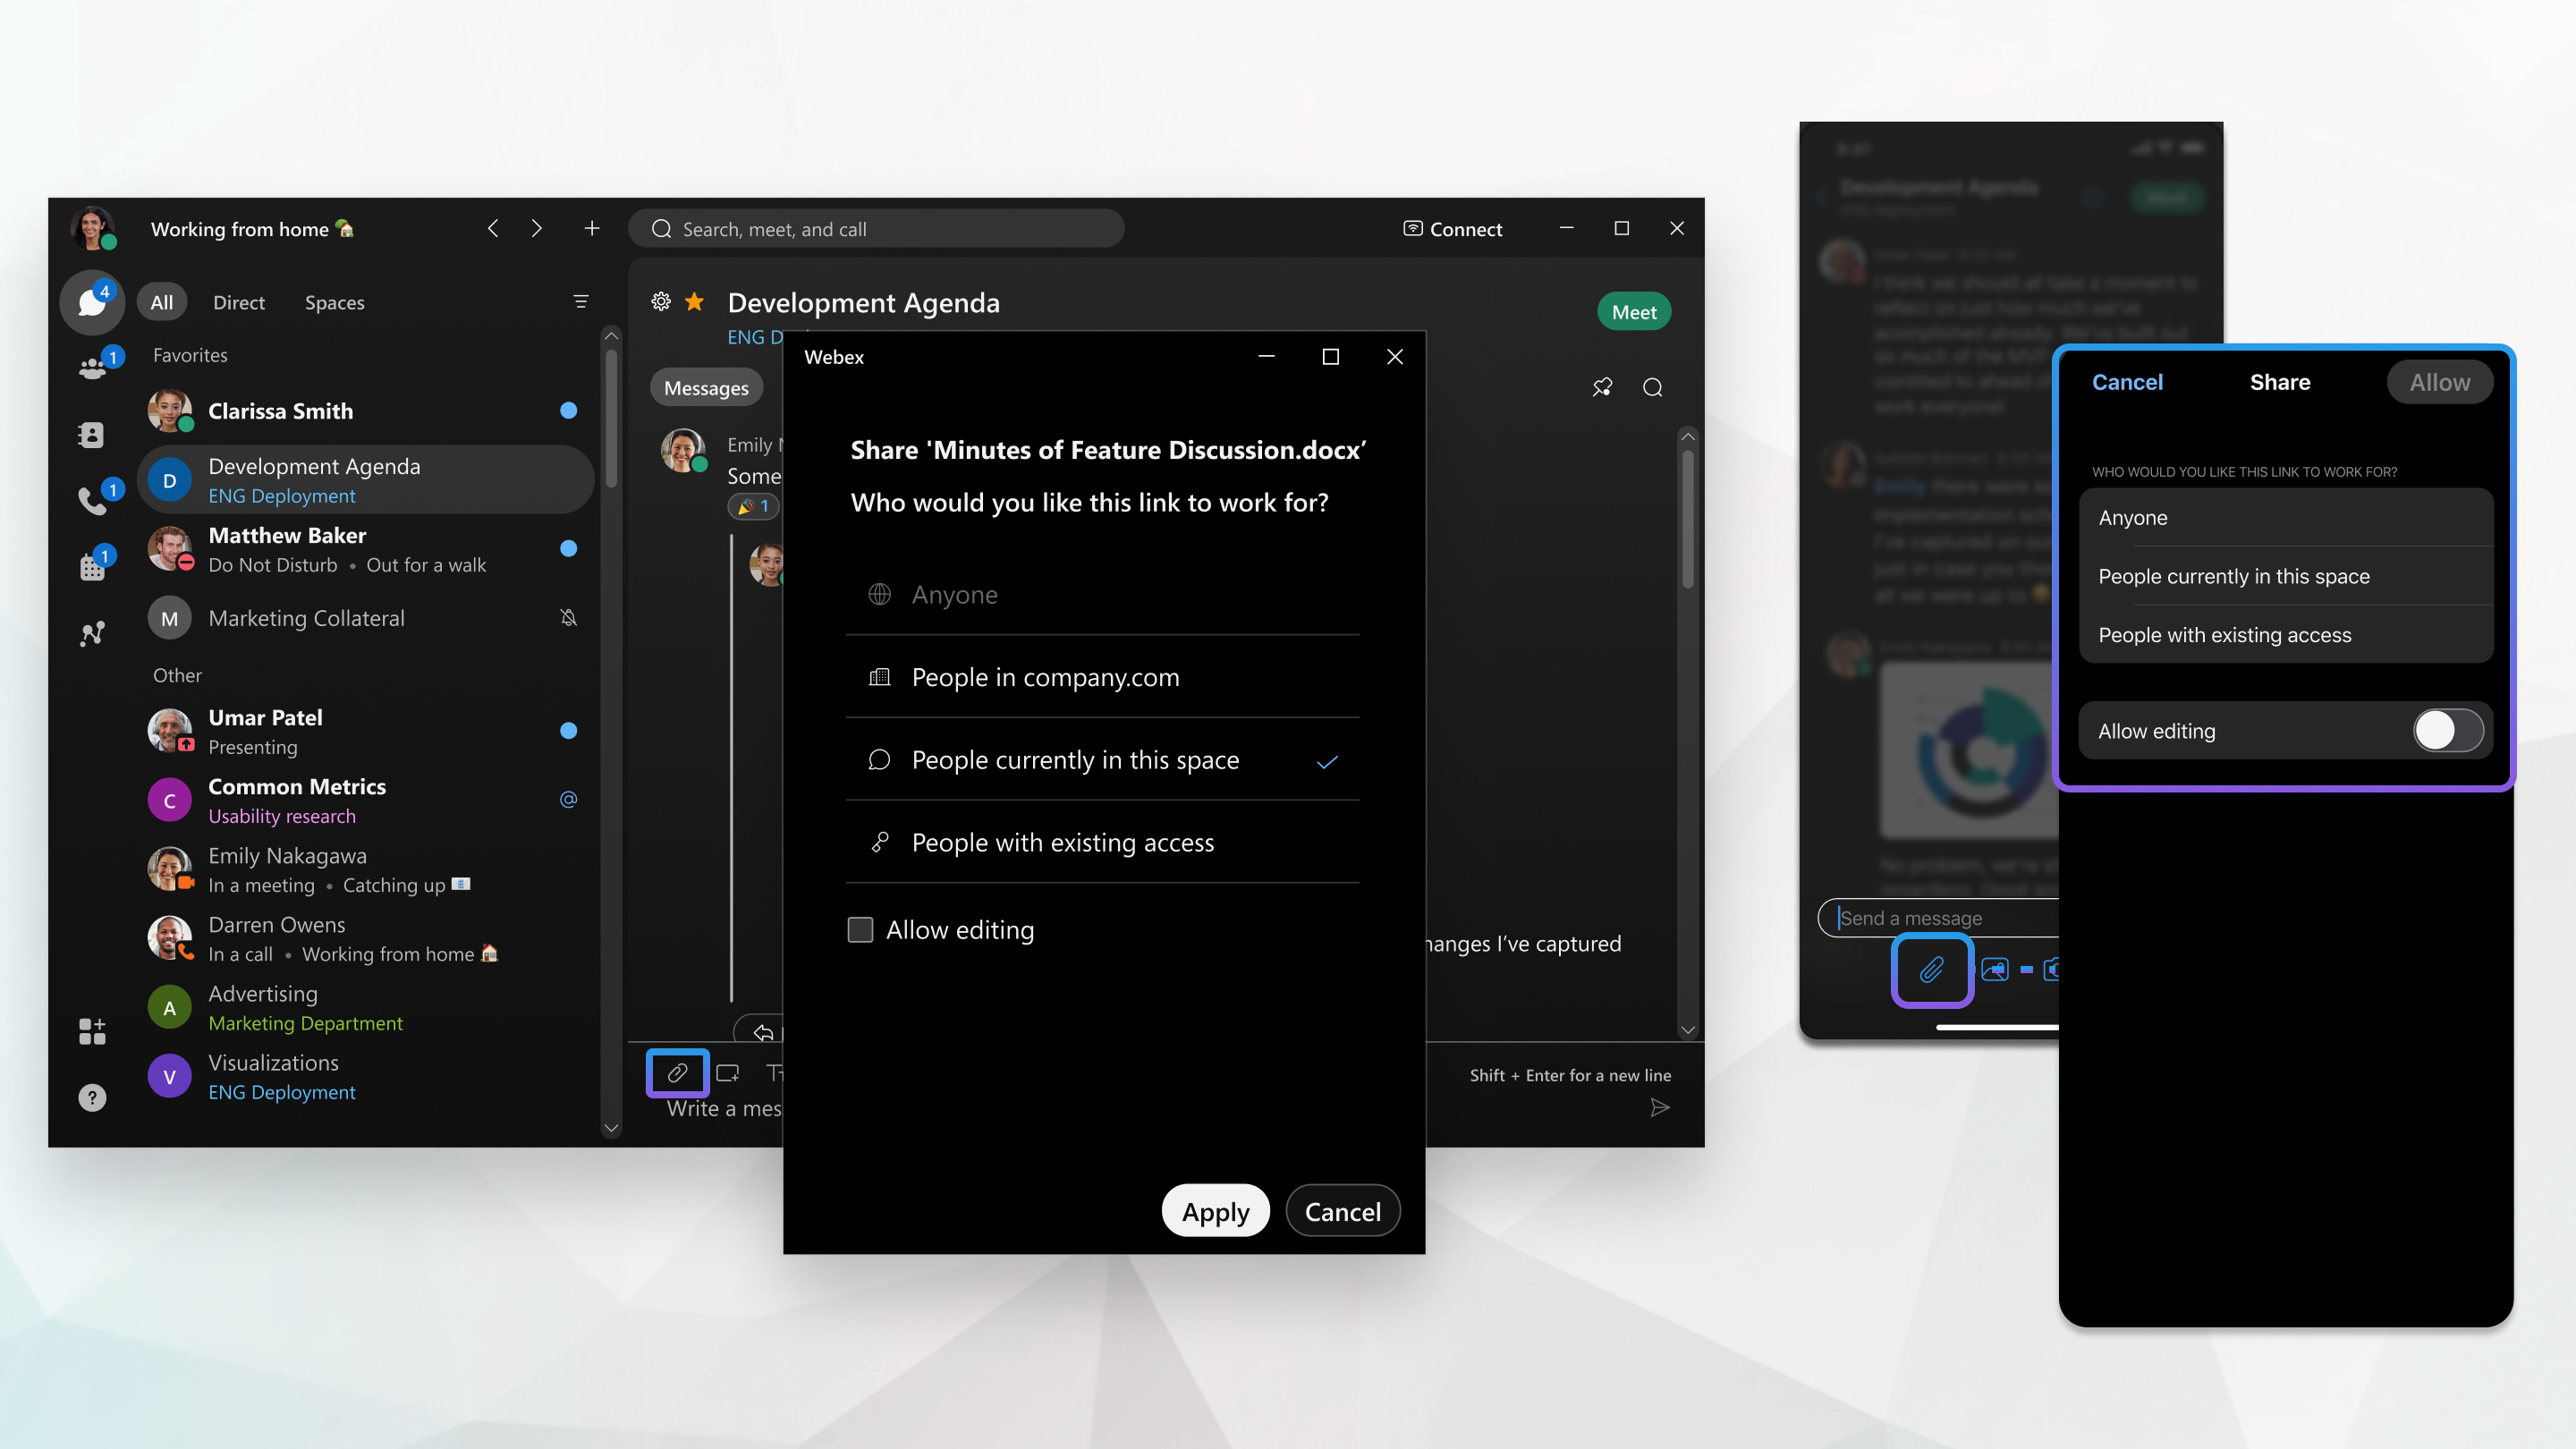
| 1 | In the message area, click Attachment Your administrator can restrict the files that you share to only files from OneDrive or SharePoint Online. When you click Attachment | ||
| 2 | Select a file from OneDrive or SharePoint Online, and then click Open. | ||
| 3 | Then, decide who can view the file in the space: Your administrator can change which of these options are available in OneDrive or SharePoint Online.
When people don't have access to the file, they see the file name but they can't edit or view the file or see a thumbnail preview. | ||
| 4 | Click Apply and then press Enter to share the file. |
 , and then choose
 You can choose a file directly from OneDrive or SharePoint Online. After you share the file in your space, people can edit the file directly from the Webex App. More than one person can edit the file at the same time and they can see all the updates.
| 1 | In the message area, tap Attachment If you haven't already added your account, click Connect to Account to add your account. | ||
| 2 | Select a file from OneDrive or SharePoint Online, and then tap Open. | ||
| 3 | Then, decide who can view the file in the space: Your administrator can change which of these options are available in OneDrive or SharePoint Online.
When people don't have access to the file, they see the file name but they can't edit or view the file or see a thumbnail preview. | ||
| 4 | Select Apply, and then tap Send |


