Start, schedule, and join Webex Personal Room meetings directly from a Zendesk ticket. You can create a space and associate it with a specific ticket, to keep relevant conversation history and content between collaborators in one spot. Associate as many spaces you need and unlink those you don't to keep conversations organized. Want to associate an existing space? You can do that too.
Webex App needs to be installed by a Zendesk administrator, so they can link your Webex site.
Your Webex site administrator can restrict the account that you use to sign into Zendesk. If you receive an access error, contact your administrator to confirm your account information. Host accounts need to have Personal Rooms enabled to start, schedule, and join meetings from Zendesk. |
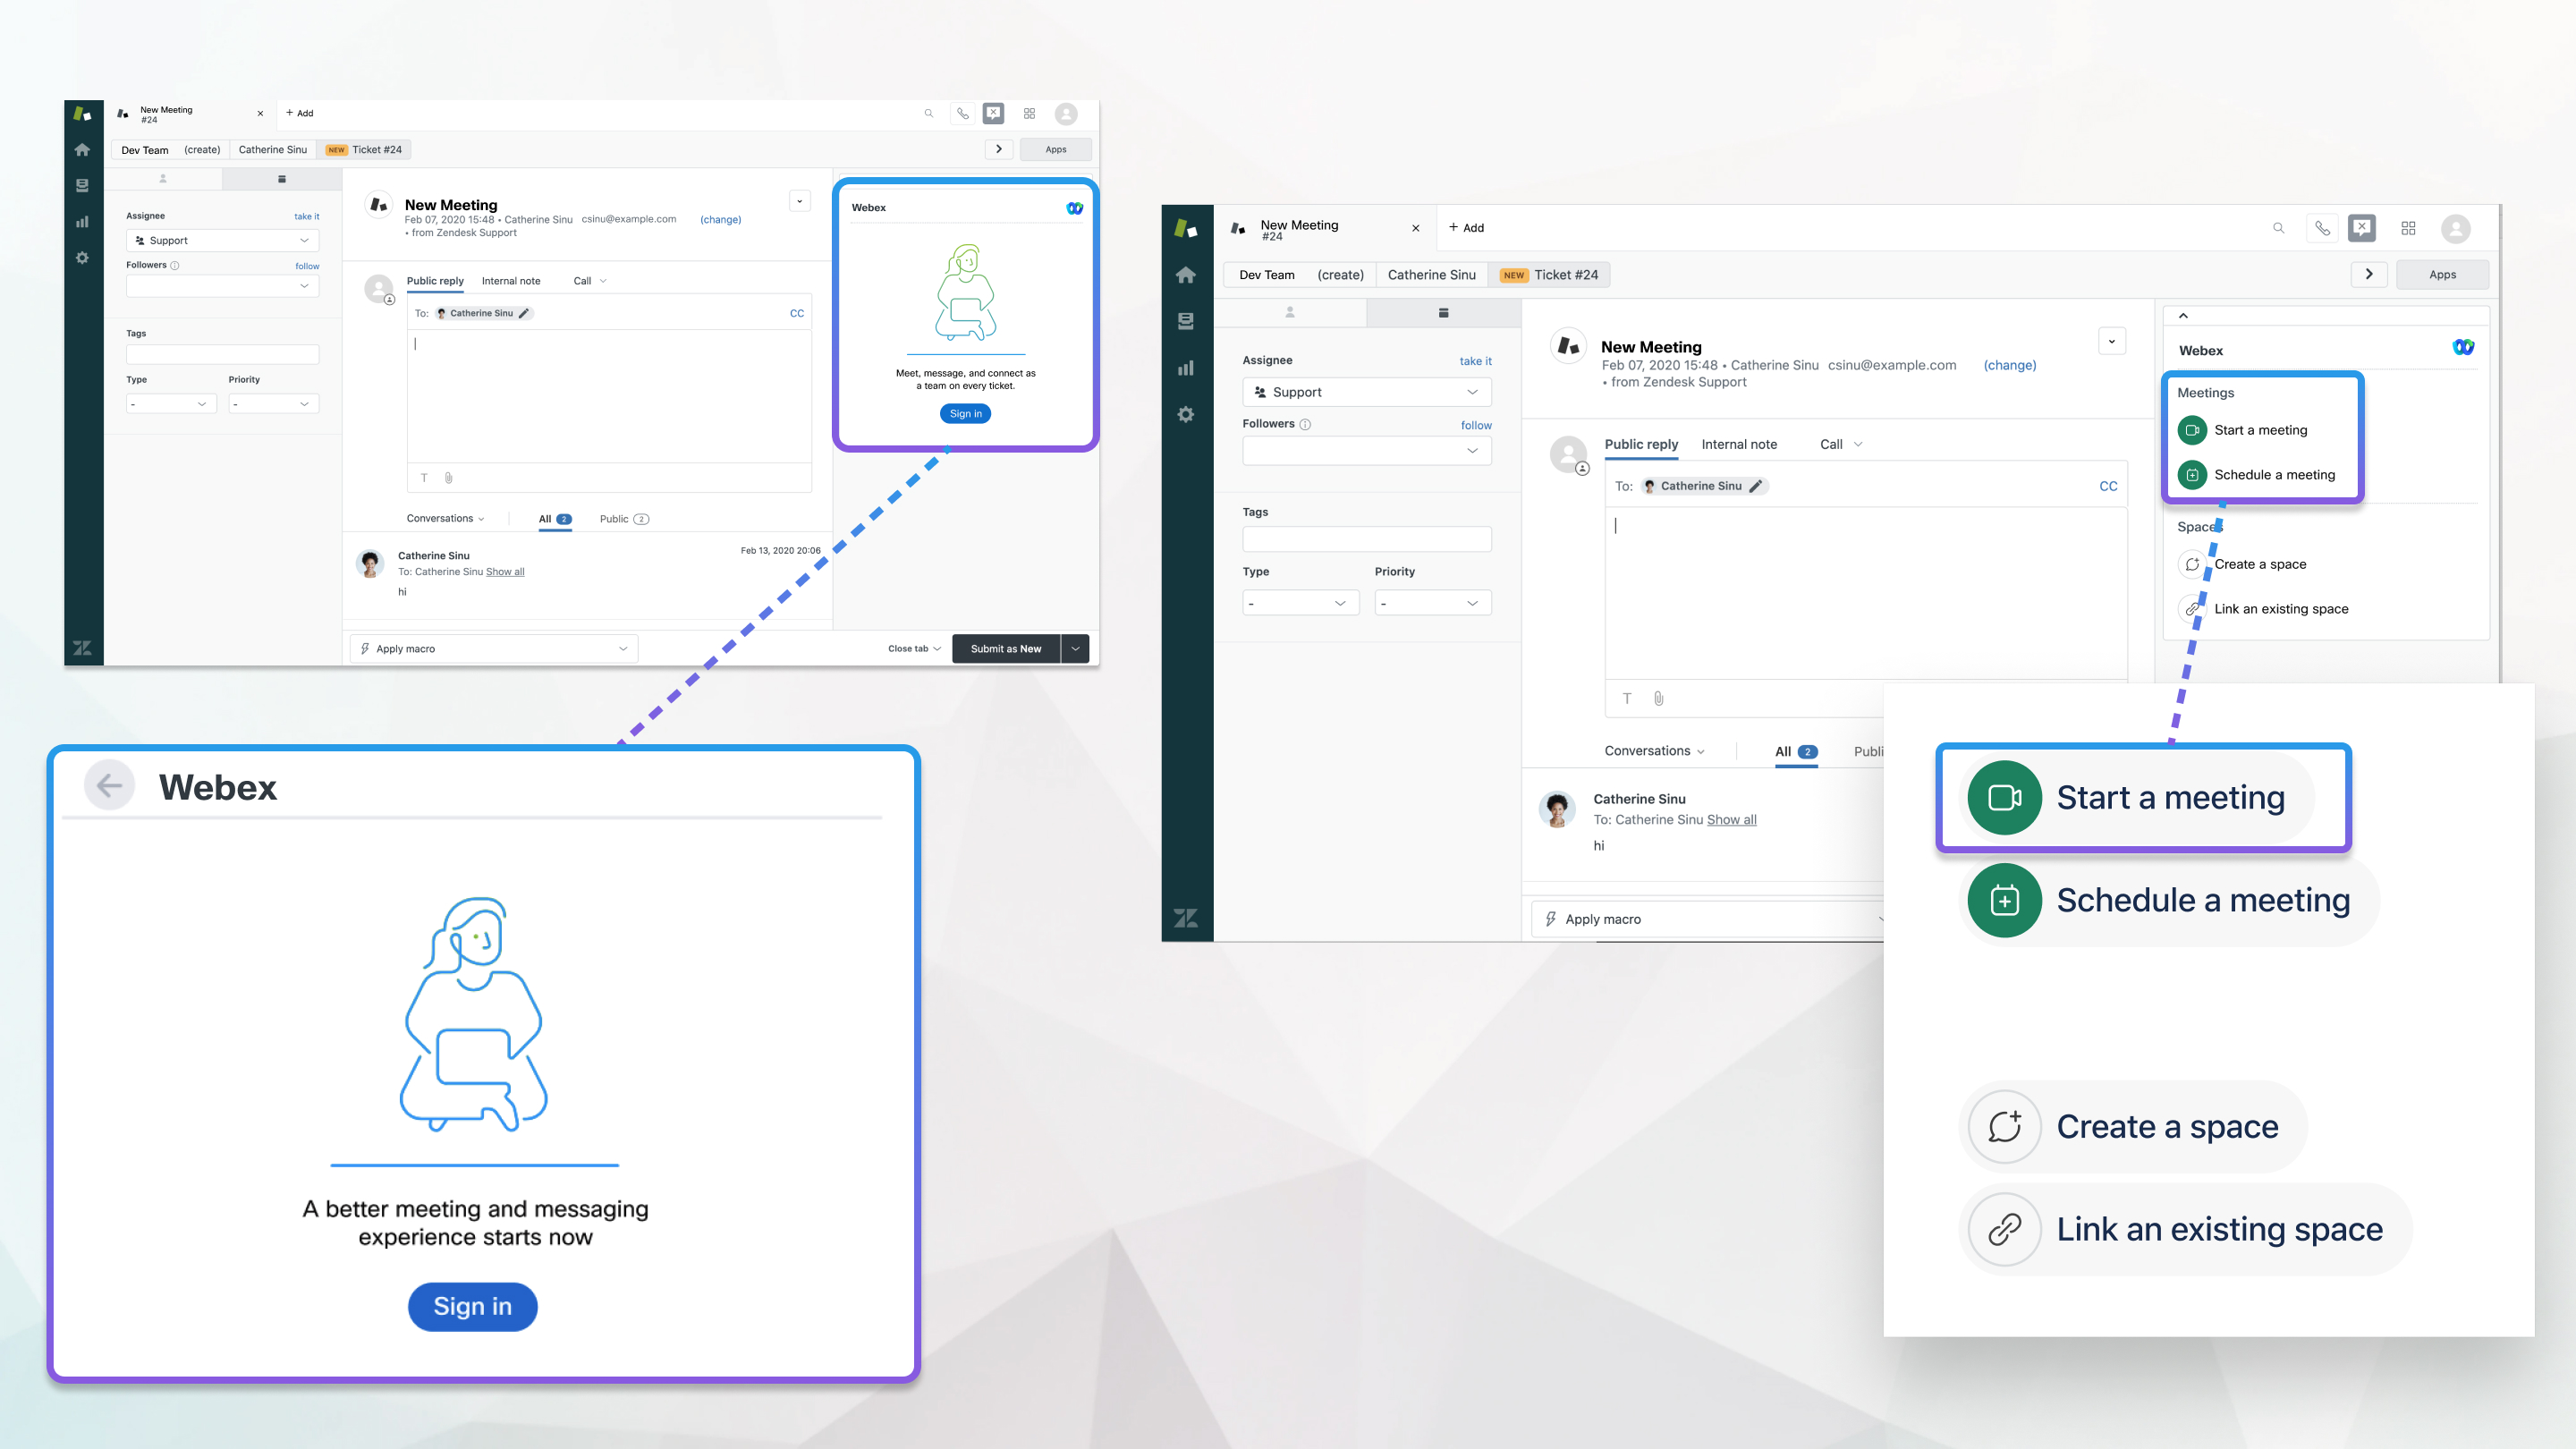
If your site administrator enabled integrations for Zendesk, you can start, schedule, and join Webex Personal Room meetings.
If you want to meet with the people working on your issue right away, you can start a meeting.
| 1 |
In a Zendesk ticket, open the Webex tab on the right side of the page. | ||
| 2 |
Under Meetings, click Start meeting.
| ||
| 3 |
Follow the on-screen prompts to launch the meeting in Webex App. | ||
| 4 |
Click Join meeting. |
Each ticket can only have one scheduled meeting at a time. |
| 1 |
In a Zendesk ticket, open the Webex tab on the right side of the page. |
| 2 |
Click Schedule meeting. |
| 3 |
Enter the Meeting topic, Date, Time, and Meeting duration. |
| 4 |
Click Schedule. Your meeting appears in the Public reply box as a comment, so everyone following the issue is notified about the meeting and can join when it's time. You can add any additional details in the box before you choose and submit the ticket status.
|
What to do next
If you're following a ticket and someone has either started an instant meeting or scheduled a meeting for that ticket, you'll see a message with the meeting details in the ticket Conversations list. Click the Join meeting link to join when it's time.
Depending on your Zendesk settings, you also may have received an invitation email with the link.
After a scheduled meeting starts, the Start meeting button and link are visible in the Webex tab for the duration of the meeting. Unscheduled meetings are visible for the first hour. |
If you scheduled a meeting but no longer need to meet, you can cancel it.
| 1 |
In a Zendesk ticket, open the Webex tab on the right side of the page. | ||
| 2 |
Click Cancel. | ||
| 3 |
Click Yes to confirm that you want to cancel the meeting.
|
If your site administrator enabled integrations for Zendesk, you can associate an incident ticket with a Webex App space. If multiple conversations are needed, associate multiple spaces with their appropriate collaborators and easily access the right conversation every time. Space history can even be accessed after it's archived and the issue is closed, in case you ever need it.
| 1 |
In a Zendesk ticket, open the Webex tab on the right side of the page. | ||
| 2 |
Under Spaces, click Create a space. | ||
| 3 |
Enter a name for the space, then click the search field to add people. | ||
| 4 |
Click Add all collaborators, or select individuals from the list. | ||
| 5 |
Click Create. | ||
| 6 |
Click the new space to open the space widget in the Webex panel.
|
 to see who belongs to the space.
Already discussing a ticket in an existing space? Associate it with the ticket and continue the conversation without having to move to a new one.
| 1 |
In a Zendesk ticket, open the Webex tab on the right side of the page. | ||
| 2 |
Under Spaces, click Link an existing space. | ||
| 3 |
Enter the space name in the search field. The filtered results are displayed; excluding any spaces already linked.
| ||
| 4 |
Select the space you want and click Link.
|
 to see who belongs to the space.
If a space is no longer relevant to the issue, you can unlink the space.
| 1 |
In a Zendesk ticket, open the Webex tab on the right side of the page. |
| 2 |
Under Spaces, click |
| 3 |
Click . |


