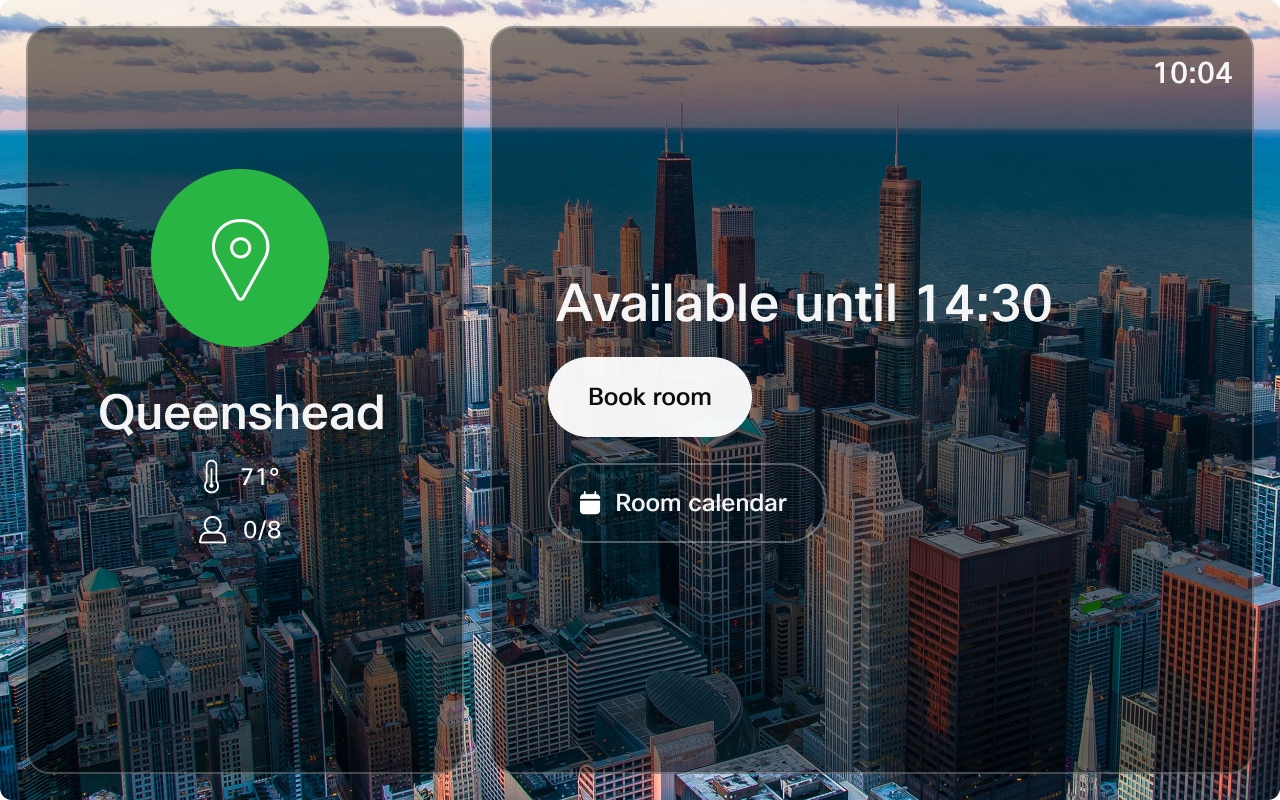
A wall mounted Room Navigator can be configured as a room booking device. It displays the room availability status and users can book ad hoc meetings or check the room calendar.
|
First, you need to set up the Board, Desk, or Room Series device for room booking in Control Hub. See Enable room booking for Board, Desk, and Room series for details. Then, to configure the Room Navigator for room booking, you need to go through its set up wizard. Perform a factory reset to access the wizard for a previously configured Room Navigator.
| 1 |
Connect the Room Navigator to the Board, Desk, or Room Series device as described here. |
||
| 2 |
Set the Device type to Room Booking. 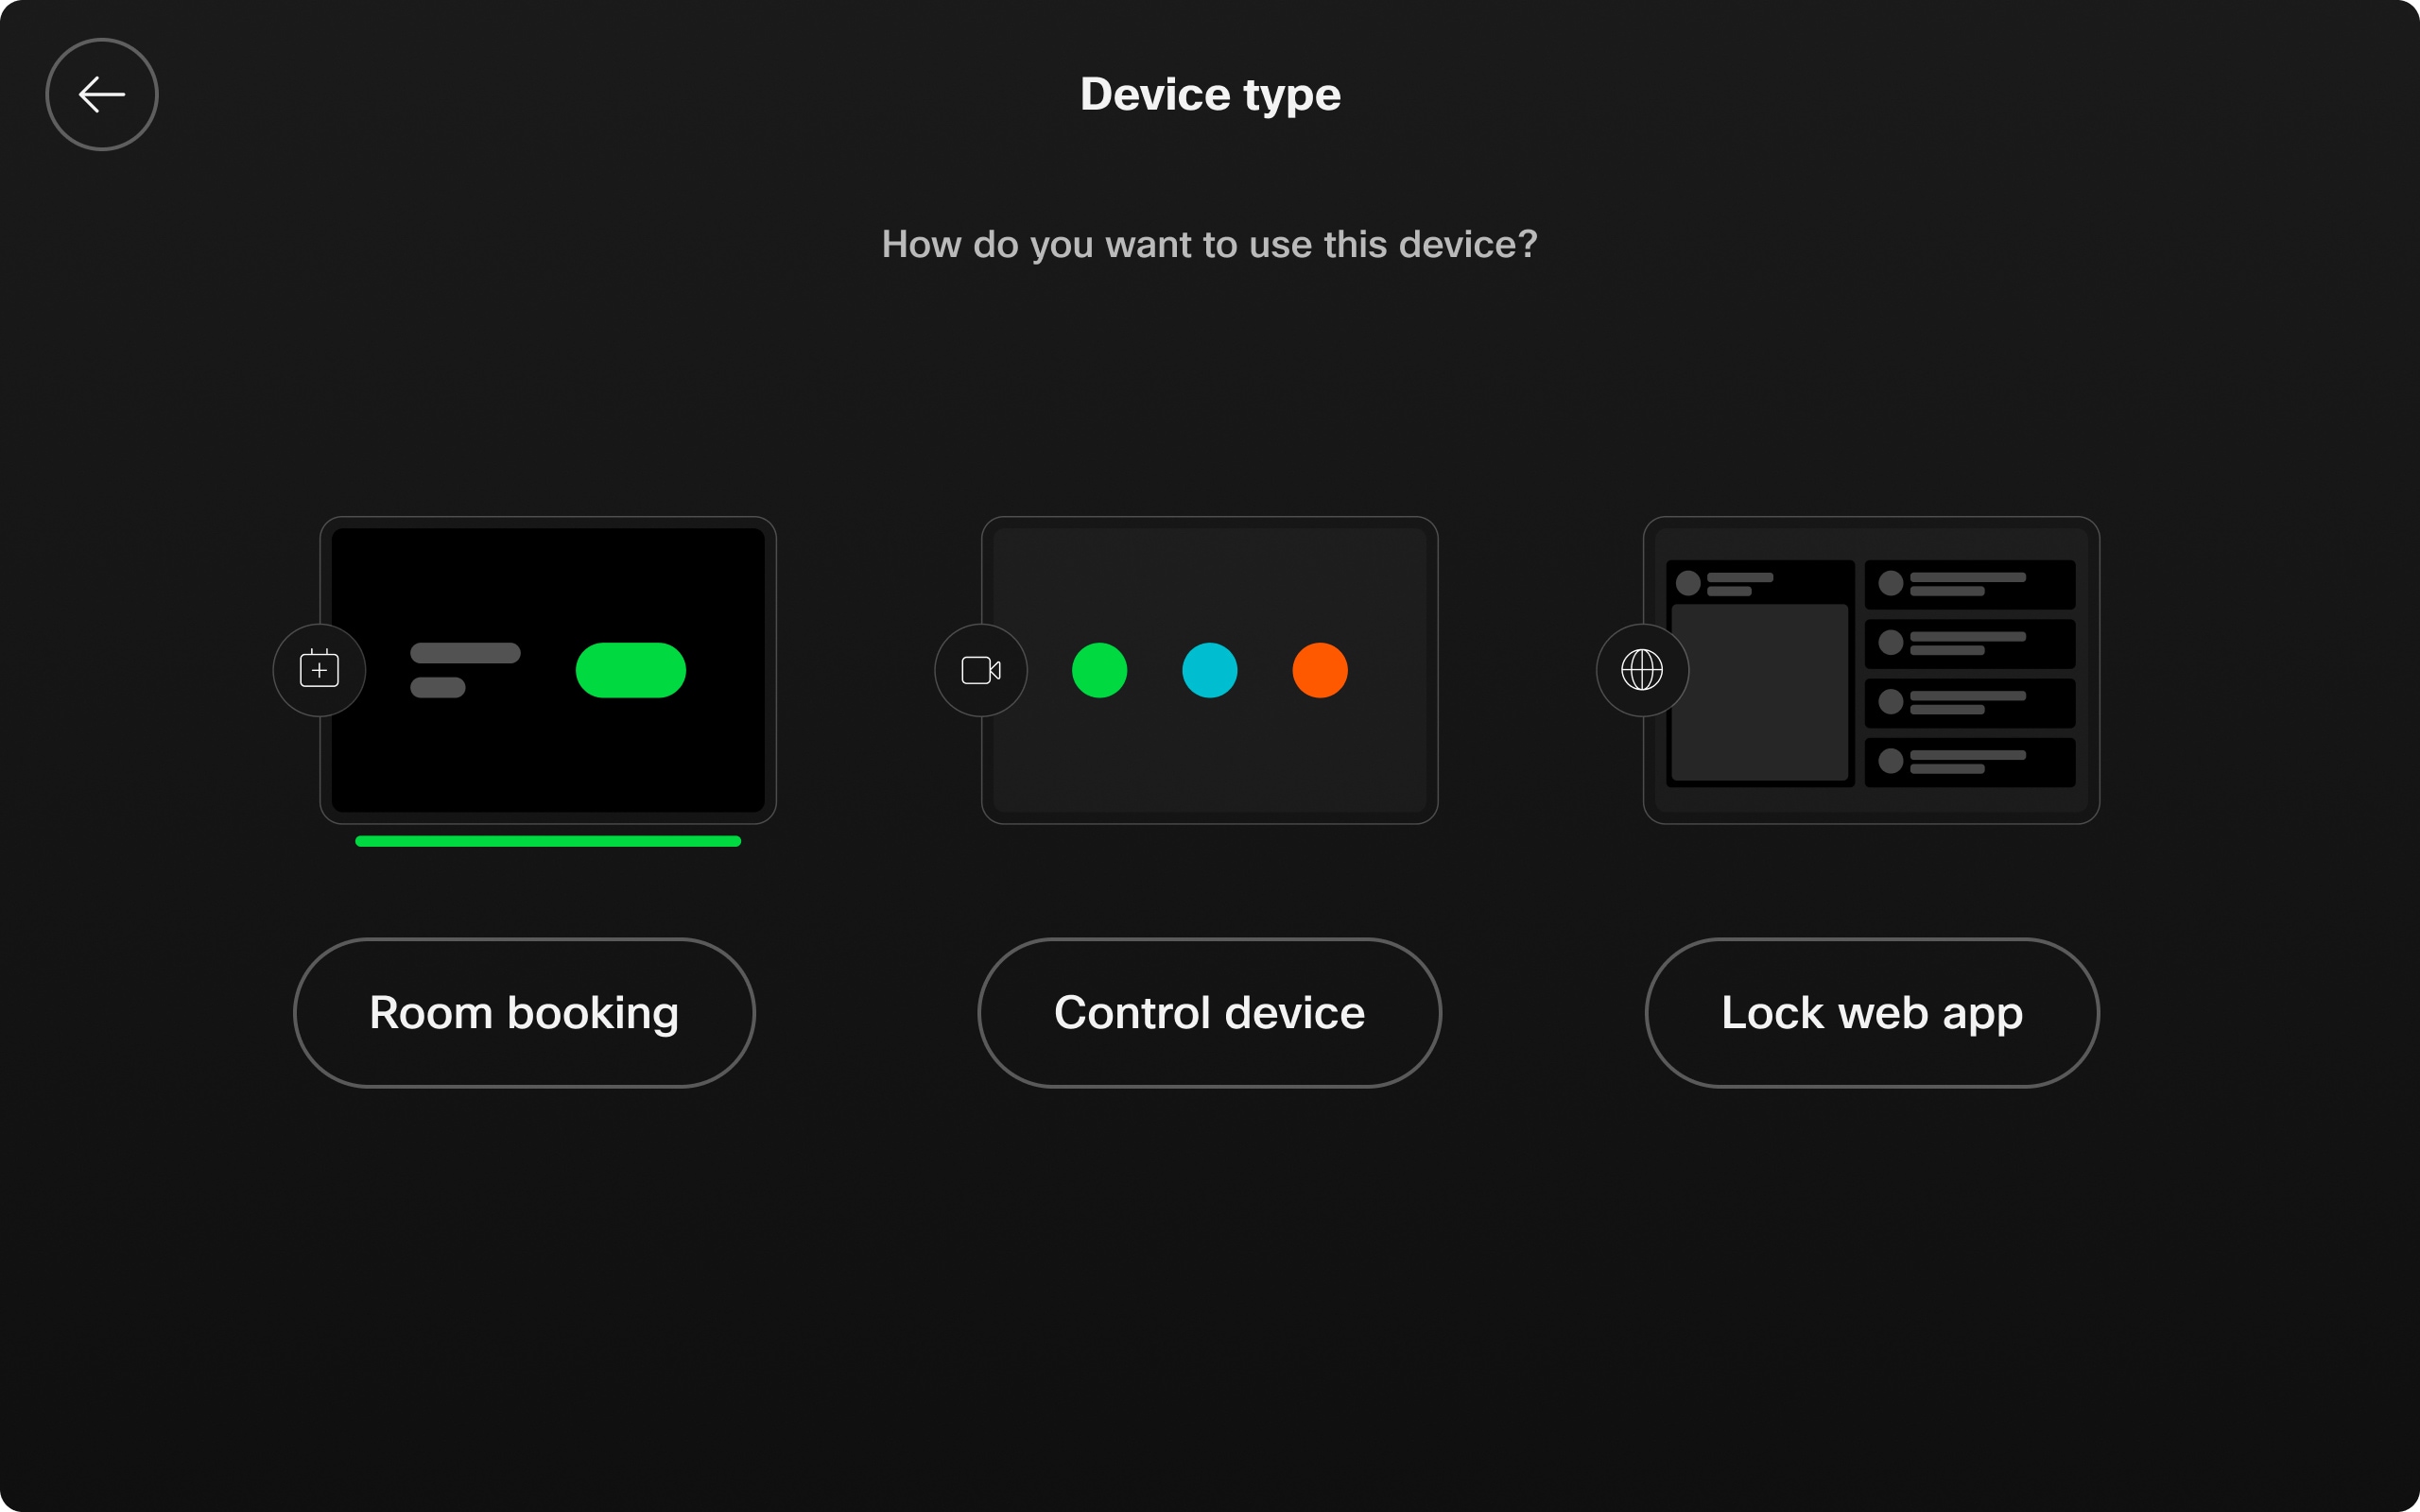 |
||
| 3 |
Select whether the Room Navigator is located inside or outside a room. 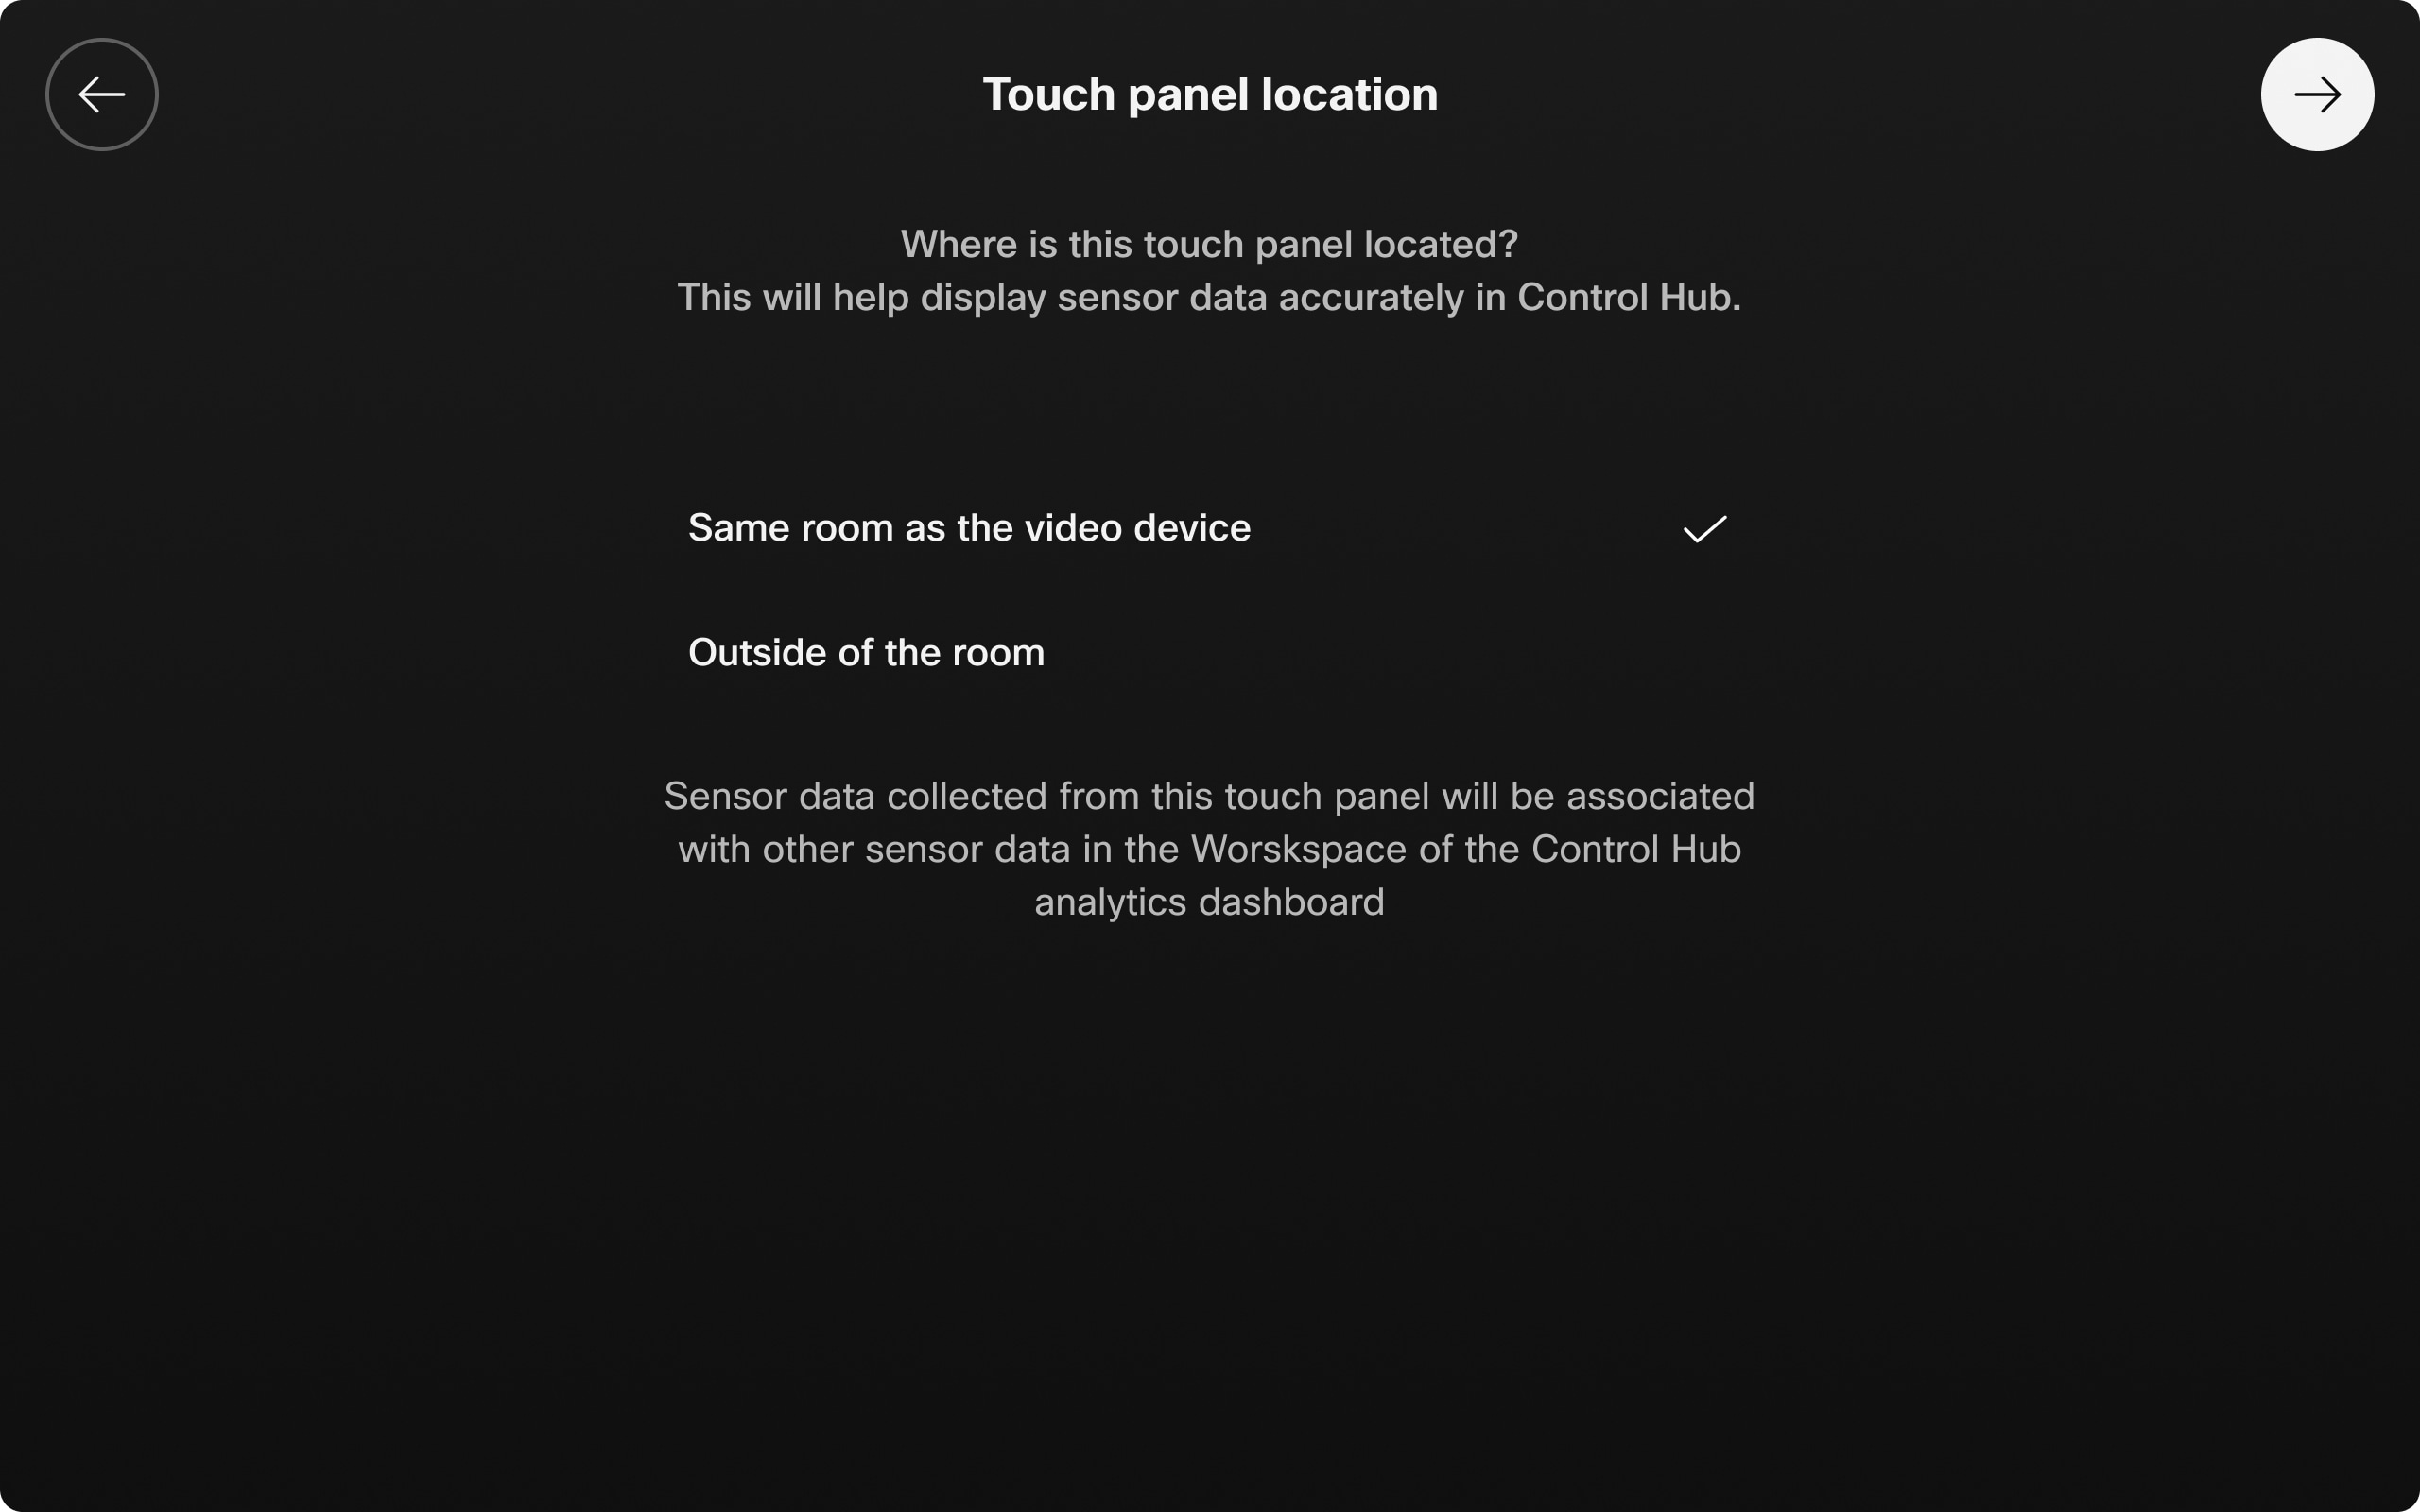
|
Room information
The Room Navigator shows information on room temperature, people count, and people presence in the room, if that is available from the device it's connected to.
The following configurations are enabled by default. You can disable or re-enable them from device configurations or the APIs. Read more about Device configurations. For detailed configuration descriptions, visit https://roomos.cisco.com/xapi.
-
Room temperature:
UserInterface RoomScheduler AmbientTemperature Show: <Auto/ShowCelsius/ShowFahrenheit/Hidden> -
People count in the room:
UserInterface RoomScheduler PeopleCount Current: <Auto/Hidden>-
To show people count, you must set:
RoomAnalytics PeopleCountOutOfCall: OnStandby WakeupOnMotionDetection: On -
People count is used for outside room booking.
-
-
People presence in the room:
UserInterface RoomScheduler StatusWhenInUse: <Auto/Free>-
To show people presence, you must set:
RoomAnalytics PeoplePresenceDetector: <On/Off> -
The device uses ultrasound and/or head detection to detect people in the workspace. One or both of these options needs to be set to On for the PeoplePresenceDetector setting to work. Ultrasound and head detection can be turned on and off using these settings:
-
RoomAnalytics PeoplePresence Input HeadDetector: On/Off(default On) -
RoomAnalytics PeoplePresence Input Ultrasound: On/Off(default Off)
-
-
To read more about sensors and which devices support these configurations, see Historical data for Board, Desk, and Room series in Control Hub workspaces.
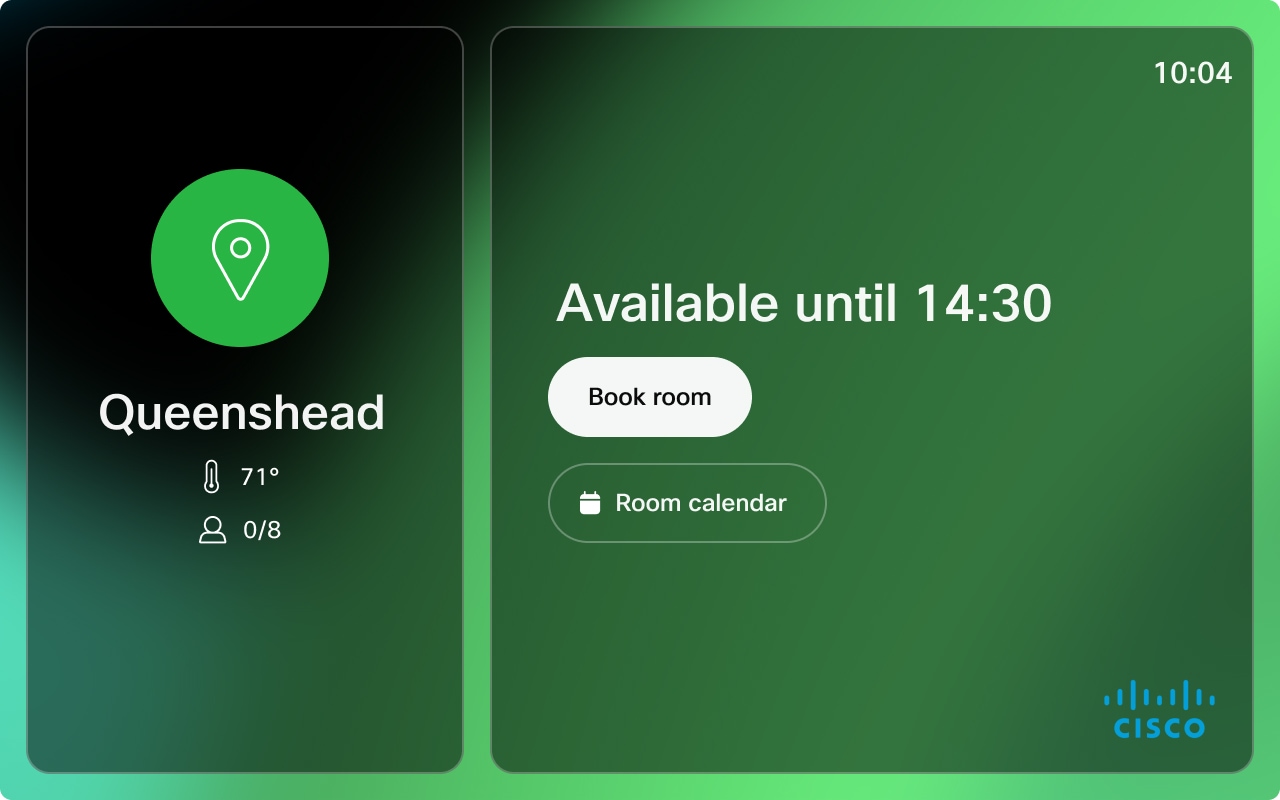
Set custom colors
You can change the color of the default wallpaper and LED strip on Room Navigators. You may want to do this to align with the workplaces color scheme or for accessibility reasons.
The selected color is applied to both the wallpaper and LED strip.
The default colors for the Room Navigator states and LED are:
-
Green - available
-
Yellow - meeting starting soon (10 minutes before the start of a new meeting) or the room is booked but not occupied
-
Red - in use or occupied

Configure custom color states
Use the following configurations to set a color for each of the states:
-
Room available:
UserInterface RoomScheduler State Available Color: <color> -
Meeting starting soon or the room is booked but not occupied:
UserInterface RoomScheduler State Pending Color: <color> -
Room is in use or occupied:
UserInterface RoomScheduler State Busy Color: <color>
The color options are: Aquamarine, Blue, Cyan, Fuchsia, Gold, Green, Lime, Magenta, Off, Orange, Orchid, Purple, Red, Scarlet, Turquoise, Violet, Yellow
Upload custom wallpaper and logo
To customize your room booking panels, you can upload a wallpaper, logo, or both to appear on all of the Room Navigators setup for room booking in your organization.
Recommendations:
-
Logo:
-
Size: 272×272px without padding
-
File type: .png
-
-
Wallpaper:
-
Recommended size: 1920×1200px
-
File types: .png or .jpeg
-
| 1 |
From the customer view in Control Hub, go to Devices and click Settings. Scroll to Branding. |
| 2 |
Under Upload custom Room Scheduler Branding, upload the wallpaper or logo and click Save to apply the changes. |
Customize default meeting title for ad hoc booking
You can customize the meeting title for ad hoc bookings that are done from a Room Navigator in booking mode. This is the title that shows up on the Room Navigator outside the meeting room.
Use the following configuration to set a custom meeting title:
UserInterface Bookings AdhocBooking DefaultTitle: <meeting title>The default meeting title is Ad hoc meeting.
Enable check in and check out
A significant percentage of meetings result in ghost meetings, meaning no one shows up and the meeting resources are wasted during the booking. Enabling the check In option helps alleviate this problem. The users can check in to their booking when they arrive to the meeting room which confirms the booking. If no one arrives for the booking, the meeting room is released and others can book the free meeting room.
Check in and out is available on shared bookable devices and standalone Room Navigator.
When enabled, a check in button appears on the inside and outside-room touch panel. Check out button appears on the inside-room for paired touch panels. For a standalone Room Navigator, check out buttons also appears on the outside-room panel. If a joinable meeting has been booked (OBTP), the check in button is only visible outside the room.
Starting 5 minutes before a booking, a check in button appears on the outside-room and in-room touch panels.
A user has 10 minutes from the start time of a booking to check in. If no one checks in during the 10 minutes, manually or automatically, the room is automatically released. 30 seconds before the end of the check in window, a 30-second countdown automatic-room-release alert appears on the touch panel. The check in window is configurable.
When a room is checked in and a call ends, an alert pops up reminding the user to check out if they wish to. If the user cancels the countdown or ignores the alert, the room is checked out. If a user can extend a booking, the room device stays checked in for the time the booking is extended.
When a booking has reached the last 5 minutes of its scheduled time and there is a back to back meeting, a notification pops up informing the user that the booking will be ending soon.
Once the booking is released, a notification is sent to the host to inform them about the canceled booking.
Automatic check in
Automatic check in starts 4 minutes after the booking has started.
Room device will automatically check in for:
-
Ad hoc bookings
-
Joining a call
-
Share session started (wired to wireless)
-
People count is 1 or more (People count is considered 1 or more after 1 minute of continuous room in us.)
Manual check in
A user can manually select to check in by tapping the check in button.
Configure check in and check out
Enable to let user check in to the rooms they have booked to confirm that the room is in use. If the user doesn’t check in, manually or automatically, the room booking is released and the organizer gets an email informing about the cancellation.
Starting 5 minutes before a booking, a check in button appears on the outside-room and in-room touch panels and it stays there
for the duration set with Bookings CheckIn WindowDuration.
Bookings CheckIn Enabled: <True/False>Default: False
Check in window is the time the check in option is available on the touch panel. Check-in window duration can be specified to 5, 10, 15, 20, 30 or 60 minutes.
Bookings CheckIn WindowDuration: <5, 10, 15, 20, 30, 60>Default: 10
Configure whether the check out button is shown outside and inside the room, inside the room, or not at all.
Bookings AllowDecline: <All, InsideOnly, None>Default: All
Factory reset
You might need to perform a factory reset in order to pair the Room Navigator with a different Board or Room series, or to configure it as a Room Booking device. You can factory reset the Room Navigator by accessing the Settings menu and tap Factory Reset.
To access the Settings menu on a Room Navigator in room booking mode, tap the screen three times with three fingers. When you tap Factory Reset, you'll be asked to confirm your selection before the Room Navigator is restored to factory settings.


