Get started with Webex Meetings for attendees
 Feedback?
Certain features mentioned in this article are available only in paid plans. Here's what comes with the free plan.
Join a meeting
If someone invites you to a meeting, you receive an invite with instructions on how to join in an email invitation. Click the Join meeting link to join the meeting.
You might be asked to enter a meeting password. You can find it your email invitation.
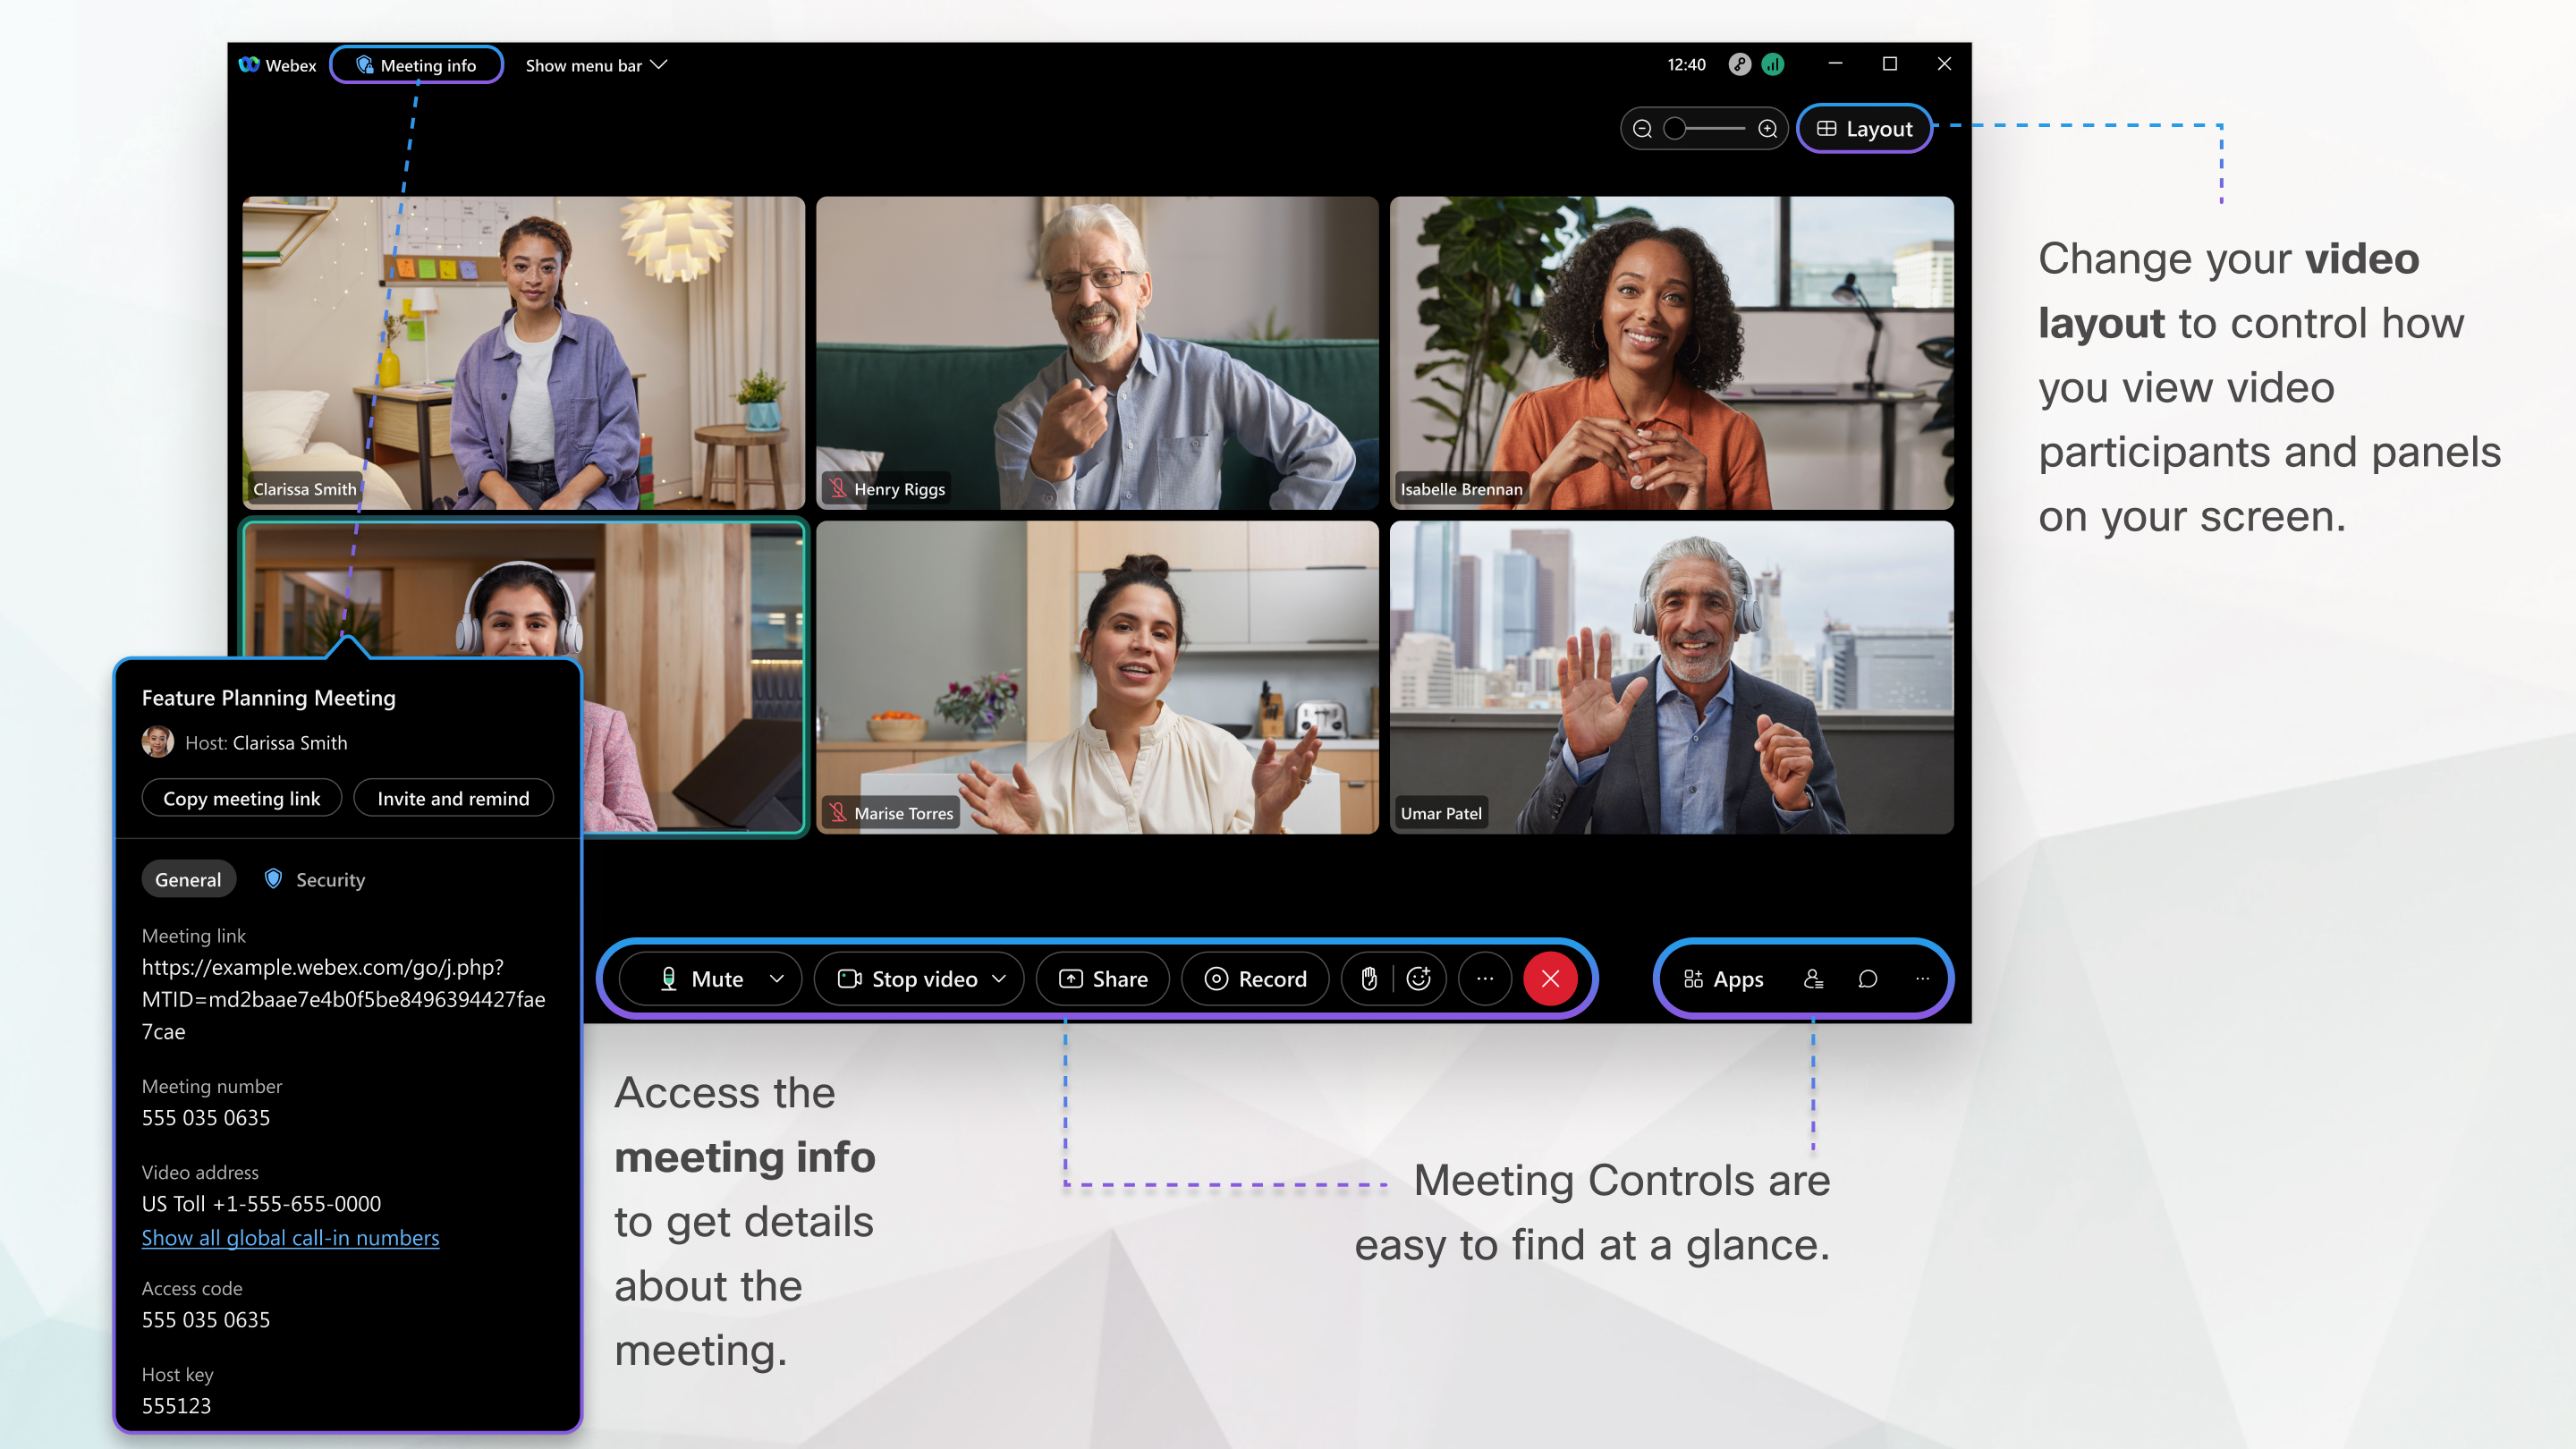
The Meetings user interface is simple. Meeting options in the center and participants and other panels on the right.
Connect audio
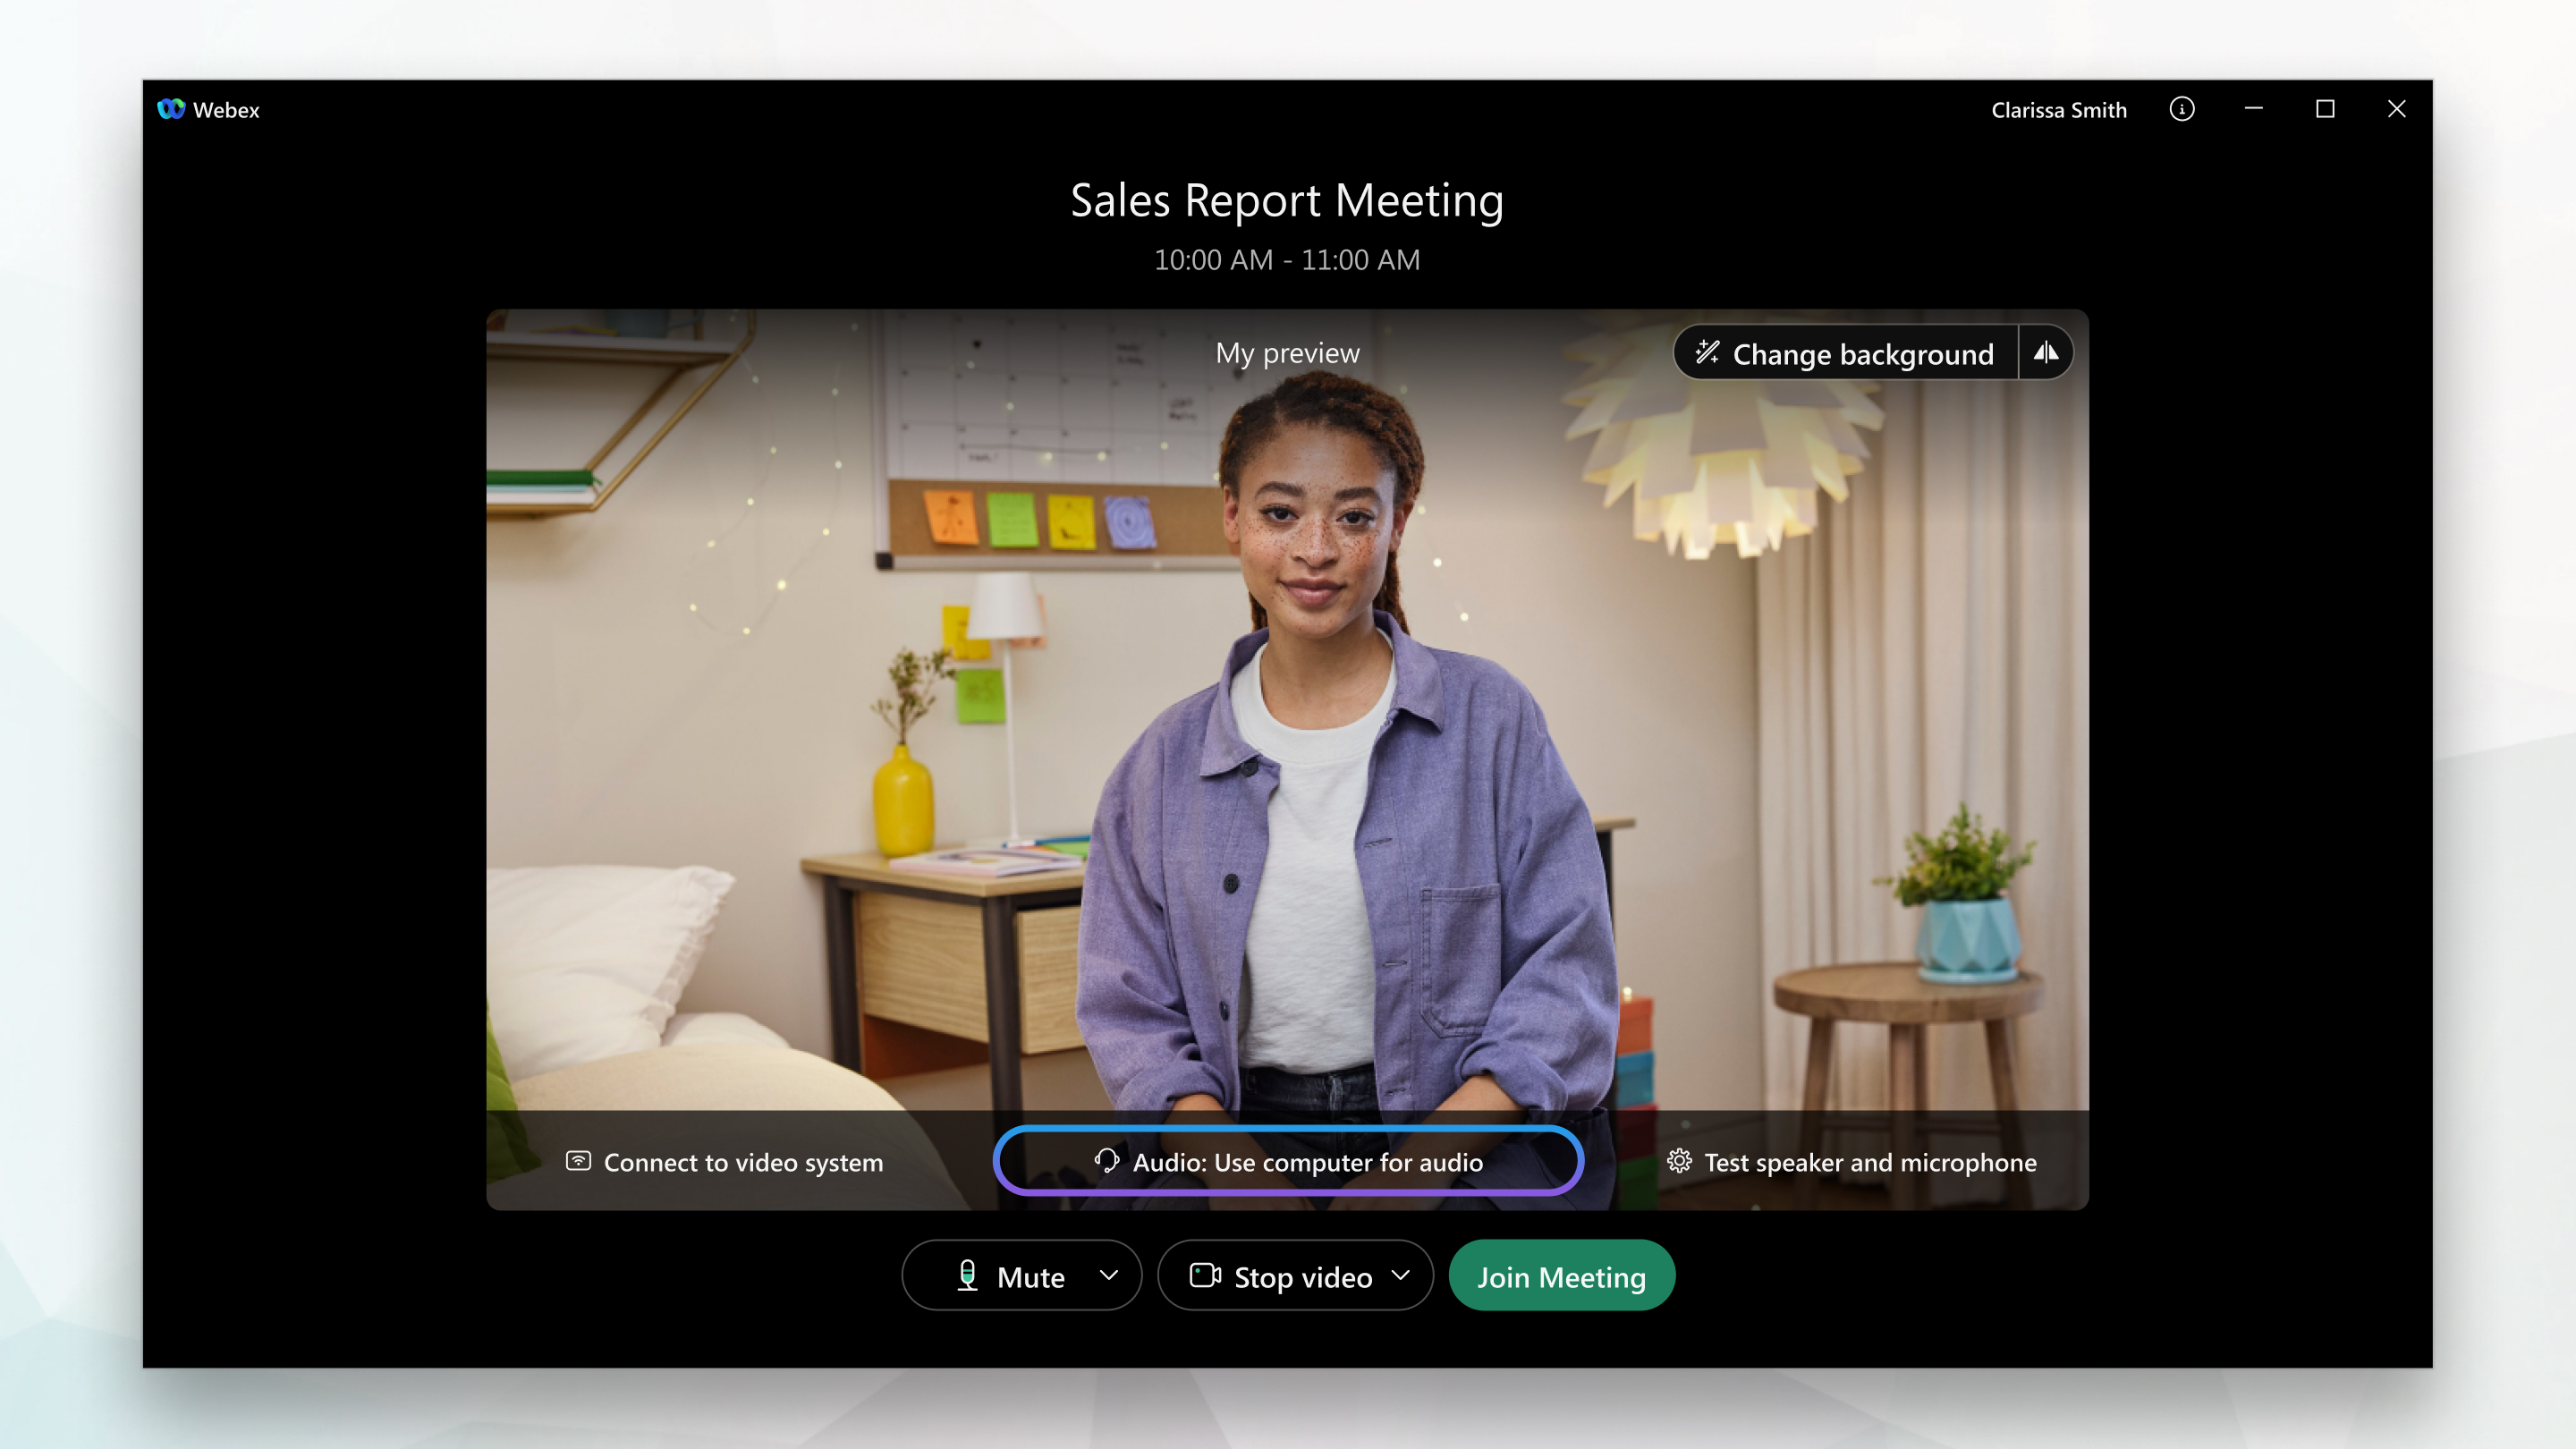
In the preview window, you can make sure your audio and video sound and look good before you join the meeting. First, choose the settings you use for audio in the meeting.
-
Click the audio connection options in the Meetings app.
-
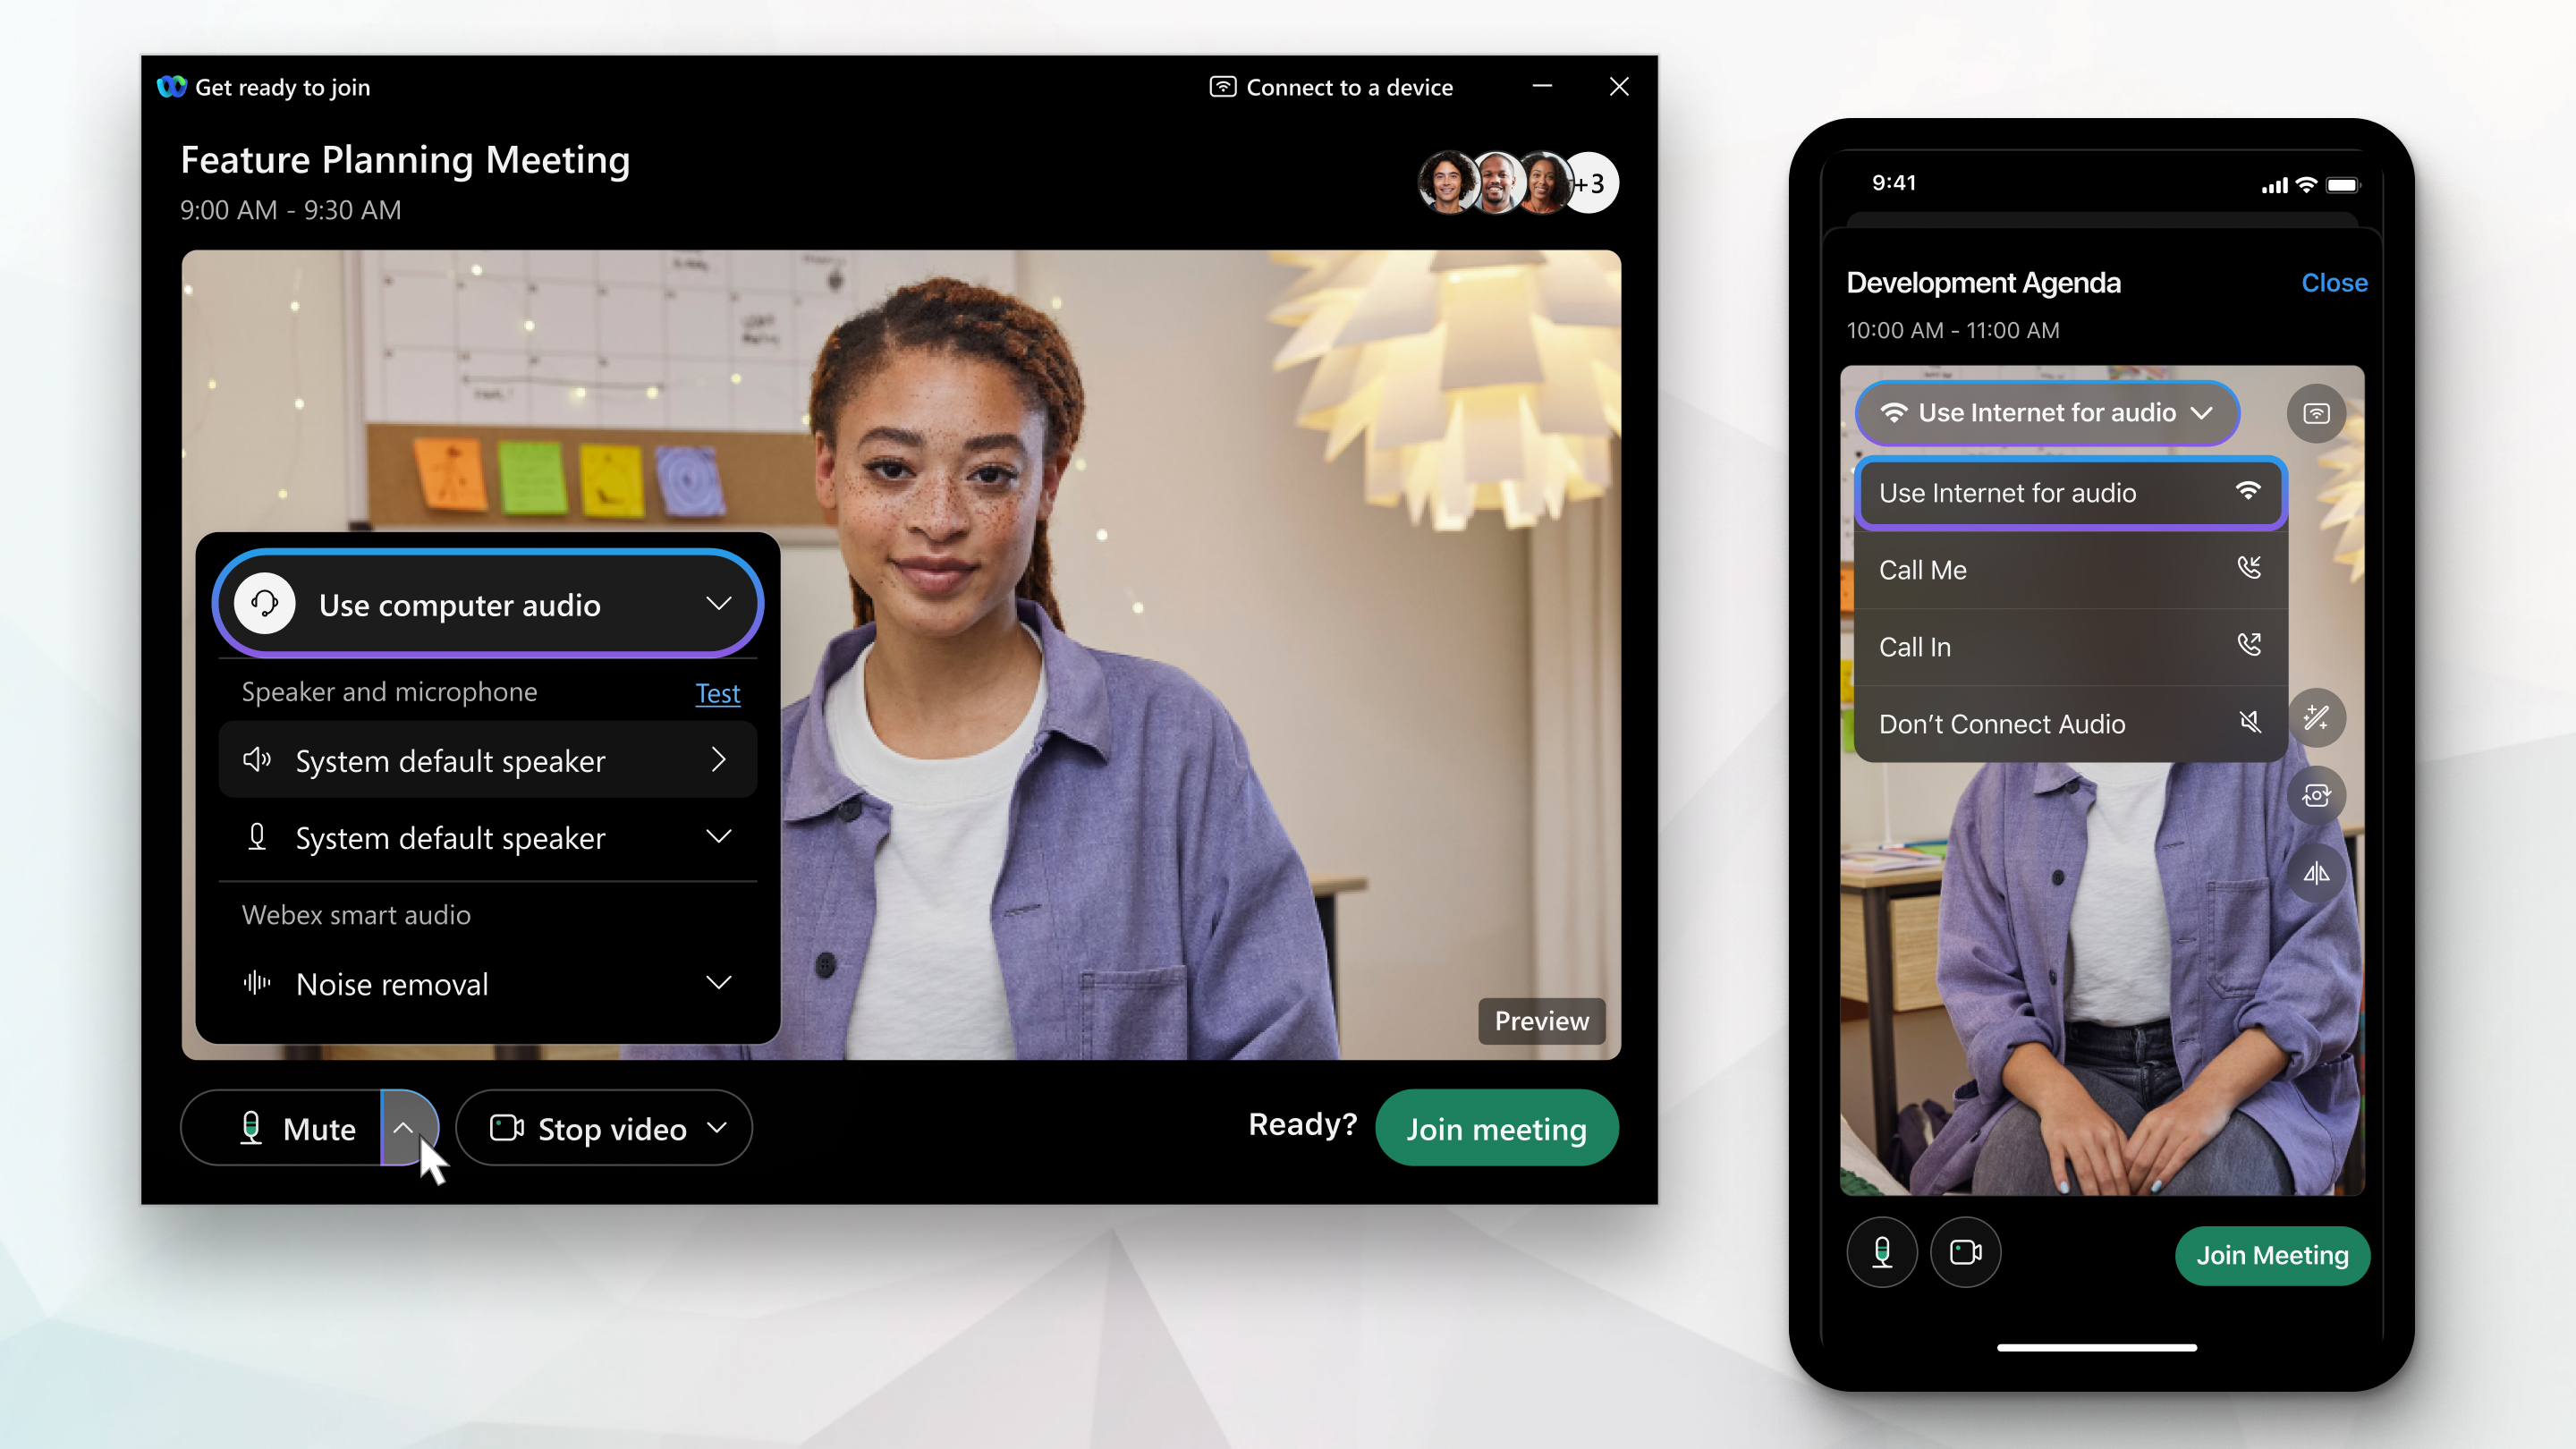
Choose how you want to hear the audio in the meeting:
-
Use computer audio—Use your computer with a headset or speakers. This is the default audio connection type.
You can change your headset, speakers, and microphone.
-
Call me—Enter or select the work or home phone number that you'd like the meeting to call.
-
Call in—Dial in from your phone when the meeting starts. A list of global call-in numbers is available after you join the meeting.
-
Don't connect to audio—You won't hear any audio in the meeting through your computer or phone. Use this option if you're in the meeting room but want to use your computer to share content in the meeting.
-
-
If you want to join the meeting with your audio muted, click Mute
 .
.You'll see
 when your microphone is muted. Click Unmute
  when you want to speak in the meeting.
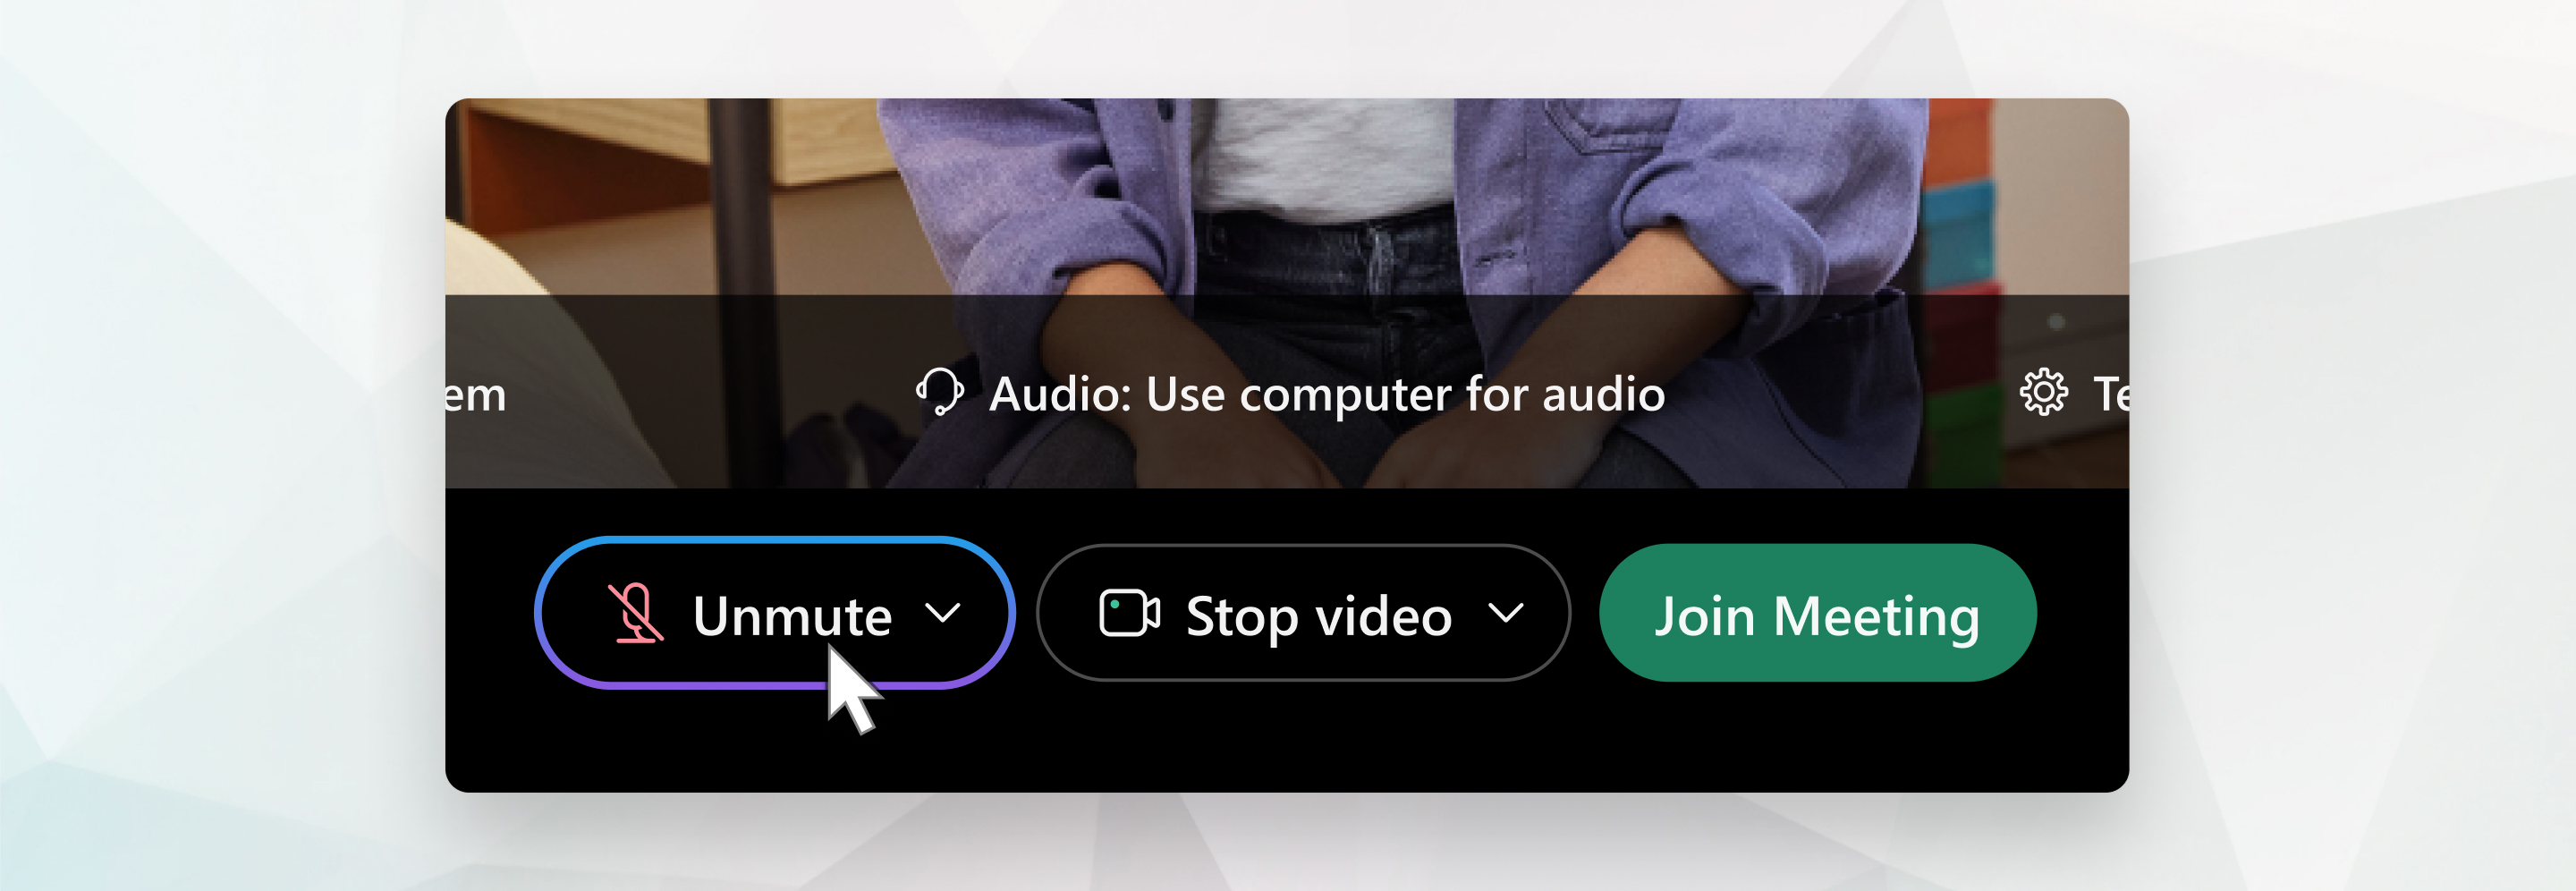
In some meetings, the host may not allow attendees to unmute. If you're prevented from unmuting, Unmute
 is locked until the host allows you to unmute.
Start your video
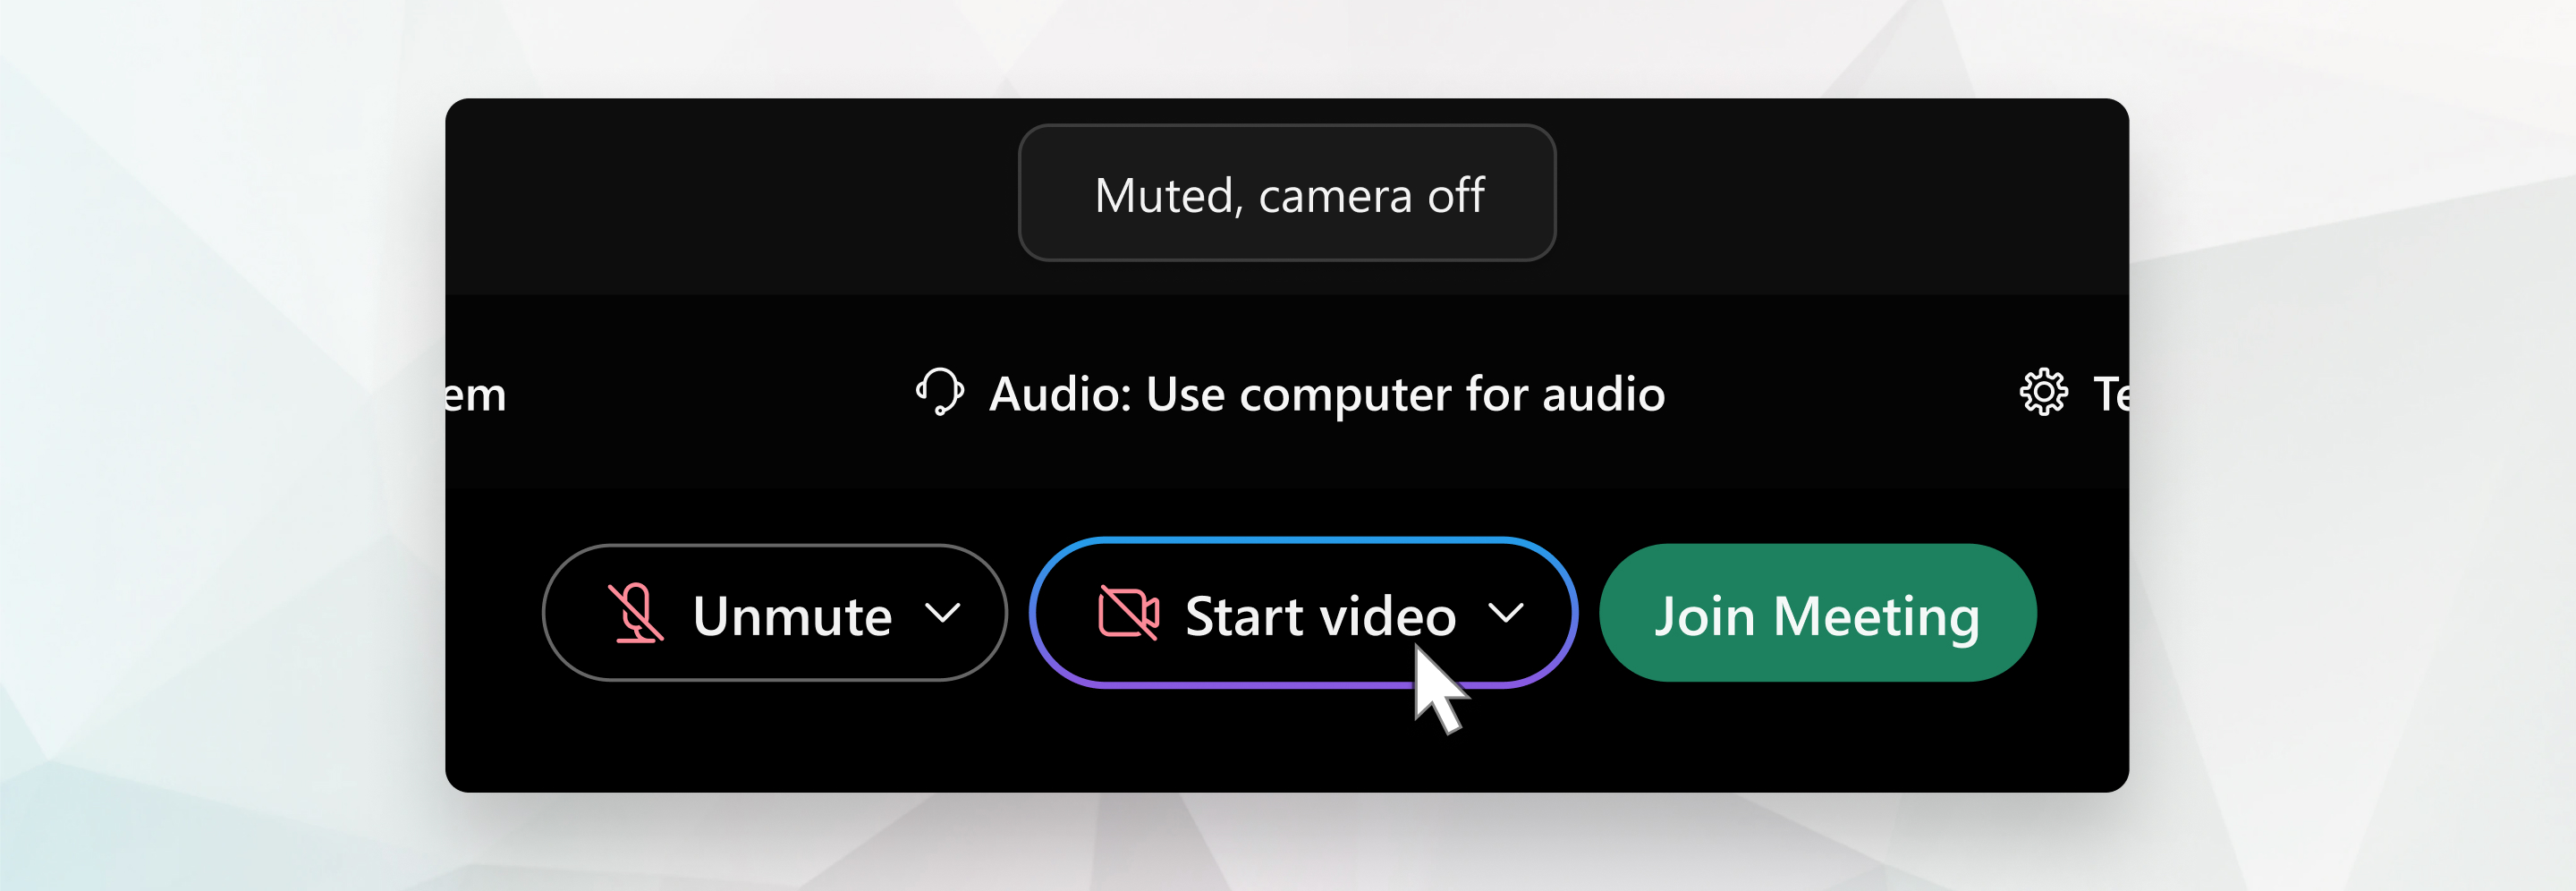
Before you join or start a meeting you can choose the settings you use for video in the meeting.
-
If you want to join the meeting with your video turned off, click Stop video
 .
.You'll see
 when your video is turned off. Click Start video
  when you want to show your video.
-
Select the camera to use.
-
By default, your self-view video shows in mirror view. You can turn off mirror view if you want to see yourself in your self-view video the same way that other meeting participants see you.
If you're happy with the audio and video settings that you chose for this meeting, you can save them for your next meeting.
-
If you want added privacy or to limit possible distractions from your video, you can use a virtual background. Click Change background, and then choose to blur or replace your background.
To join the meeting from a compatible video device, connect to a device.
Share content
To share content during a meeting, from the meeting control panel, select Share  .
.
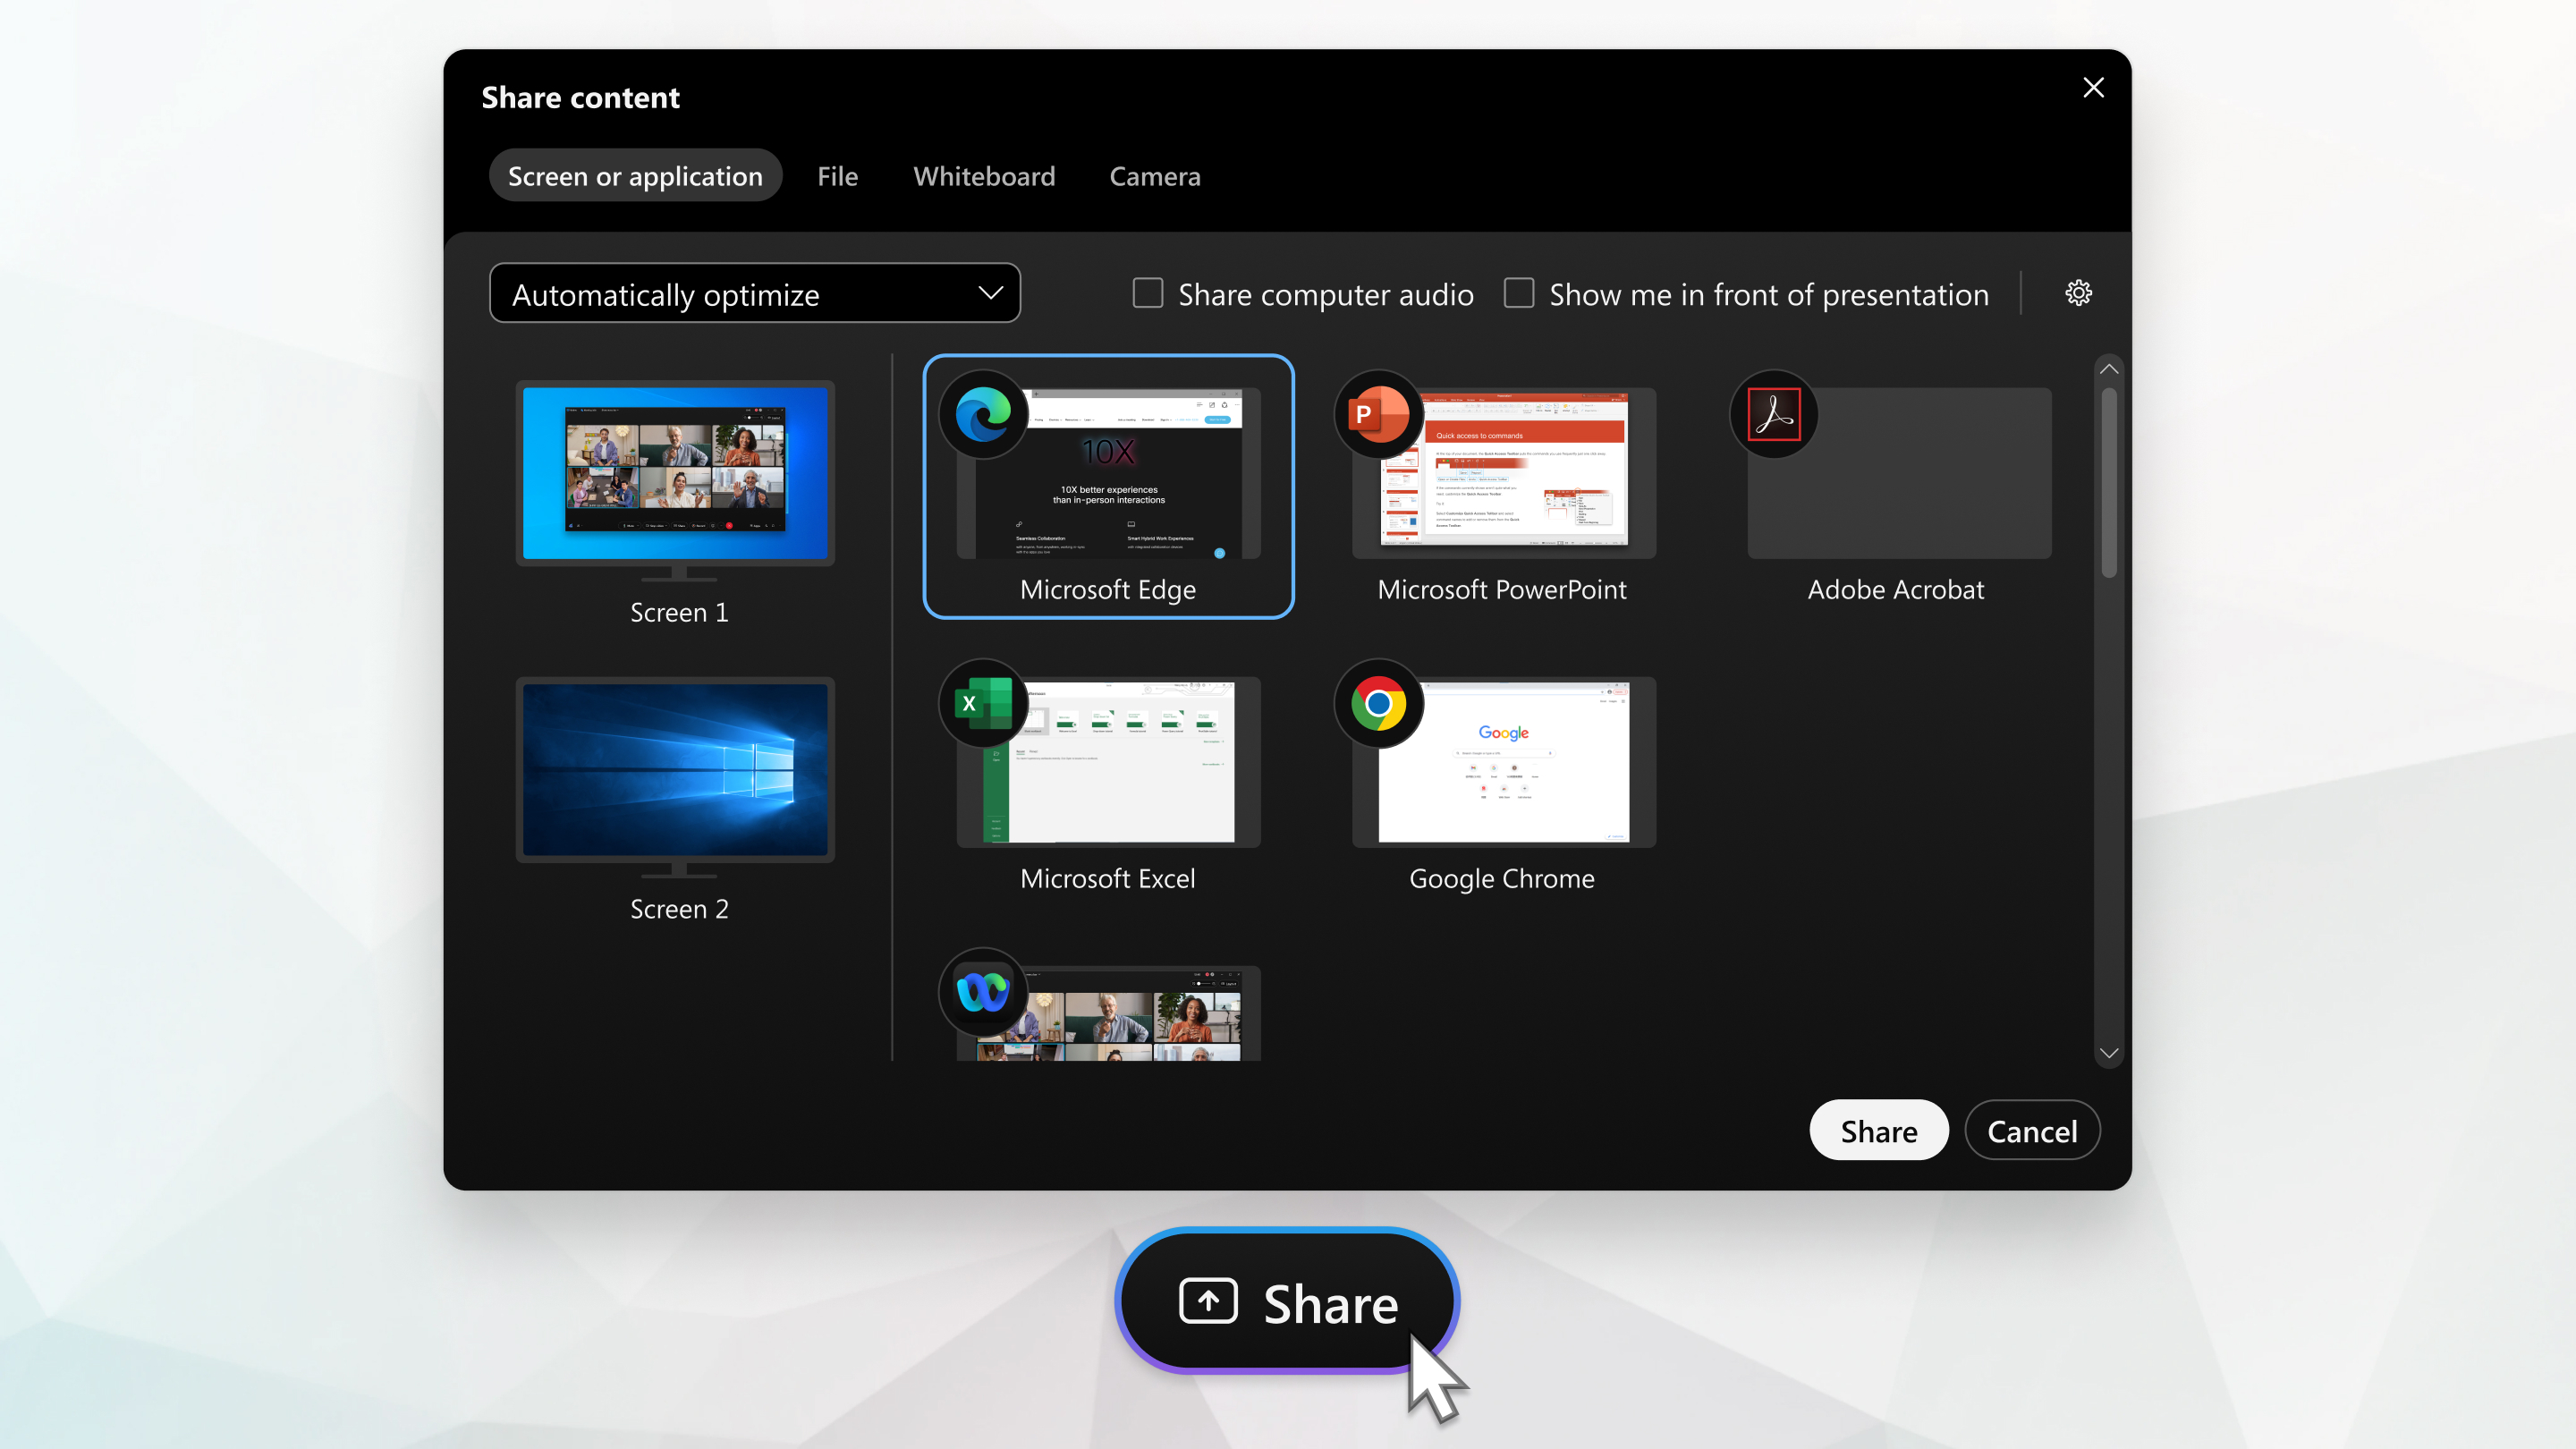
Go to the Share menu for more sharing options.
High-quality video-supported cameras
Administrators can now allow their users to use virtual cameras (in addition to physical cameras) in the Mac desktop app.
Most PC-compatible cameras should work with Meetings. The following cameras were tested for high-quality video:
-
Cisco Precision HD
-
Cisco VT Camera II
-
Cisco VT Camera III
-
Logitech HD Pro Webcam C910
-
Logitech HD Webcam C920
-
Logitech QuickCam C905
-
Logitech QuickCam Orbit AF
-
Logitech QuickCam Pro 9000
-
Logitech QuickCam S7500
-
Microsoft LifeCam Cinema
-
Microsoft LifeCam HD
-
Microsoft LifeCam NX-6000
-
Microsoft LifeCam VX-1000
-
Microsoft LifeCam VX-3000
-
Microsoft LifeCam VX-6000
High-definition video-supported cameras
The following cameras were tested for high-definition video:
-
Logitech HD Webcam C310
-
Logitech HD Webcam C500
-
Logitech HD Webcam C510
-
Logitech HD Webcam C905/B905
-
Logitech HD Pro Webcam C910/B910
-
Logitech HD Webcam C920
-
Microsoft LifeCam HD-5000/HD-5001
-
Microsoft LifeCam HD-6000
-
Microsoft LifeCam Cinema
-
Microsoft LifeCam Studio
-
Cisco Precision HD
-
Cisco TelePresence SX10
-
Cisco VT Camera III
-
Apple iSight HD


