Proces overenia domény pre SIP video zariadenia
 Spätná väzba?
Pri videozariadeniach registrovaných v cloude existuje zavedený reťazec dôvery a my vieme, či tieto zariadenia patria vašej organizácii alebo nie. Ak chcete dosiahnuť rovnakú úroveň zabezpečenia so štandardnými SIP video zariadeniami, postupujte podľa nasledujúcich krokov. Vďaka tomu sa k schôdzkam budú môcť pripojiť iba SIP videozariadenia vašej organizácie bez potreby PIN kódov a kľúčov.
Dokončenie procesu overenia domény:
| 1 |
Prihláste sa do Control Huba potom prejdite do . |
| 2 |
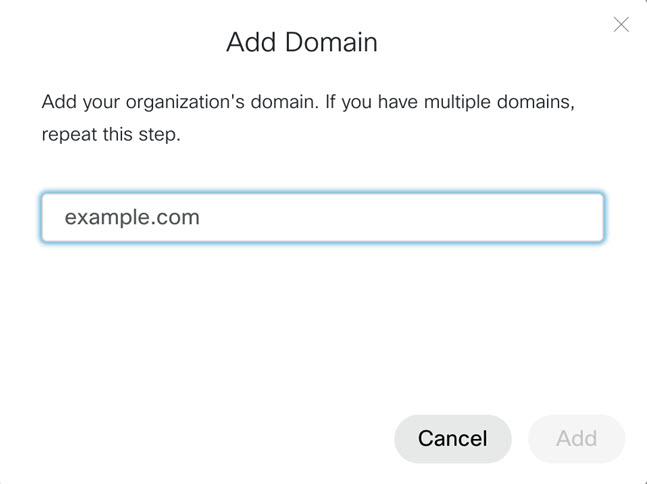
Zadajte názov svojej domény a kliknite na Pridať.  Viac informácií nájdete v časti Spravovanie domén. |
| 3 |
Kliknite na  |
| 4 |
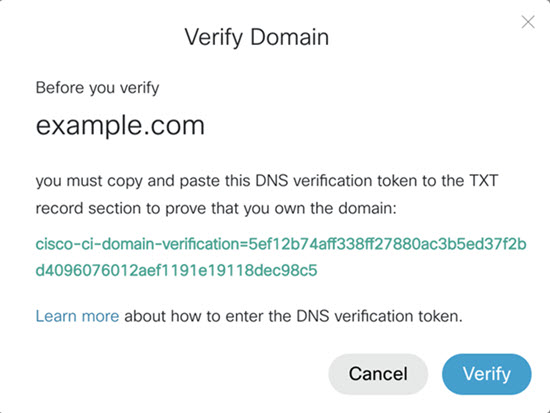
Skopírujte overovací token do vášho TXT záznamu DNS.
|
| 5 |
Vyberte si jeden:
example.com je doména SIP videa. Môže byť rovnaký ako názov spoločnosti alebo ho uviesť ako SAN (Subject Alternatívny názov subjektu) ako dôveryhodnú CA. |
| 6 |
Kliknite na Overiť vedľa každej domény. Uistite sa, že je overenie domény dokončené, pretože je to povinný krok. Proces nárokovania domény je pre SIP video zariadenia voliteľný. |

 vedľa vašej domény a vyberte Získať overovací token.

