
Hvala na povratnim informacijama.
Podesite postavke zakazivanja sastanaka
 Povratne informacije?
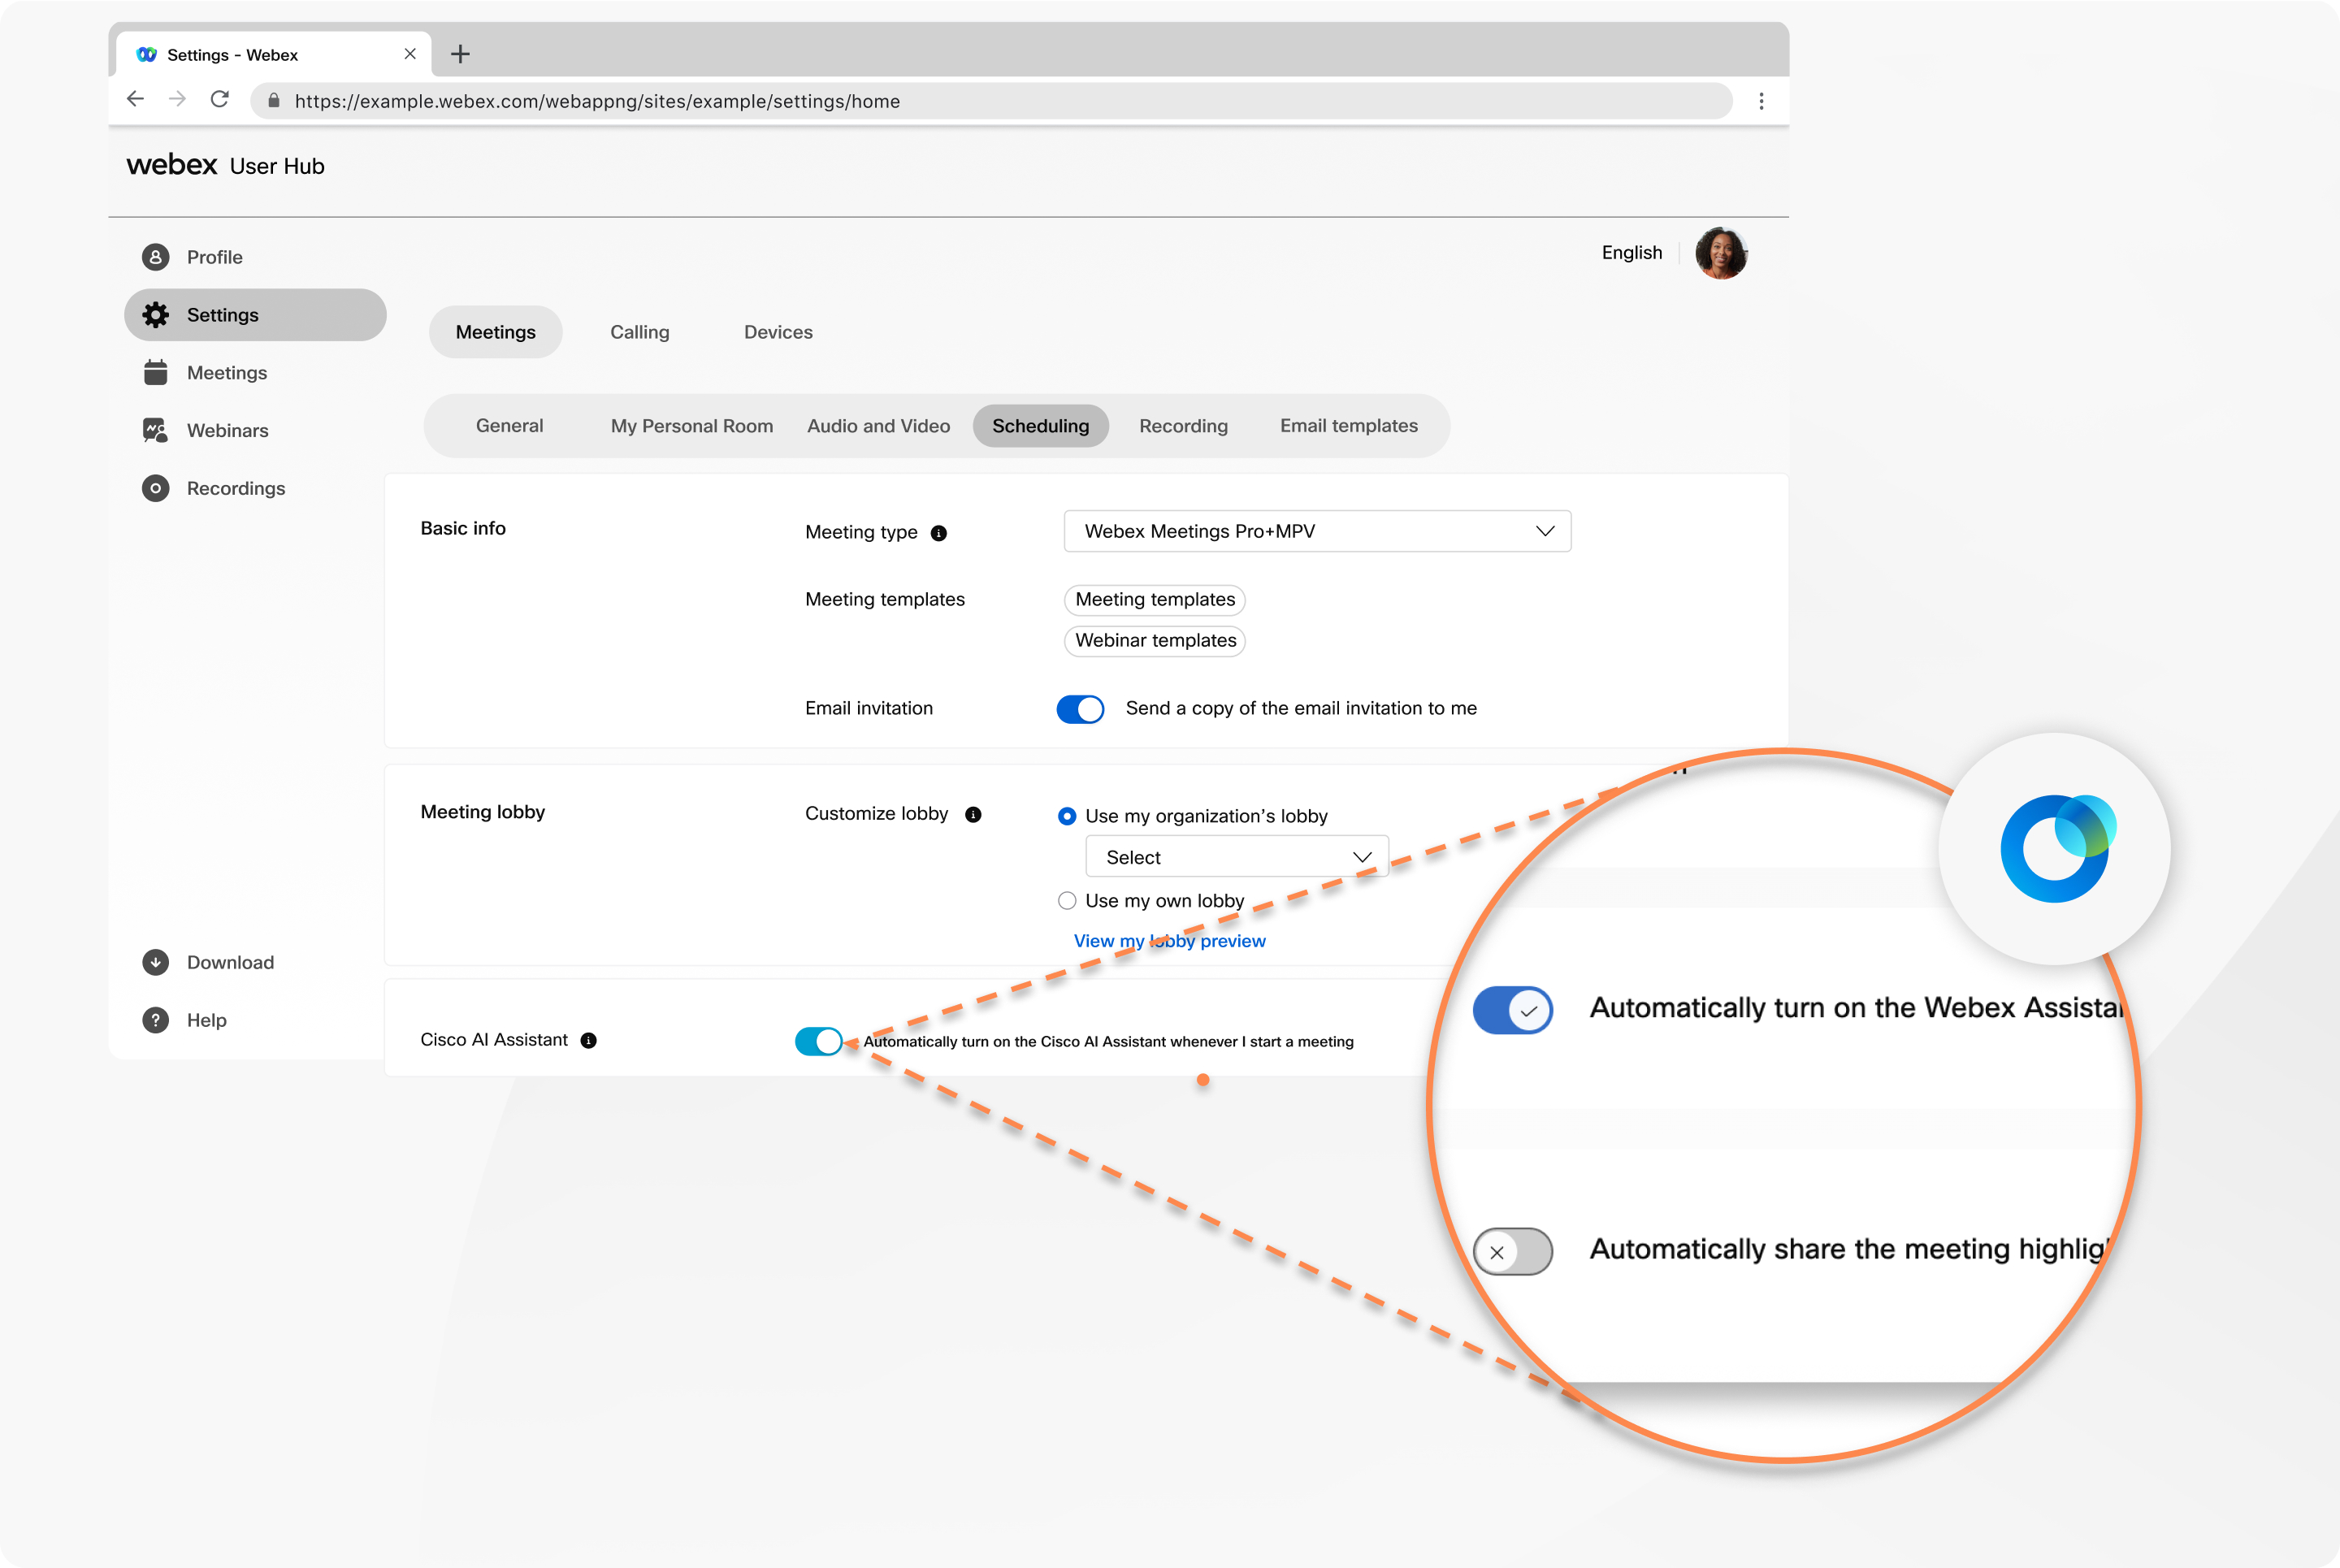
| 1 |
Prijavite se u User Hub, a zatim izaberite Podešavanja. |
| 2 |
Idi na . |
| 3 |
Za osnovne informacije u tipu sastanka izaberite vrstu sastanka koji želite zakazati sa padajuće liste. Lista sadrži tipove sastanaka koji su dostupni za Veb lokaciju vaše usluge. Da biste izbegli ponovni unos istih postavki prilikom zakazivanja, možete Koristite šablon na sastancima ili vebinarima. Za pozivnicu e-poštom uključite Pošalji kopiju e-pošte sa pozivnicom da pošaljem pozivnicu e-poštom na vašu e-poštu. |
| 4 |
Za predvorje sastanka možete odabrati prilagođeno predvorje koje je kreirala vaša organizacija. Izaberite Koristi predvorje moje organizacije i izaberite predvorje sa padajuće liste. Da biste kreirali prilagođeno predvorje, izaberite Koristi sopstveni lobi, kliknite na dugme Uredi i nastavite na sledeći korak. Kliknite na Pogledaj pregled mog predvorja da biste pregledali kako izgleda vaše predvorje. |
| 5 |
Za Cisco AI Assistant, uključite Automatski uključite Cisco AI Assistant kad god započnem sastanak ako želite da se Cisco AI Assistant na sastancima automatski pokrene kada započnete sastanak. Ako vaši sastanci nisu na platformi za sastanke Vebek Suite, idite na Vebek pomoćnika, proverite Automatski uključite Vebek asistenta kad god započnem sastanak da uključim Vebek pomoćnika za sastanke da se automatski uključi kada započnete sastanak. |
| 6 |
Za Deljenje sadržaja sastanka uključite Automatski delite snimak sa pozvanim osobama na sastanak da biste poslali snimak sastanka prisutnima ako snimite sastanak. |
| 7 |
Za dozvolu za planiranje ,dozvolite drugim domaćinima da zakažu sastanke u vaše ime tako što ćete ovde uneti njihove e-adrese. Zasebne e-adrese zarezom ili tačkom i zarezom. Uključite Automatski delite sadržaj sastanka da biste delili sadržaj sastanka sa učesnicima i pozvanim osobama i dali im privilegije uređivanja. |


