- Home
- /
- Article

Thanks for your feedback.

Integrate Webex Contact Center with Salesforce (Version 2-New)
 In this article
 Feedback?
When you integrate Webex Contact Center with Salesforce, you can launch Desktop from within Salesforce.
Requirements
Before you integrate Webex Contact Center with Salesforce console, ensure you have the following:
-
A production, sandbox or developer instance to install into. To create an account, go to the Salesforce developer portal at https://developer.salesforce.com/ and click Sign Up.
-
Administrator access to your Salesforce instance.
-
Lightning App from App Manager. Classic mode is not supported.
-
Download the latest Call Center .xml file from the Github repository: https://github.com/webex/webex-contact-center-crm-connectors/blob/main/salesforce/cti/OpenCTI.callCenter-meta.xml.
Integrate
To integrate Webex Contact Center with the Salesforce console, complete the following tasks:
Install Webex Contact Center for Salesforce
Before you begin
This connector is available exclusively for customers using Development, Enterprise, and Ultimate editions of Salesforce only. It is not available in Group and Professional editions of Salesforce.
To integrate Webex Contact Center with the Salesforce console, complete the following tasks:
| 1 |
Install the CRM connector using the production environment URL. For development purposes, use the development environment URL instead of the above production environment URL. This is to ensure you direct your requests to the appropriate Salesforce test environment. |
| 2 |
Enter your username and password for the Salesforce organization in which you want to install the package, and click Log In. |
| 3 |
Choose one of the following options: The login URL is different for a sandbox environment. After you test the application in the sandbox, you must install the application in a production environment using the Install in Production option. 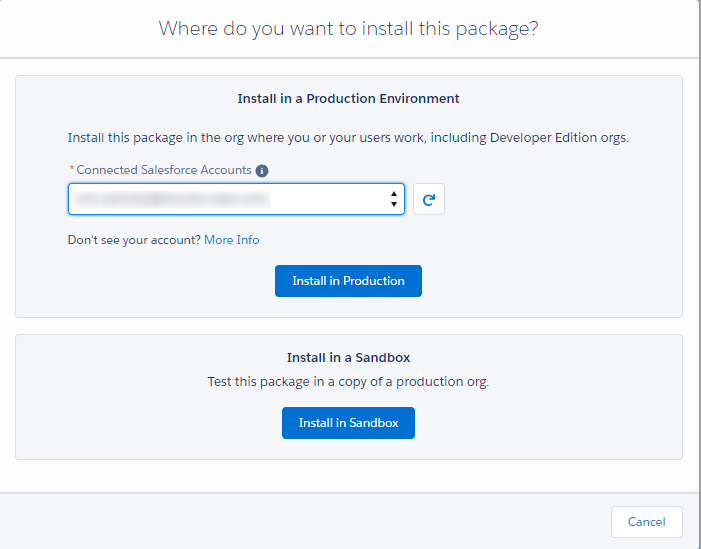
|
| 4 |
Confirm installation details and click Confirm and Install. 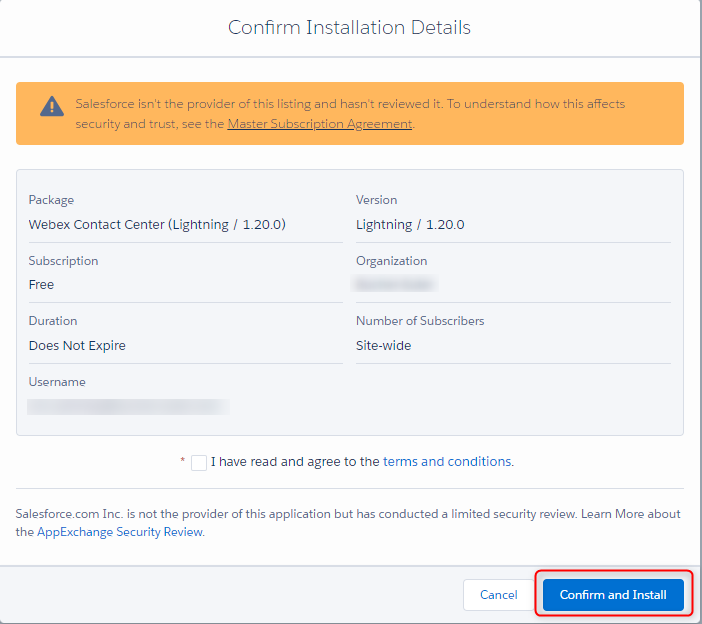
|
| 5 |
Log into Salesforce with your instance credentials when prompted. |
| 6 |
On the Install screen, choose Install for Admins Only and click Install. 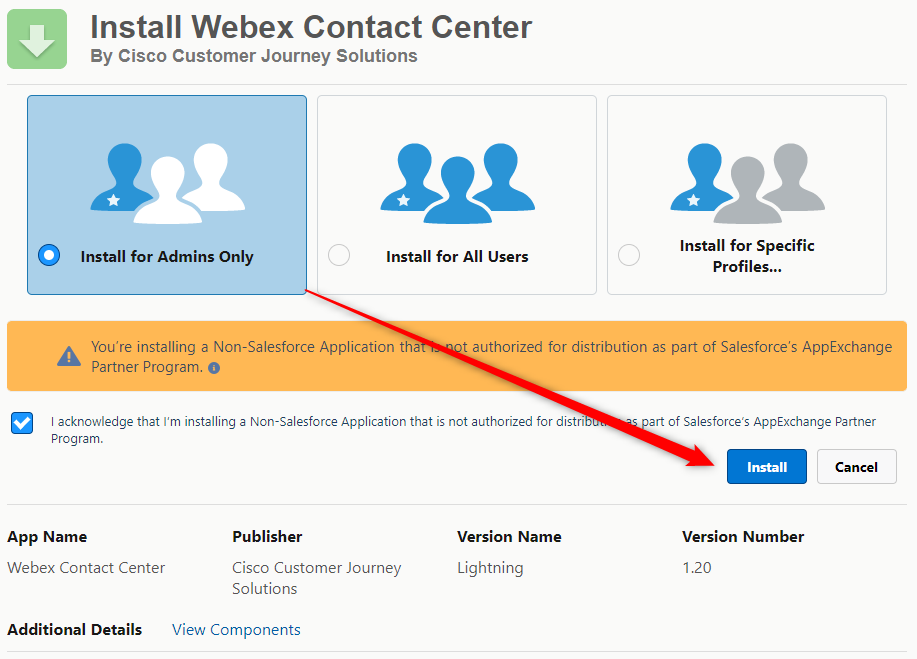
|
| 7 |
After the installation is complete, click Done. |
Create a Softphone Layout
| 1 |
In Salesforce, click the gear icon in the upper-right corner and choose Setup. |
| 2 |
Go to Feature Settings > Service > Call Center > Softphone Layouts. 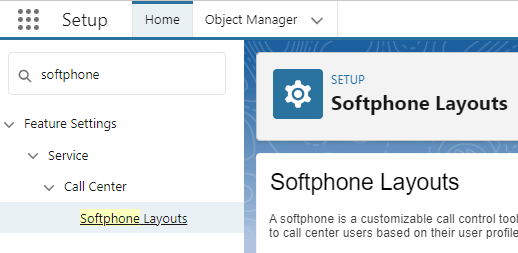
|
| 3 |
Click New. 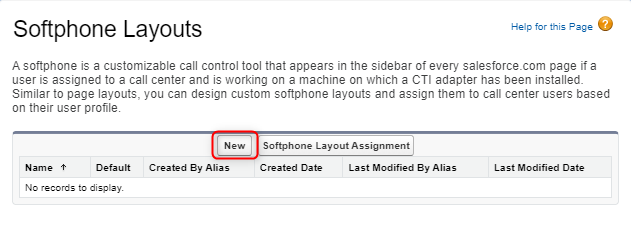
|
| 4 |
In the Name field, enter a name for the layout and check Is Default Layout. 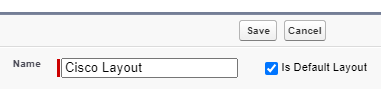
|
| 5 |
In the Display these salesforce.com objects section, choose your items. These will be the objects searched to trigger the lookup and screen pop on an inbound call. 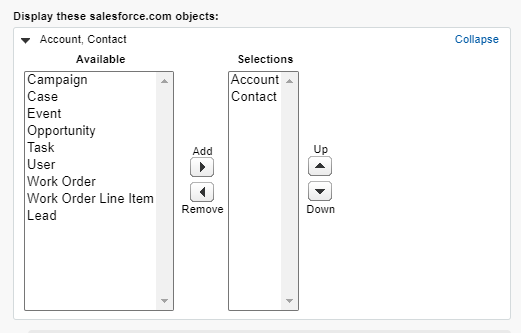
|
| 6 |
Set Screen Pop Settings according to desired behavior for matching records. 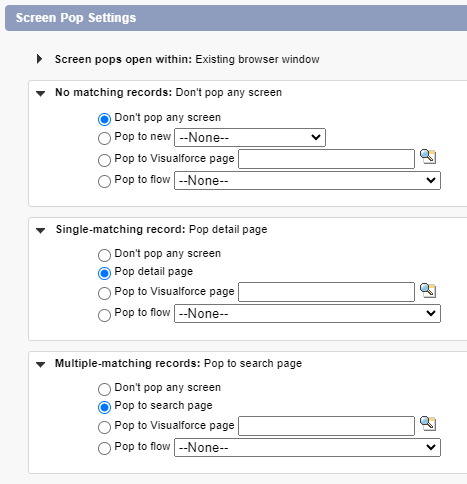
|
| 7 |
Click the Save button at the top when finished.
|
Configure the Call Center File
Download the latest call center definition file:
Visit the Github repository to download the latest call center definition file https://github.com/webex/webex-contact-center-crm-connectors/blob/main/salesforce/cti/OpenCTI.callCenter-meta.xml.
Import the Call Center file
| 1 |
Go to Setup > Call Center > Call Centers. 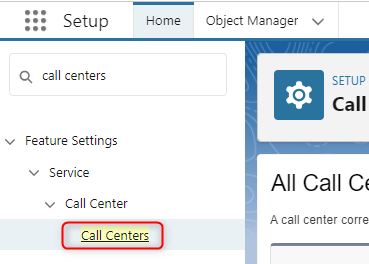
|
| 2 |
Click Import. Choose the call center .xml file and click Import again. 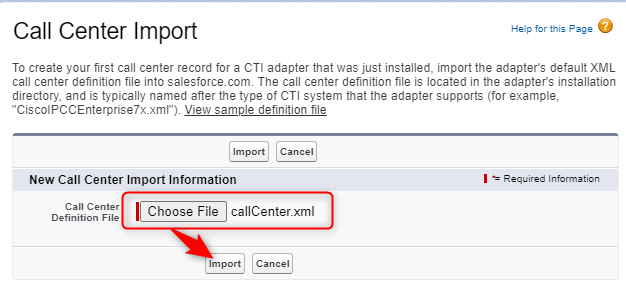
|
Set Call Center Settings
Users will not see the Phone in their utility bar until this step is completed.
| 1 |
Go to Setup > Call Center > Call Centers. |
| 2 |
Click Edit on the Call Center. 
|
| 3 |
Set the WxCC Region at a minimum and Save. For more information on settings, see Customize tab. 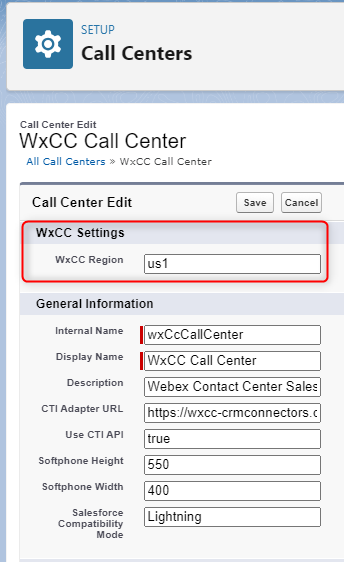
|
Add users to Call Center
Users will not see the Phone in their utility bar until this step is completed.
| 1 |
Go to Setup > Call Center > Call Centers.
|
| 2 |
Click the name of the Cisco Call Center. 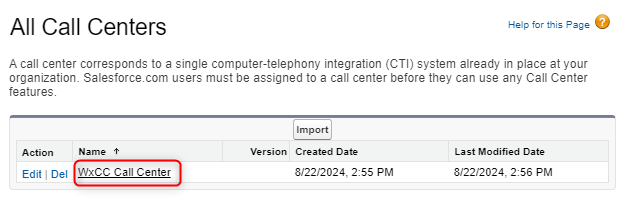
|
| 3 |
Click Manage Call Center Users at the bottom of the page. 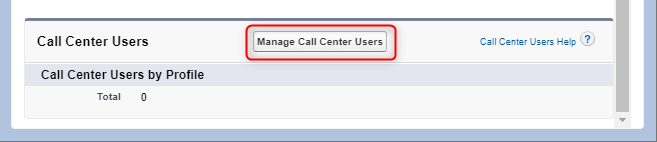
|
| 4 |
Click Add More Users. 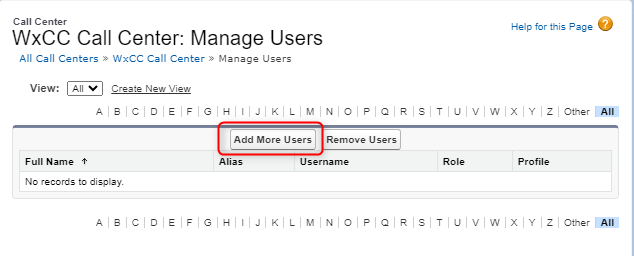
|
| 5 |
Define the parameters for your search and click Find or just click Find to list all users. Check the box next to the desired names and click Add to Call Center. 
|
What to do next
Add Open CTI Softphone to App
| 1 |
Go to Setup > Apps > App Manager. 
|
| 2 |
Click Edit on the Lightning App you will be working in. 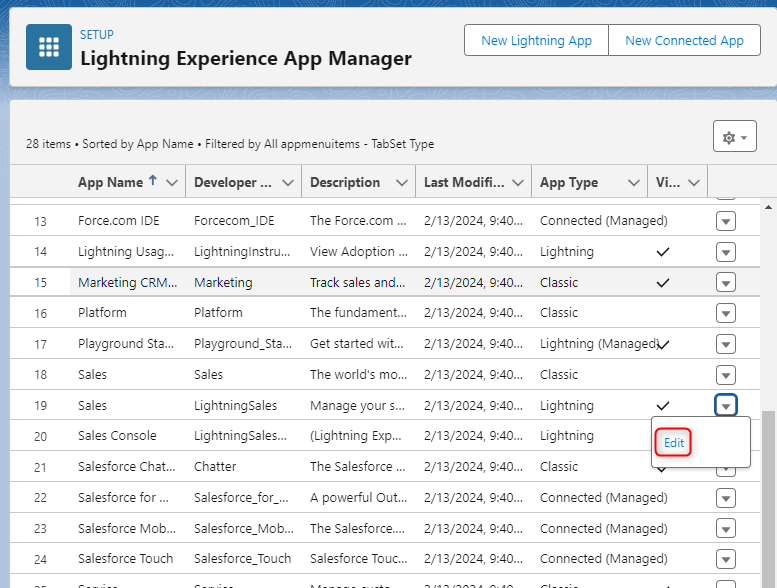
|
| 3 |
Click Utility Items (Desktop Only) > Add Utility Item > Open CTI Softphone. 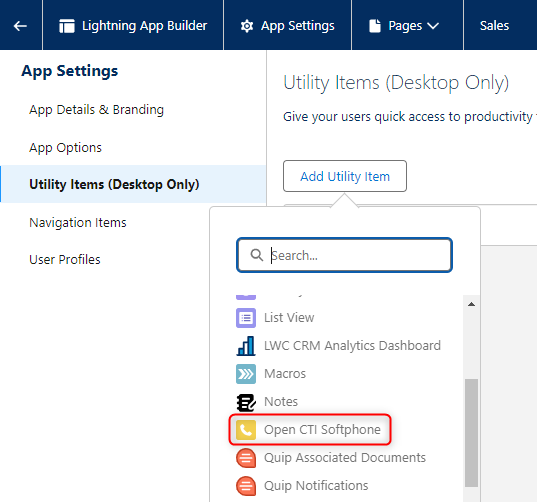
|
| 4 |
Click Save. |
Add Agent Permission Set
| 1 |
Click Setup > Users > Permission Sets. 
|
| 2 |
Click the name of the Webex Contact Center Agent permission set. 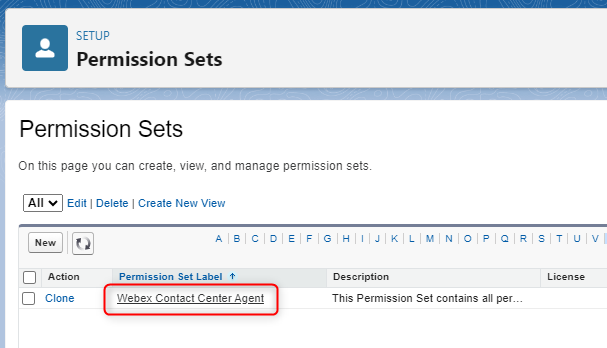
|
| 3 |
Click Manage Assignments. 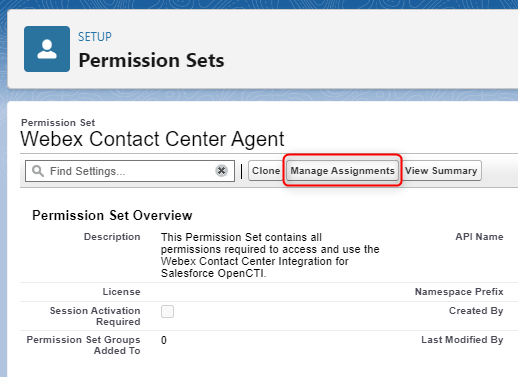
|
| 4 |
Click Add Assignment to add users. 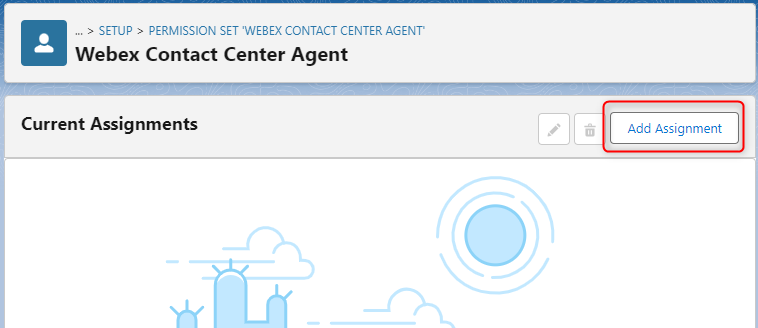
|
| 5 |
Check the users you want to add and then click Assign. 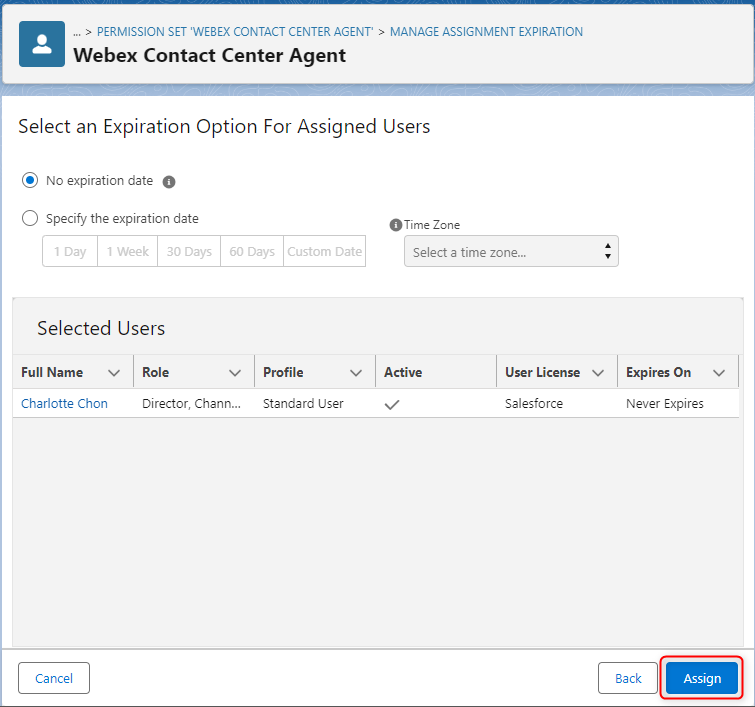
|
Customize
The following sections describe the configuration and customization of Webex Contact Center Salesforce Agent Desktop application. You can customize and automate different workflows for the agents while they handle both inbound and outbound calls through the Webex Contact Center Agent Desktop application.
Call Center configuration customizations
The following section describes the customization of each property of the Call Center configuration file. You can customize the behavior of Salesforce as per the required business use case.
|
Call Center property |
Description |
Values |
|---|---|---|
| WxCC Settings | Wxcc Region used by agent |
|
| webRtcDomain | Domain, when using the “Desktop” mode |
The domain is used to establish the correct WebRTC connection. Use the location of your WxCC tenant: US: rtw.prod-us1.rtmsprod.net ANZ: rtw.prod-as1.rtmsprod.net CA: rtw.prod-ca1.rtmsprod.net JP: rtw.prod-ja1.rtmsprod.net EU1: rtw.prod-uk1.rtmsprod.net EU2: rtw.prod-gm1.rtmsprod.net Singapore: rtw.prod-sn1.rtmsprod.net |
|
Call Center property |
Description |
Values |
|---|---|---|
| Internal Name | Unique name to reference the Call Center | [Default: WxCcCallCenter] Any unique name |
| Display Name | Unique display name for the Call Center | [Default: WxCC Call Center] Any unique name |
| Description | Description of the Call Center | [Default: Webex Contact Center Salesforce Integration] Any description |
| CTI Adapter URL | CDN path to the adapter | [Default: https://wxcc-crmconnectors.ciscoccservice.com/salesforce/connector/v1/index.html] |
| Use CTI API | Represents that the call center is using Open CTI | [Default: true] true or false |
| Softphone Height | Height of the adapter in pixels | [Default: 550] Any height |
| Softphone Width | Width of the adapter in pixels | [Default: 400] Any width |
| Salesforce Compatibility Mode | Determines where the softphone is visible (Do not change) | [Default: Lightning] |
|
Call Center property |
Description |
Values |
|---|---|---|
| Date Format In Subject | Formatting of Date/Time in Task subject line | [Default: MM-DD-YYYY hh:mm a] |
| Subject Template |
This field can include a mix of variables and static text. Example:{direction} Call {activityDatetime} {queueName} In this example, "Call" is static plain text, while {direction}and{activityDatetime} are variables. All variables must be enclosed in {} brackets. Only the variables {direction} and {activityDatetime} are supported as placeholders and replaced when the Call Activity record is created. CAD variables are not supported. | [Default: {direction} Call {activityDatetime}] |
| Record Call Live Subject | This feature flag enables the Write a subject option from Log tab in the Connector. | [Default: true] true or false |
| Record Call Live Notes | This feature flag enables the Write a note option from Log tab in the Connector. | [Default: true] true or false |
| Live Call Notes Field Mapping | Salesforce Field Name on the Task record to write notes. | [Default: Description] |
| Change Activity Record Ownership For Transferred Calls | This feature flag enables changing the ownership of the activity task record when an agent transfers a call to another agent. It ensures that only one activity record is created for each interaction. | [Default: true] true or false |
| CAD Variable Name That Holds Activity Id | Name of the CAD variable that holds the activity ID and is used to change the ownership of the activity record for transferred calls. | |
| Object Field Mappings |
This feature uses a string of comma separated key value pairs to map the WebexCC CAD variables and SFDC Field Names. Format: SF_Field_Name1={CADVariable1},SF_Field_Name2= {CADVariable2} Example: Category__c={Category},C Cisco_Queue__c={queueName},Language__c={Language} For the field mapping, only single CAD variables are allowed. Combinations of multiple CAD variables or with fix text are not supported. | |
| Variable for Record Sharing | Defines the name of the variable used to store the currently open record when an agent initiates a consult or conference. If this variable is set, the record-sharing feature is enabled. | |
| Use Activity as Shared Record by default | When enabled (true), the system automatically uses the related activity (Task) as the shared record during consult or conference calls. This means the activity will be stored in the configured variable without requiring manual selection. | [Default: false] true or false |
On call answer, the Call Activity record is created, and the following Salesforce fields are automatically prefilled:
| Salesforce field | Value |
|---|---|
| Subject | As defined in the “Subject Template” configuration |
| Ani | Calling number (=ani) |
| Dnis | Calling number (=dnis) |
| Queue Name | Name of the team assigned to the call (=virtualTeamName) |
| Call Object Identifier | Interaction ID (= interactionId) |
| Status | In Progress |
| Call Type | Inbound or Outbound |
| Other Salesforce fields | As defined in the “Object Field Map-pings” configuration |
On end wrap-up, the following Salesforce fields are updated:
| Salesforce field | Value |
|---|---|
| Call Duration | = Talk time (calculated from answer call until hangup, without |
| Call Result | Selected Wrapup reason (= wrapUpReason ) |
| Status | Completed |
|
Call Center property |
Description |
Values |
|---|---|---|
| Remove Phone Number Prefix Strings |
Specify the country codes as a comma-separated list. These codes will be removed from the phone number field in SFDC on the outbound dial. Example: +1,+41,+49 | Any country code |
|
Call Center property |
Description |
Values |
|---|---|---|
| Advanced Screen Pop Enabled |
Feature flag to enable Advanced Screen Pop Configurations | [Default: false] true or false |
| CAD Variable Name | Name of the CAD Variable that holds the ID to be searched in Softphone Layout. | Any CAD Variable |
| Remove ANI Prefix Strings |
Specify the country codes as a comma-separated list. These codes will be removed from the phone number ANI on the inbound call. Example: +1,+41,+49 | Any country code |
|
Call Center property |
Description |
Values |
|---|---|---|
| Auto Case Creation For Inbound Calls |
Option to create new case for every inbound call | [Default: false] true or false |
| Auto Case Creation For Outbound calls | Option to create new case for every outbound call | [Default: false] true or false |
| Open Case Object In Edit Mode |
Option to open newly created case in edit mode | [Default: false] true or false |
| Object Field Mappings |
This field uses a string of comma separated key value pairs to map the WebexCC CAD variables and SFDC Field Names. Format: Field_Name1={CADVariable1},Field_Name2= {CADVariable2} Example: Languages__c={Language},Subject=New case created,SuppliedCompany={Category},SuppliedName={Product},SuppliedPhone={ANI} For the field mapping, only single CAD variables are allowed. Combinations of multiple CAD variables or with fix text are not supported. |
|
Call Center property |
Description |
Values |
|---|---|---|
| Object Field Mappings |
In the Softphone Layout, you can choose to create a new record for No matching record calls (Pop to new <Object type>). This field uses a string of comma separated key value pairs to map the WebexCC CAD variables and SFDC Field Names on this new object. Format: Field_Name1={CADVariable1},Field_Name2= {CADVariable2} Example: Languages__c={Language},Phone={ANI} For the field mapping, only single CAD variables are allowed. Combinations of multiple CAD variables or with fix text are not supported. |
|
Call Center property |
Description |
Values |
|---|---|---|
| Enable Omni-Channel Sync |
The feature flag enables Voice/Omni state change based on incoming interactions. For more information about enabling Omni-Channel routing in Salesforce and setup instructions, please see: https://help.salesforce.com/s/articleView?id=sf.omnichannel_intro.htm | [Default: false] true or false |
| Omni-Channel Not Ready Reason |
Name of the SFDC Omni-Channel "Busy" reason status used when the agent receives inbound call. This state must not be synchronized. That is, Webex cannot have a state with the same label. Example: Busy_Phone_Call | Any Presence Status Developer Name |
| WxCC Idle Reason Code |
Name of the WxCC Idle Auxiliary code used when the agent receives Salesforce Omni-Channel routed task. This state must not be synchronized. That is, the Omni-Channel cannot have a state with the same label. Example: | Any WxCC Idle Auxiliary Code |
If the Webex Contact Center idle reason Name and the Salesforce Omni Presence Name (label) are identically, the Webex Conact Center presence and the Salesforce Omni Presence are synchronized to the same state.
|
Call Center property |
Description |
Values |
|---|---|---|
| Send Browser Notifications |
This feature flag enables browser-based pop-up notifications. | [Default: false] true or false |
List of variables
These variables can be used to be mapped to Salesforce fields in the Call Activity record or Case record:
| Variable name | Variable description |
|---|---|
| ani | Calling number |
| dn | Called number |
| virtualTeamName | Name of the team assigned to the call |
| ronaTimeout | Value of the Ring On No Answer parameter |
| Custom Webex CC variables | Name of the variable defined on the Webex CC flow designer |
| {direction} | Inbound or outbound call. Only supported in the Subject line of the Call Activity record. |
| {activityDateTime} | Current date and time. Only supported in the Subject line of the Call Activity record. |
This example shows how to save ani, dn wrapupAuxCodeId, wrapupAuxCodeName into the short description field of the interaction:
{ "Key": "activityRecordMapping", "Value": "short_description= {ani} / {dn} / {wrapUpAuxCodeId} / {wrapUpAuxCodeName} "}
Screen Pop
A Screen Pop node is available in the WxCC Flow. It can be used to trigger a screen pop inside Salesforce or in a separate window.
Further information on this function can be found in the Flow Designer documentation.
Screen Pop in a separate window
To open the screen pop in a separate window an *absolute* URL must be provided in the Screen Pop node. The queryParameters will be appended as search parameters to the URL.
The following modes are supported:
- New browser tab: Always opens a new browser tab.
- Existing browser tab: On the first `Existing browser tab` screen pop, a new browser tab is opened. That tab will be the dedicated tab for subsequent `Existing browser tab` screen pops and the URL will be refresh within that specific browser tab.
- Inside Desktop: It is handled the same way as *New browser tab*.
The currently opened page can prevent a redirect. In that case an `Existing browser tab` screen pop opens in a new browser tab.
If the URL is a relative path (without domain part) to a CRM element like a Visualforce Page or CRM record, this Salesforce element opens as a new CRM tab. The screen pop target (New Browser Tab, Existing Browser Tab, or Inside Desktop) is ignored.
WebRTC
The SalesForce connector supports WebRTC on the following browsers—
- FireFox
- Google Chrome
However, WebRTC is not supported on Microsoft Edge browser.
To enable WebRTC, enure that:
- Webex CC Desktop profile allows Desktop.
- webRTCDomain field is configured in the Call Center configuration set with the correct domain name.
- Browser refresh requires you to logout and login again.
- Device selection (micro/headset) is not possible (coming in the next release).
Limitation
If an agent unplugs an active default device while on a call, they will need to select a new device manually through the "Speaker and Microphone" settings.
Speaker and Microphone selection is currently not possible in Firefox.
Desktop Timeout
To enable automatic agent logout after a specified inactivity threshold, the Desktop Profiles Desktop Timeout setting must be configured with a custom value
Limitation
The global Tenant Settings Desktop Inactivity Timeout does not affect the behavior of the CRM connector and will not automatically log out an agent once the inactive duration is reached.
Share Record
Limitation
Variable does not get overwritten during a consultation call to entry point, record is not shareable.
WxCC DN restrictions in gadget
In WxCC Control Hub, under Desktop Profiles > Voice Channel Options, you can configure how Agent DN (Directory Number) is validated. There are three available options:
-
Unrestricted (Allow any value)—Agents can enter any DN of their choice.
-
Provisioned DN (Restrict login DN to provisioned agent DN)—The DN is predefined and cannot be changed by the agent. The DN field in the gadget is pre-filled and disabled.
-
Validate using Dial Plans (Select from list)—Agents can select a DN from a list of predefined options configured by the administrator.
Release updates
This update (relevant on December 01, 2025) addresses the following enhancements:
- To use the Share Record feature, you must update the Call Center Definition File.
Features and Improvements
- Agents can now share the opened record during consultation and conference calls
- Agents can now use a dialpad during to initiate a consulation or transfer call
- Agents are now automatically logged out if they are inactive
Bug Fixes
- Blind transfer to an idle agent in WebRTC fails and removes the call
Call Center Definition File needs to be updated in order to consume new features (Agent Share Record)
Archives
November 2025
Features and Improvements
- Enable Agents to start outgoing calls from the Home screen using a dialpad
- Edit call subject field from within the connector
- Send DTMF Tones via keypad when using WebRTC
October 2025
Features and Improvements
- Send DTMF Tones via keypad when using WebRTC.
September 2025
Features and Improvements
- Added support to enable direct transfers to entry point.
- Ability to update Outdial ANI settings.
- Introduced WebRTC mute and unmute functionality.
August 2025
Features and Improvements
- Added the ability to mute and unmute the microphone during active WebRTC calls.
- Pre-filled the dial number field on the login screen with the default dial number for faster sign-in.
- Enabled changing Team, DN, and Telephony options on the fly for greater flexibility.
- Enhanced CRM lookups by including related records.
July 2025
Features and Improvements
- Enabled selection of a phone number as the caller ID for outgoing calls.
- Added the ability to switch microphone and speaker devices when using WebRTC.
- Provided the option to reject incoming calls for more control.
June 2025
Features and Improvements
- Introduced a new Call Center to support Desktop Login Mode.
- Set the due date to the current date when creating a call log in Salesforce.
- (Beta) Added support for the "Desktop" Voice Channel option.
- Switched event tracking for better reporting and analytics.
- Enabled selection of audio input and output devices.
- Improved the accuracy of the Disconnect Reason field on voice call records.
March 2025
Features and Improvements
- Enabled initiating screen pops by a Webex Contact Center flow within Salesforce.
- Displayed queued consultation calls for better visibility.
- Enhanced voice channel login options based on Webex Contact Center configuration.
- Added support for consult, conference, and warm transfer to entry points.
- Updated integration to use the latest List Contact Service Queues API.
- Improved user experience by automatically closing open drawers when an alert is shown.
- Added the "with sharing" attribute to APEX classes for improved data security.
January 2025
Features and Improvements
- Enabled assigning a contact or account to a case during an active call when a single match is found.
- Provided an option for customers to end calls directly.
- Improved screen pop handling during consult and conference scenarios.
- Enhanced API endpoints for Webex Contact Center requests.
- Updated menu options to a sidebar layout for easier navigation.


