- Home
- /
- Article

Thanks for your feedback.


 In this article
 Feedback?
If you have your own identity provider (IdP) in your organization, you can integrate the SAML IdP with your organization in Control Hub for single sign-on (SSO). SSO lets your users use a single, common set of credentials for Webex App applications and other applications in your organization.
Overview
Before integrating single sign-on (SSO), Webex uses basic authentication by default. Basic authentication requires users to enter their Webex username and password each time they sign in. If you have your own identity provider (IdP) in your organization, you can integrate it with your organization in Control Hub for SSO. SSO lets your users use a single, common set of credentials for Webex applications in your organization.
If you prefer using basic authentication, you don't need to act. However, consider that basic authentication may be less secure and less convenient for users than SSO, especially if your organization already uses an IdP. For enhanced security with basic authentication, we recommend using multi-factor authentication (MFA) in Control Hub. For more information, see Enable multi-factor authentication integration in Control Hub.
Tested SSO IdPs
The following web access management and federation solutions were tested for Webex organizations. The documents linked below walk you through how to integrate that specific identity provider (IdP) with your Webex organization.
These guides cover SSO integration for Webex services that are managed in Control Hub ( https://admin.webex.com). If you're looking for SSO integration of a Webex Meetings site (managed in Site Administration), read Configure Single Sign-On for Cisco Webex Site.
If you want to set up SSO for multiple identity providers in your organization, refer to SSO with multiple IdPs in Webex.
If you don't see your IdP listed below, follow the high-level steps in the SSO Setup tab in this article.
Single sign-on setup
Single sign-on (SSO) enables users to sign in to Webex securely by authenticating to your organizations common identity provider (IdP). Webex App uses the Webex service to communicate with the Webex Platform Identity Service. The identity service authenticates with your identity provider (IdP).
Start configuration in Control Hub. This section captures high-level, generic steps for integrating a third-party IdP.
When you configure SSO with your IdP, you can map any attribute to the uid. For example,
map the userPrincipalName, an email alias, an alternative email address or
any other suitable attribute to the uid. The IdP needs to match one of the user’s email
addresses to the uid when signing in. Webex supports mapping up to 5 email addresses to the
uid.
We recommend that you include Single Log Out (SLO) to your metadata configuration while setting up Webex SAML federation. This step is crucial to ensure that user tokens are invalidated at both, the Identity Provider (IdP) and the Service Provider (SP). If this configuration is not performed by an administrator, then Webex alerts users to close their browsers to invalidate any sessions left open.
Requirements for Identity Providers
For SSO and Control Hub, IdPs must conform to the SAML 2.0 specification. In addition, IdPs must be configured in the following manner:
-
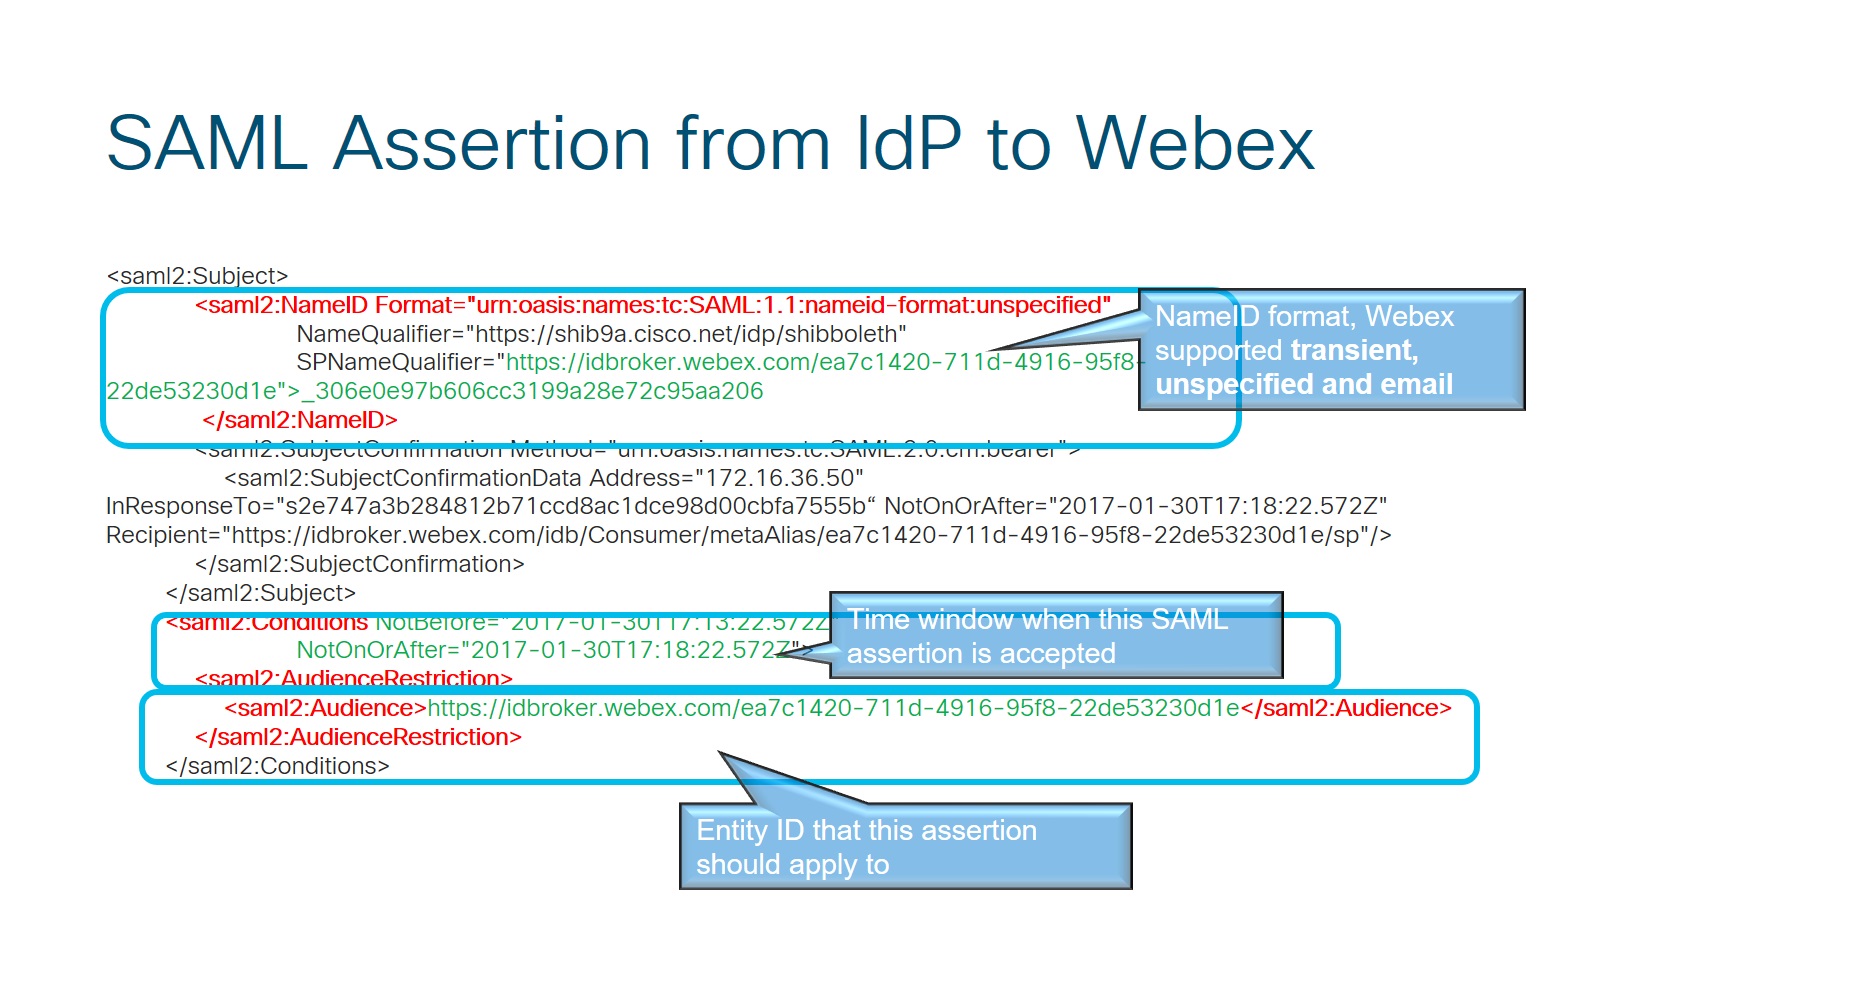
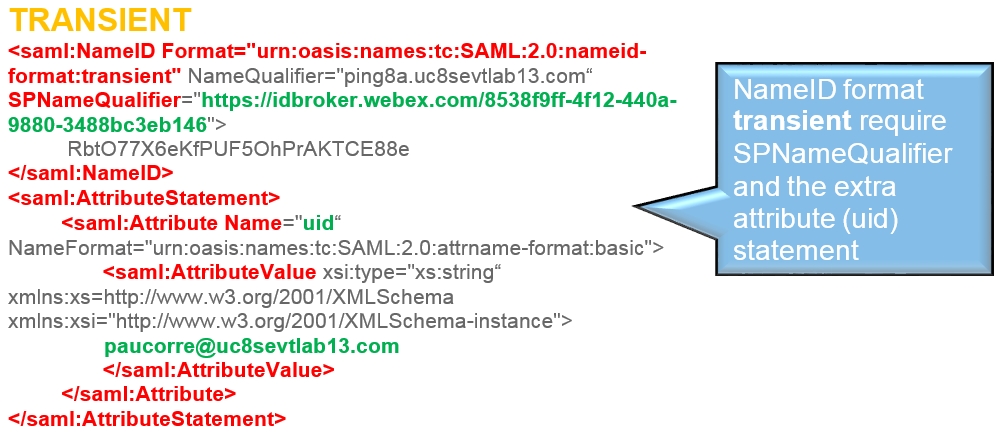
Set the NameID Format attribute to urn:oasis:names:tc:SAML:2.0:nameid-format:transient
-
Configure a claim on the IdP according to the type of SSO that you are deploying:
-
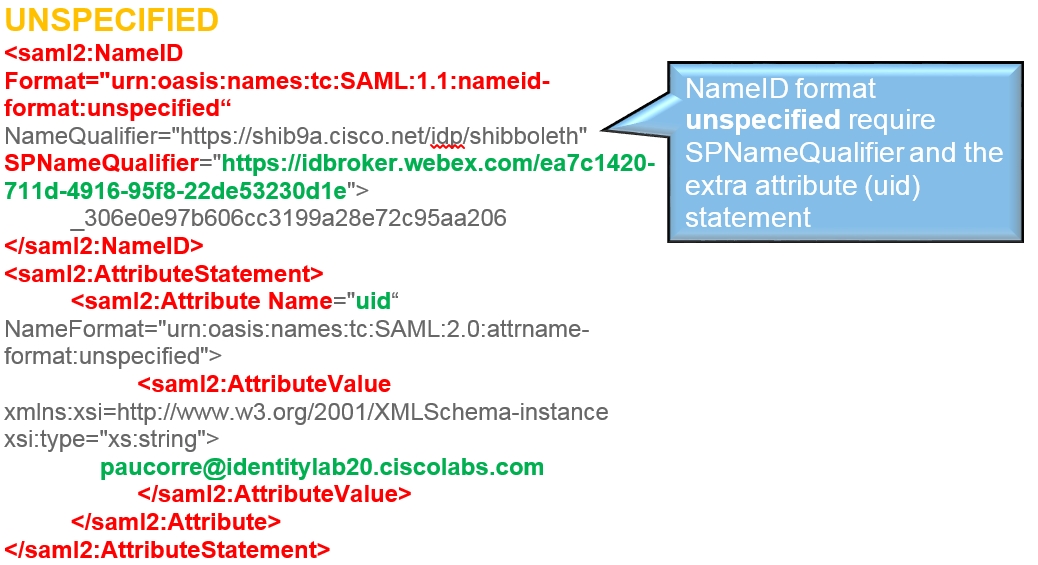
SSO (for an organization)—If you are configuring SSO on behalf of an organization, configure the IdP claim to include the uid attribute name with a value that is mapped to the attribute that is chosen in the Directory Connector, or the user attribute that matches the one that is chosen in the Webex identity service. (This attribute could be E-mail-Addresses or User-Principal-Name, for example.)
-
Partner SSO (for Service Providers only)—If you are a Service Provider administrator who is configuring Partner SSO to be used by the customer organizations that the Service Provider manages, configure the IdP claim to include the mail attribute (rather than uid). The value must map to the attribute that is chosen in the Directory Connector, or the user attribute that matches the one that is chosen in the Webex identity service.
For more information on mapping custom attributes for either SSO or Partner SSO, see Deployment Guide for Directory Connector.
-
-
Partner SSO only. The Identity Provider must support multiple Assertion Consumer Service (ACS) URLs. For examples of how to configure multiple ACS URLs on an Identity Provider, see:
-
Use a supported browser: we recommend the latest version of Mozilla Firefox or Google Chrome.
-
Disable any popup blockers in your browser.
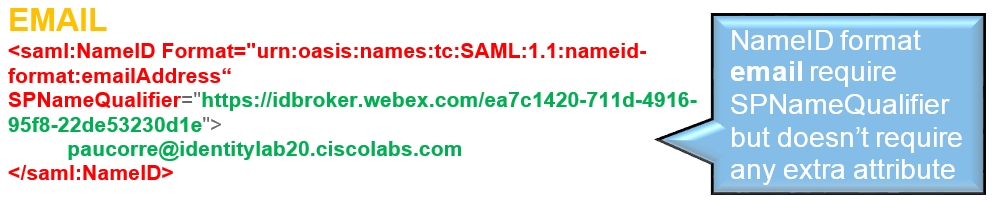
The configuration guides show a specific example for SSO integration but do not provide exhaustive configuration for all possibilities. For example, the integration steps for nameid-format urn:oasis:names:tc:SAML:2.0:nameid-format:transient are documented. Other formats such as urn:oasis:names:tc:SAML:1.1:nameid-format:unspecified or urn:oasis:names:tc:SAML:1.1:nameid-format:emailAddress will work for SSO integration but are outside the scope of our documentation.
Establish a SAML Agreement
You must establish a SAML agreement between the Webex Platform Identity Service and your IdP.
You need two files to achieve a successful SAML agreement:
-
A metadata file from the IdP, to give to Webex.
-
A metadata file from Webex, to give to the IdP.
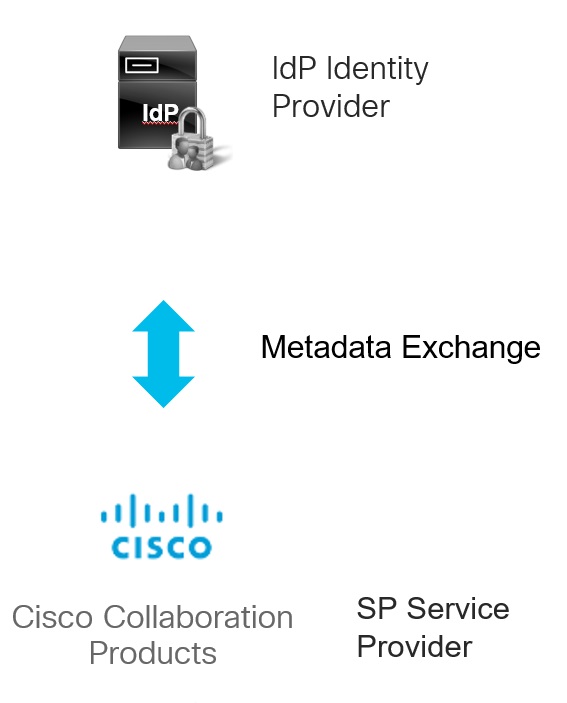
The metadata file from your IdP identifies the IdP and tells Webex where to send SAML authentication requests. The file typically includes the IdP entity ID, signing certificate, supported NameID formats, and one or more Single Sign-On service URLs.
IdP metadata labels and values vary by identity provider. Use the metadata file that you export from your IdP and identify the equivalent fields in the following table. For IdP-specific setup guidance, see Tested SSO IdPs.
| Metadata | Value or element | Purpose |
|---|---|---|
|
IdP entity ID |
|
Identifies the IdP in the SAML agreement. |
|
Authentication request signing requirement |
|
Indicates whether the IdP requires signed authentication requests from Webex. |
|
Signing certificate |
|
Provides the certificate that Webex uses to verify signed SAML responses from the IdP. |
|
NameID format |
|
Defines the user identifier format that the IdP can send in the SAML assertion. |
|
SSO service URL |
|
Provides the IdP endpoint that Webex can use to send sign-in requests. |
|
User attributes |
|
Identifies user attributes that the IdP may include in the SAML assertion. |
The metadata file from the identity service identifies Webex as the SAML service provider and provides the values that your IdP needs to complete the SAML agreement. Use this file to configure the service provider entity ID, signing and encryption certificates, supported NameID formats, logout endpoints, and Assertion Consumer Service URL.
The following table shows Webex identity service metadata fields that your IdP may need.
| Metadata | Value or element | Purpose |
|---|---|---|
|
Service provider entity ID |
|
Identifies the Webex identity service in the IdP configuration. |
|
Authentication request signing |
|
Indicates whether the Webex identity service signs authentication requests. |
|
Assertion signing |
|
Indicates whether the Webex identity service requires signed assertions. |
|
Signing certificate |
|
Provides the certificate that the IdP can use to verify metadata or messages signed by the Webex identity service. |
|
Encryption certificate |
|
Provides the certificate that the IdP can use to encrypt SAML assertions for the Webex identity service. |
|
Single Logout service URL |
|
Provides Webex logout endpoints, if logout is configured in the IdP. |
|
NameID format |
|
Lists the NameID formats that the Webex identity service supports for the SAML agreement. |
|
Assertion Consumer Service URL |
|
Provides the Webex endpoint where the IdP posts SAML assertions after authentication. |
When you configure the SAML agreement in Webex, use the IdP metadata to verify the IdP entity ID, signing certificate, NameID format, and SSO service URL required by your identity provider.
Configure Webex Identity Service
Use this task when you configure Webex as an identity provider in Control Hub and define routing rules for users who authenticate through that IdP.
If you're configuring a third-party SAML IdP, use the metadata values from your IdP and the Webex identity service to complete the SAML agreement before you test and activate SSO.
| 1 |
Sign in to Control Hub. |
| 2 |
Go to . |
| 3 |
Go to the Identity provider tab and click Activate SSO. |
| 4 |
Select Webex as your IdP and click Next. |
| 5 |
Check I've read and understood how Webex IdP works and click Next. |
| 6 |
Set up a routing rule. Once you've added a routing rule, your IdP is added and is shown under the
Identity provider tab.
For more information, refer to SSO with multiple IdPs in Webex.
|
Manage
After you set up SSO, use the SSO management features in Control Hub to maintain the integration.
You can renew certificates, export or import metadata, manage SSO alerts, configure Single Logout, disable SSO, and use self-recovery options.
See Manage single sign-on (SSO) integration in Control Hub for a full breakdown.
Troubleshoot
If you run into problems with your SSO integration, use the requirements and procedure in this section to troubleshoot the SAML Flow between your IdP and Webex.
Requirements for Troubleshooting SSO
-
To troubleshoot, use the web browser where you installed the SAML trace debug tool and go to the web version of Webex at https://web.webex.com.
Troubleshoot the SAML Flow Between Webex App, Your IdP, and Webex Services
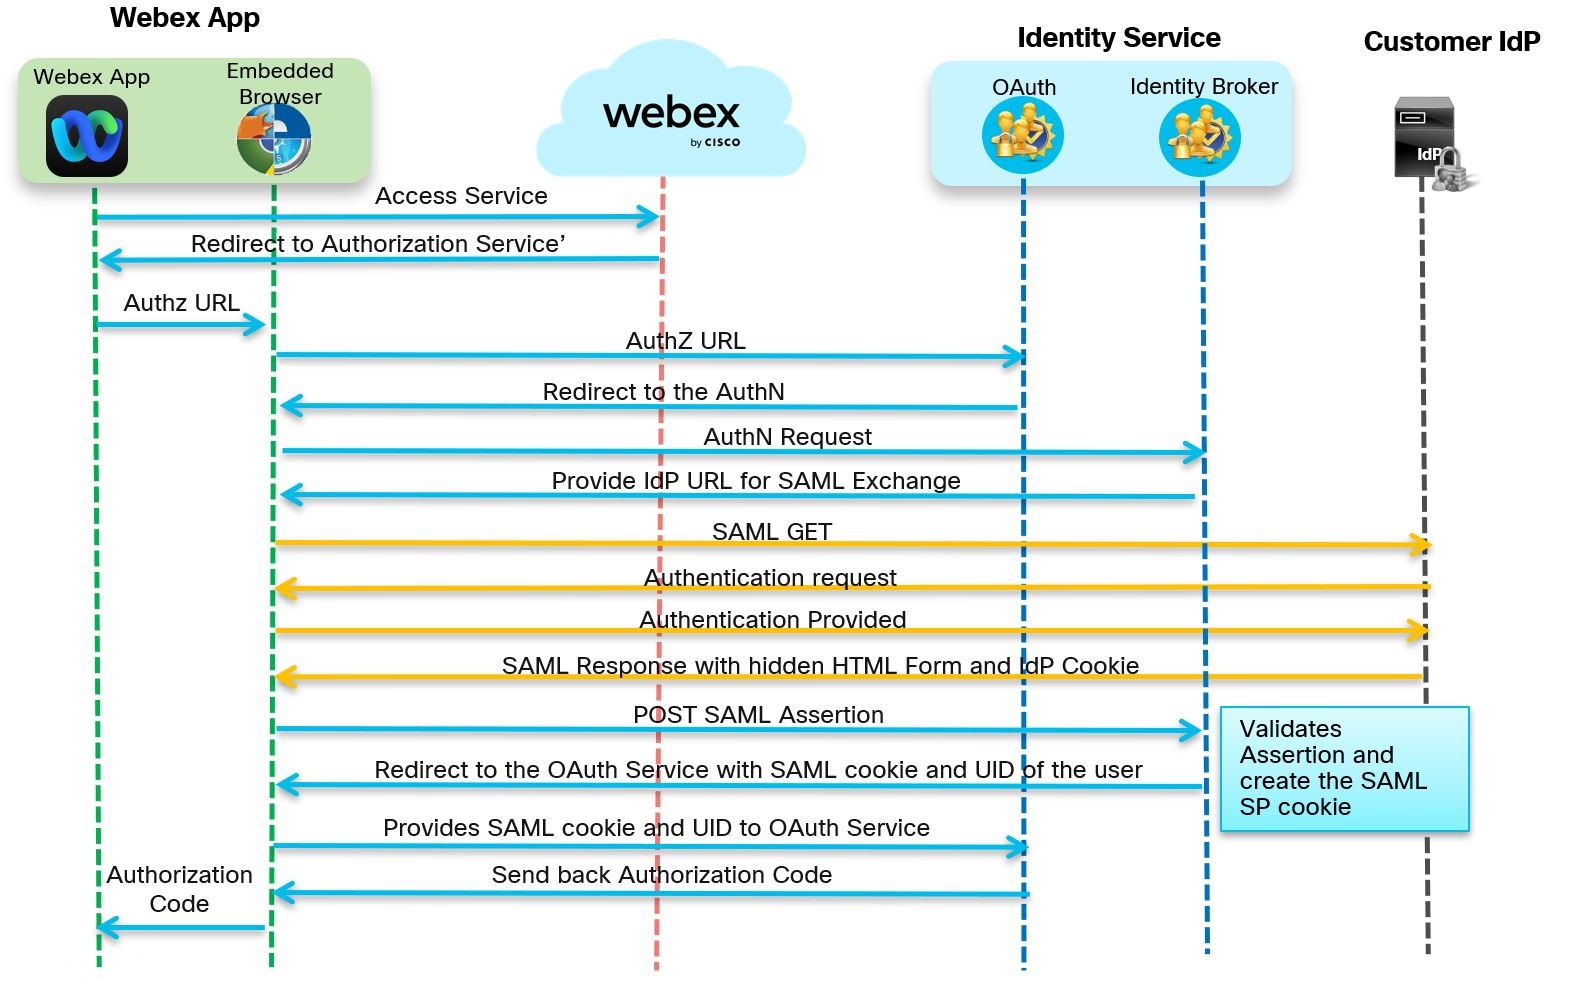
The following is the flow of messages between the Webex App, Webex Services, Webex Platform Identity Service, and the Identity provider (IdP).
| 1 |
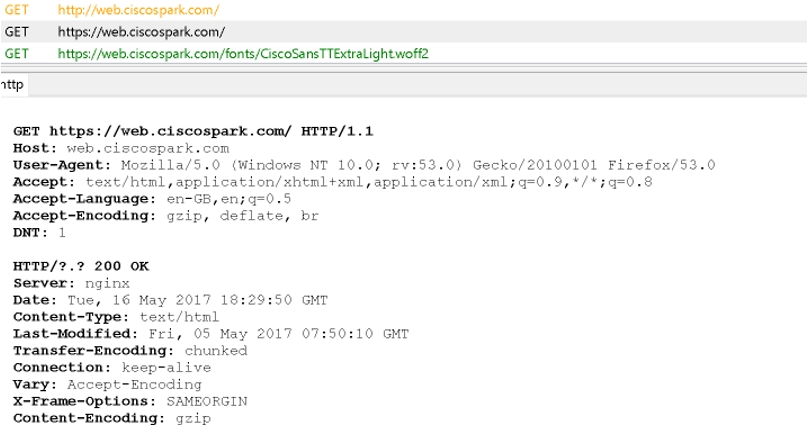
Go to https://admin.webex.com and, with SSO enabled, the app prompts for an email address.
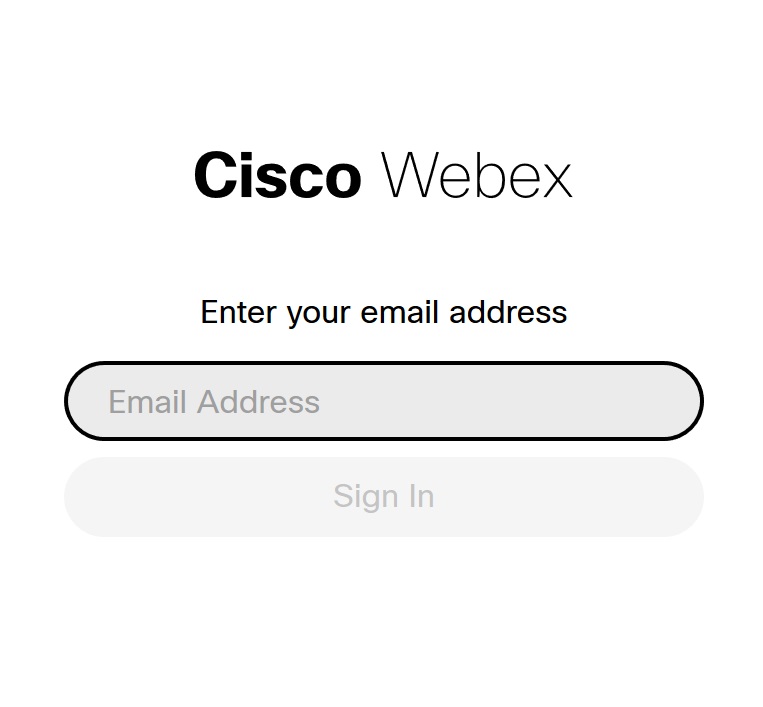 The app sends the information to the Webex service which verifies the email address.
|
| 2 |
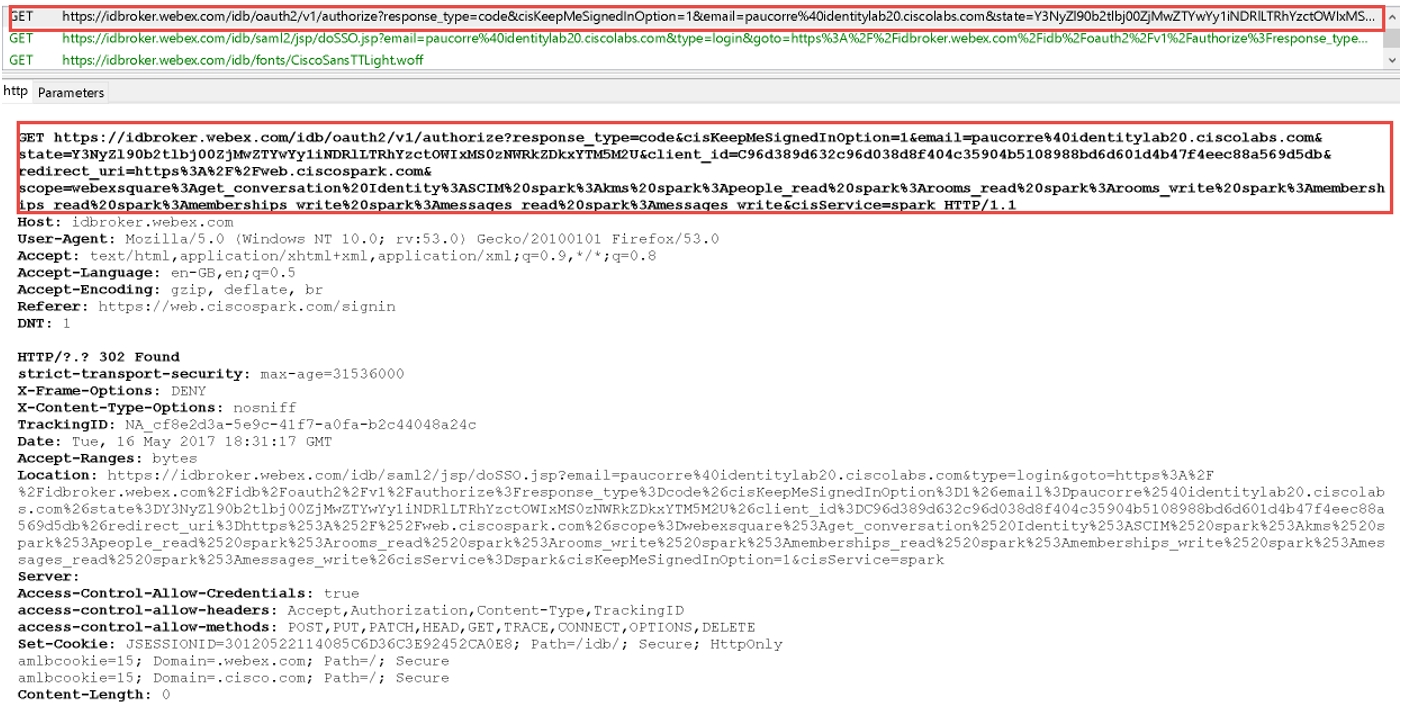
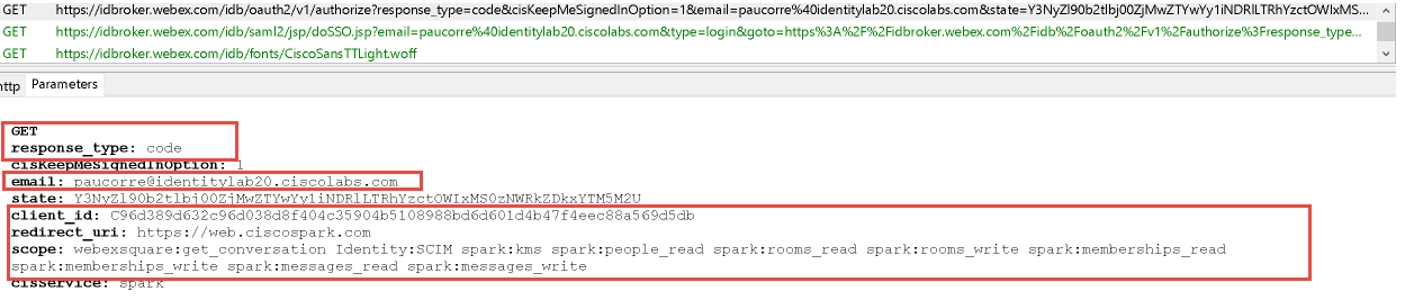
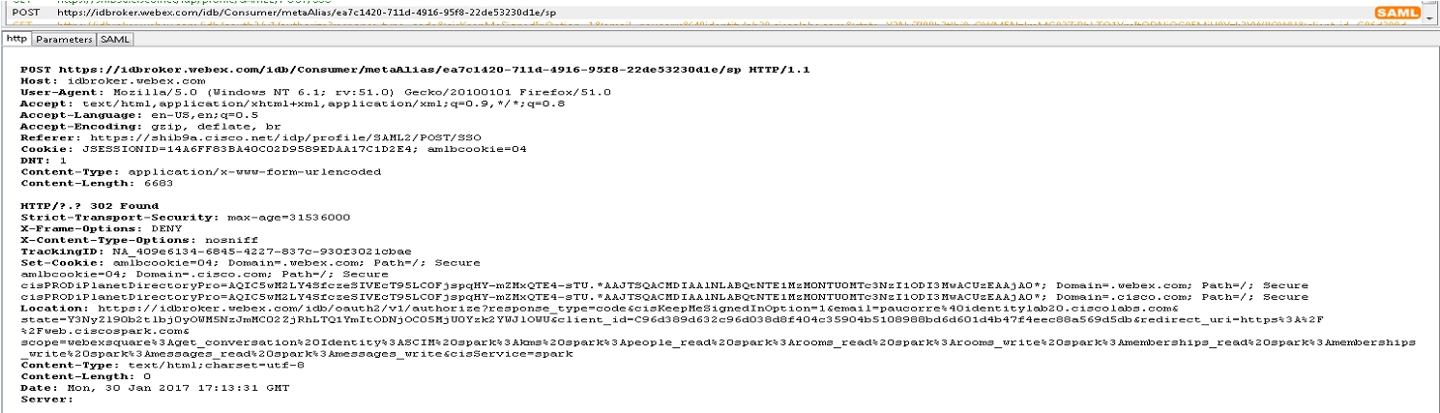
The app sends a GET request to the OAuth authorization server for a token. The request is redirected to the identity service to the SSO or username and password flow. The URL for the authentication server is returned. You can see the GET request in the trace file.
In the parameters section the service looks for an OAuth code, email of the user who sent the request, and other OAuth details such as ClientID, redirectURI and Scope.
|
| 3 |
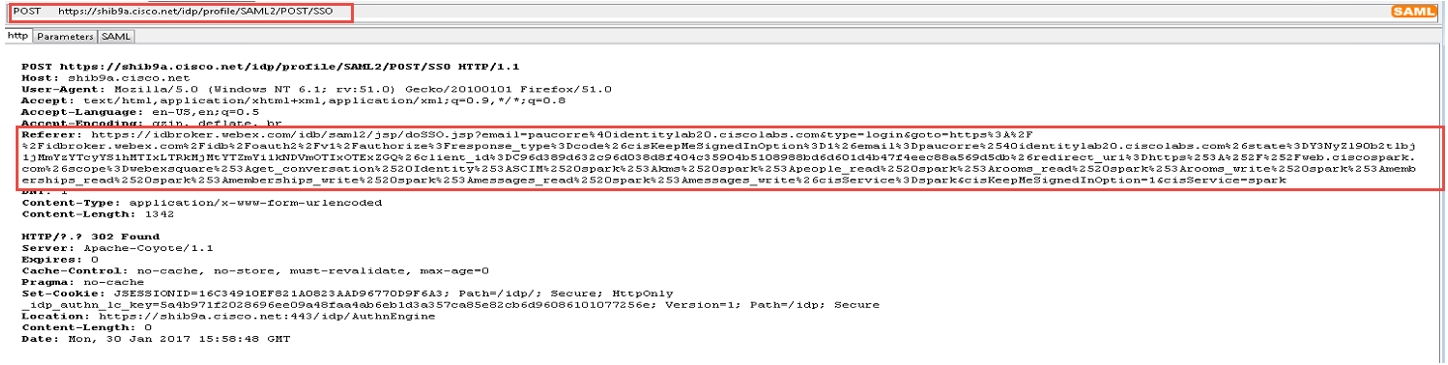
The Webex App requests a SAML assertion from the IdP using a SAML HTTP POST.
When SSO is enabled, the authentication engine in the identity service redirects to the IdP URL for SSO. The IdP URL provided when the metadata was exchanged.
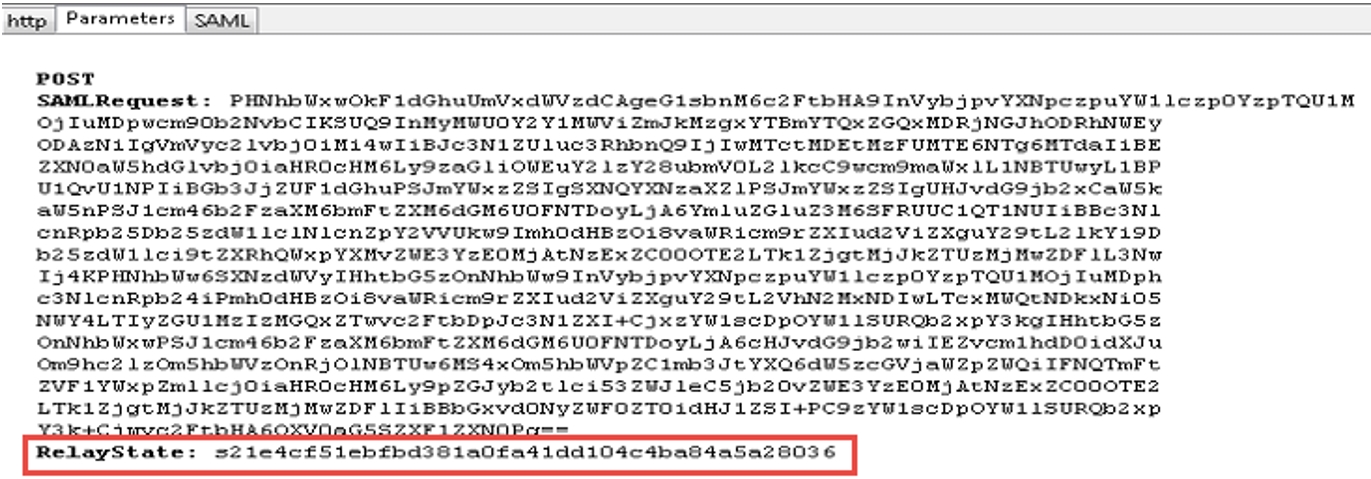
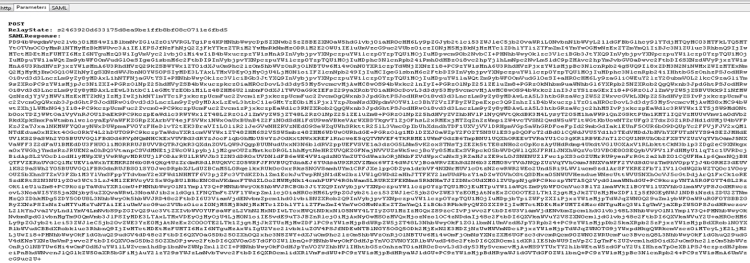
Check in the trace tool for a SAML POST message. You see an HTTP POST message to the IdP requested by the IdPbroker.
The RelayState parameter shows the correct reply from the IdP.
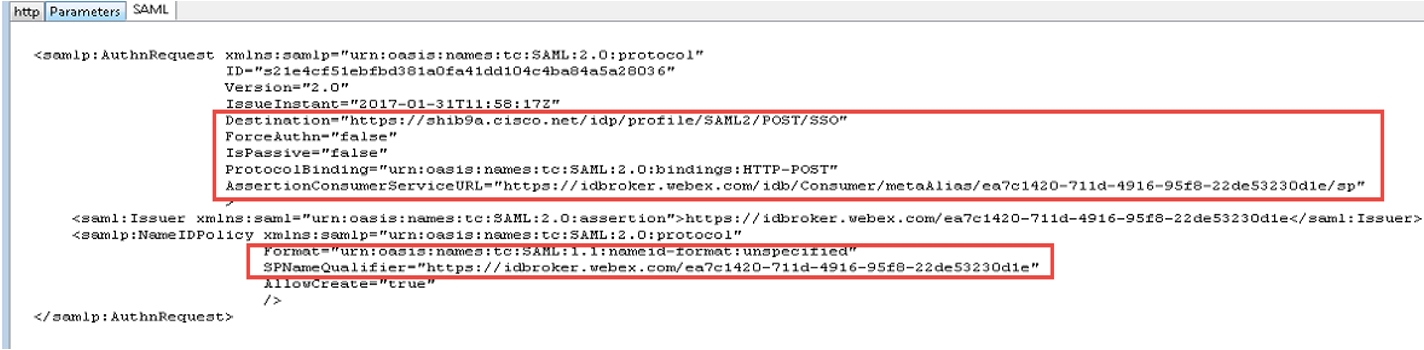
Review the decode version of the SAML request, there is no mandate AuthN and the destination of the answer should go to the destination URL of the IdP. Ensure that the nameid-format is correctly configured in the IdP under the correct entityID (SPNameQualifier)
The IdP nameid-format is specified and the name of the agreement configured when the SAML agreement was created. |
| 4 |
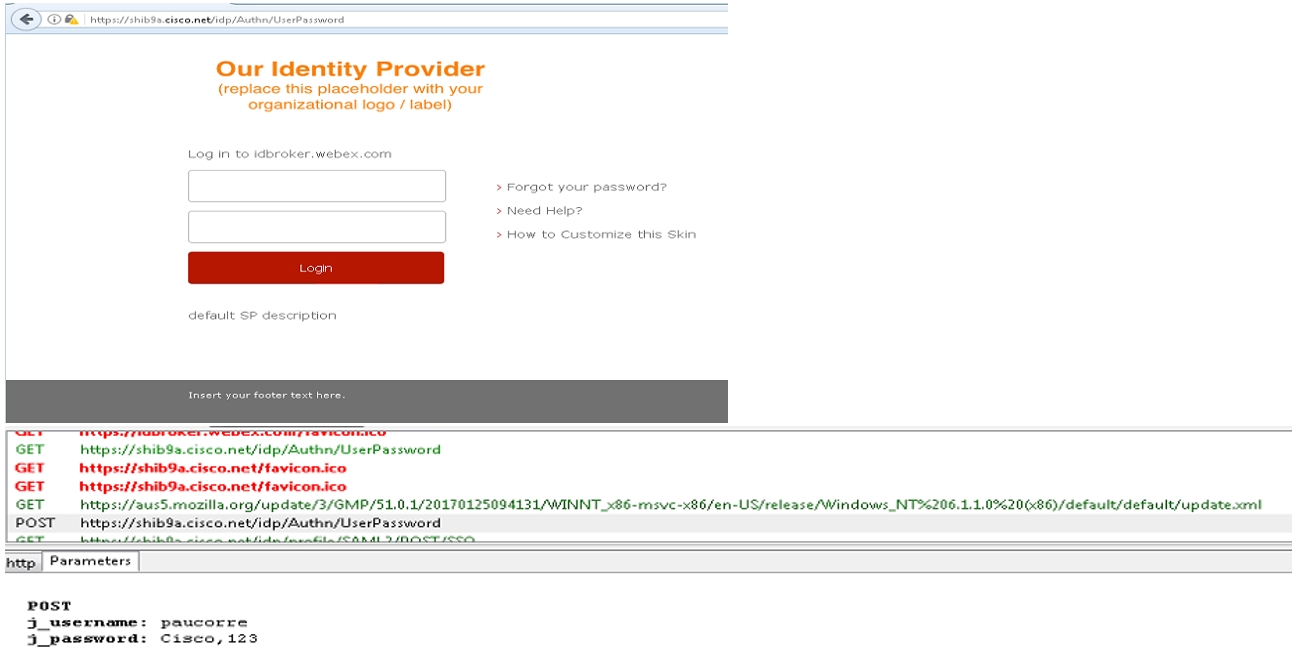
The authentication for the app happens between the operating system web resources and the IdP.
Depending on your IdP and the authentication mechanisms configured in the IdP, different flows are started from the IdP.
|
| 5 |
The app sends an HTTP Post back to the identity service and includes the attributes provided by the IdP and agreed in the initial agreement.
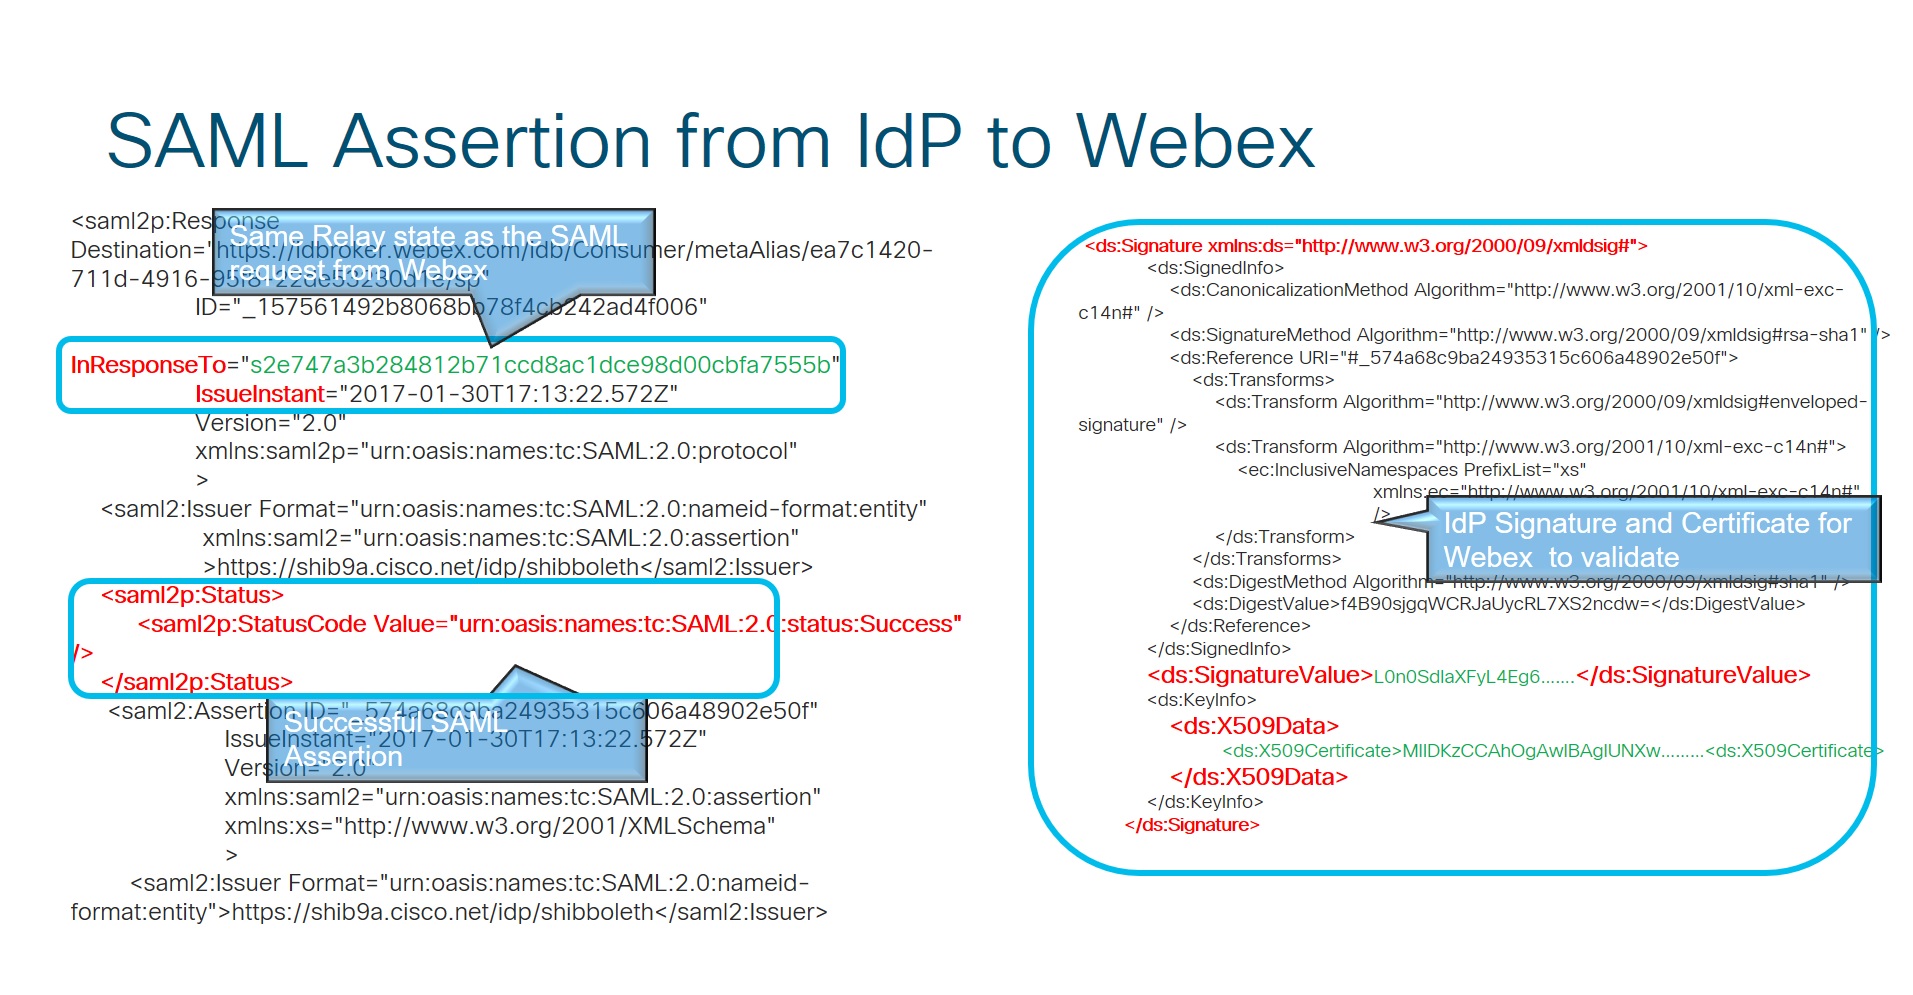
When authentication is successful, the app sends the information in a SAML POST message to the identity service.
The RelayState is the same as the previous HTTP POST message where the app tells the IdP which EntityID is requesting the assertion.
|
| 6 |
SAML Assertion from IdP to Webex.
|
| 7 |
The identity service receives an authorization code that is replaced with an OAuth access and refresh token. This token is used to access resources on behalf of the user.
After the identity service validates the answer from the IdP, they issue an OAuth token that allows the Webex App to access the different Webex services.
|