- Home
- /
- Article

Thanks for your feedback.

Access and use Webex Contact Center within Salesforce (Version 2-New)
 In this article
 Feedback?
After your administrator integrates Webex Contact Center with Salesforce, you can launch Desktop from within Salesforce.
Access Webex Contact Center within Salesforce
This section provides instructions on how to access the Webex Contact Center after it is integrated into Salesforce.
| 1 |
Sign in to your Salesforce account. |
| 2 |
Click the Phone button in the Salesforce toolbar to launch the application. 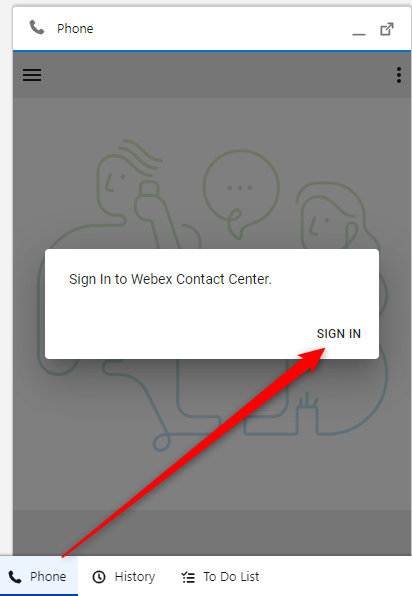
|
| 3 |
Click Sign in to open the Webex Authentication portal. |
| 4 |
Enter your email address and password to authenticate. |
| 5 |
Enter your Station Credentials for 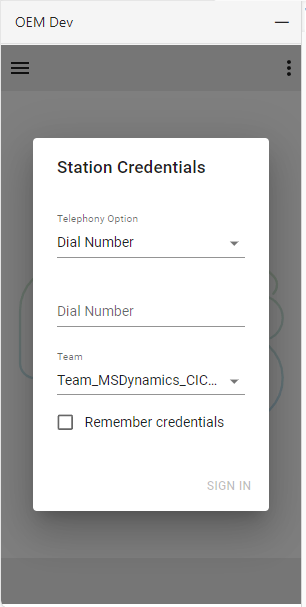

|
Manage incoming calls
| 1 |
Click the state button to change the agent state to 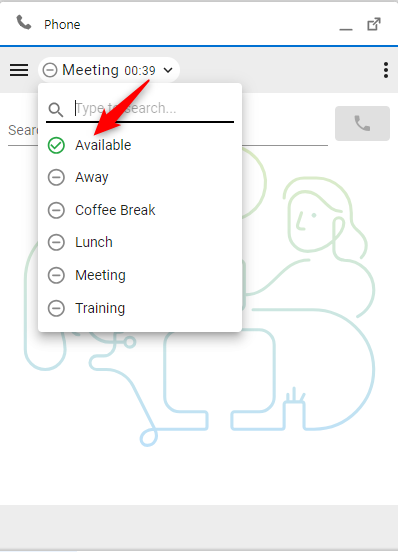
|
| 2 |
Answer the incoming call on your ringing device. When logging in with the telephony option “Desktop,” calls can be accepted or rejected in the connector. 
|
| 3 |
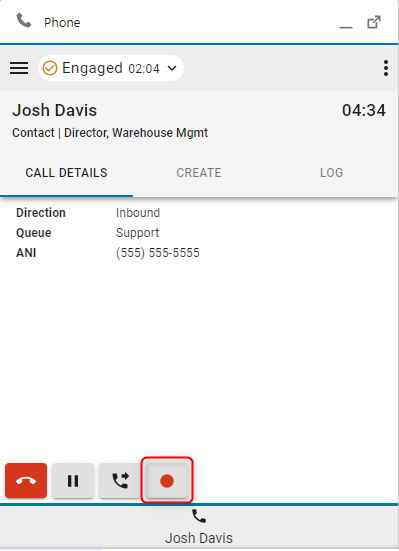
While in the 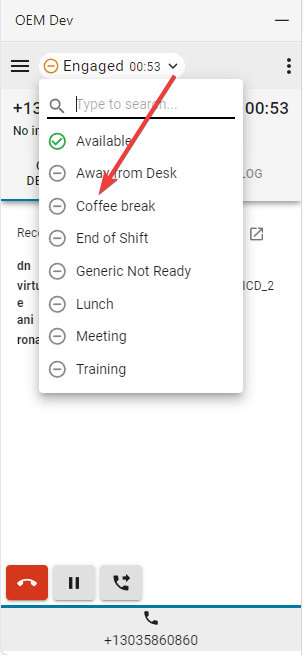
|
| 4 |
Click the red phone button to end the call. 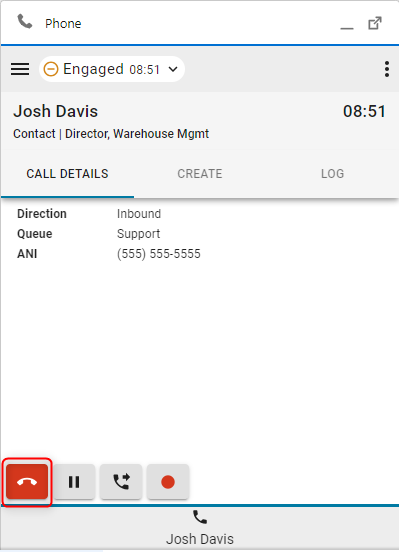
|
| 5 |
Click the Pause button to put the call on hold. 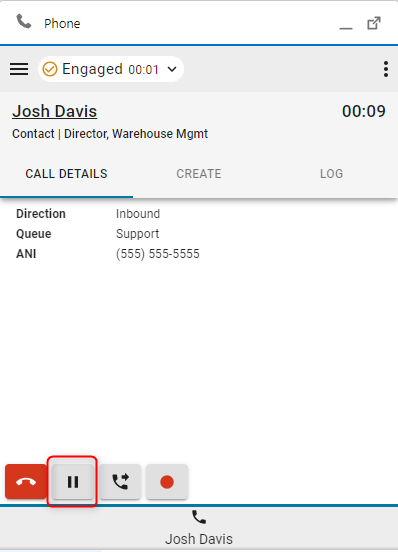
|
| 6 |
To resume, click the Play button. 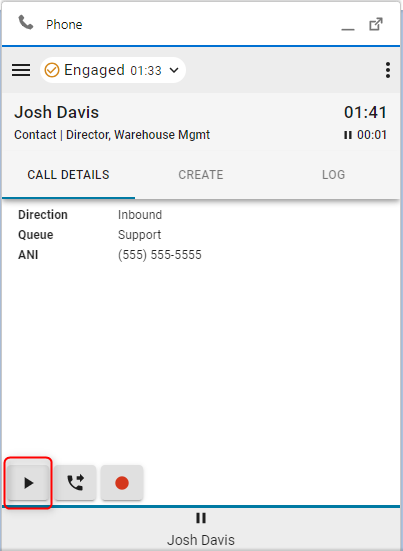
|
| 7 |
Click the Transfer button to initiate a Consult or Direct Transfer call. 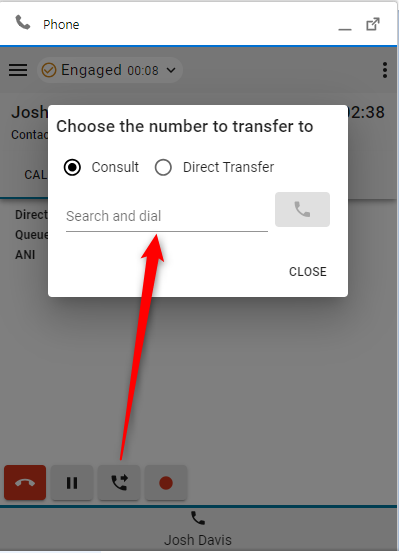
|
What to do next
Consult (Warm Transfer)/Conference
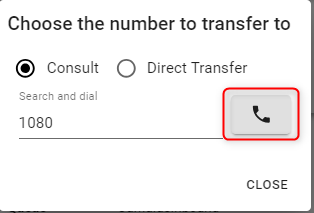
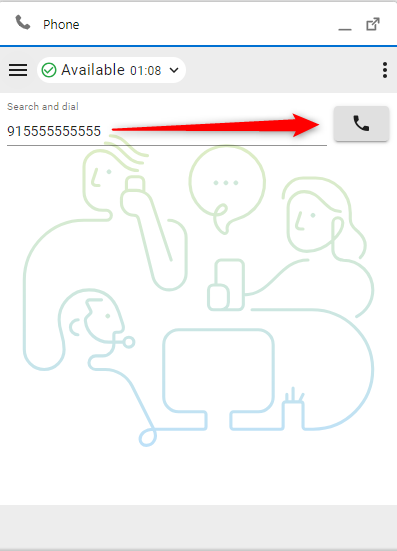
- Type the number or extension in the Search and dial field and click the Dial button.
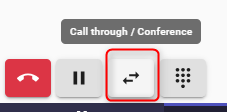
- Once the call is established, click the Call through button.
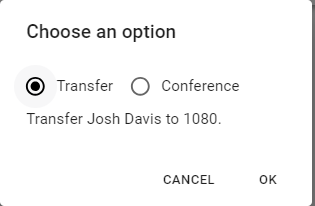
- Choose either Transfer or Conference option and click OK to initiate the call.
Direct Transfer
- Type the number or extension in the Search and dial field and click the Dial button to transfer.

- Click the Call Recording button to pause and resume recording control.
- When the call has ended, choose and set a Wrap-up reason.
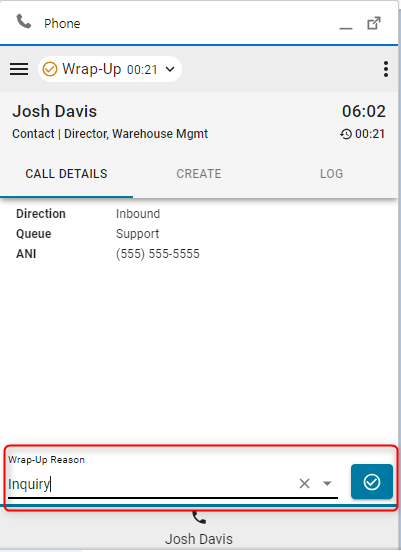
If the Auto Wrap-up extension is enabled, click X on the blue timer button to cancel the auto wrap-up timer.
Manage outgoing calls
| 1 |
Using manual dial:
|
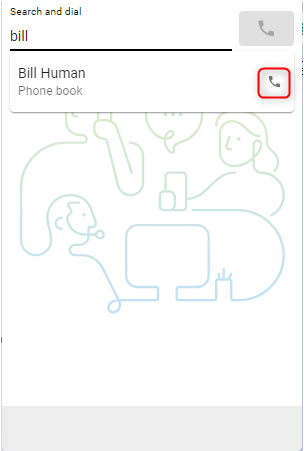
| 2 |
Using Phonebook:
|
| 3 |
CRM Record |
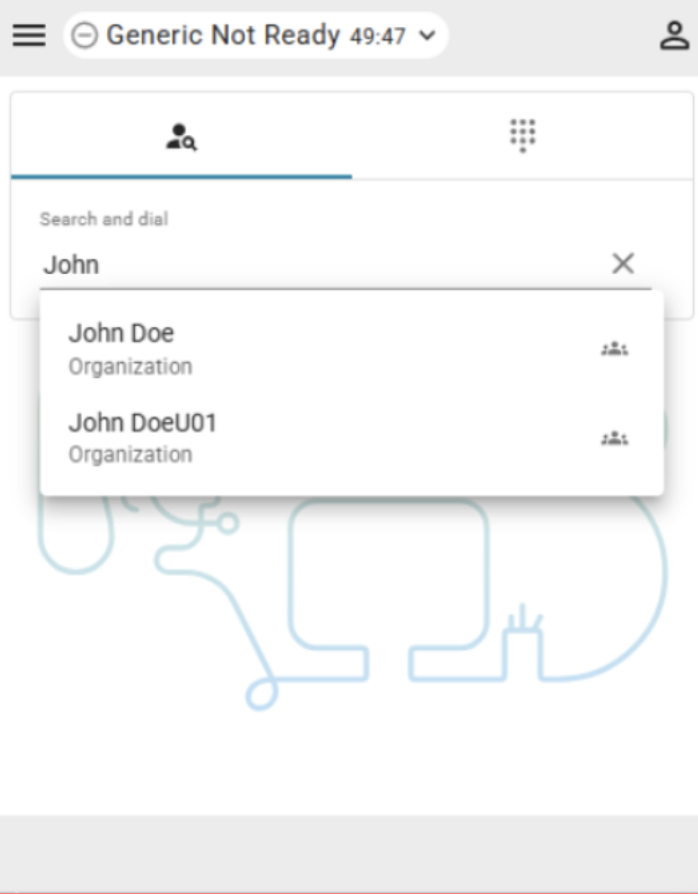
Webex Directory Search
Agents can search the Webex directory directly from the connector to find and call other organization members.
Clicking a phone number in the directory search results in an outbound call.
Limitations
- Presence information is not displayed.
- When you call an organization members, the connector checks whether the phone number belongs to a contact center agent who is currently logged in. If the number can be matched to an agent, the call is handled and shown inside the connector and on the device.
- If the number cannot be matched to a logged in agent, the call is still placed successfully, but is handled on the device, and no active call is shown in the connector.
- Direct transfers are not displayed as contact center calls when the target agent is not in an available state. In this case, the call is routed to the target agents device but is not visible in the connector.
- Directory search is not supported on other tabs than the main tab. When multiple connector tabs are open, directory search is only available in the main tab.
Interface Options
| 1 |
Call details—This section will display your available CTI data. 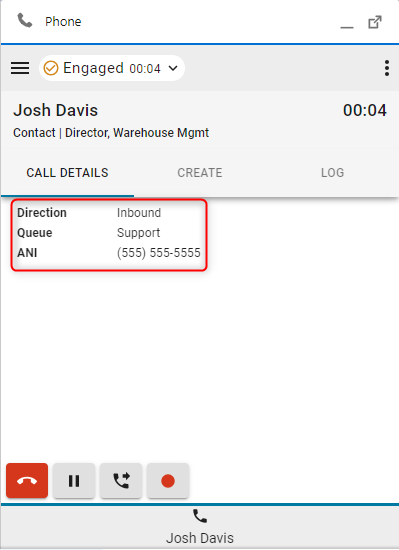
|
| 2 |
Create—Click Create new customer or Create new case to open a new Account or Case in edit mode. 
|
| 3 |
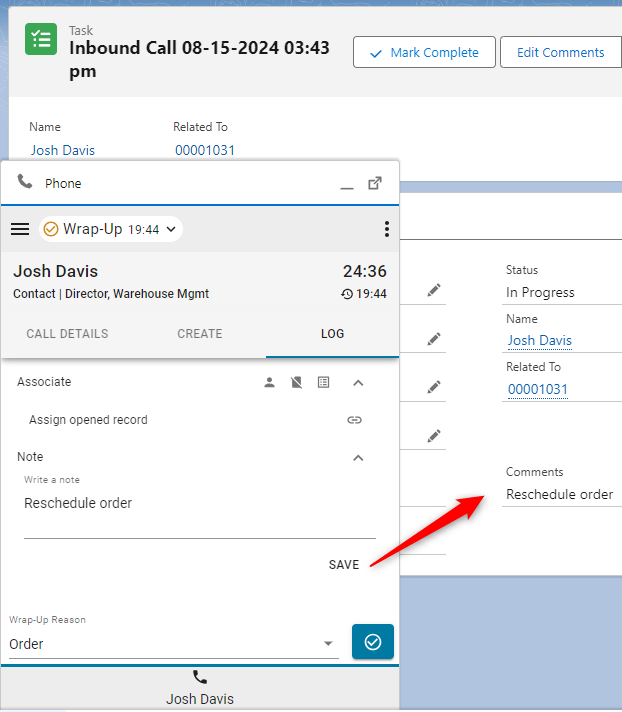
Log—Every inbound and outbound call generates a phone log by default. |
| 4 |
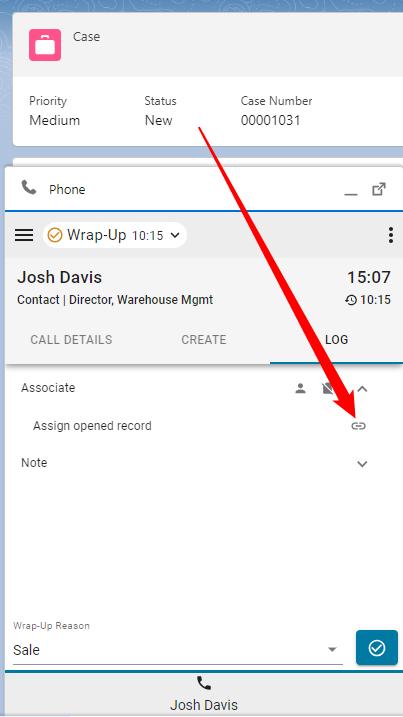
Associate
|
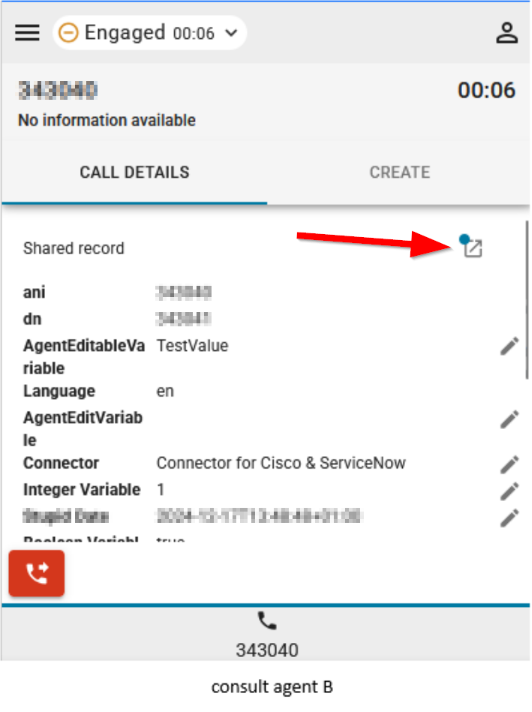
| 5 |
Share record—Agents can now share the record they currently have open during a consult or conference call.
|
Reports menu
Analyzer Reports
| 1 |
Click the menu button to open reports. 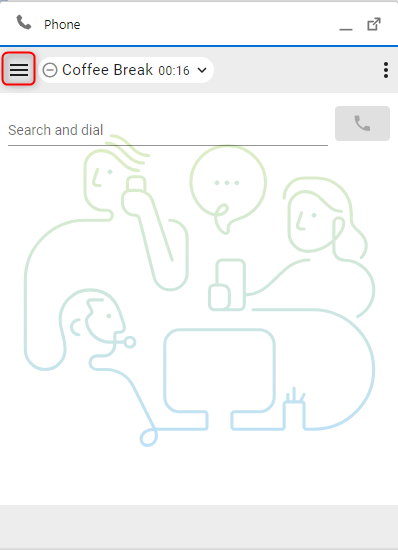
|
| 2 |
Click on a report to open in a new window. 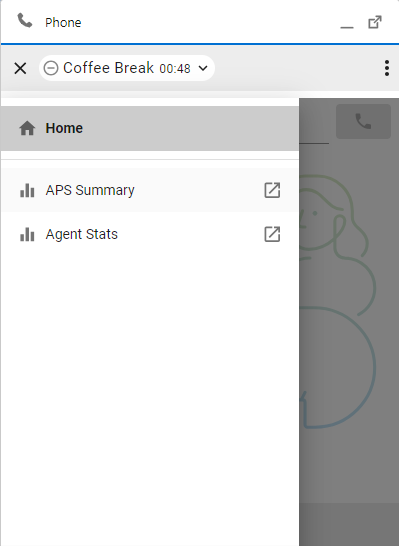
|
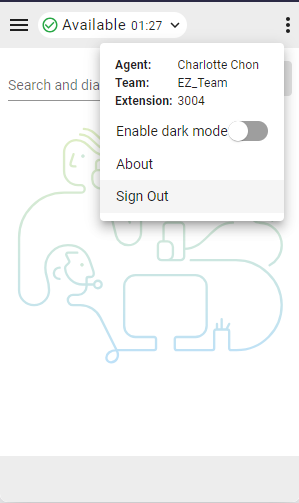
Options menu
This section gives additional information, options and sign out functionality.
-
About—Agent name
-
Sign Out—Logs the agent out of system phone.
-
Dial Number / Extension—Device extension
-
Team—Selected team
-
Profile Settings—Allows agents to change their dial number/extension and team assignment.
-
Dark mode—Changes theme from light to dark.
WebRTC
Selecting the “Desktop” telephony option when logging in will enable WebRTC — no extra device required for calls.
Speaker and microphone selection
- Click the options menu button to open the sidebar.

- Click the Speaker and Microphone option.

- Select a speaker or microphone. By default, the device currently used by your OS will be selected.

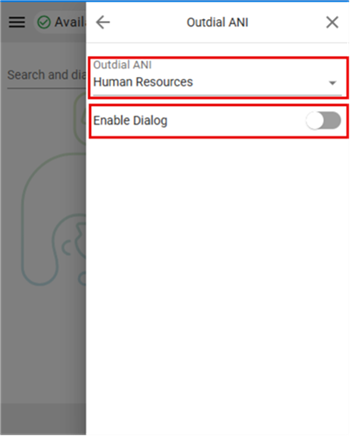
Outdial ANI
If Outdial ANI is configured in the Control hub, agents must select the desired ANI to dial out.

When Outdial ANI is configured and agents want to dial out, the dialog to select an Outdial ANI by default always appears. However, agents can select a default Outdial ANI via the Options menu and choose to disable the dialog for the time being.