
Thanks for your feedback.
Webex App | Share only a portion of your screen
 Feedback?
If you prefer, you can share your entire screen or an application in a call or share your entire screen or an application in a meeting.
Before you begin
This feature is available on our Webex Suite meeting platform. Find out if your meetings use the Webex Suite meeting platform.
This feature isn't available for webinars.
| 1 |
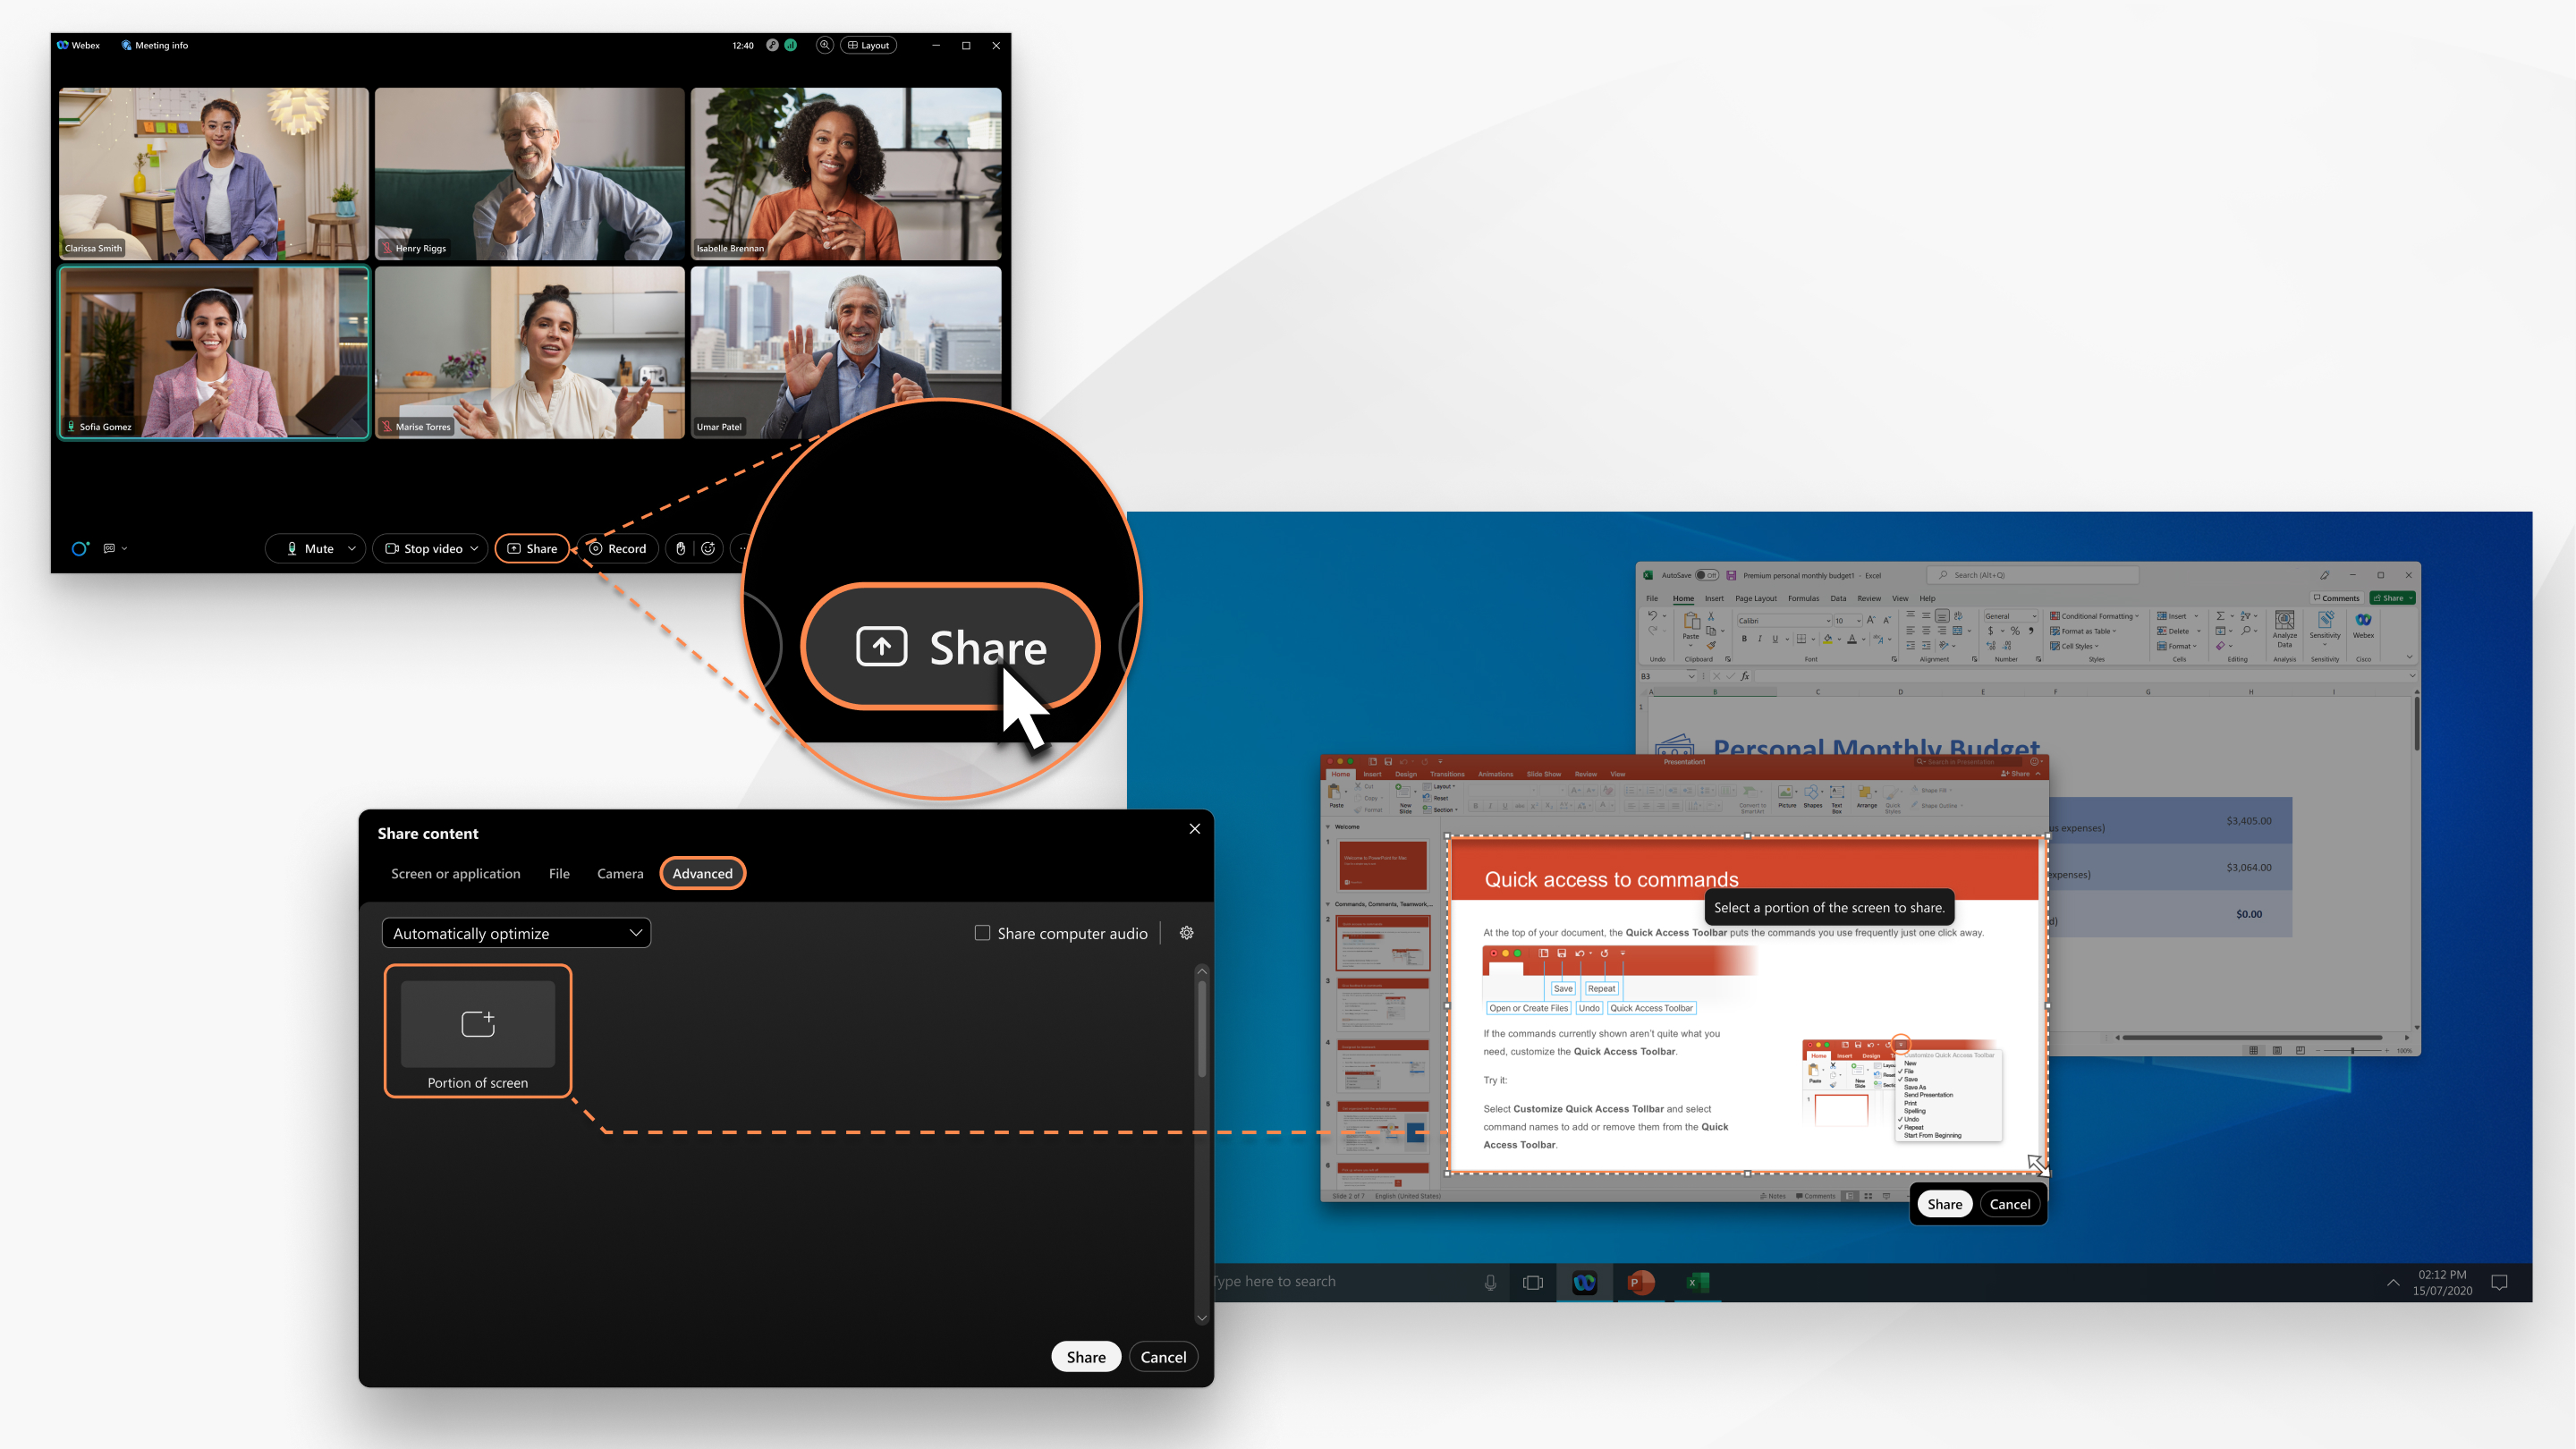
During a call or meeting, click Share content |
| 2 |
Select the Advanced tab. |
| 3 |
Choose one of the options from the drop-down list under Sharing options:
|
| 4 |
When you share content with audio, select the Include computer sound check box to allow others to hear your computer audio in addition to your microphone audio. |
| 5 |
Select Portion of screen, and then click Next. A green frame appears on your screen.
|
| 6 |
Move the frame to the portion of the screen that you want to share. If you have multiple screens, move it to the screen that you want to share. |
| 7 |
Drag the resize handle |
| 8 |
Click Share. To adjust the portion of the screen when you're sharing, move or resize the frame. You don't have to stop sharing to adjust the frame.
|
| 9 |
Use the floating window to conveniently access the following options:
The |
| 10 |
When you’re ready to stop sharing, click Stop sharing |

 on any of the four corners or sides to make the frame larger or smaller. The portion that the frame covers is the portion that you'll share in the meeting.


 Lock meeting
 indicator shows your network connection and CPU usage, the
  indicator appears when the meeting is being recorded, and the


