Webex App | Set a Custom Status
 Feedback?
| 1 |
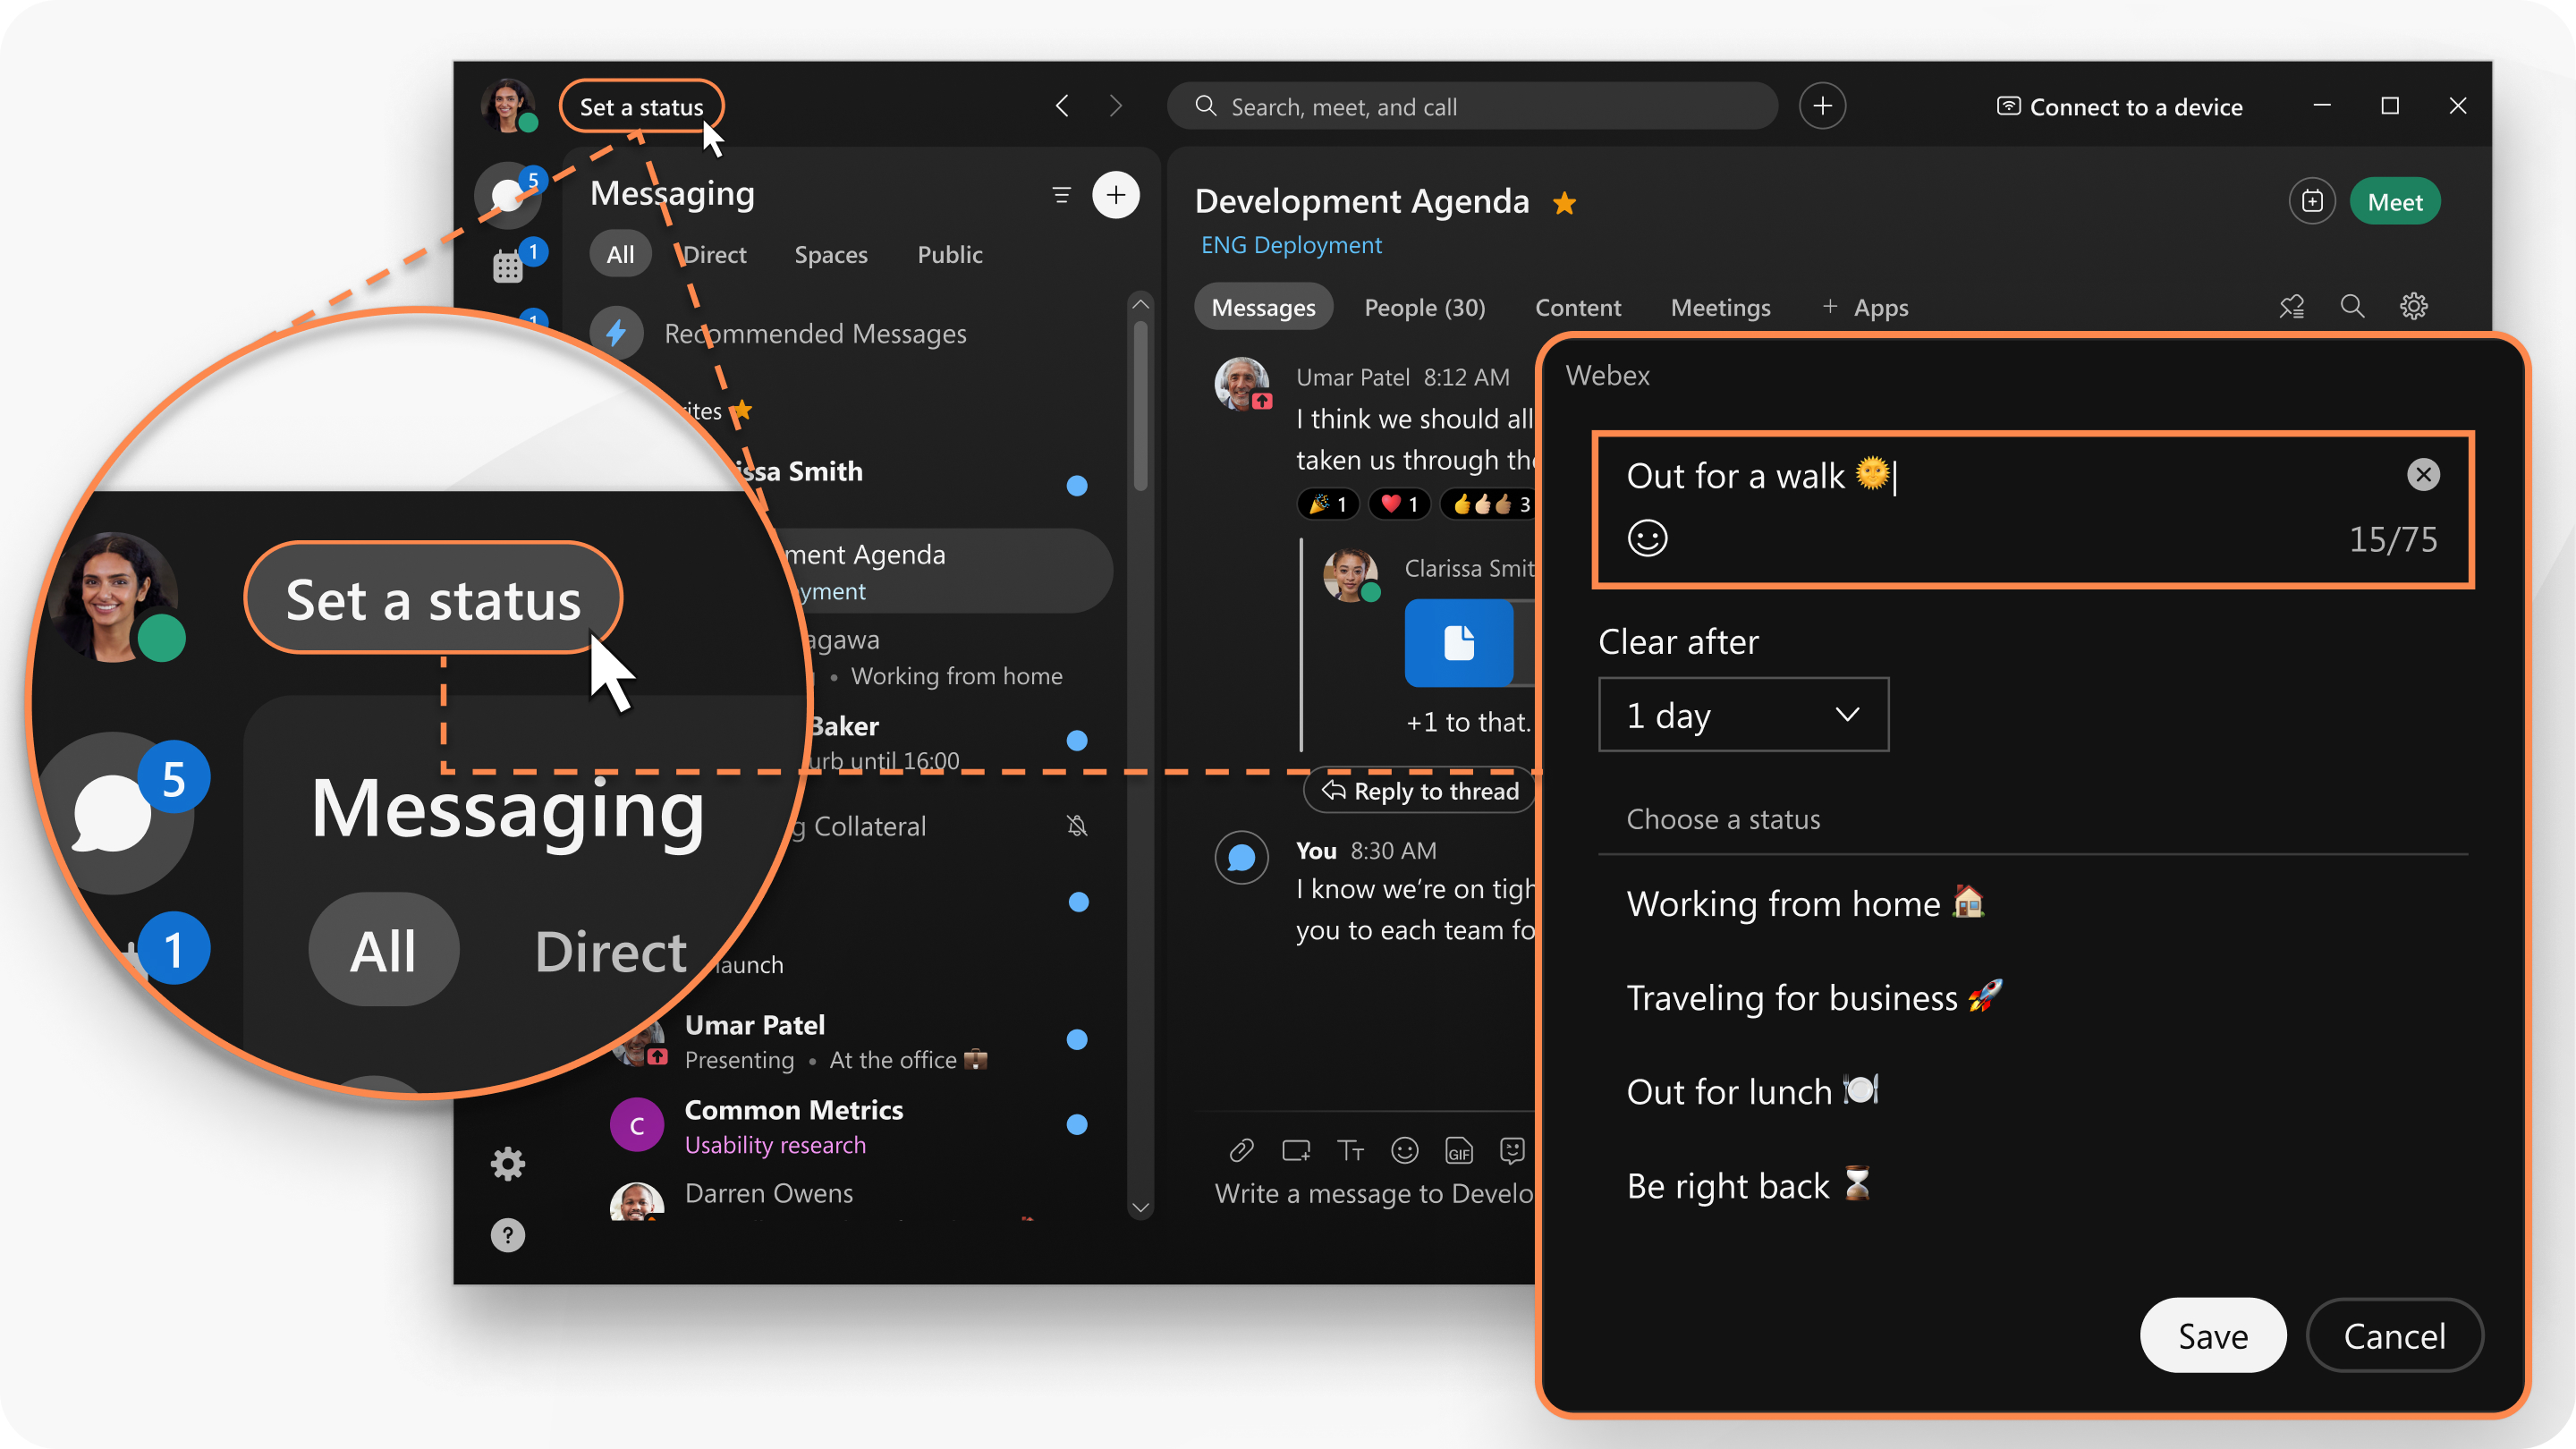
In the app header, click Set a status. |
| 2 |
Select a status from the list, or enter your status in the What's your status? window. You can add up to five status options to the list so they are quickly available. Each status has a maximum length of 75 characters and can also include emojis. |
| 3 |
In the Clear after drop-down, choose from the following:
|
| 4 |
Click Save. To remove a selected status, click Clear. |
| 1 |
Tap your profile picture, and then tap Set a status. |
| 2 |
Select a status from the list, or tap the text box to create a new status. You can add up to 5 status options to the list, so they are quickly available. Each status has a maximum length of 75 characters and can also include an emoji. |
| 3 |
Tap Clear after to set a time for your status to clear, choose from the following:
You can set a status for a maximum of 7 days, or a minimum of 30 minutes. |
| 4 |
Then, tap Done. |
| 1 |
Tap your profile picture, and then tap Set a status. |
| 2 |
Select a status from the list, or tap the the text box to create a new status. You can add up to 5 status options to the list, so they are quickly available. Each status has a maximum length of 75 characters and can also include an emoji. |
| 3 |
Tap Clear after to set a time for your status to clear, choose from the following:
You can set a status for a maximum of 7 days, or a minimum of 30 minutes. |
| 4 |
Then, tap |

 .
.
