- Home
- /
- Article

Thanks for your feedback.

Pre-migration assistant for Dedicated Instance using Setup Assist
 In this article
 Feedback?
This pre-migration Assistant for Dedicated Instance utility provides the necessary discovery, assessment, readiness checklists and reports that will help on-premise UCM customers leverage third party migration providers or Cisco Set Up Assist to successfully move to Dedicated Instance. This tool uses the Webex Cloud Connect-UC agent to extract and retrieve the required information from the target UCM and UCM Clusters and offers full control, security, and flexibility.
Overview
The Pre-Migration Assistant in Control Hub helps you gather source data and check prerequisites for migrating from UCM to Dedicated Instance using a third-party tool. Before migration, it assesses readiness, provides checklists, and lets you compare data between your on-premises cluster and Dedicated Instance.
The Pre-Migration Assistant for Dedicated Instance does not perform actual migration. Customers work with a partner who provides full migration services using a Certified Migration Provider tool to successfully complete the migration journey.
Steps in Pre-migration assistant
| 1 |
Sign in to Control Hub. |
| 2 |
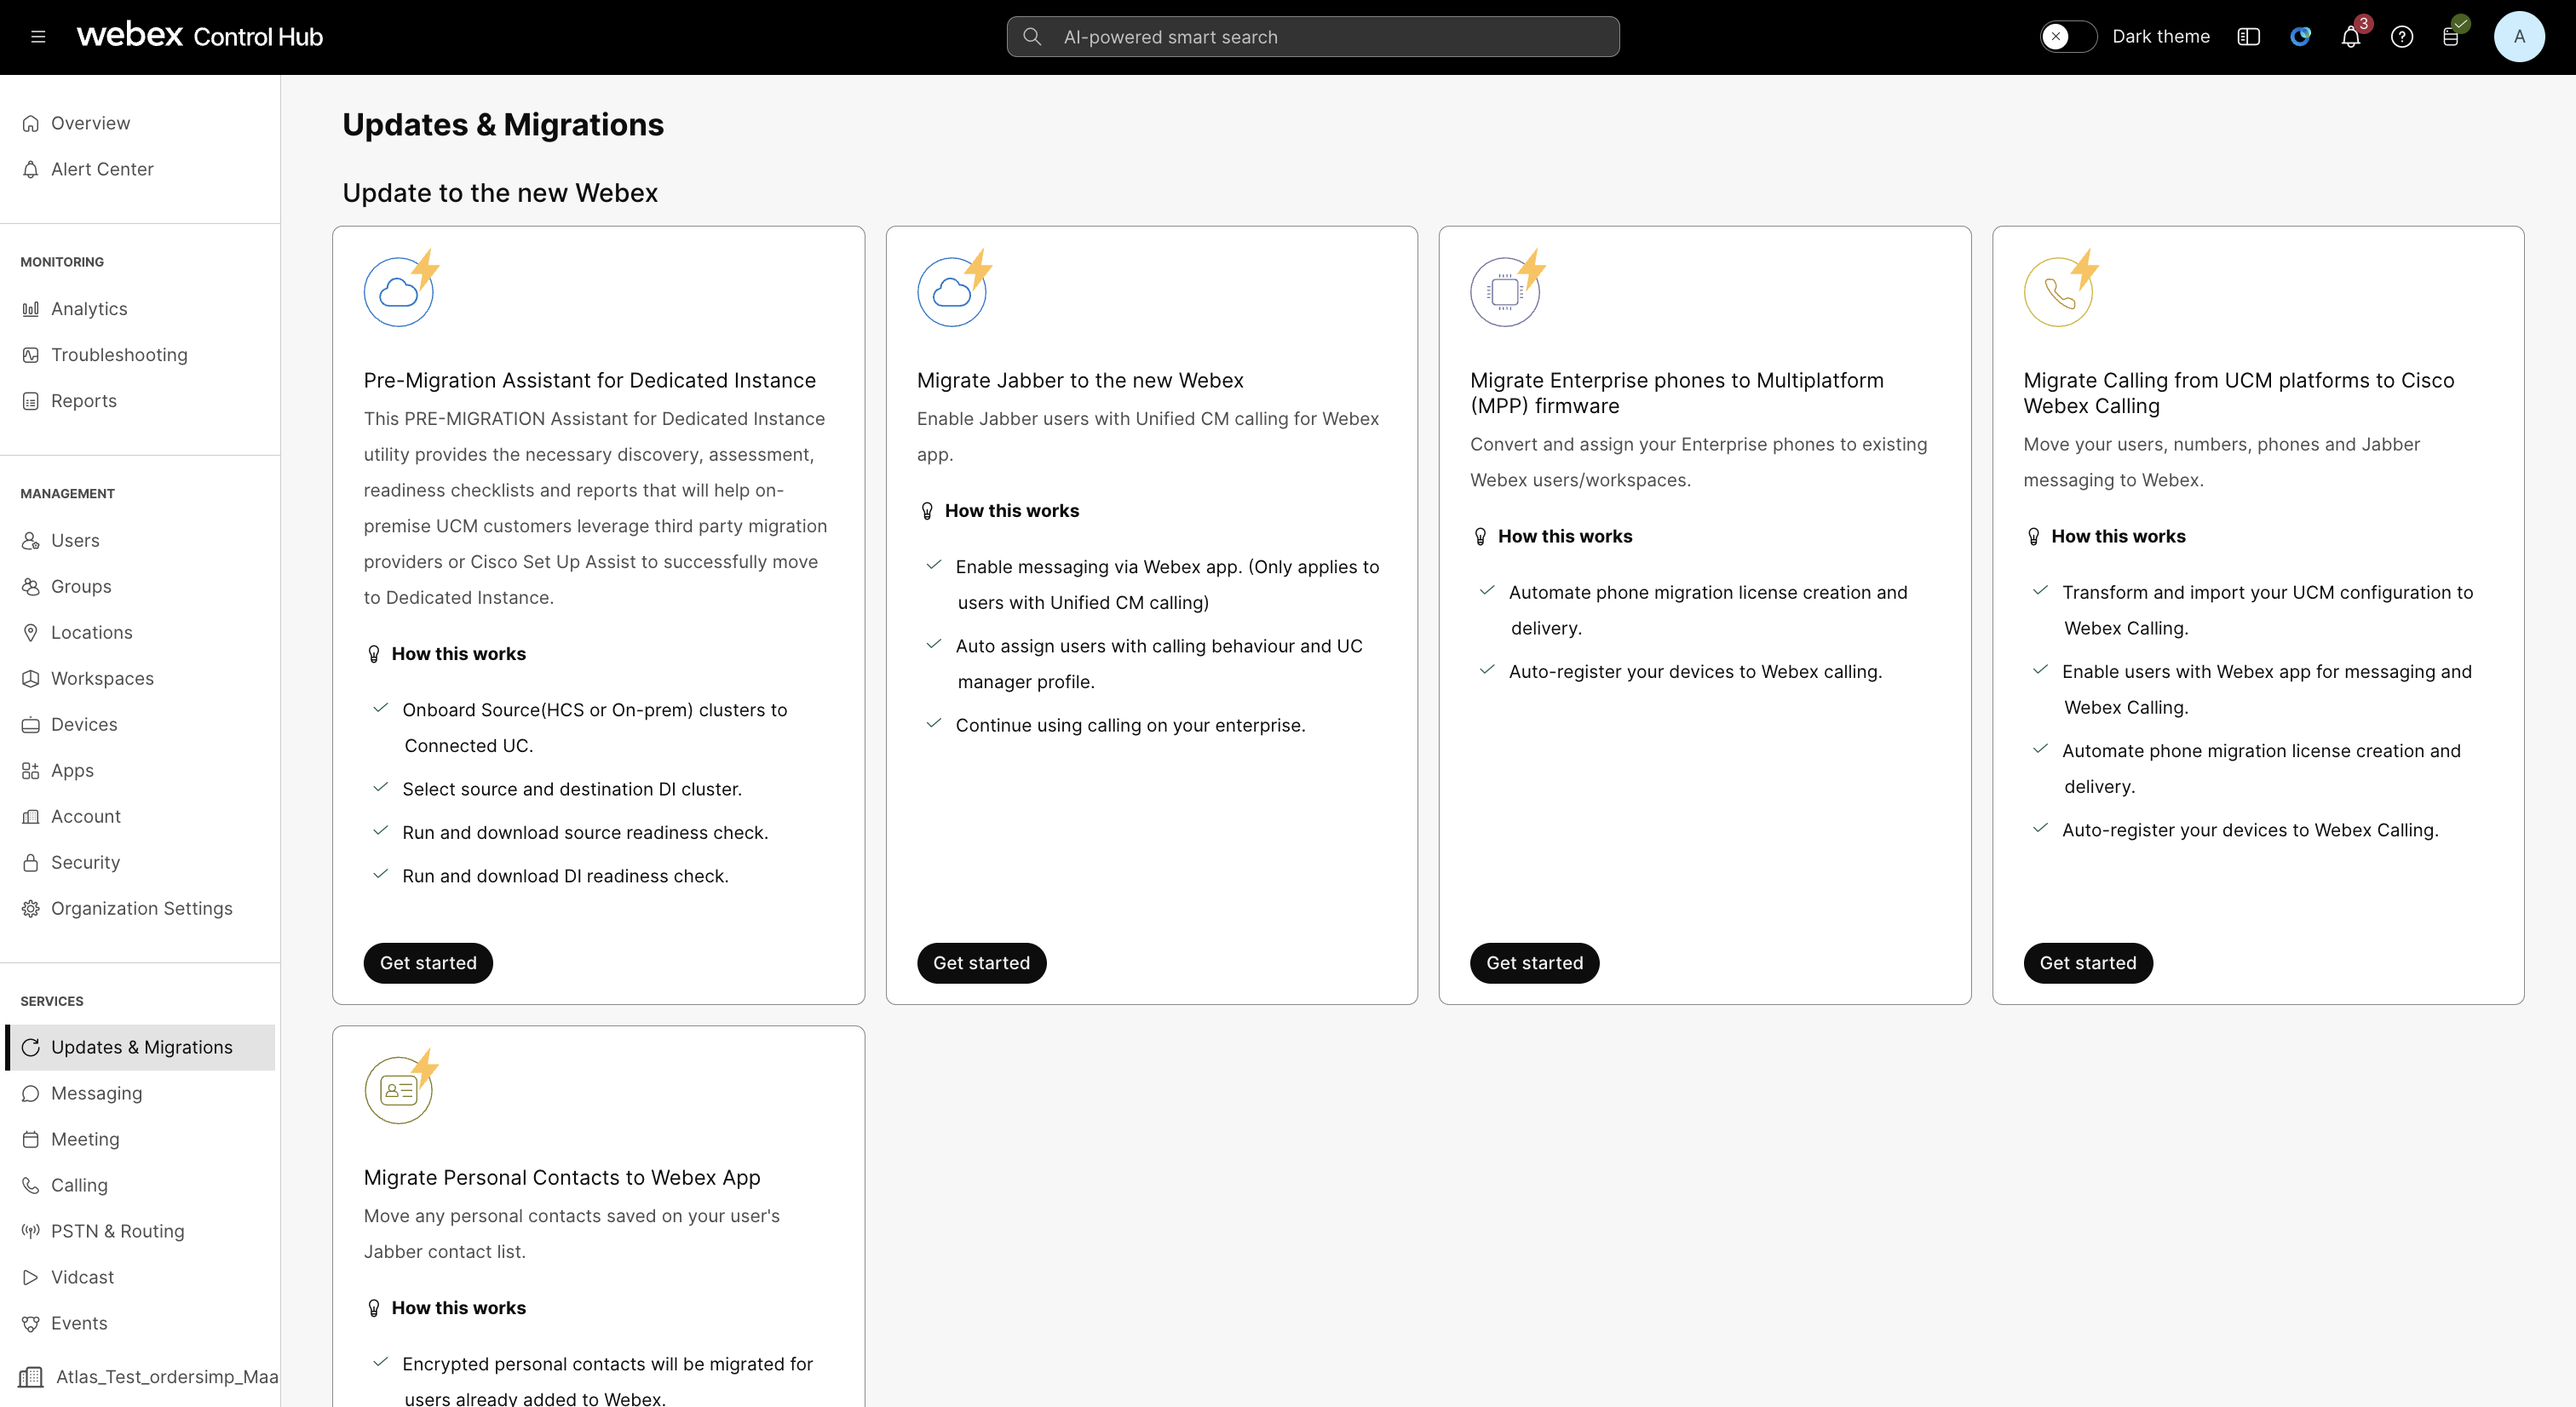
Go to Services >Updates & Migration in the left pane. |
| 3 |
In the Updates & Migrations page, click Get Started on Pre-Migration Assistant for Dedicated Instance tile.
The tile is visible only If you have the setup assist is enabled along with DI. |
| 4 |
The steps involved in Pre-Migration Assistant is given below:
If there are no error, the left pane's color changes to green, indicating that the step is complete. |
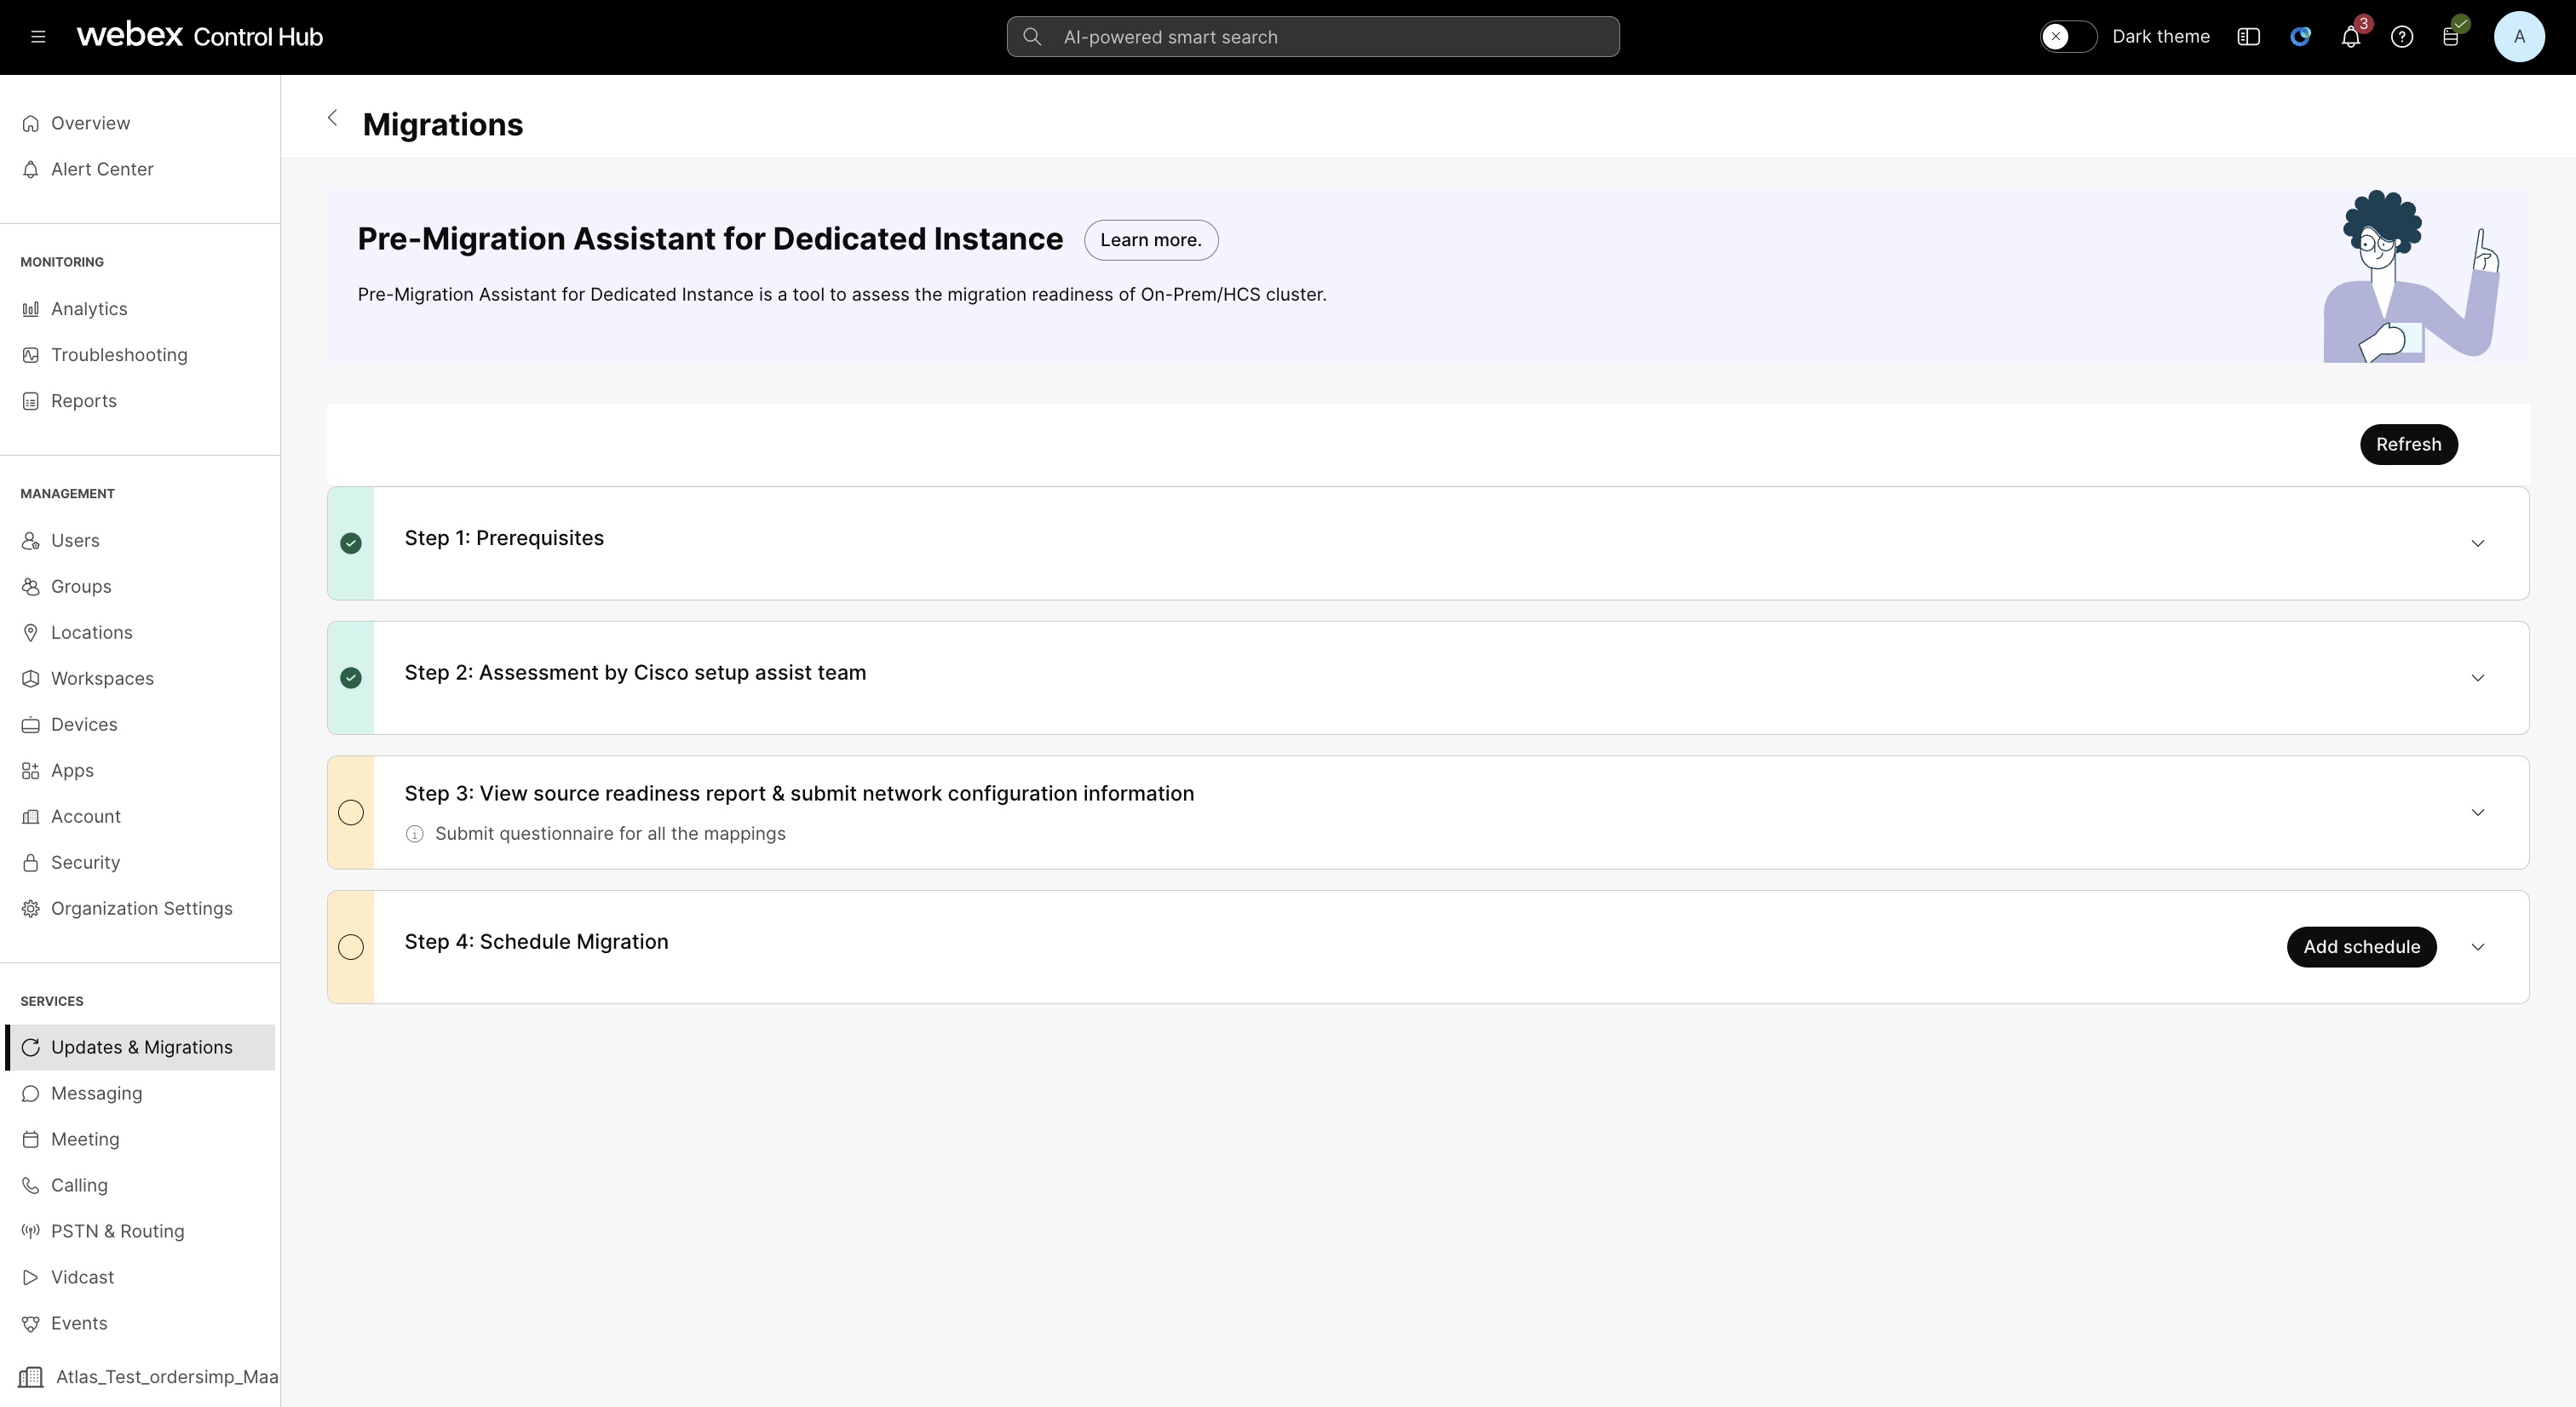
Step 1: Prerequisites
| 1 |
Make sure you have an active subscription with Webex Calling Dedicated Instance as a cloud deployment option. |
| 2 |
Make sure to onboard your organization to Webex Cloud-Connected UC. See Set up Webex Cloud-Connected UC for on-premises devices. |
| 3 |
Make sure to enable the deployment insights. See Enable-or-Disable-Webex-Cloud-Connected-UC-Services-in-Control-Hub. |
| 4 |
Select the I have read and completed the prerequisites checkbox. After completing the prerequisites, the Ready to migrate option is enabled. |
| 5 |
Click Ready to migrate. |
Step 2 : Assessment by Cisco Setup Assist team
Once the Ready to migrate option is selected in Step 1, the Cisco Setup Assist team starts working on the mapping of your source cluster and DI Cluster, and generates the source readiness checks report.
Step 3: View source readiness report and submit network configuration information
| 1 |
Once the Setup Assist admin maps each cluster, the migration task is created and the status of the source cluster changes to In Progress.
The configuration under Actions is not available until the Cisco Setup Assist admin approves the source readiness check report. |
| 2 |
After the approvals from the Cisco Setup Assist team, the source readiness check status changes to Download report, and the Configuration under Actions is enabled. |
| 3 |
Click Download report, to validate the source readiness check report. Source readiness checks The following are the actions recommended to the customer admins before migration to DI.
|
| 4 |
Customer admin approves the Source readiness checks. |
| 5 |
Click the Configuration under Actions tab, the confirmation dialog box opens. |
| 6 |
Click I agree in the confirmation dialog box. |
| 7 |
Click Continue to fill the network questionnaire. |
| 8 |
In the Network Configuration page, you can choose the purpose of the trunk, which is configured in the source cluster. The trunks are prepopulated based on the result of the source readiness report. |
| 9 |
Add a note with more details about the trunk usage. |
| 10 |
Select the Network peering with DI appropriately. |
| 11 |
Click Submit. The answer in the configuration helps to assist with the migration. The status changes to In Review until the Cisco Setup Assist admin approves it. |
| 12 |
After the approval, the configuration status changes to complete now. |
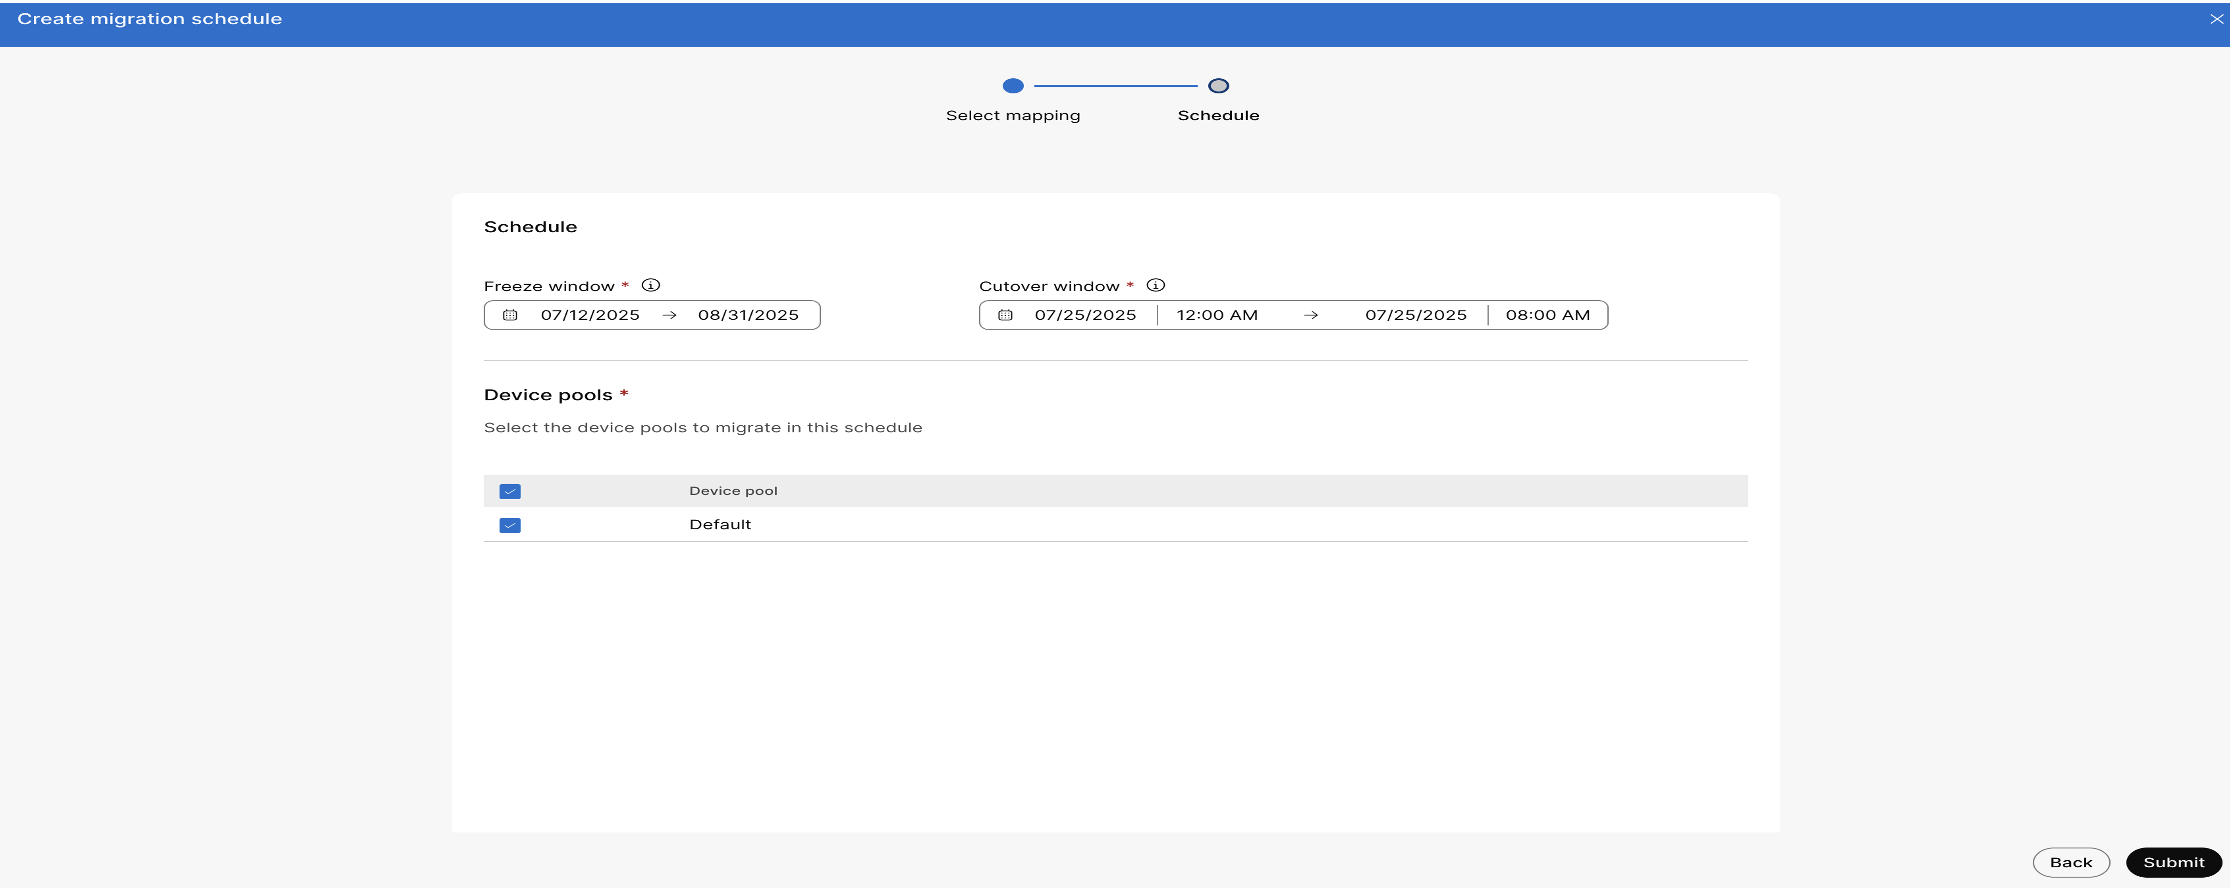
Step 4: Schedule Migration
| 1 |
Sign in to Control Hub. |
| 2 |
Click Add schedule to create a schedule. |
| 3 |
Add the Schedule name. |
| 4 |
In the Selecting mapping section, select the Destination region and Source cluster mapping to create the freeze and cutover dates.
|
| 5 |
Click Next. |
| 6 |
Enter the start and end date for Freeze window for the cluster |
| 7 |
Enter the start and end date and time for cutover window. The cutover window should not exceed ten hours. During the cutover window, you need to switch the phones, under the selected device pools of the migration schedule, to register to the DI cluster. |
| 8 |
Click Submit. |
| 9 |
Once you submit, the status is In-progress until the selected sites (device pools) are migrated to the DI successfully. |
| 10 |
Once the status is complete, Click under actions, click ⋮ to see the following reports.
|