- Home
- /
- Article

Get started with Cisco Room USB
 In this article
 Feedback?
Cisco Room USB is a smart video conferencing solution for huddle spaces, and is compatible with any collaboration vendor.
Introduction
The Cisco Room USB is controlled with a remote control or directly through your software client. It provides a great video and audio experience in meetings, with features such as automatic noise cancellation and best overview. You can also share presentation locally by connecting your Room USB to your laptop with an HDMI cable.
Make a call
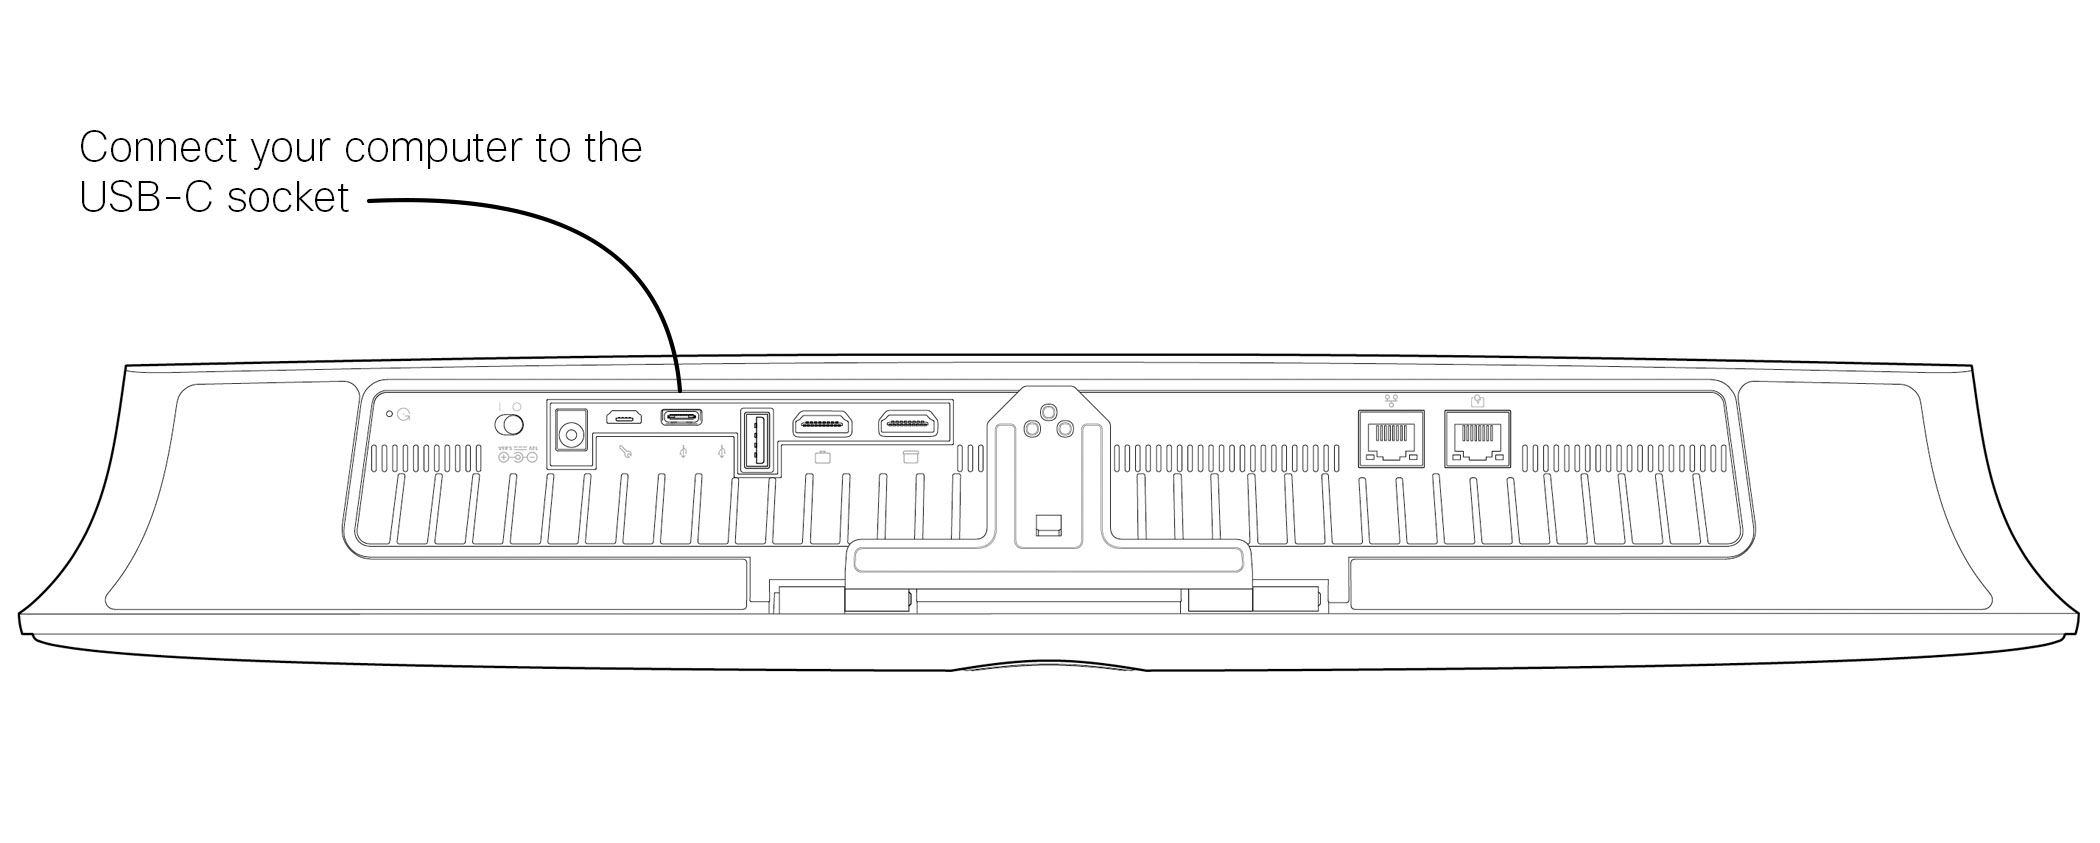
Connect your computer to the USB-C socket of the Room USB with the USB cable. The Room USB supports HD1080p video.
From your computer, open your calling client settings. In the video and audio parameters, make sure to select the Room USB.

If you want to extend the configuration to include an external monitor with this setup, connect your computer to the monitor in your usual way.
When placing calls using a third-party client, the camera, microphone, and loudspeakers are selected based on the OS or app defaults. You can override these settings.
The camera light indicator is lit whenever the camera is active in order to maintain privacy.
The third-party client controls all other functionality.
Share content through a HDMI cable
The Room USB offers 4K local content sharing. Simply connect your computer to the Room USB using a HDMI cable.
Note that sharing is only available outside a call. In order to share during a call, you need to use your calling client.
Wireless guest share
You can use Guest share to wirelessly share from your browser to a Cisco Room USB.
Guest share from share.webex.com allows you to share content wirelessly to any Webex registered room device. You don’t need to download the Webex App or sign-up to a Webex account, so it's a great way to collaborate with your colleagues.
As you use Guest share, note the following:
-
You can’t start a share when someone else is sharing.
-
Audio plays through your laptop but not through the display screen.
-
Video streams at 1080p at 10 frames per second or 720p at 30 frames per second. Select Optimize for motion and video to ensure the best possible experience when sharing video.
-
Guest share works on the latest versions of Firefox and Chrome on Windows, Mac OS, and Linux.
-
Closing the browser or the tab where share.webex.com is open stops the share.
| 1 |
You can find the guest share code on the home screen. |
| 2 |
Go to devices.webex.com and enter the 9-digit guest share code and click Next. Then enter the 4-digit share PIN and click Connect. The share PIN appears on your device's screen. |
| 3 |
Click Share Screen and select if you want to share the entire screen, an application, or a Chrome tab. If you're going to share video content, select Optimize for Video for a higher frame-rate and lower resolution. This gives a more fluid video sharing experience. |
| 4 |
To stop sharing, click Stop Sharing from your browser. |
Camera control
There are two ways to control the camera view on Room USB. When you're on the home screen, press the return button on the remote control to open the settings on the side. Select Camera.
-
Auto: choose between group and frames. When selecting group, the camera adjusts to show everyone. When selecting frames, the camera automatically detects meeting participants and provides ideal framing. Press OK with the remote control to save your choice.
-
Manual: select manual to focus on a specific object or area of the room. Use the remote control to manually set the desired view.
Change UI language
The following languages are supported:
-
Arabic
-
Catalan
-
Chinese (Simplified)
-
Chinese (Traditional)
-
Czech
-
Danish
-
Dutch
-
English (US)
-
English (UK)
-
Finnish
-
French (France)
-
French (Canada)
-
German
-
Hebrew
-
Hungarian
-
Italian
-
Japanese
-
Korean
-
Norwegian
-
Polish
-
Portuguese (Portugal)
-
Portuguese (Brazil)
-
Russian
-
Spanish (Spain)
-
Spanish (Latin America)
-
Swedish
-
Turkish
-
Ukrainian
| 1 |
On the homescreen, use the remote control to navigate to the settings button |
| 2 |
Navigate in the menu and select Language. Then navigate up or down on the list and select a language. |


