
Thanks for your feedback.
Create or delete meeting highlights during a meeting or webinar
 Feedback?
-
Webex Assistant is available in Meetings and Webex Webinars (available for hosts only in webinars in webcast view).
-
In addition to Meetings and Webinars, Webex Assistant is also available for the Webex App. Meetings started or joined from a space don't support Webex Assistant.
-
Webex for Government doesn't support Webex Assistant.
-
This feature requires Cisco Webex video platform version 2.0 with joining meetings from video systems enabled. Find your Webex Meetings version number.
-
Hosts can turn on or turn off Webex Assistant during the meeting or webinar. You can automatically turn on Webex Assistant whenever you start a meeting
-
Closed captions aren’t turned on by default for the hosts or participants when Webex Assistant is turned on by the hosts. Webex remembers if you used automated captions or not in your previous meeting or webinar. Closed captions automatically turn on or off for your next one, depending on your last usage.
-
Webex site admins can turn off automatic postmeeting emails to prevent cluttering inboxes. To turn these postmeeting emails on or off, contact your Webex site admin.
-
You can generate the following types of transcripts:
- A transcript embedded with the video recording. This transcript supports English transcription only.
- A transcript that's available on the postmeeting site page for the duration that
recording is on AND Webex Assistant or closed captions is on. This transcript and any Webex Assistant highlights support transcription in all spoken languages (see Show real-time
translation and transcription in meetings and webinars to see which languages
are available to you).
-
To access this transcript, sign in your Webex account, click Calendar, then select Review.
-
| 1 |
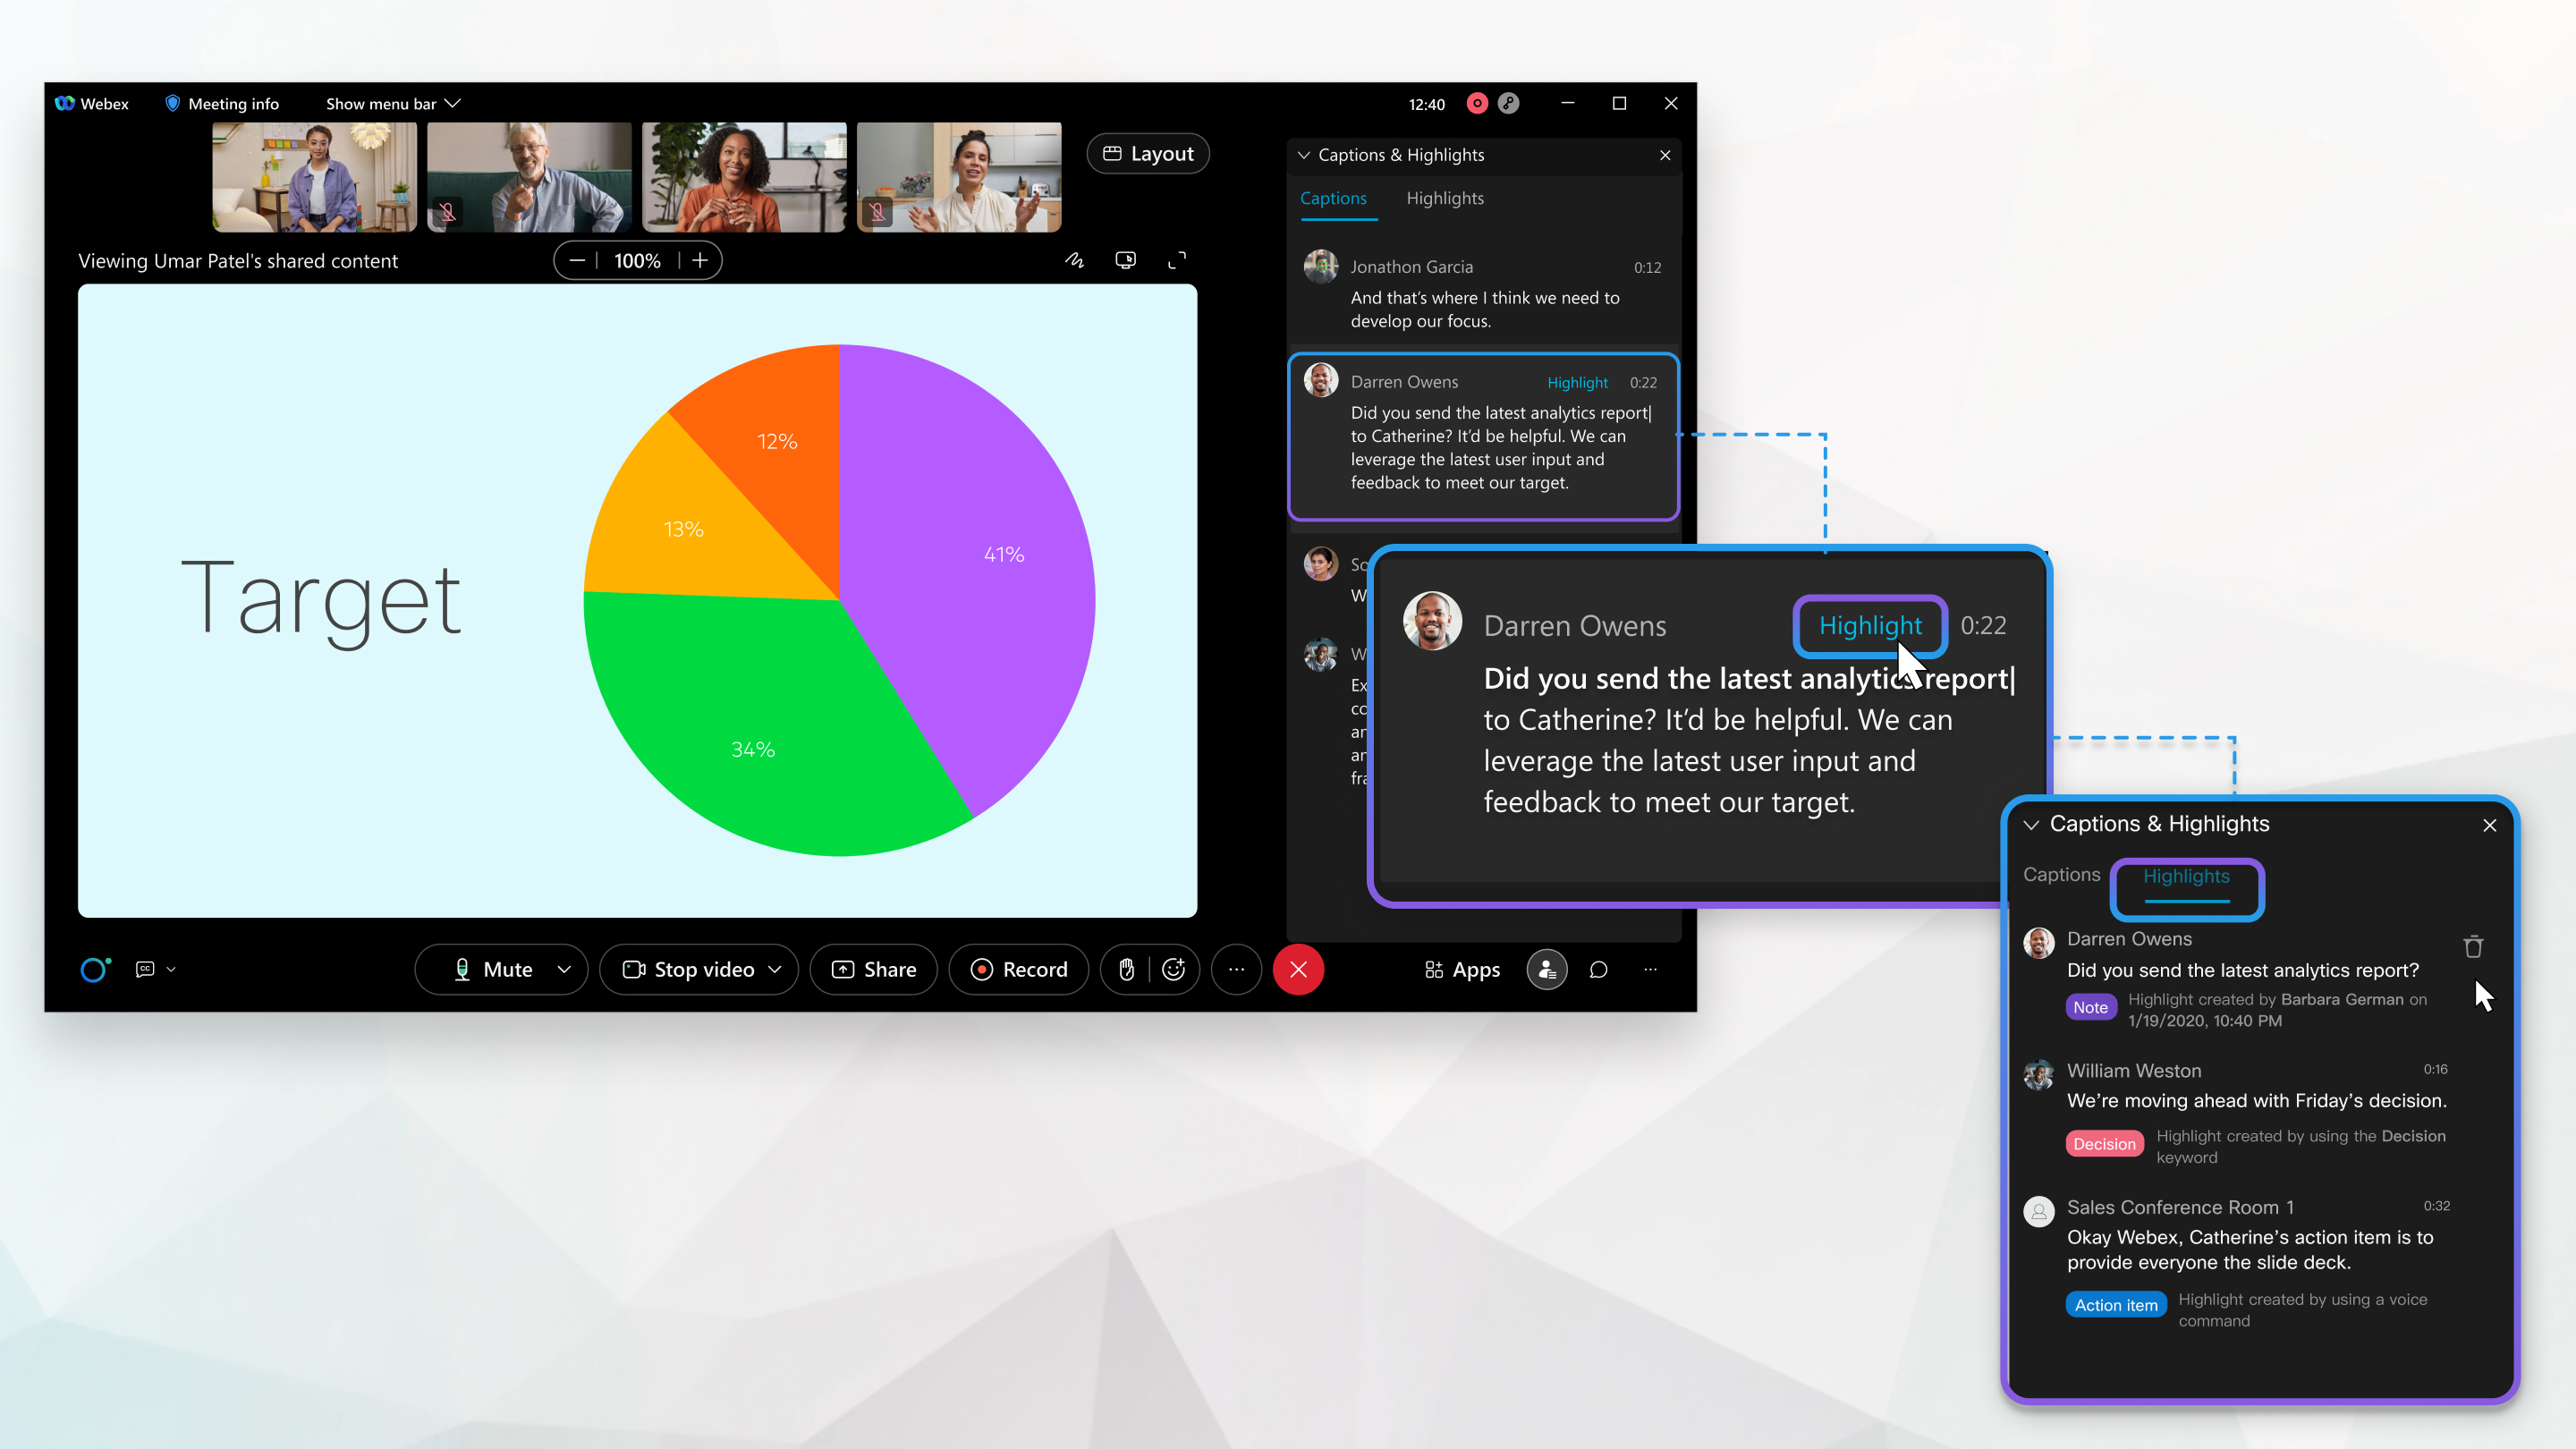
Create a highlight by doing one of the following:
|
| 2 |
To delete a highlight, select Highlights in the Captions & Highlights panel and select Delete highlight next to the highlight that you want to delete. |
| 1 |
Create a highlight by doing one of the following:
|
| 2 |
Delete a highlight by doing one of the following:
|
 and select

 .
.


