- Home
- /
- Article

Thanks for your feedback.

Move Calling service from one subscription to another
 In this article
 Feedback?
You can move a user or a workspace from one active Calling subscription to another without impacting the Calling services.
There are different scenarios where a customer or partner may need to move a Webex Calling user from one subscription to another.
For example:
A subscription change—a new subscription replaces a previously used subscription.
To provide uninterrupted Calling services, a partner or customer must move a user or workspace from a Calling subscription to another before processing either a Calling cancellation or a suspended subscription.
You can view and manage suspended licenses for individual users only through Control Hub.
Control Hub activates the suspend-announcement for all users and workspaces using a license from the suspended subscription. You hear the announcement Your calling service may soon be disrupted. To avoid this, please contact your system administrator immediately for all outgoing calls unless it’s blocked. On reassigning a user or workspace with a suspended license to an active license, the system disables the suspend-announcement. The suspend announcement does not play during emergency calls.
If you attempt to move users from a suspended subscription to a new subscription using the automatic license template, you experience the following:
-
Loss of configuration data
-
Failure to move users to the new subscription
-
Can’t preserve the current Calling configuration. Personalized services such as voicemail, voicemail pin, number assignments, and all individual user call settings are lost when the Calling license is removed.
Several methods exist to move a user or a workspace from one Calling subscription to another, from individual user or workspace subscription modification to bulk tools that allow subscription modification to all users or workspaces in an organization.
Move Calling user subscription
Move Calling user subscription using edit license
Use the Edit License option to change the license type for an individual user. An administrator can change the subscription plan for a user without impacting services for that user and the rest of the organization.
| 1 |
Sign in to Control Hub. |
| 2 |
Go to . |
| 3 |
Choose a user to change the license. |
| 4 |
Click Summary, go to the Licenses section, and click Edit Licenses. The list of existing license details appear. |
| 5 |
Click Edit Licenses. |
| 6 |
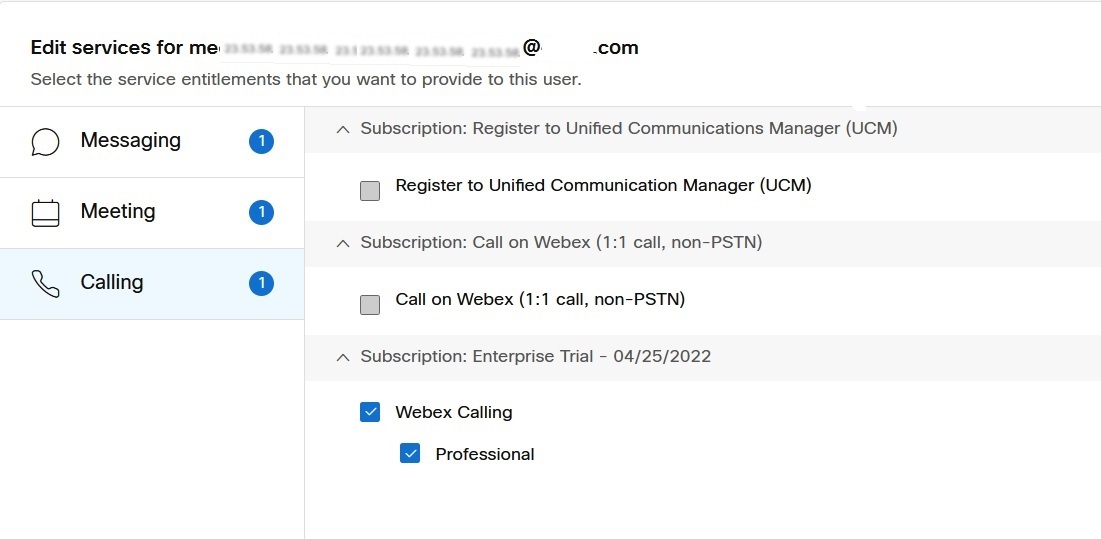
Click the Calling service from the left, and uncheck the current subscription.
|
| 7 |
Check the new subscription that you want the user to use.
|
| 8 |
Validate the changes and click Save. |

Move Calling user subscription using CSV template
Use the CSV template to alter the Calling subscription for users in an organization and move users from one Calling subscription to another without impacting Calling services.
| 1 |
Sign in to Control Hub. |
| 2 |
Go to . |
| 3 |
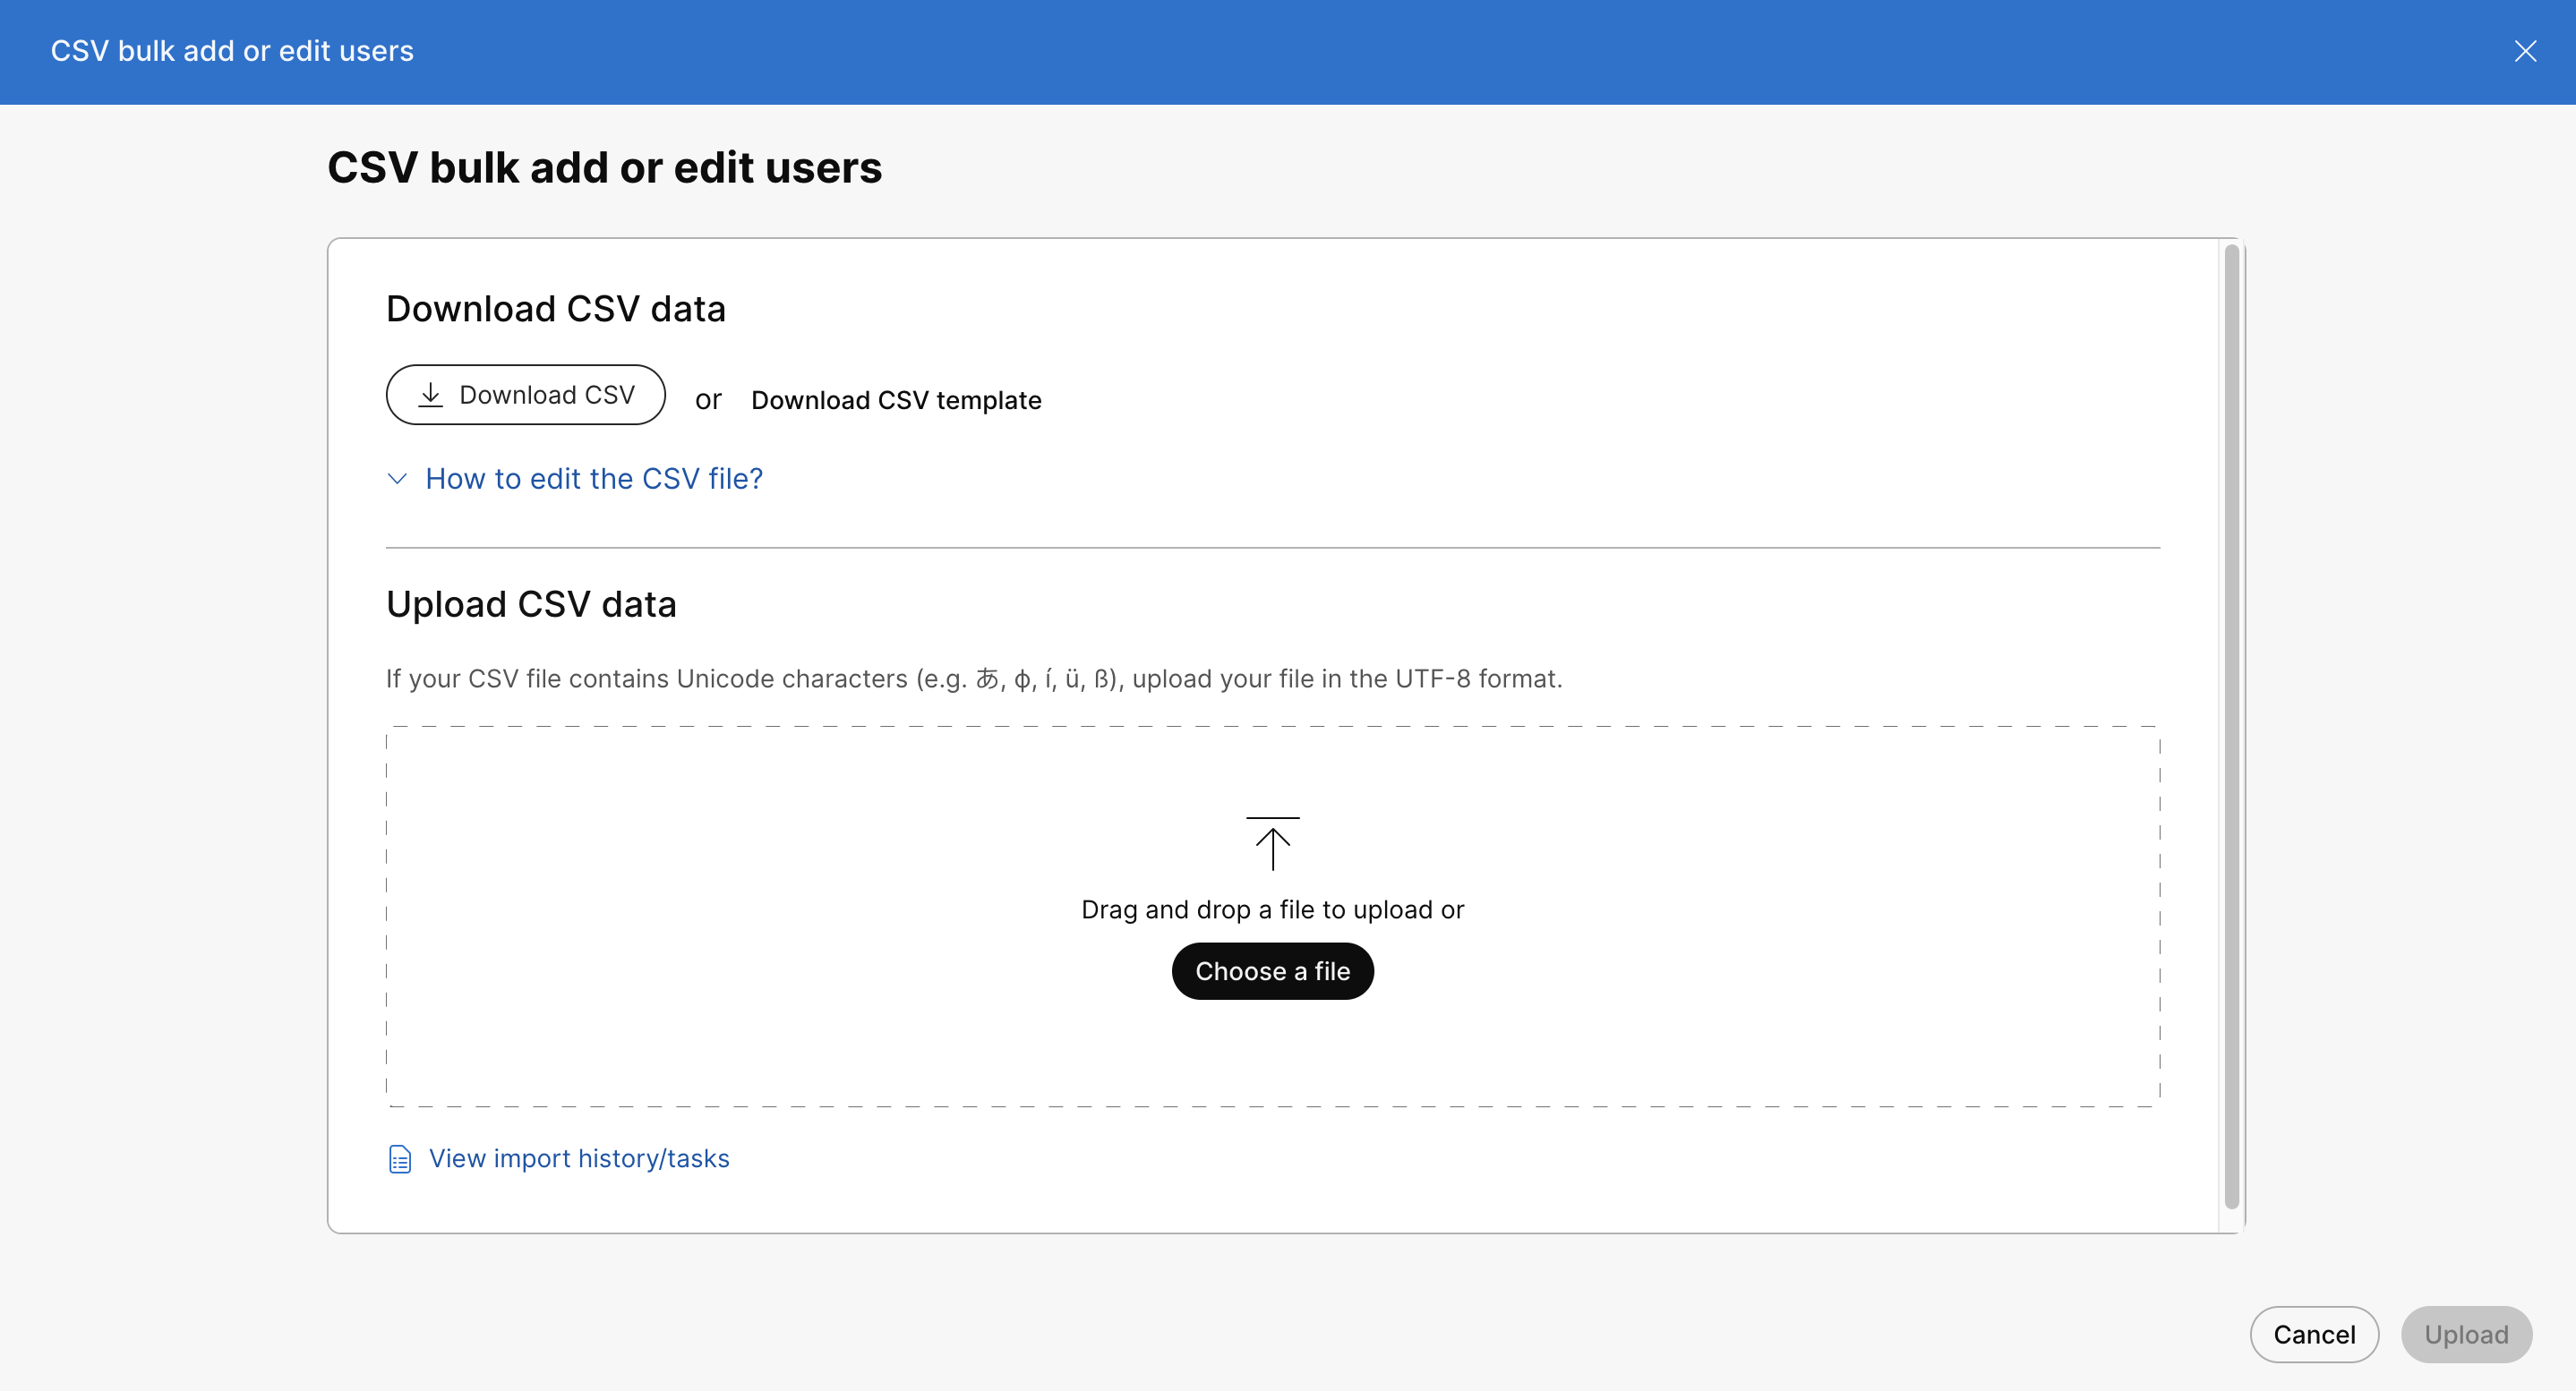
From the Add users drop-down, select Manage user by CSV. |
| 4 |
Click Download CSV to download the existing users' data.
|
| 5 |
In the downloaded CSV file, set the current Calling subscription to FALSE, and the new Calling subscription (where the users are moved) to TRUE. Do this for all users in the CSV file, to move to the new Calling subscription. |
| 6 |
After you save the file, click Choose a file, select the modified file, and click Open. |
| 7 |
Click Upload. The CSV file uploads and creates your task. You can close the browser or this window and your task continues to run. To review the progress of your task, see Manage Tasks in Cisco Webex Control Hub. |
Move Calling user subscription using automatic license template
To change license assignments for existing users in bulk, use the automatic license template from the modify license template screen.
If you attempt to move users from a suspended subscription to a new subscription using the automatic license template process, you experience the following:
-
Loss of configuration data
-
Failure to move users to the new subscription
-
Can’t preserve the current Calling configuration.
| 1 |
Sign in to Control Hub. |
| 2 |
Go to . |
| 3 |
Click the Licenses tab. |
| 4 |
From the License assignments section, click Set up under the Organization-based licenses. |
| 5 |
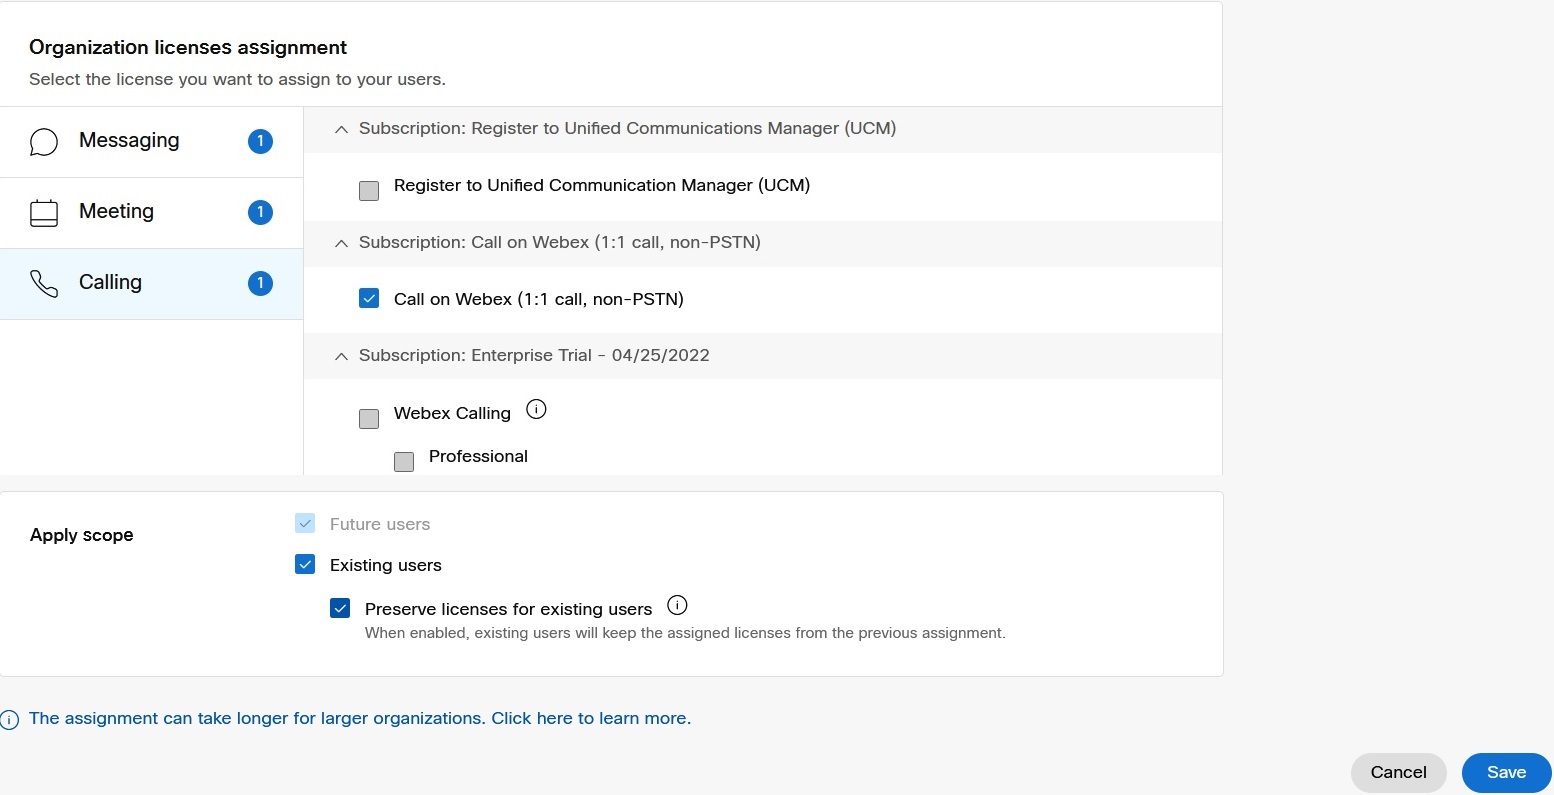
Click the Calling service. |
| 6 |
Go to the Apply scope section, select Existing users, and perform the following selections: |
| 7 |
Click Save.
|
Move Calling workspace subscription
Move Calling workspace subscription using edit license
Use the Edit License option to change the license type for an individual workspace. An administrator can change the subscription plan for a workspace without impacting services for that user and the rest of the organization.
| 1 |
Sign in to Control Hub. |
| 2 |
Go to . |
| 3 |
Choose a workspace to change the license. |
| 4 |
Click Overview, go to the Calling section, and click 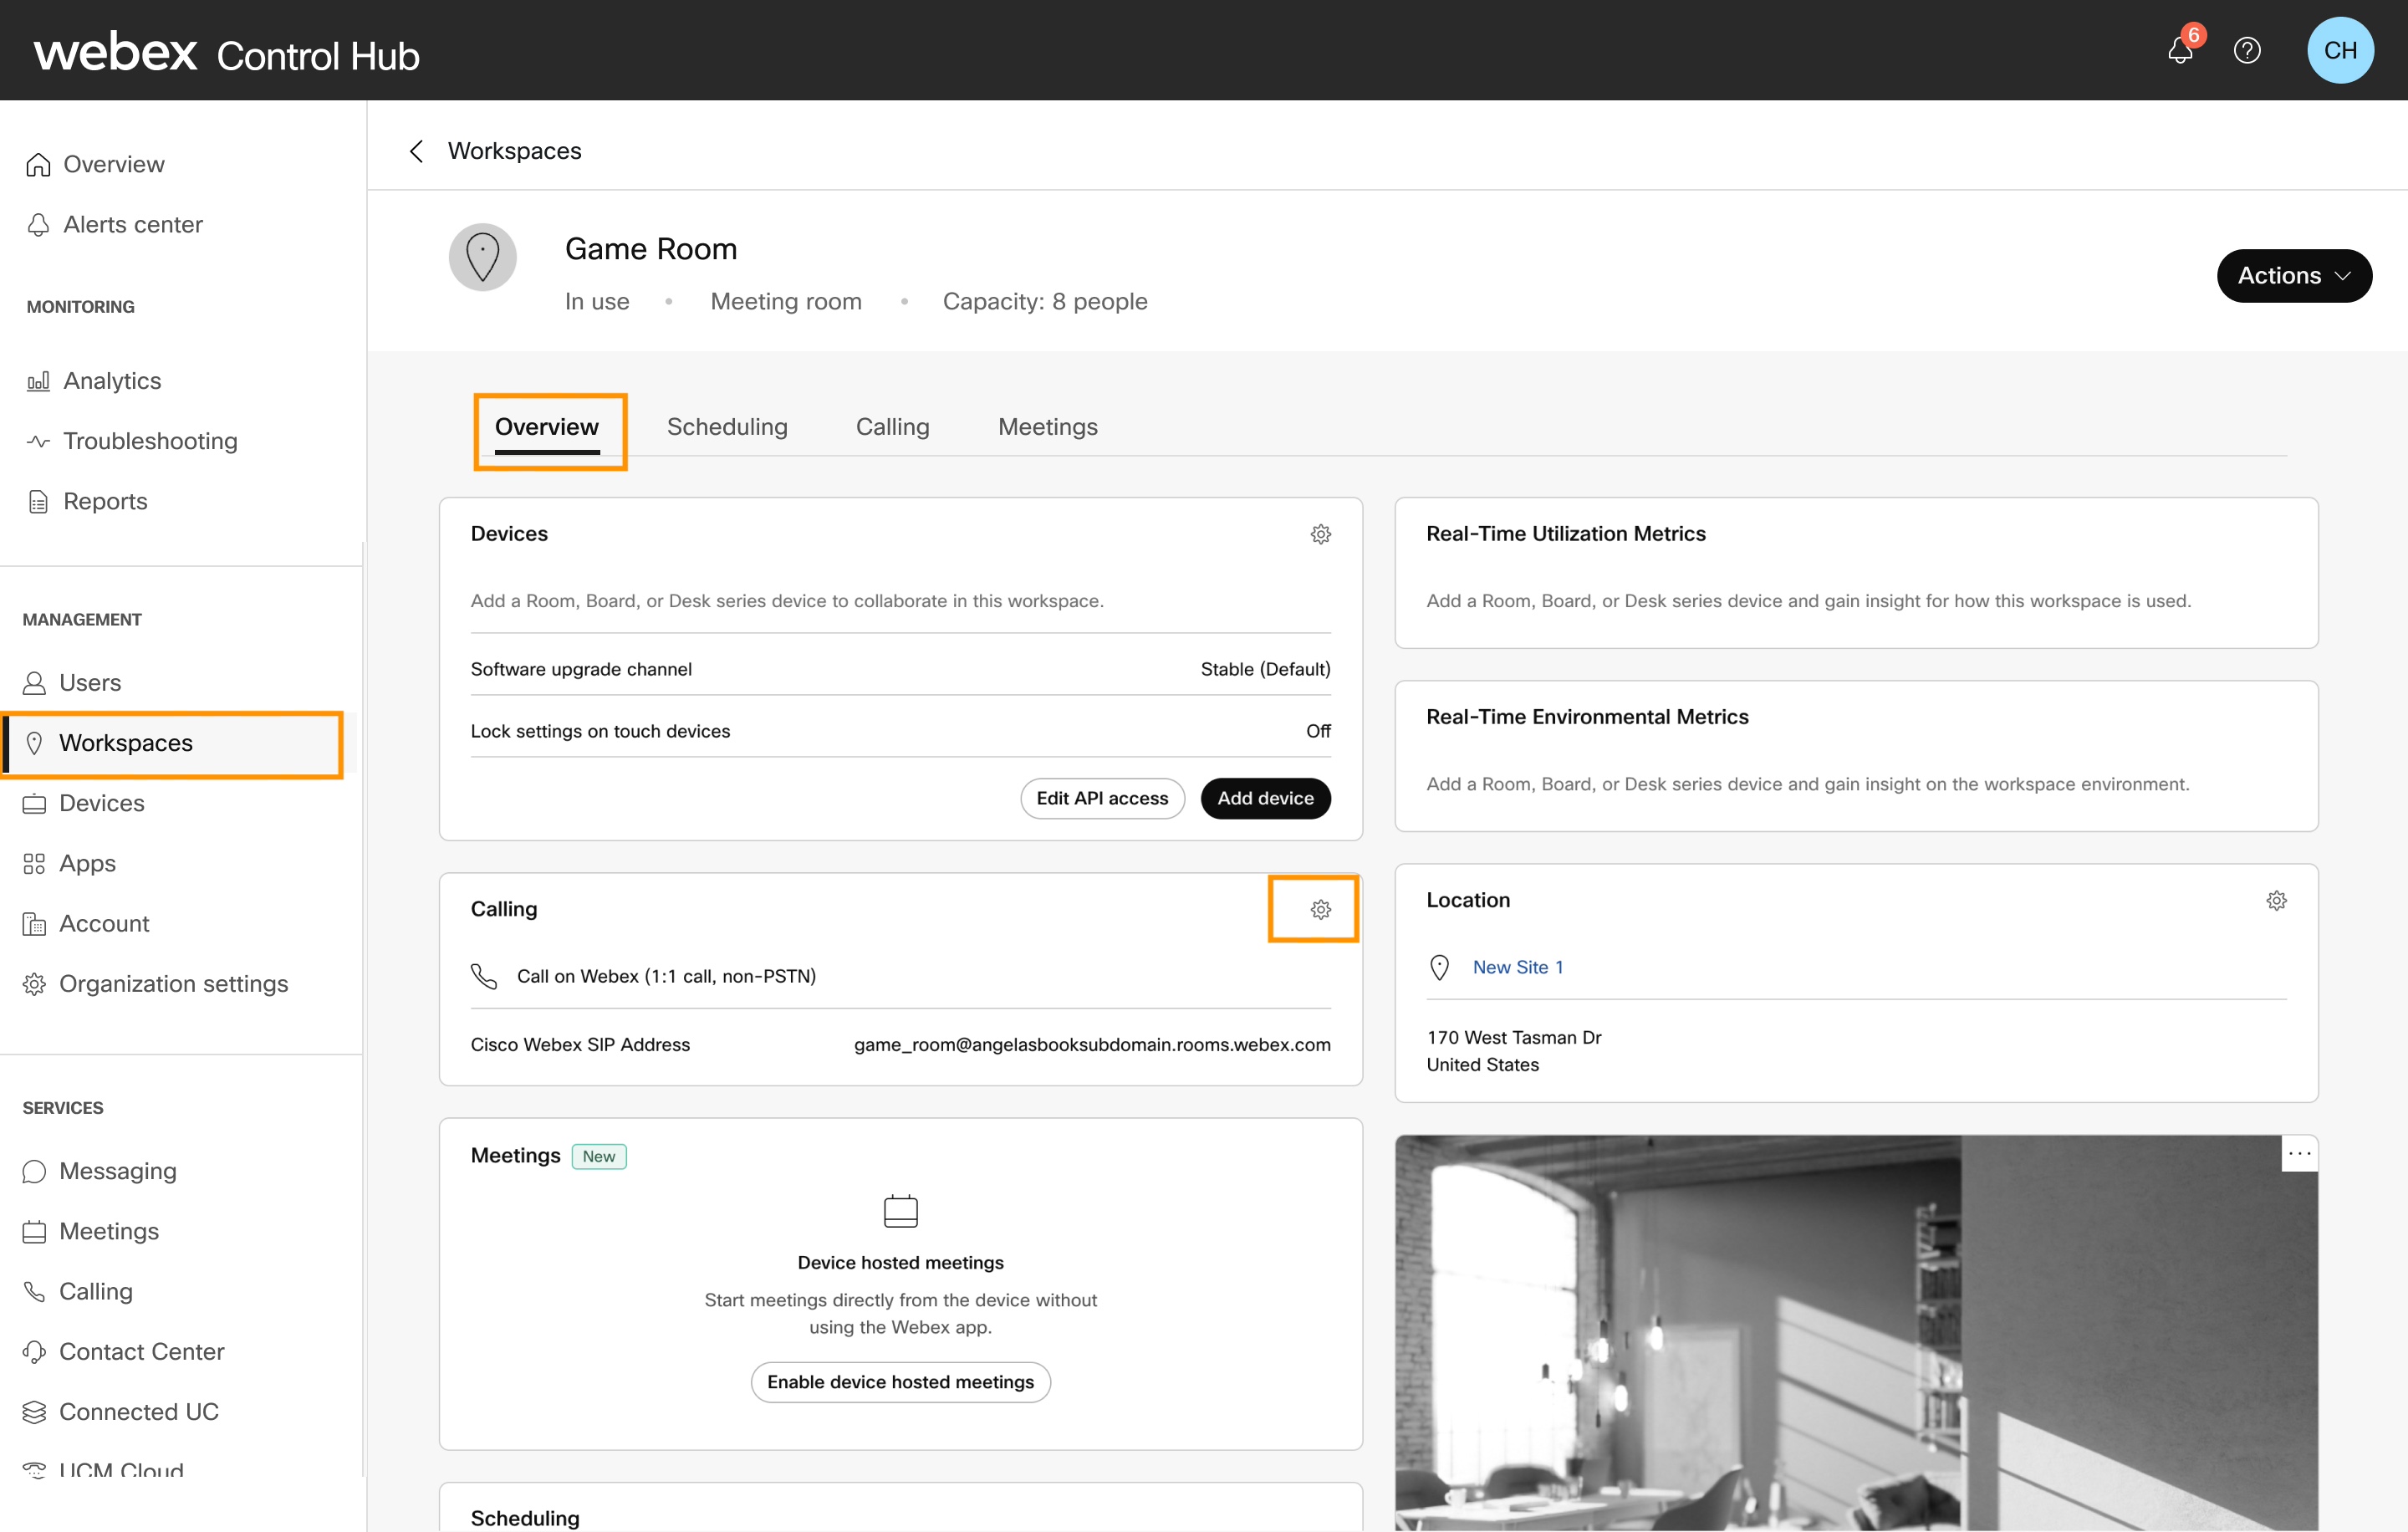
|
| 5 |
Choose the Cisco Webex Calling service, and click Next. |
| 6 |
Uncheck the current subscription, and then check the new subscription that you want the workspace to use. |
| 7 |
Validate the changes and click Save. 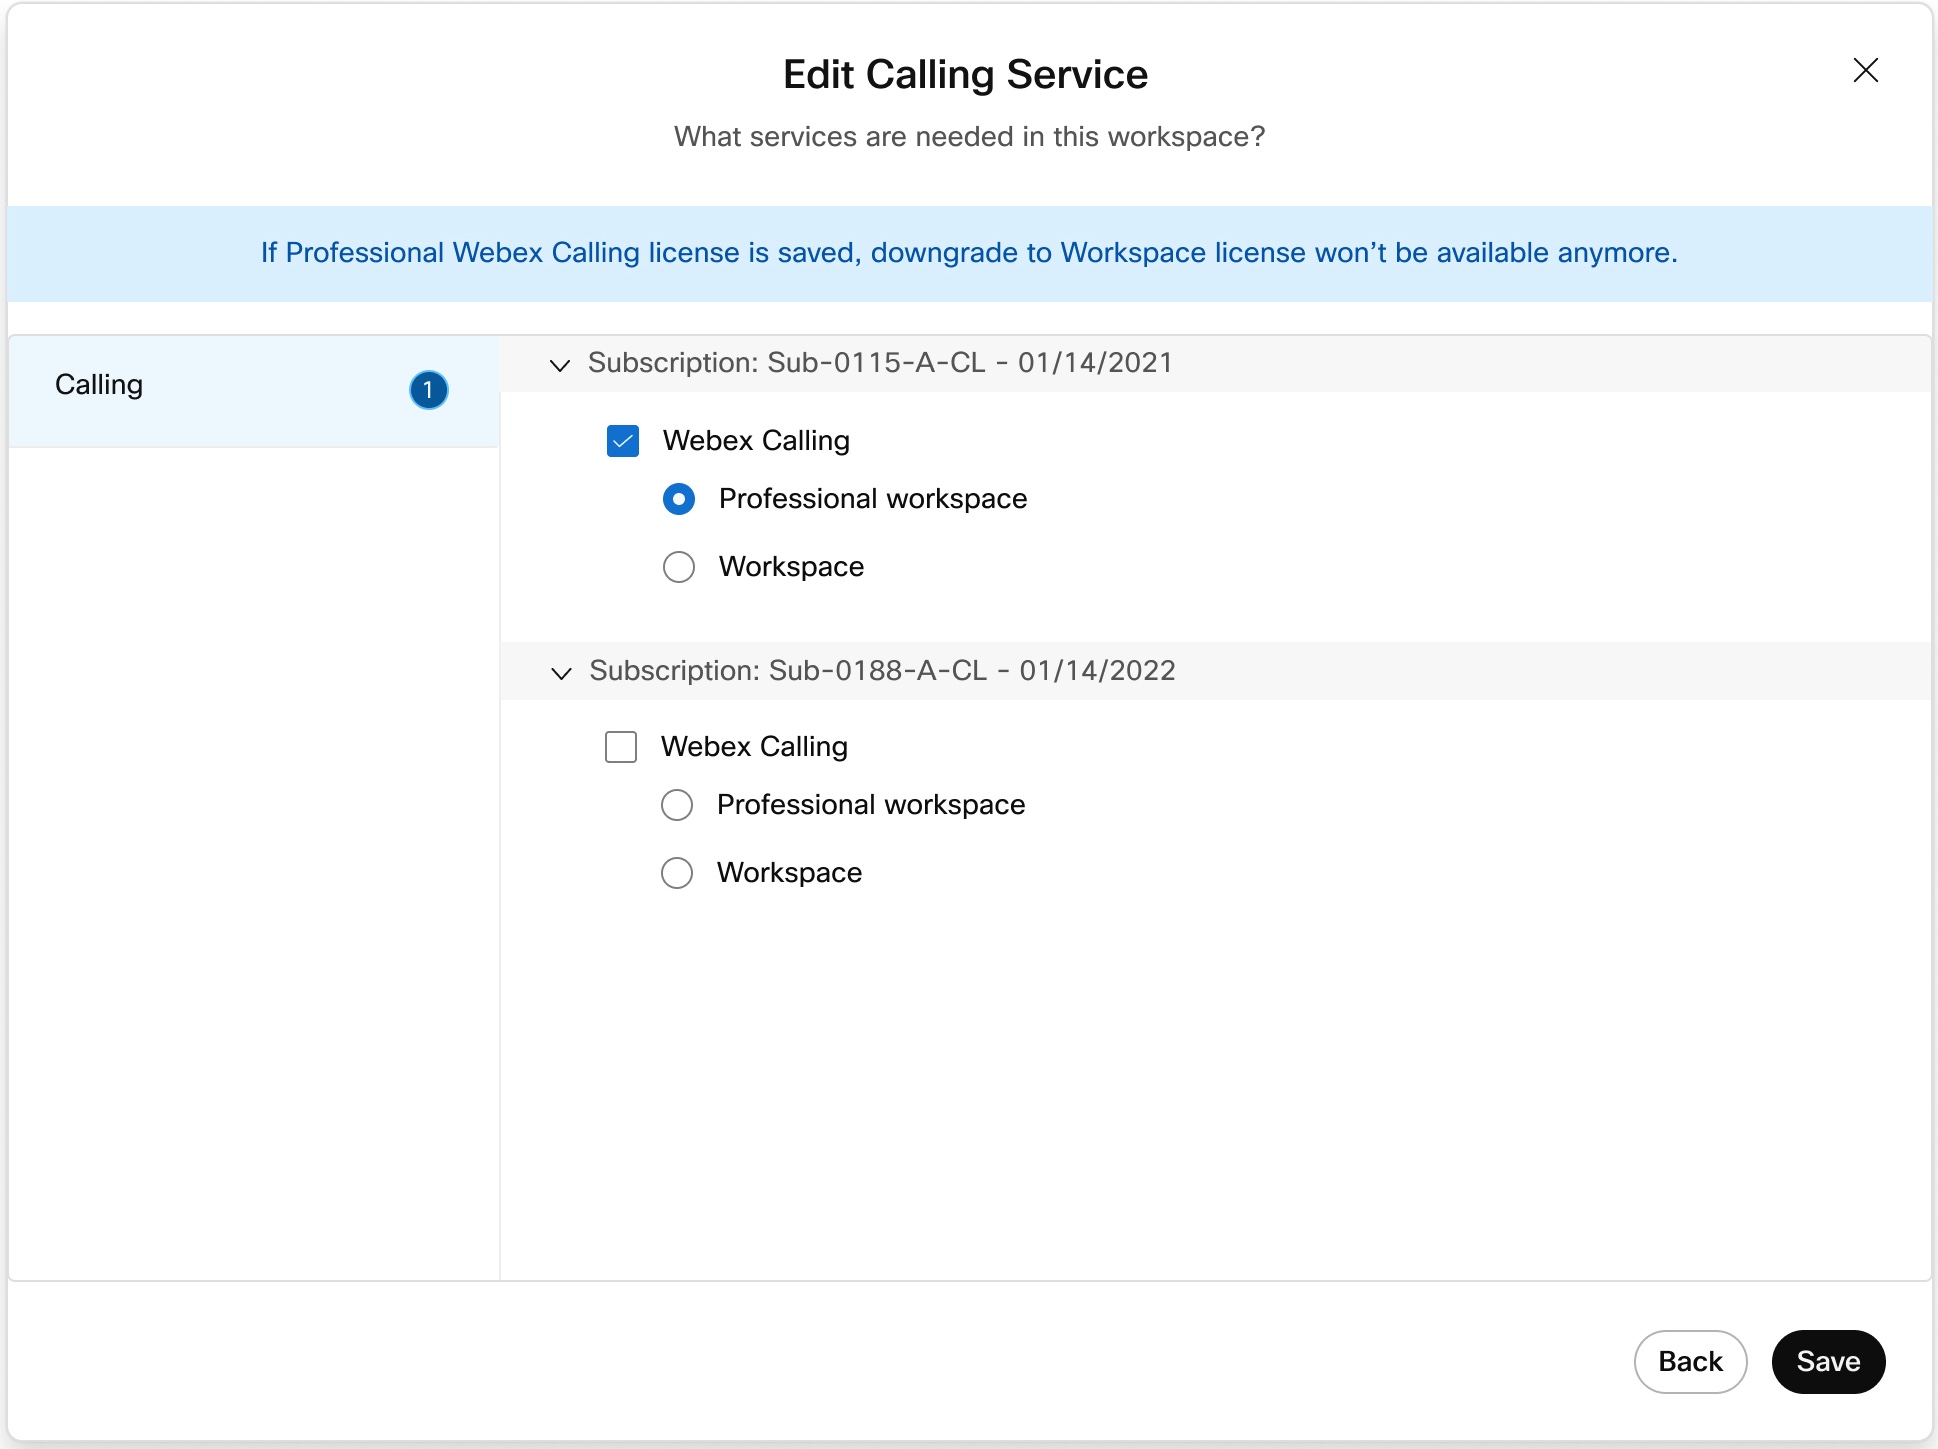
|
 .
.Move Calling workspace subscription using CSV template
Use the CSV template to alter the Calling subscription for workspaces in an organization and move workspaces from one Calling subscription to another without impacting Calling services.
| 1 |
Sign in to Control Hub. |
| 2 |
Go to . |
| 3 |
From the drop-down, choose Workspaces in my organization, and click Download to download the existing workspaces' details. You can view the download progress from the Task page.
|
| 4 |
In the downloaded CSV file, set the current Webex Calling workspace subscription to FALSE, and the new Calling workspace subscription (where the workspaces are moved) to TRUE. Do this for all workspaces in the CSV file, to move to the new Calling workspace subscription. If you want to update only the subscription and skip the device onboarding, set the “Workspace Subscription Update Only” column to TRUE. If you want to update the subscription and onboard the new device, set it to FALSE. For more information on the CSV file details, see Add and assign devices in bulk. |
| 5 |
After you save the file, click Choose a file, and select the modified file, and click Open. |
| 6 |
Click Submit. 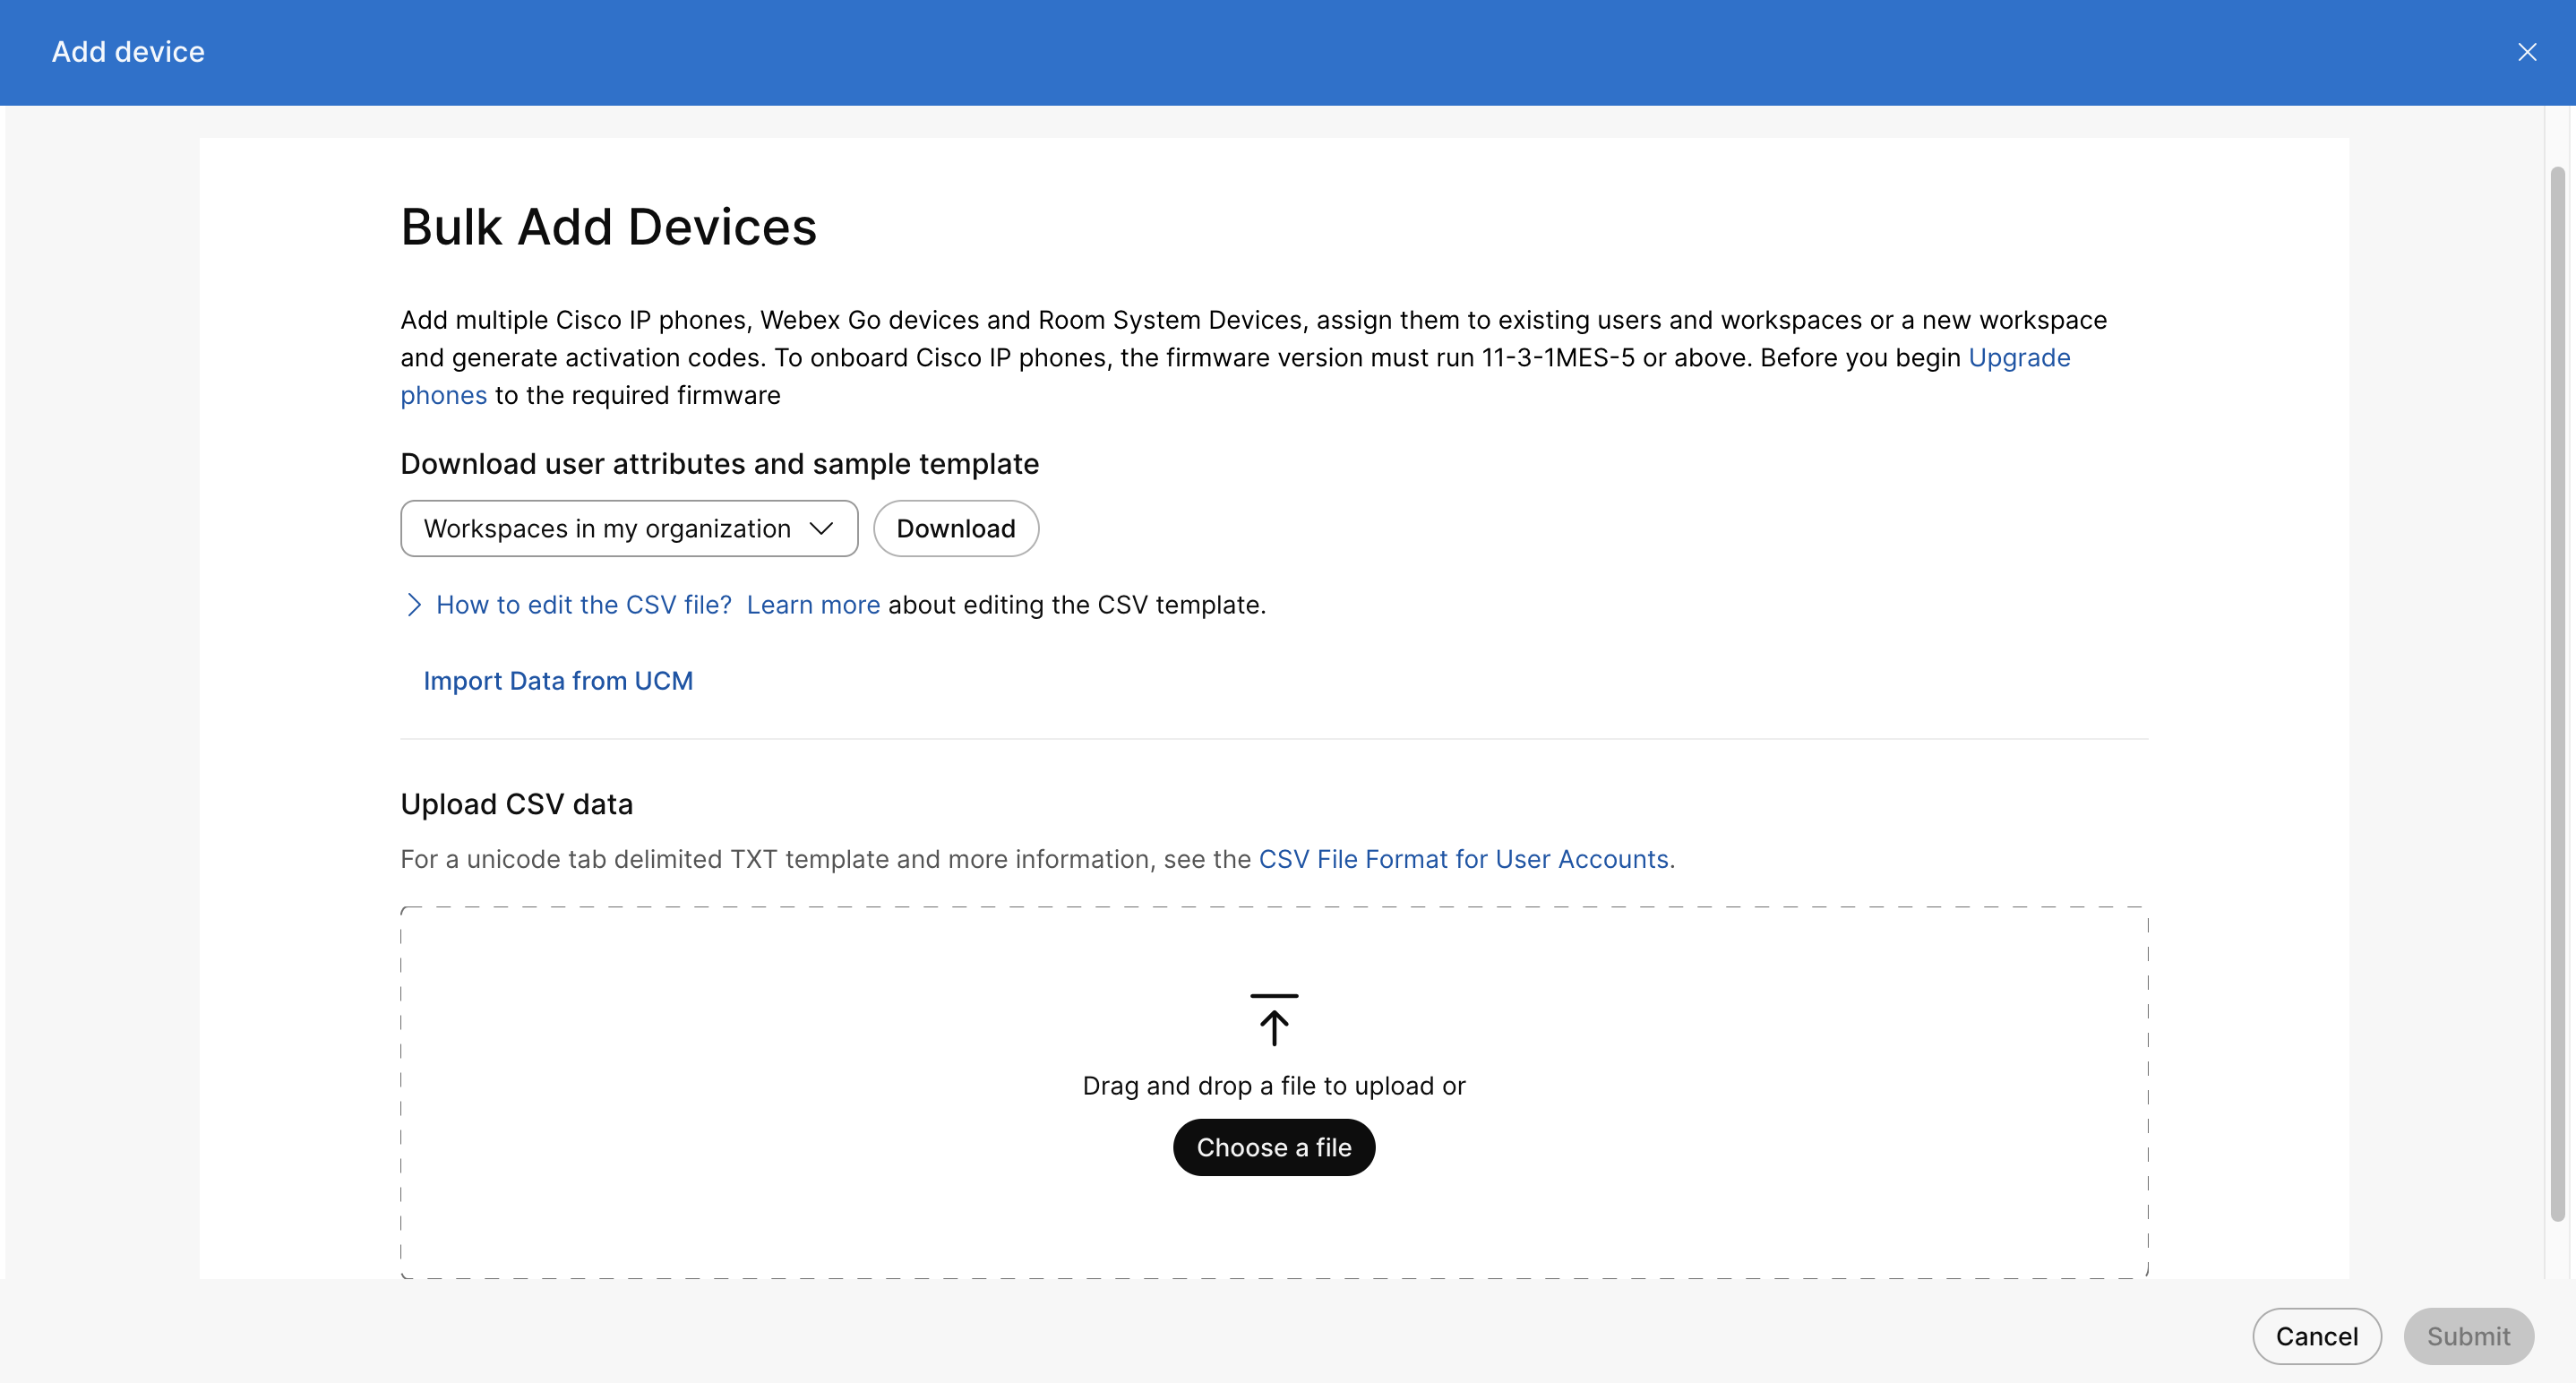
|


