
Thanks for your feedback.
Set your meeting audio and video preferences
 Feedback?
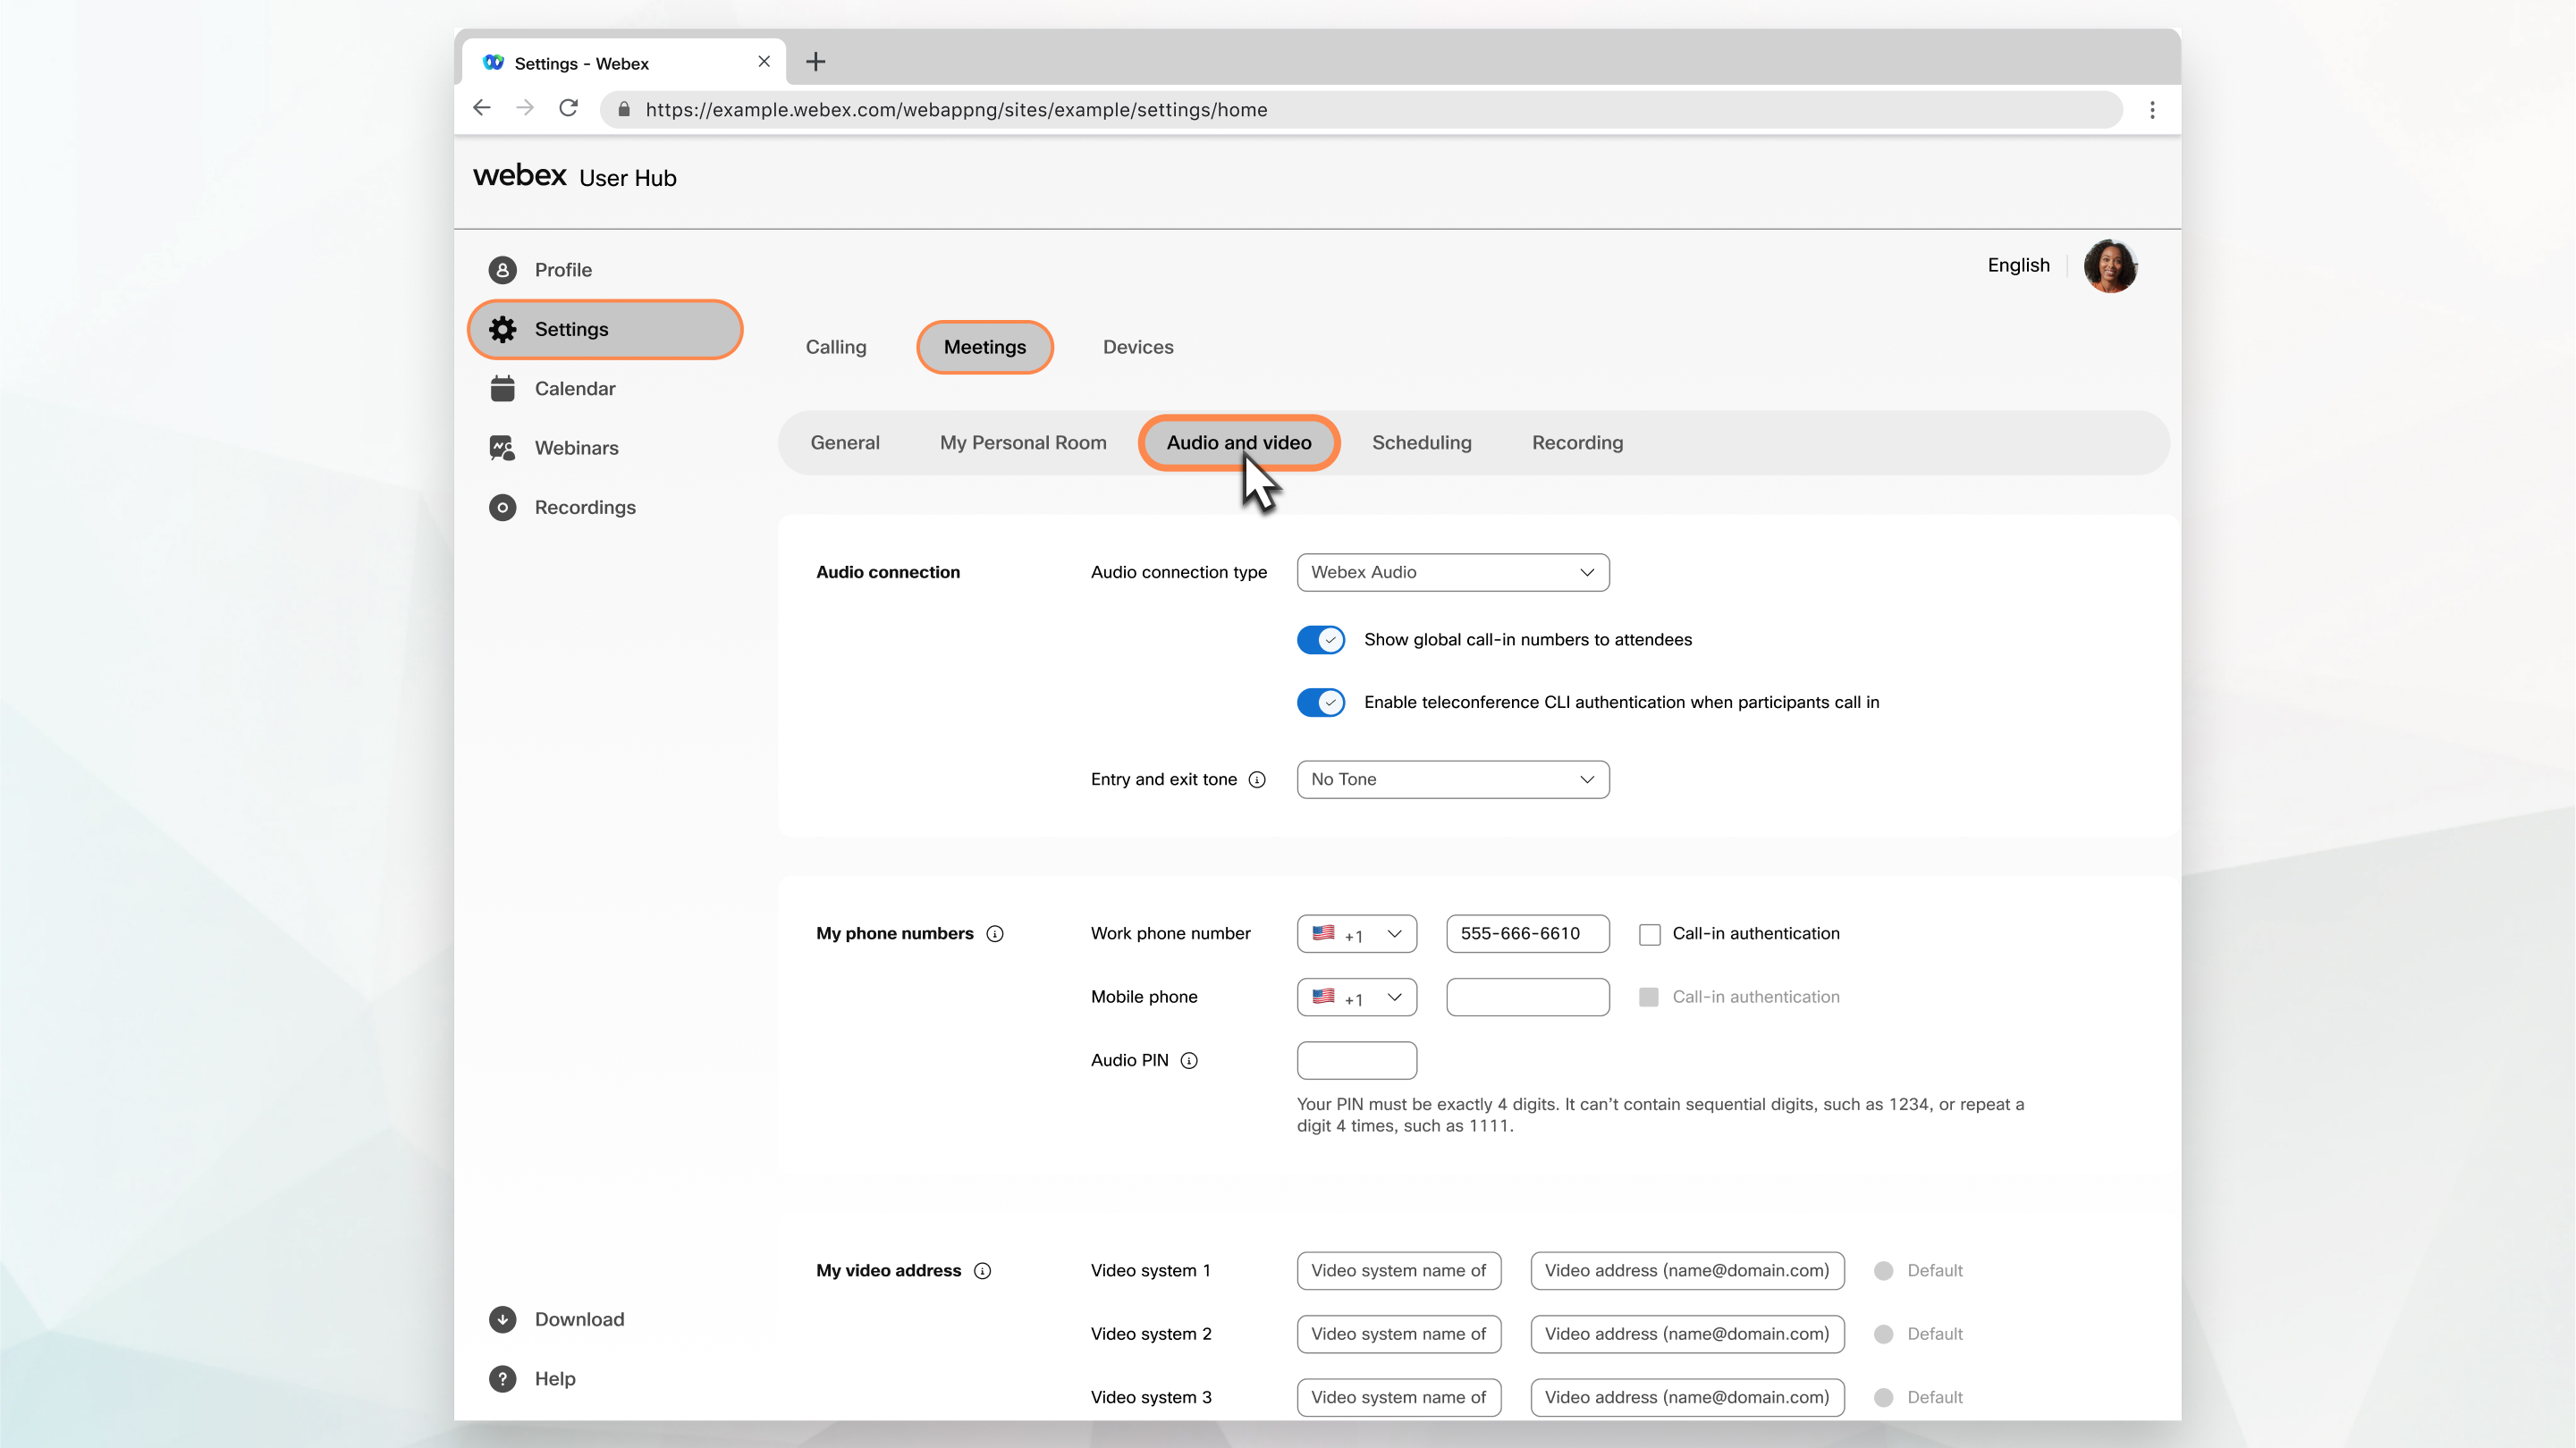
| 1 |
Sign in to User Hub, then select Settings. |
| 2 |
Select the Audio and Video tab. |
| 3 |
Edit the settings for your audio connection type. |
| 4 |
Select whether to display a toll-free number or display a global call-in number to attendees. |
| 5 |
Next to Entry and exit tone, choose the indicator you want to hear when someone enters or exits the audio portion of the meeting. When using the Webex Audio option, if the Announce Name feature is selected, those joining using the Use computer for audio option don't get the option to record and announce their name. On the Webex Suite meeting platform, Announce Name isn't supported as an entry and exit tone. |
| 6 |
Set the default call-in number for the sessions you host or attend. Set up to two call-in numbers to display when joining:
|
| 7 |
Under My Phone Numbers, enter the phone numbers that will be used to authenticate you. These numbers will appear when you use the Call me option to connect to audio in meetings. |
| 8 |
Enter a host PIN if you want to start a Personal Room meeting by phone or video system or a scheduled meeting by phone. |
| 9 |
Enter an audio PIN if you want a secondary level of phone authentication. |
| 10 |
To use a Webex Personal Conference meeting (PCN) click Generate an account. |
| 11 |
If you want to join meetings faster, check the Automatically connect to audio using computer check box. Now when you start or join a meeting on this site, your audio connects automatically to your computer. |
| 12 |
Add the details for the Video Systems such as the video system name and video address. You can add up to three video systems. |
| 13 |
Select Save. |


