
Thanks for your feedback.
 Feedback?
Your Webex site is now User Hub
Your Webex site (for example, company.webex.com) is now User Hub. User Hub is a single location that includes everything available on your Webex site, and also includes account settings and other specific user settings that were previously managed at the following sites:
- settings.webex.com
- Calling User Portal
User Hub will continue to be updated in future releases to add new and existing Webex Suite capabilities.
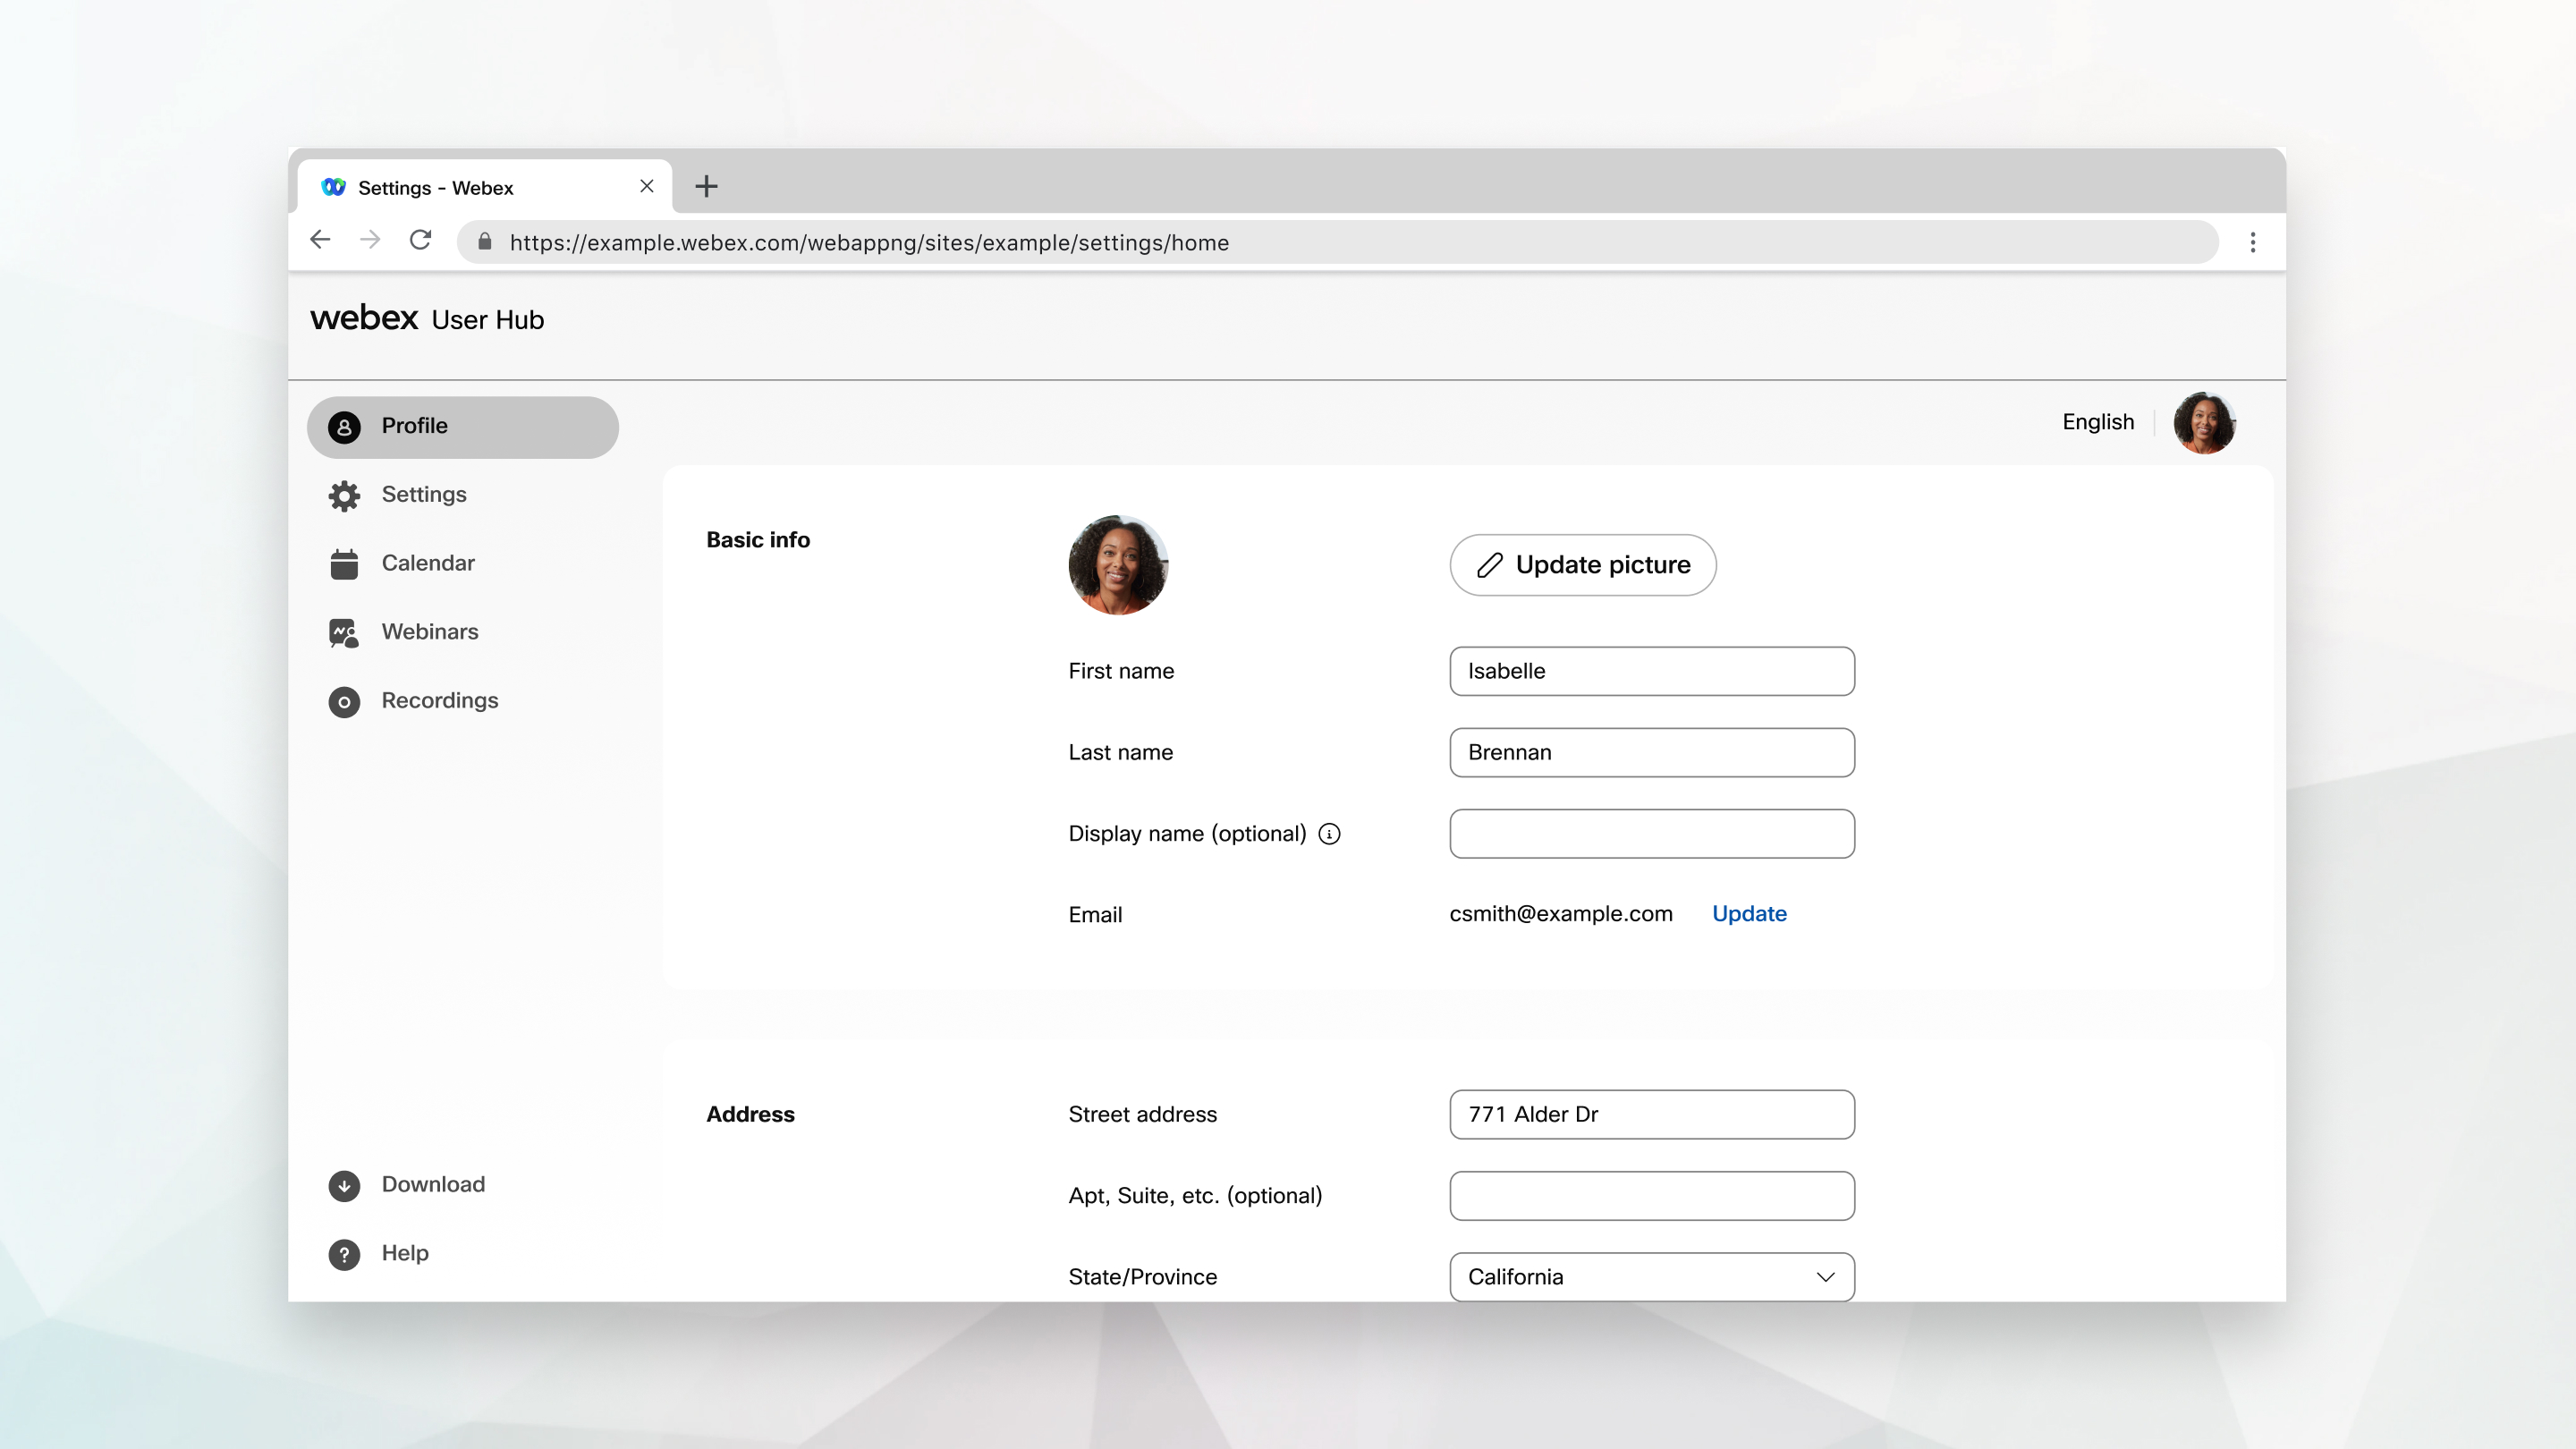
If your organization allows you to edit your profile information on User Hub, click Profile. On the Profile page, you can update your picture, edit your first name, last name, display name, and change your address.
Select Update to edit your email address or Reset to change your password.
For more options available and personalizing your Meetings profile, see Edit your Webex Meetings profile.
Select Settings from the navigation bar to edit your preferences. The options that appear depend on what services you have, but may include Meetings, Calling, and Devices.
Meetings
In the Meetings tab, you have the following groups of settings:
-
General— Edit your tracking code, location, sign-in accounts, reset Webex sessions and calendar integration. See, Set your Webex Meetings general preferences.
-
My Personal Room— Edit the Personal Room name and view your Personal Room link, lock your Personal Room, and allow others to host meetings. You can choose your notification settings, enable simultaneous interpretation, and mute or unmute attendees. See, Set your Personal Room preferences.
You can view Personal Room meetings, even meetings scheduled from third-party calendars. Personal Room meetings appear the same as scheduled Webex meetings, whether you schedule the meeting using any of the following options:
-
Google Calendar
-
Webex Scheduler for Outlook
-
Webex App
For callback prompts, Webex uses your language settings.
If you set your meeting to automatically lock 0 minutes after the meeting starts, we recommend that you start your meeting from the Meetings app and not from a video device. If you start your meeting from a video device, you can't unlock the meeting and admit participants.
-
-
Audio and Video— Edit your audio connection settings and choose your call-in numbers. Enter your phone number, host PIN, and audio PIN details. You can display a toll-free number and a global call-in number to attendees, and also generate a personal conferencing number. Finally, add details for your video systems. See Set your meeting audio and video preferences.
-
Scheduling— For more information about scheduling preferences, see Set your meeting scheduling preferences. All settings except Meeting type and Scheduling permission apply only to meetings scheduled in User Hub.
If you enable Share meeting content when scheduling your meeting, post meeting content such as, the AI summary, recording, transcript, and chat, will be shared automatically to the Meeting Recap section of Webex App.
-
Recording—For more information on recordings, see Set recording settings in Webex Meetings.
-
Email templates—Hosts and cohosts can customize the email invitation that are sent out. See Customize email templates in Webex Webinars.
Calling
In the Calling tab, you have the following groups of settings:
- Call settings—Turn on anonymous call rejection, call waiting, set your call forwarding preferences, and more.
- Voicemail— Set when to turn on voicemail, your message storage location and capacity, and set your voicemail notifications and greetings.
- Additional settings— Assign assistants to your assistant pool, filter which calls get sent to your assistants, set where you want call notifications to go, and set your alerting mode and unanswered call settings.
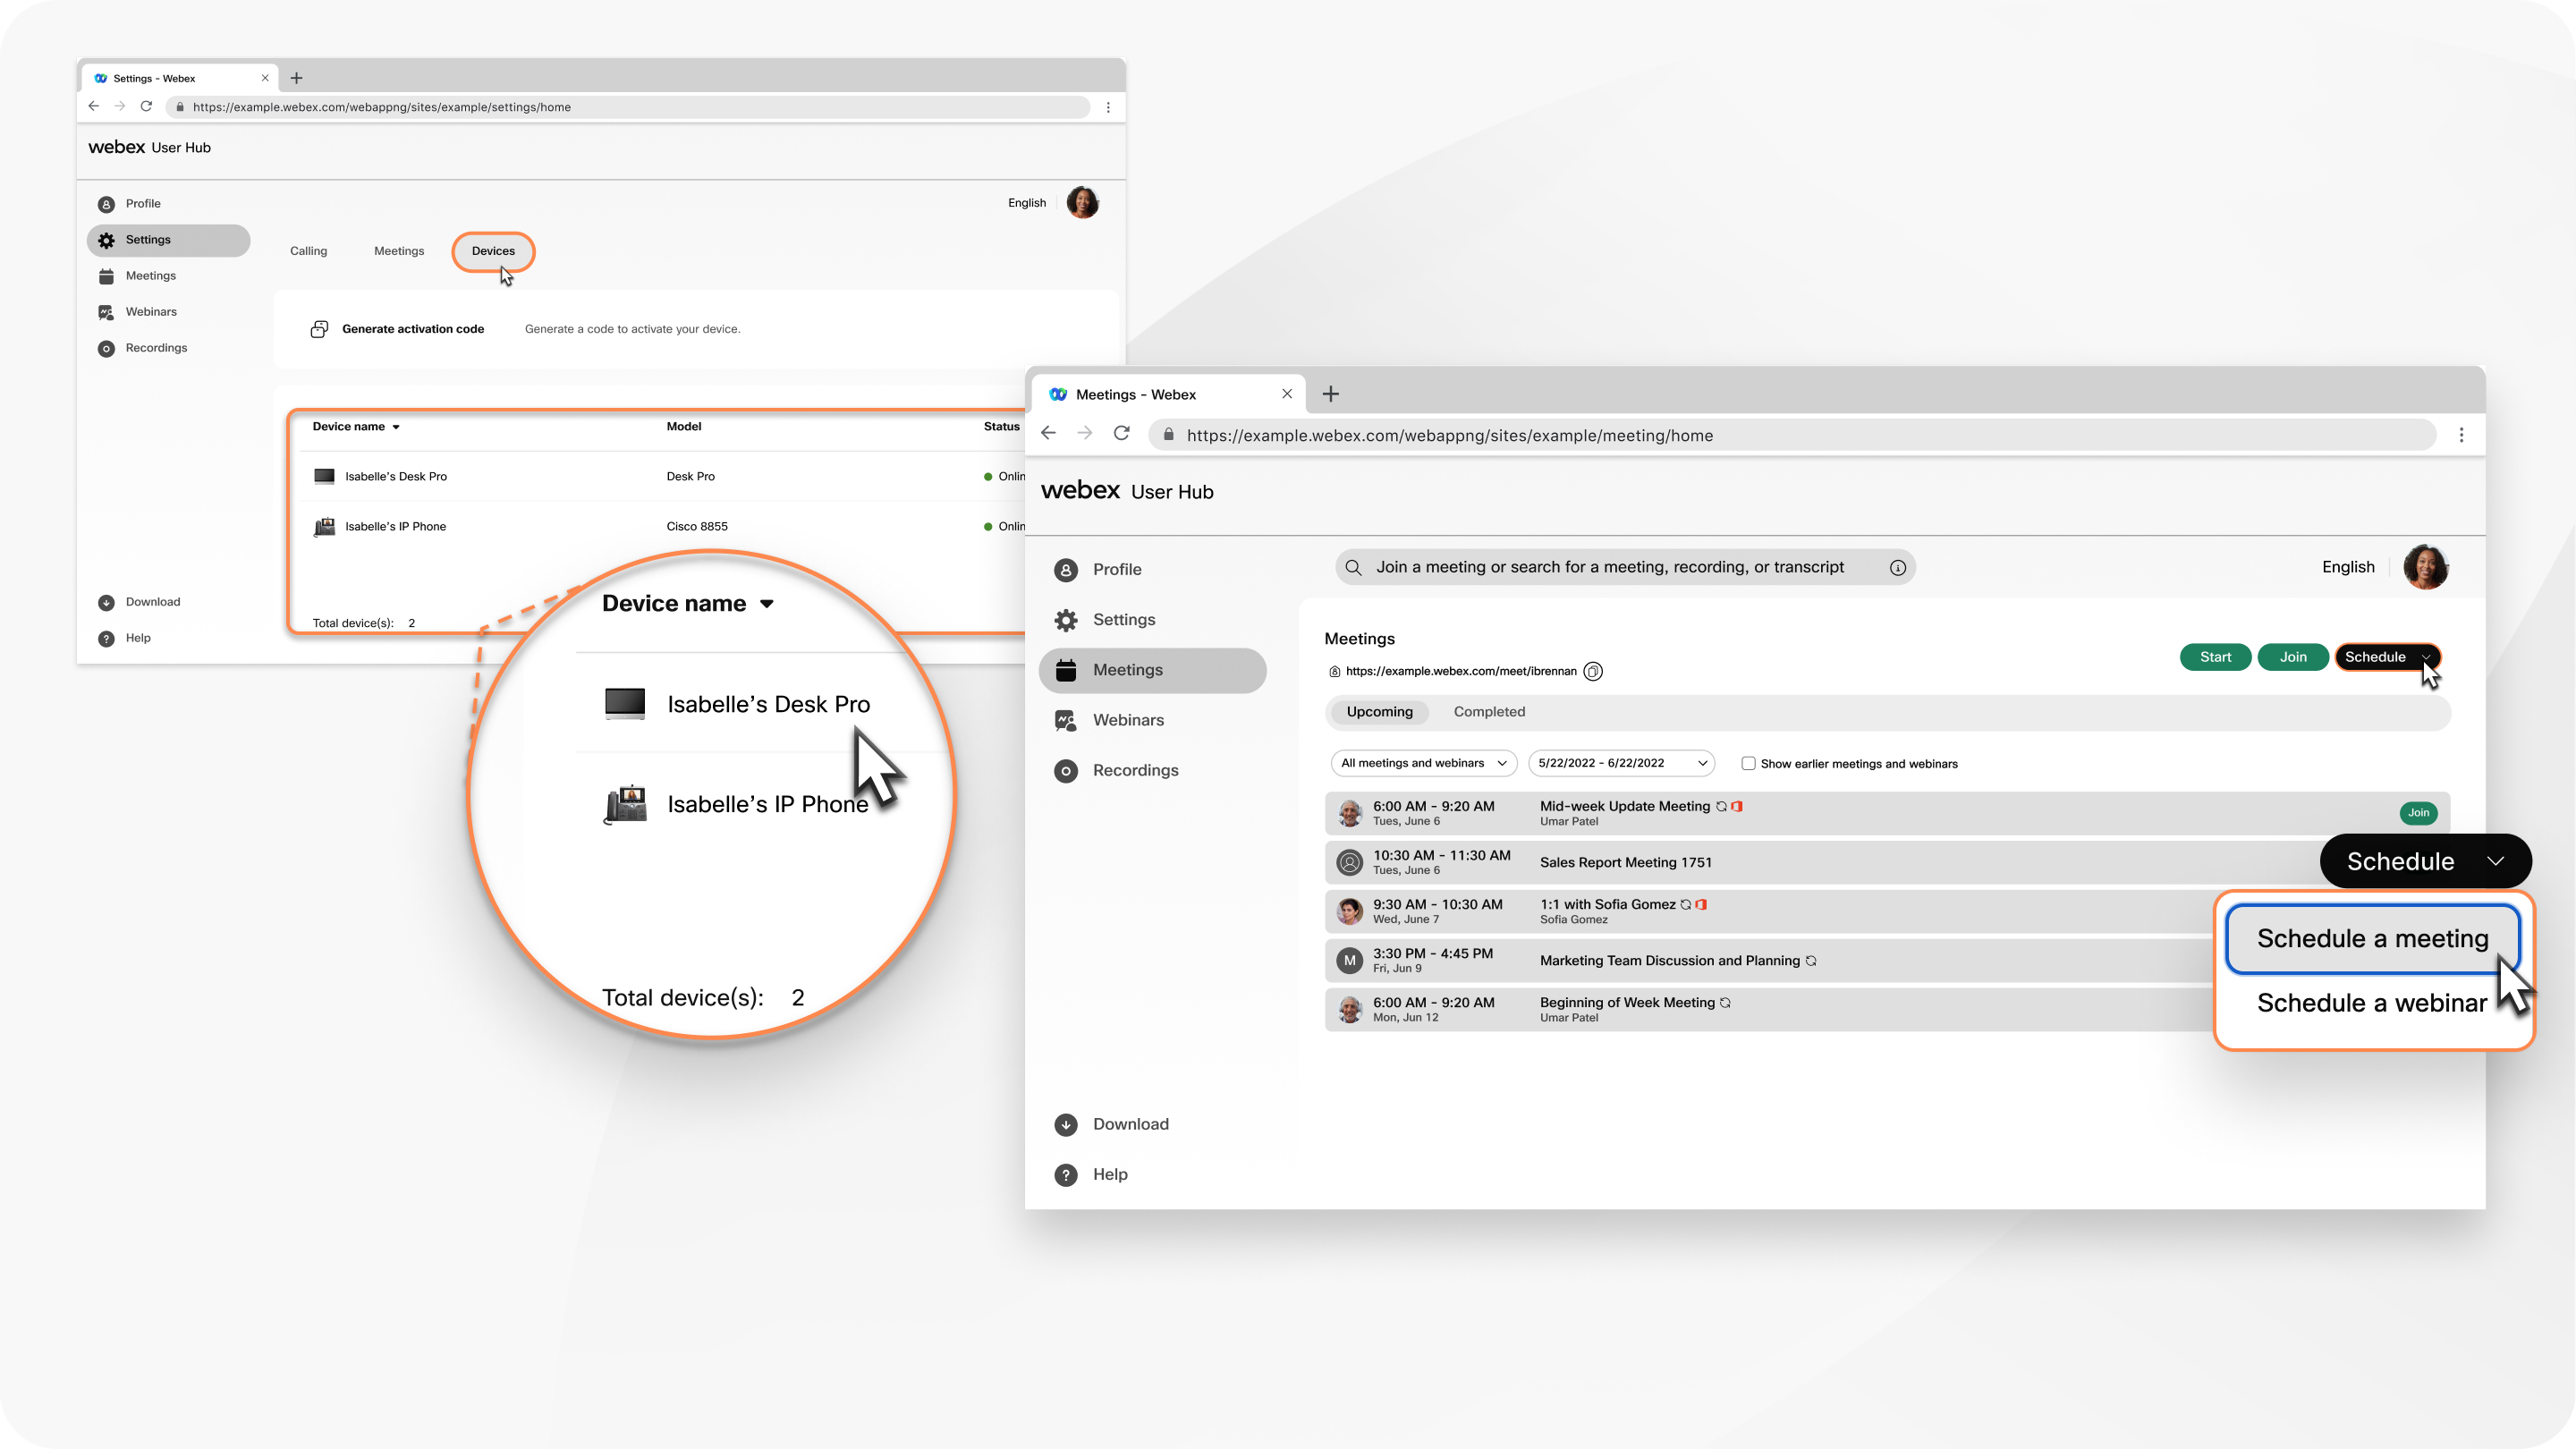
Devices
In the Devices tab, manage your Cisco video devices. You can generate a code to activate your device, set your device name, and set which software release channel you want your device to be on.
Personal Room
Personal Room is available only for sites that have the Webex Meetings service.
From the Personal Room section of your dashboard, you can select Start to start a meeting in your Personal Room. Before you start a meeting, configure your settings to join meetings in the way that works best for you.
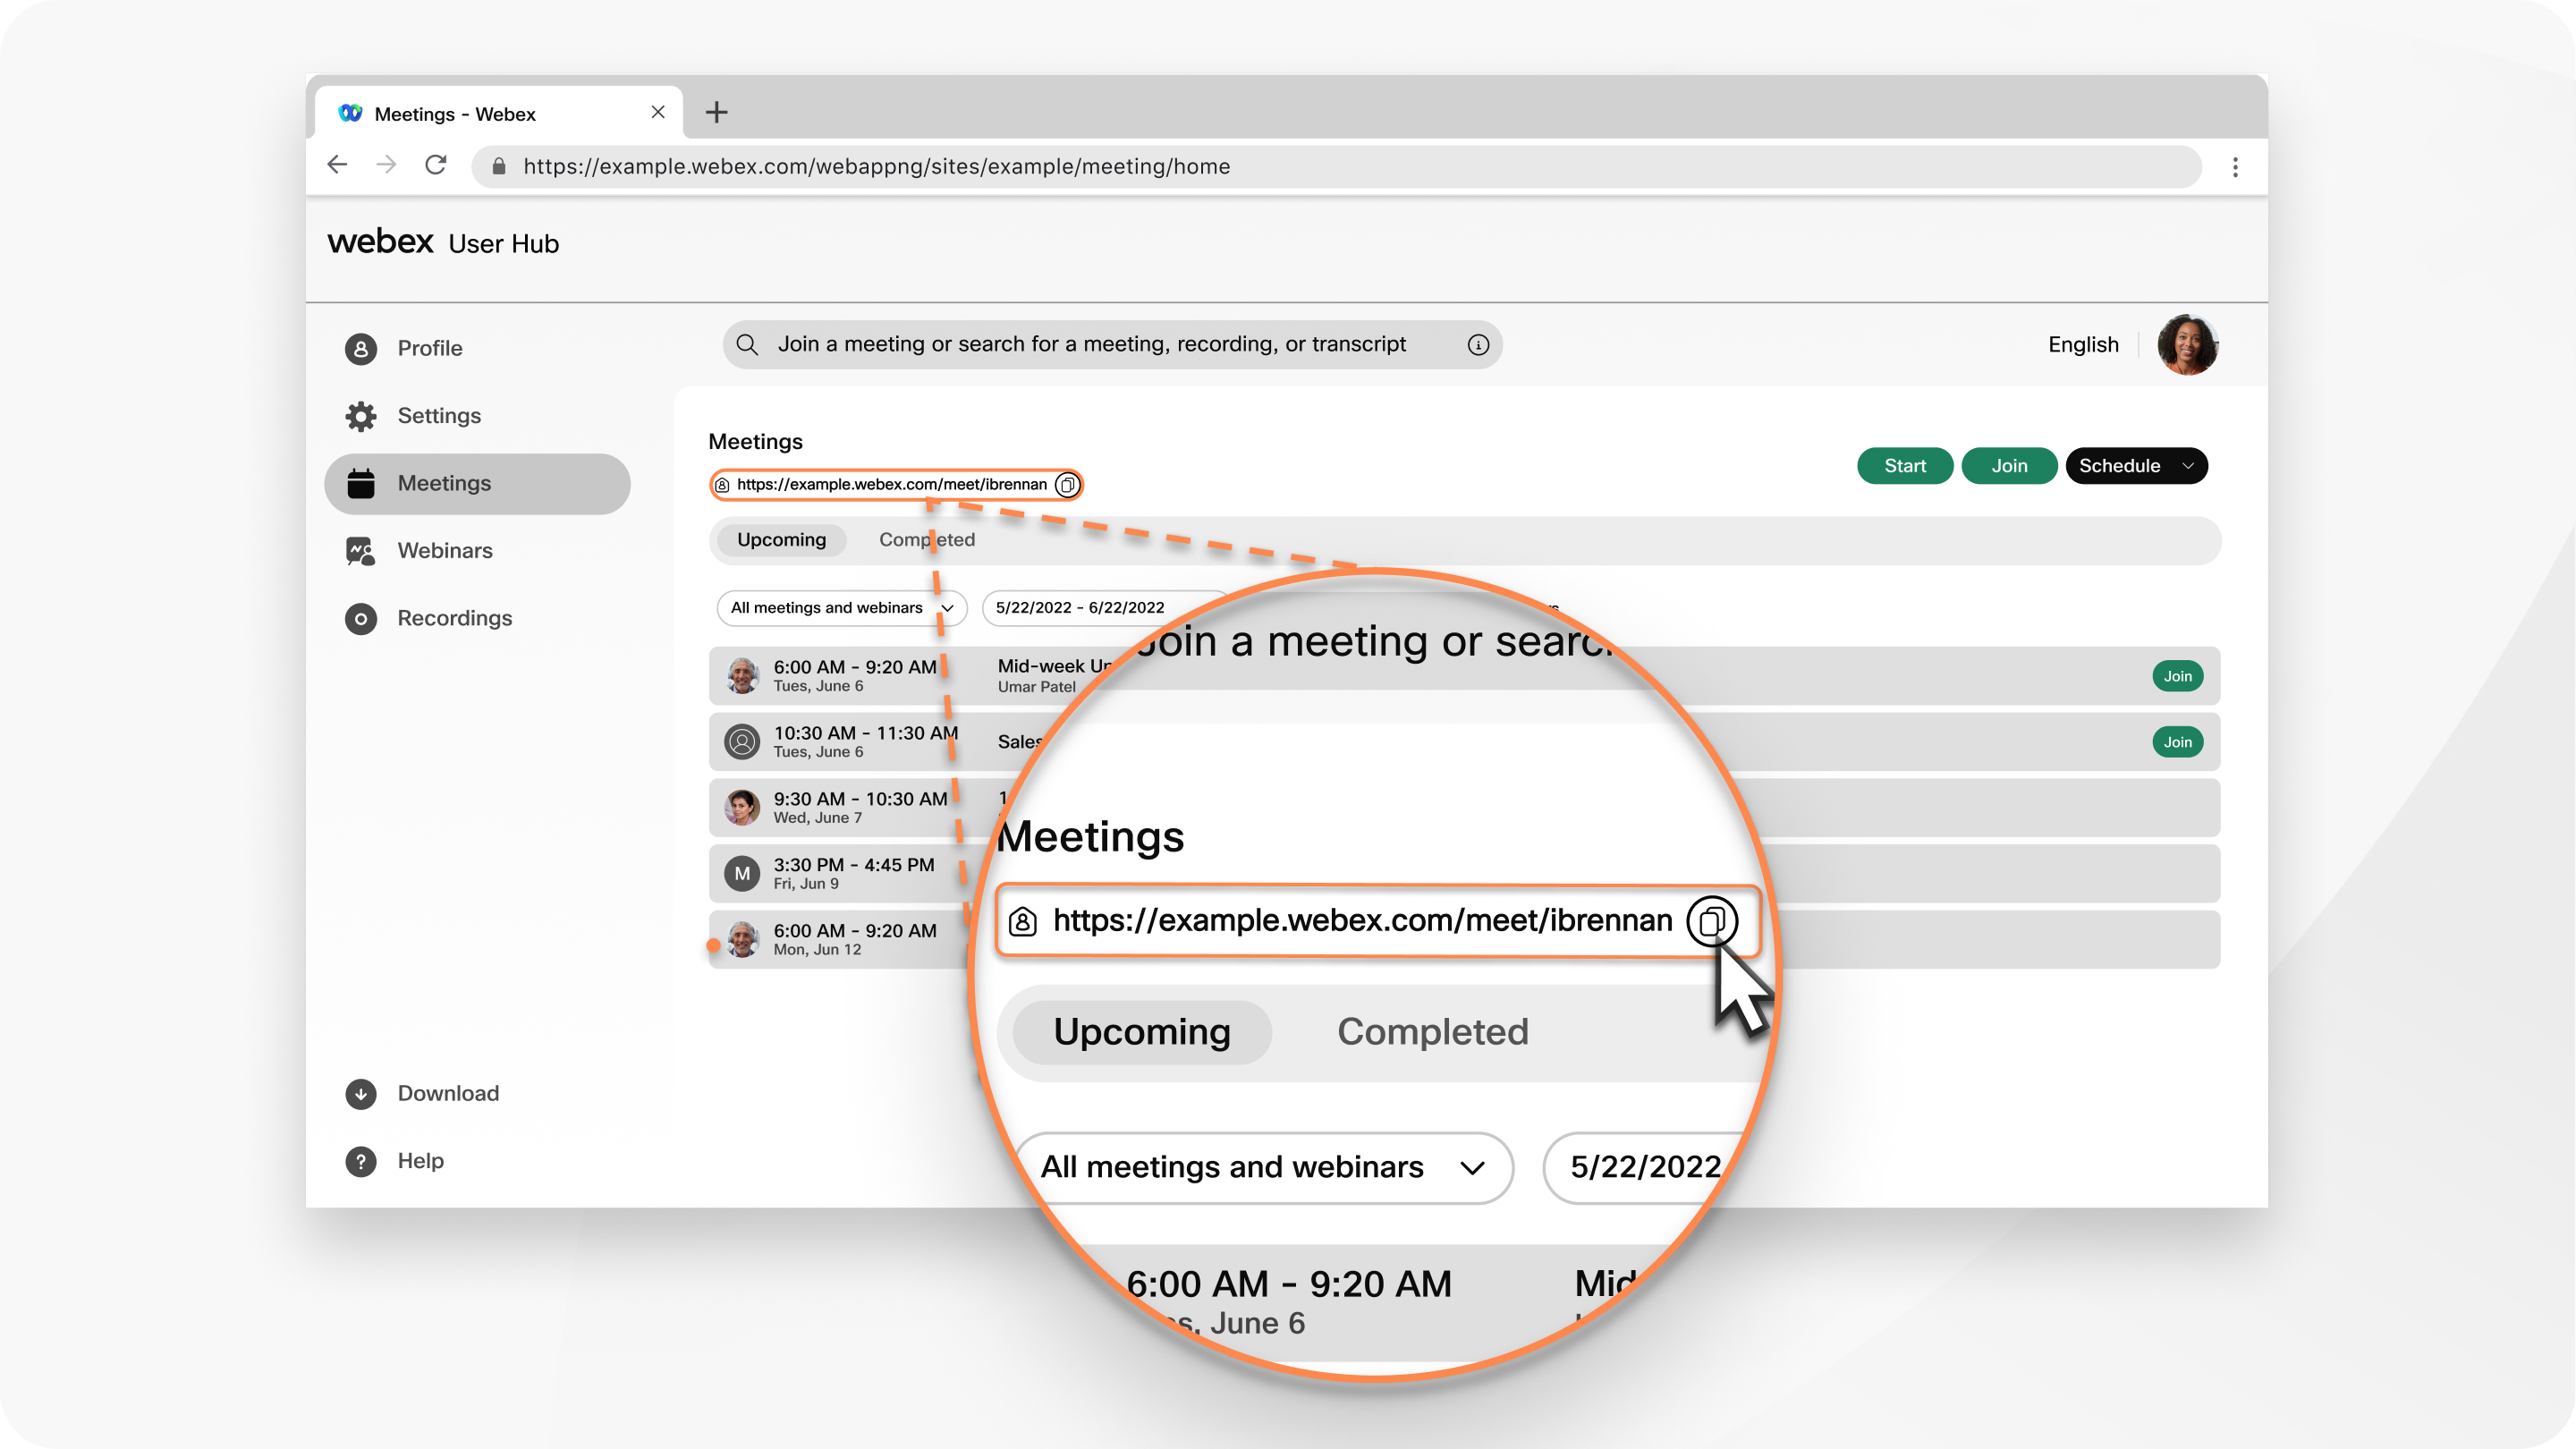
Click the Personal Room details icon next to your Personal Room URL to see other ways to join a meeting in your Personal Room, including how to join by phone or from a video device.
Click Copy next to your Personal Room URL to copy this information, so that you can paste it into an email or conversation.
Join a meeting
From the Join or search for a meeting, recording, or transcript text box, you can enter the number or Personal Room ID for the meeting, webinar, training session, or room that you want to join. After you enter the meeting or training session number, or Personal Room ID in the text box, select Join.
You can find the host's Personal Room host ID in the Personal Room link. For example, if the Personal Room link is company.webex.com/meet/jparker, the Personal Room ID is jparker.
You can find the 9-digit meeting number in your email invitation.
When joining a meeting you're not invited to, you must enter the meeting password before you can join.
After you join the meeting, the meeting details open in the Meetings page of User Hub. You can also join meetings in other ways to suit what works best for you.
Start or schedule a meeting
From the Meetings tab, you can start or schedule a meeting, or schedule a webinar.
Start a meeting
- Select Start to immediately start a meeting in your Personal Room.
- Mouse over the drop-down arrow and select Use desktop app or Use web app to choose how you want to join the meeting.
- At the bottom of the page, select Start.
Schedule a meeting
- Select Schedule a meeting or Schedule a webinar to go to the scheduling page and enter your meeting or webinar information.
- select the date, time, and duration of your meeting or webinar.
- At the bottom of the page, select Schedule to schedule your meeting or webinar.
Upcoming meetings
In the Upcoming section of the Meetings tab, you can see up to four upcoming meetings, webinars, or training sessions. If you're the host, select Start whenever you're ready to start your meeting. Select Join when it's time to join someone else's meeting.
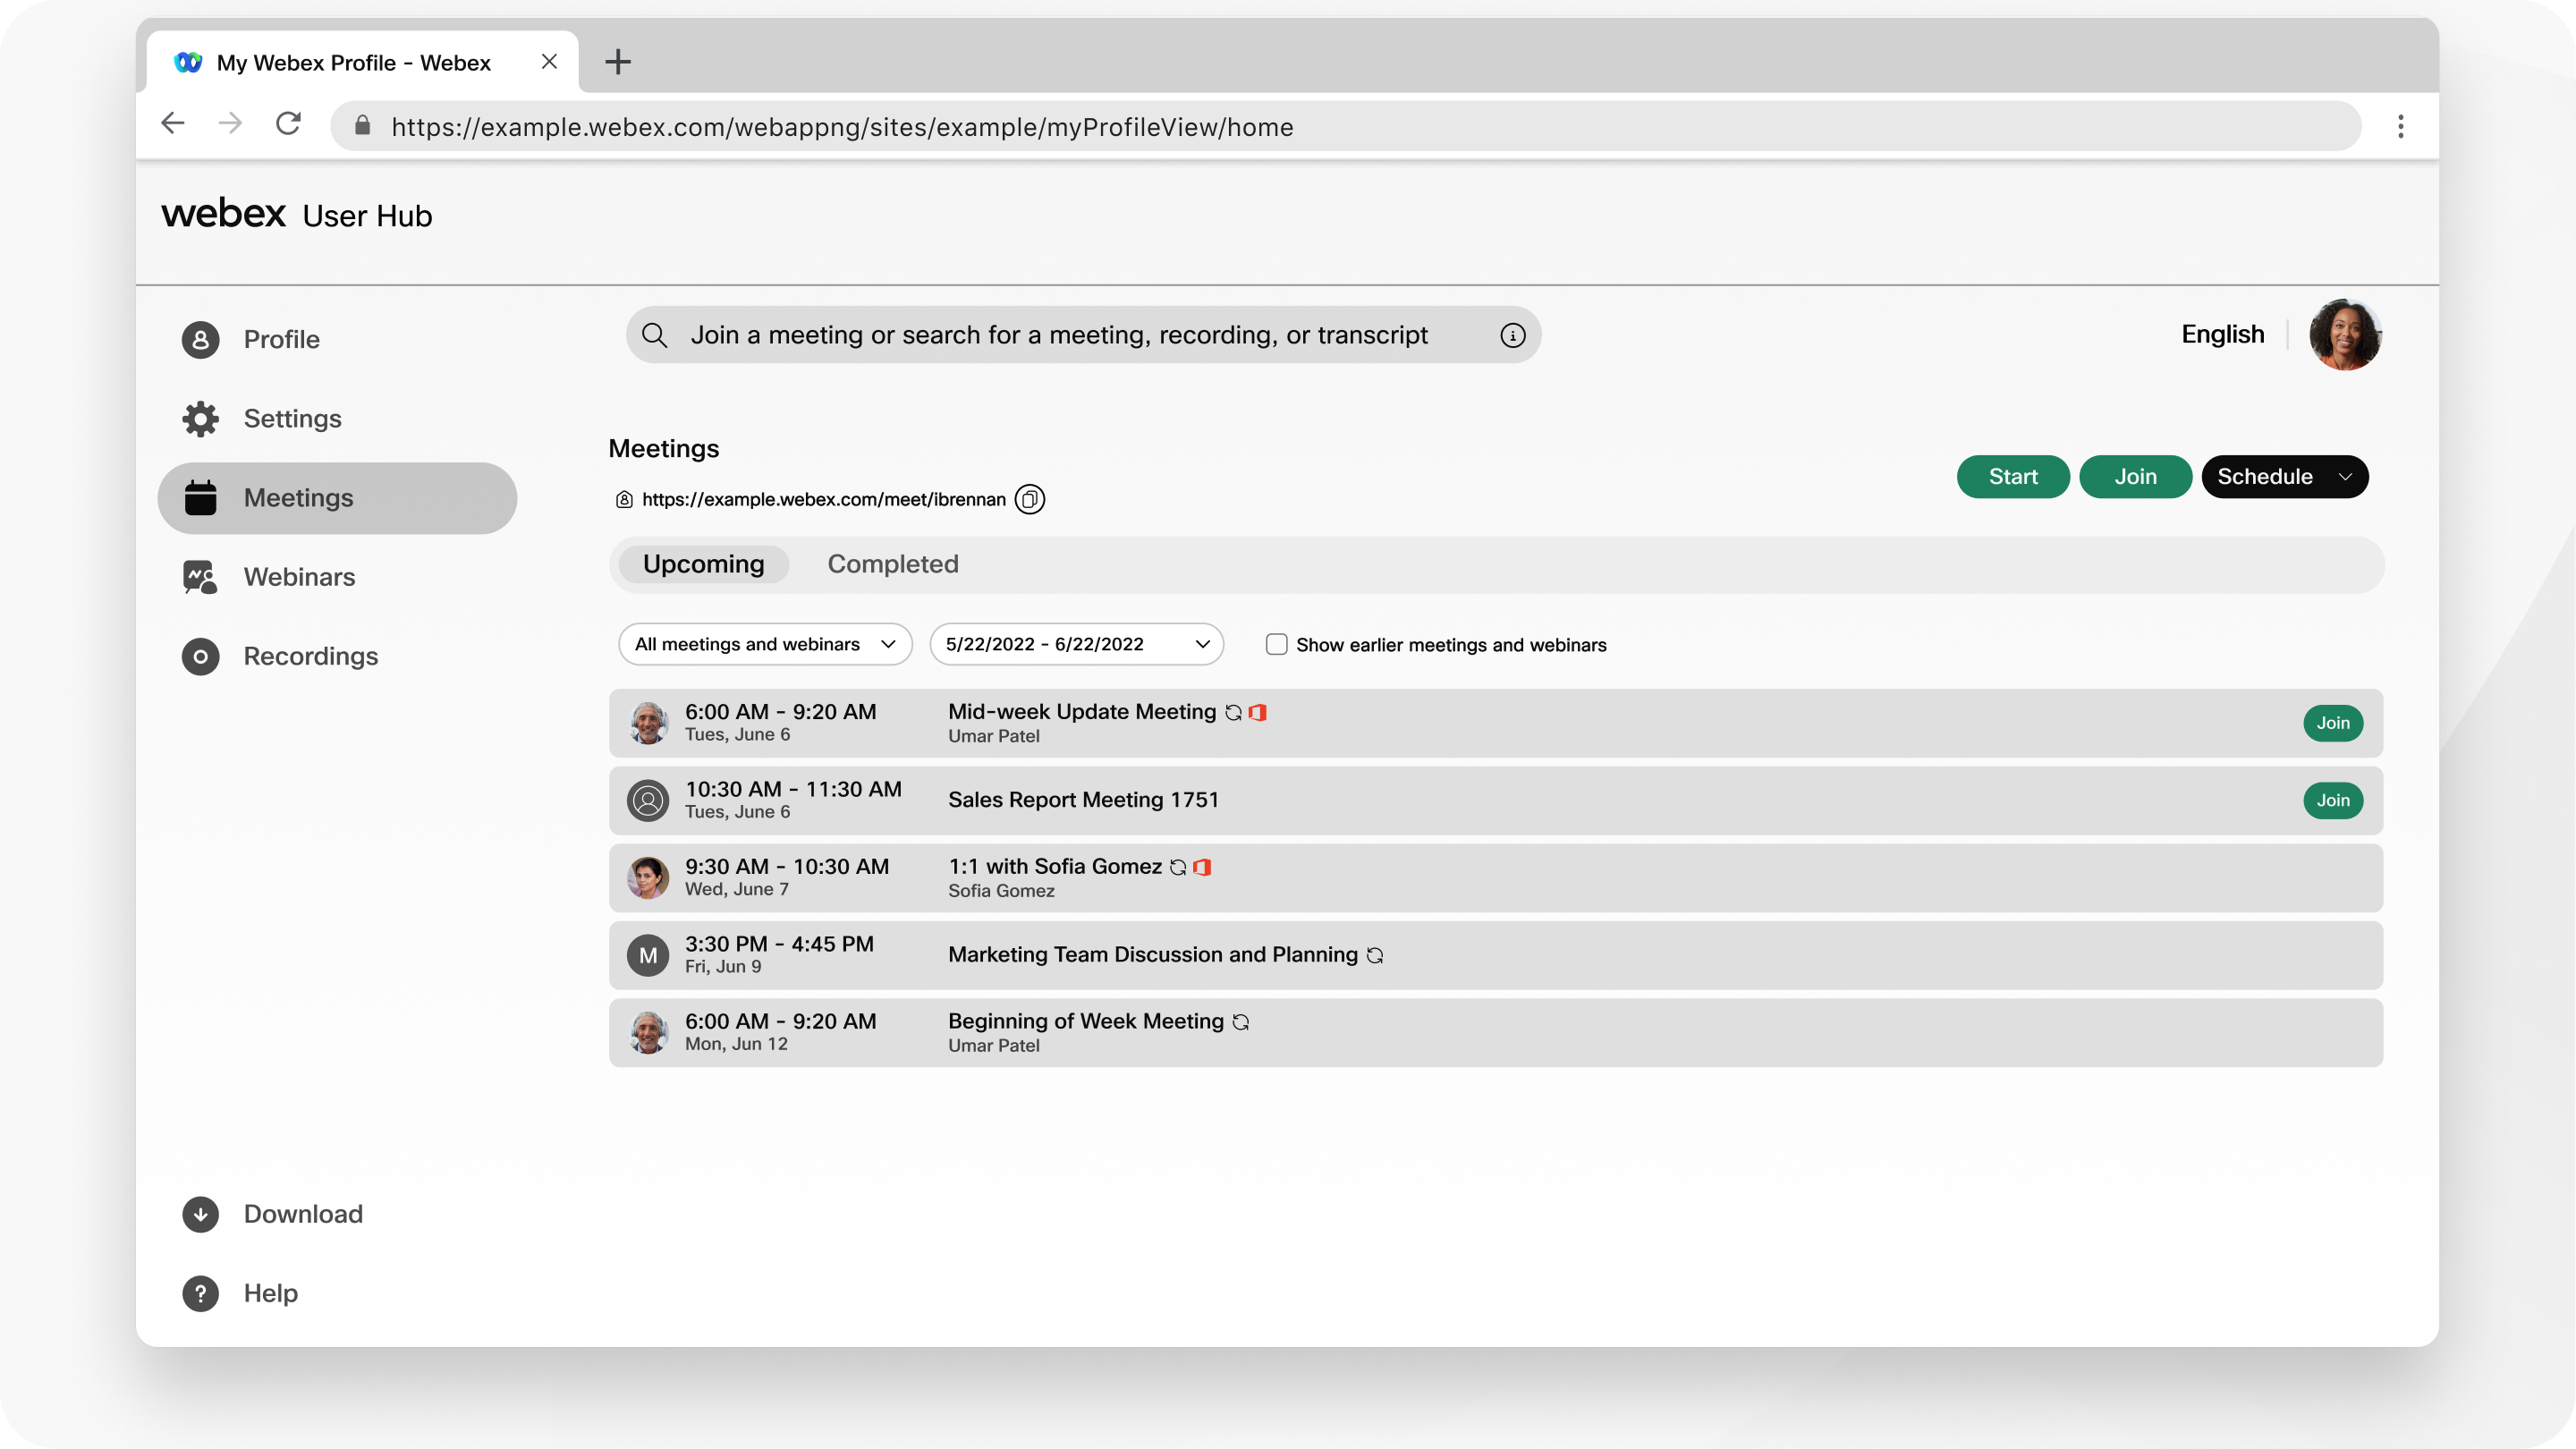
To see more upcoming meetings, webinars, or training sessions, select All meetings and webinars from the drop-down list. You can sort the list to show only your scheduled meetings, within a specified range of dates.
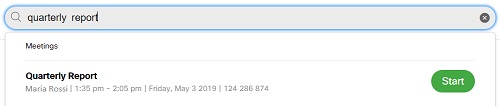
Search for meetings and recordings
Use the search bar at the top of the page to search for your upcoming meetings, recordings that you want to play back, or transcripts.
In the WebinarsWebinars tab you can Schedule a webinar or create a webinar series. You can also view a list of My webinar and Webinar series. For more information, see Get started with Webex Webinars.
Select Recordings from the navigation bar to access your recordings. The My recordings page lists the recordings for meetings, webinars, and training sessions that you hosted. Recordings that other hosts share with you also appear in the list.
When the meeting or webinar ends, Webex begins generating your recording. A Generating status appears next to the recording while Webex processes it.
For each recording, Webex provides the following information:
-
Name
-
Security settings
-
Date and time stamp
-
Duration
-
File size
-
Format
-
Registration
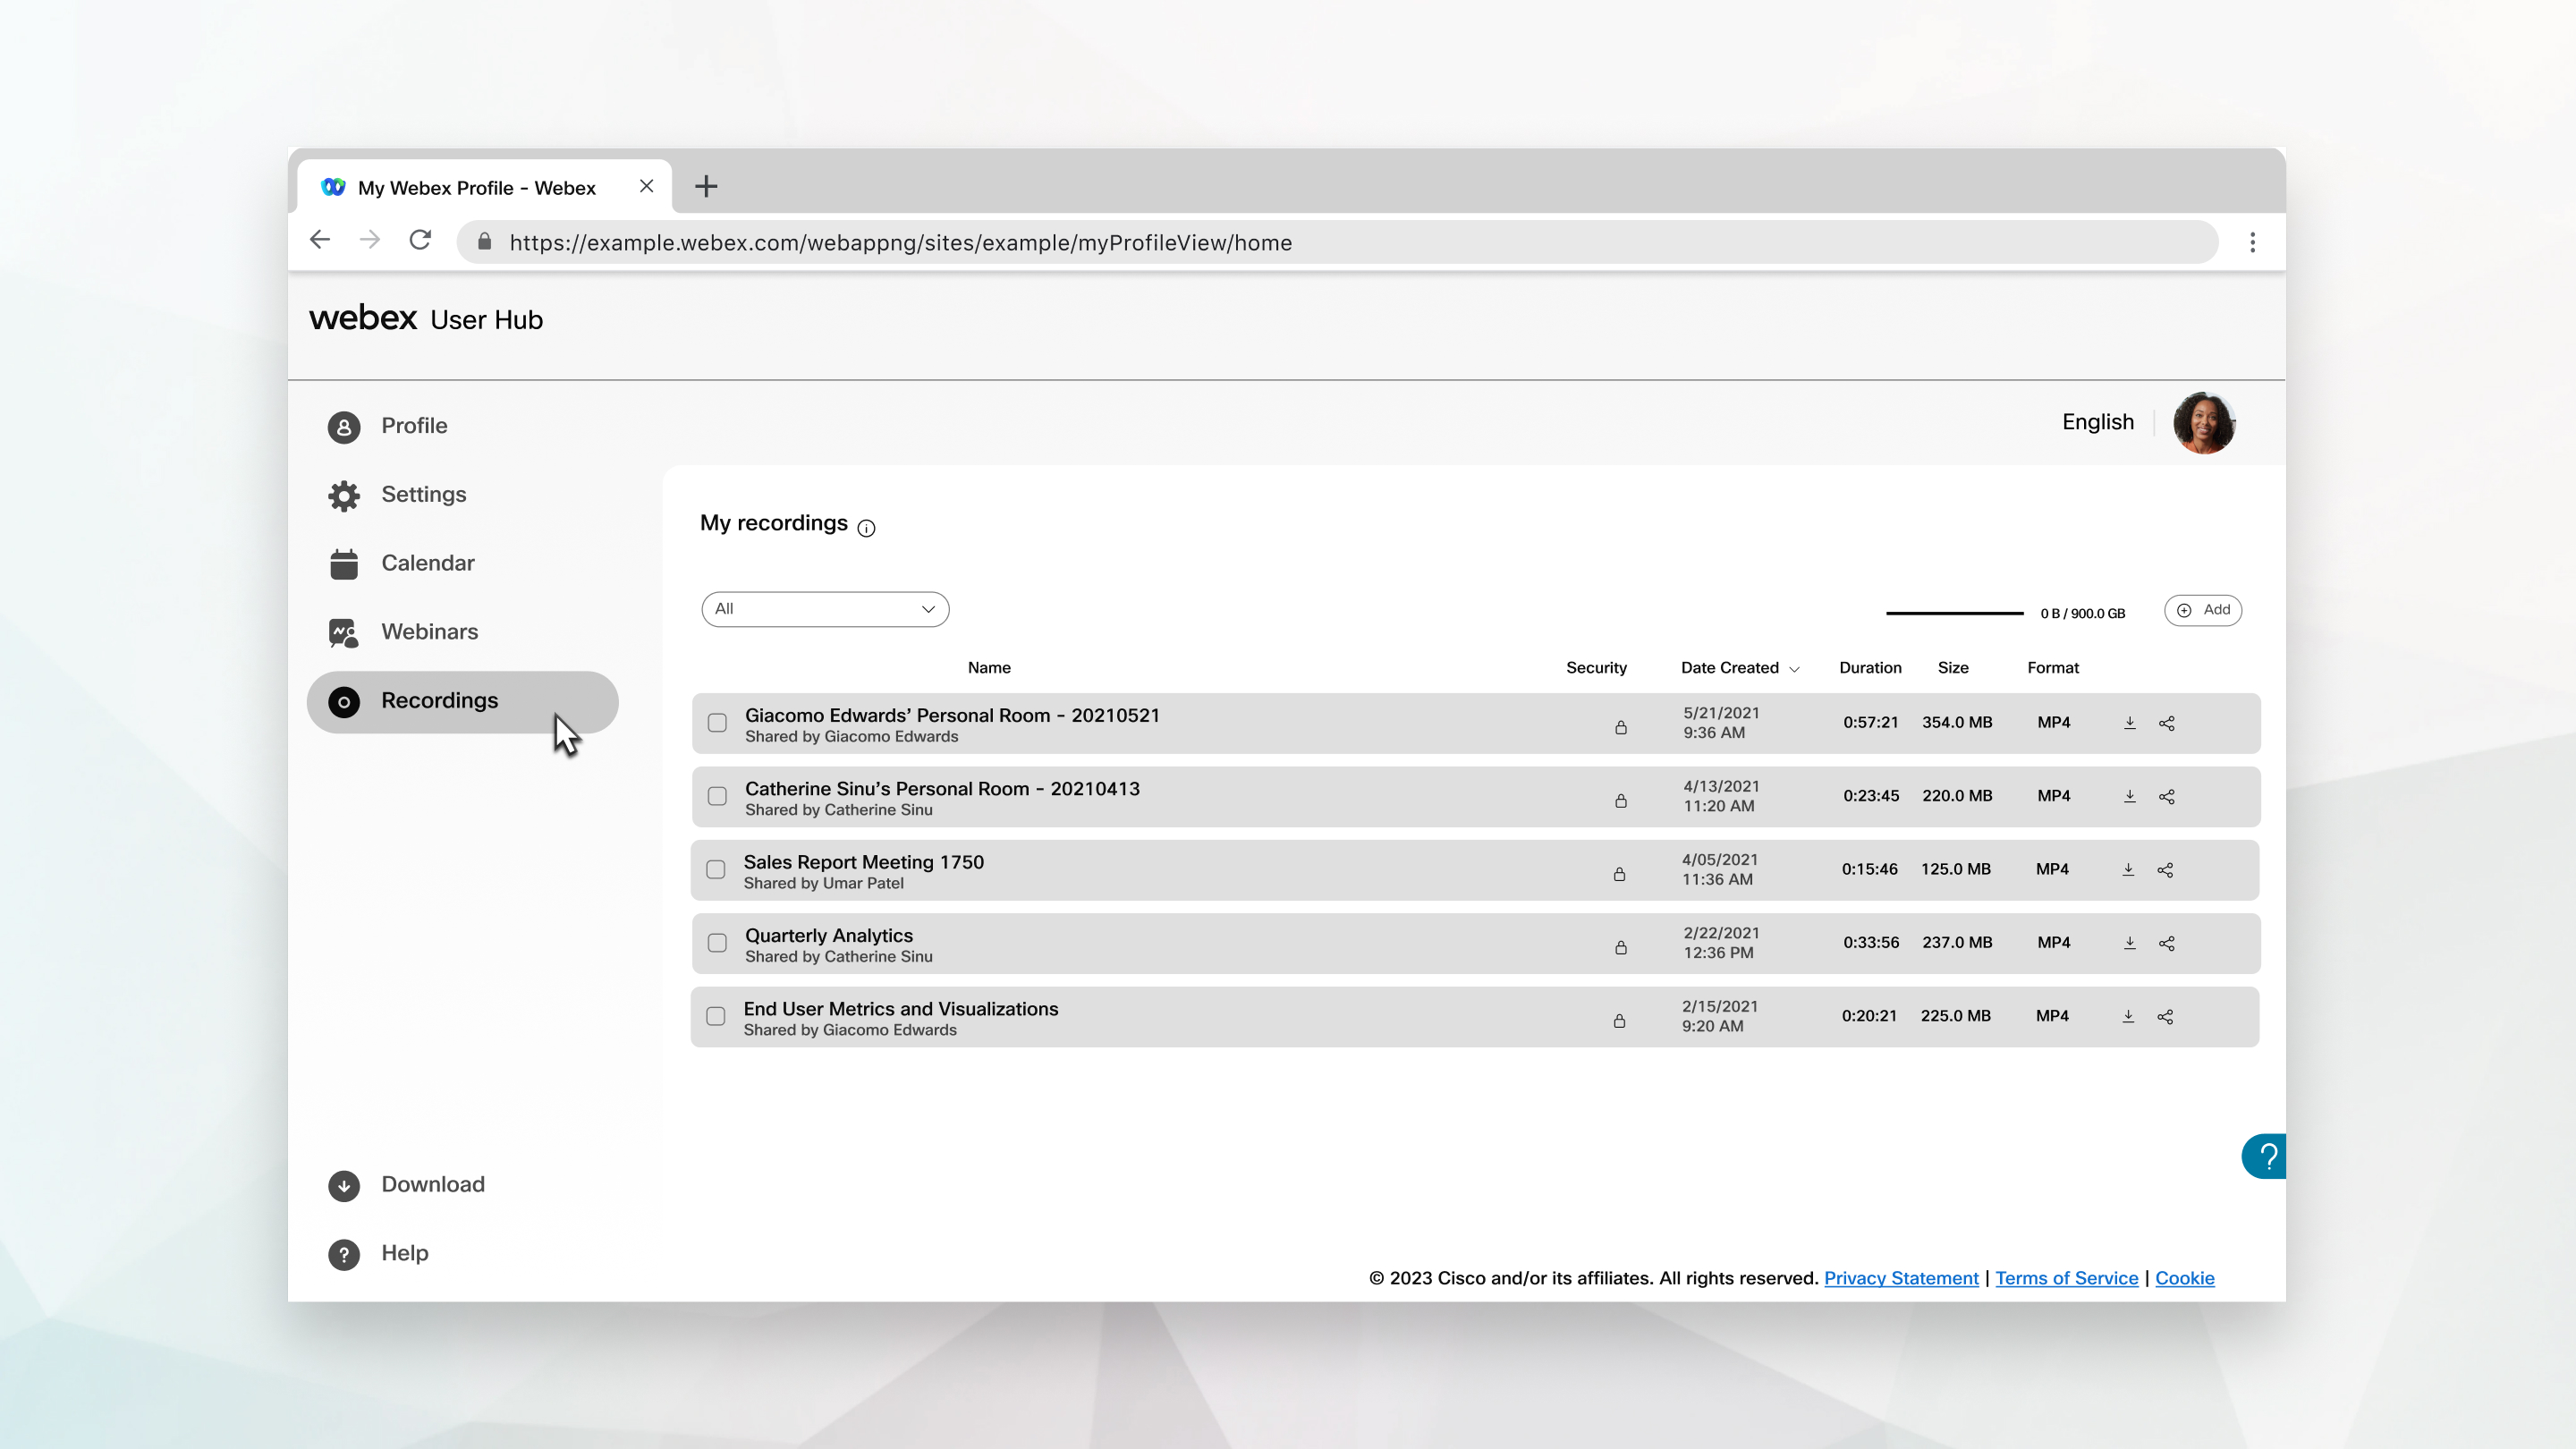
From the My recordings page, you can do the following:
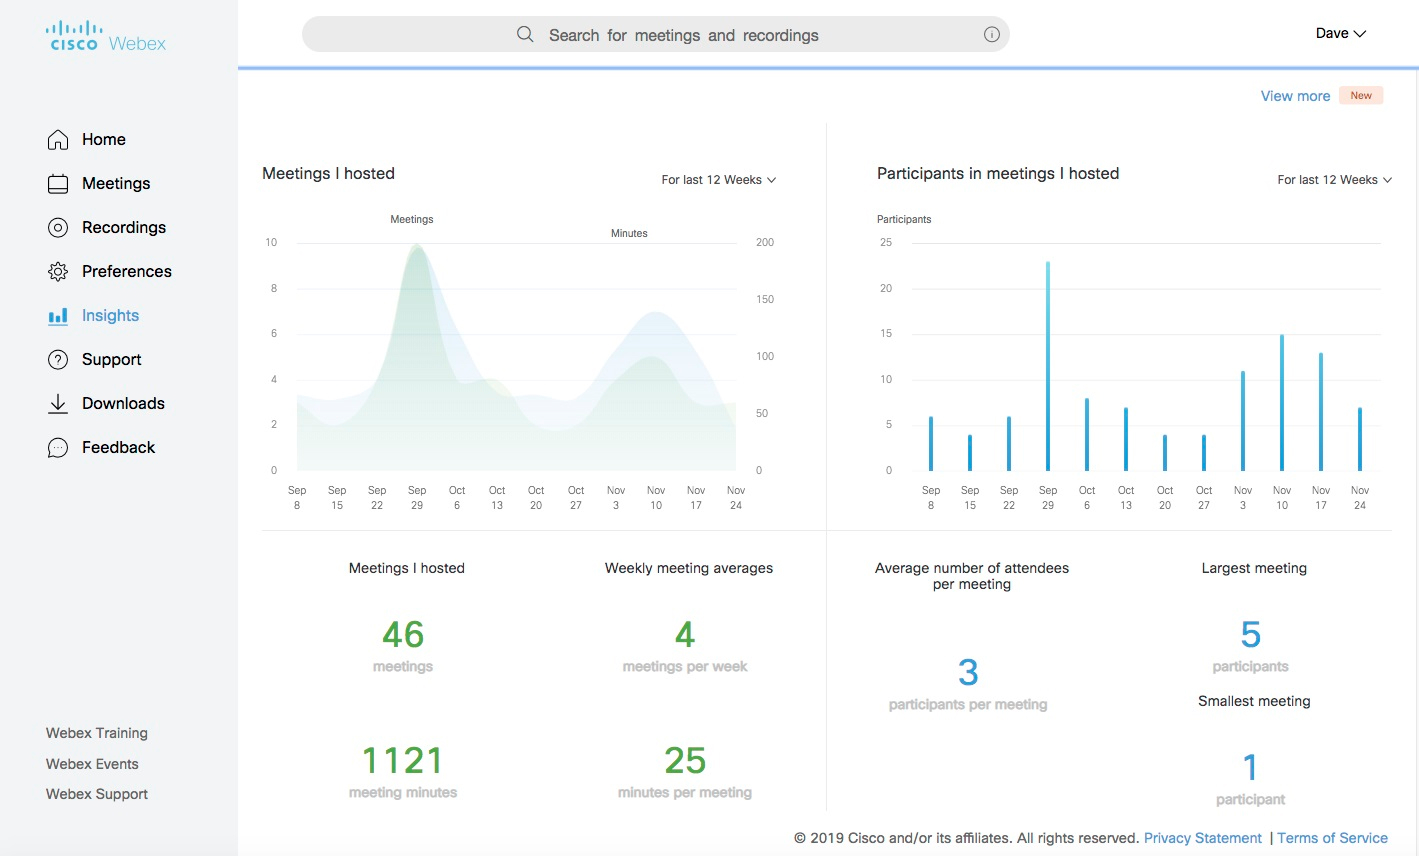
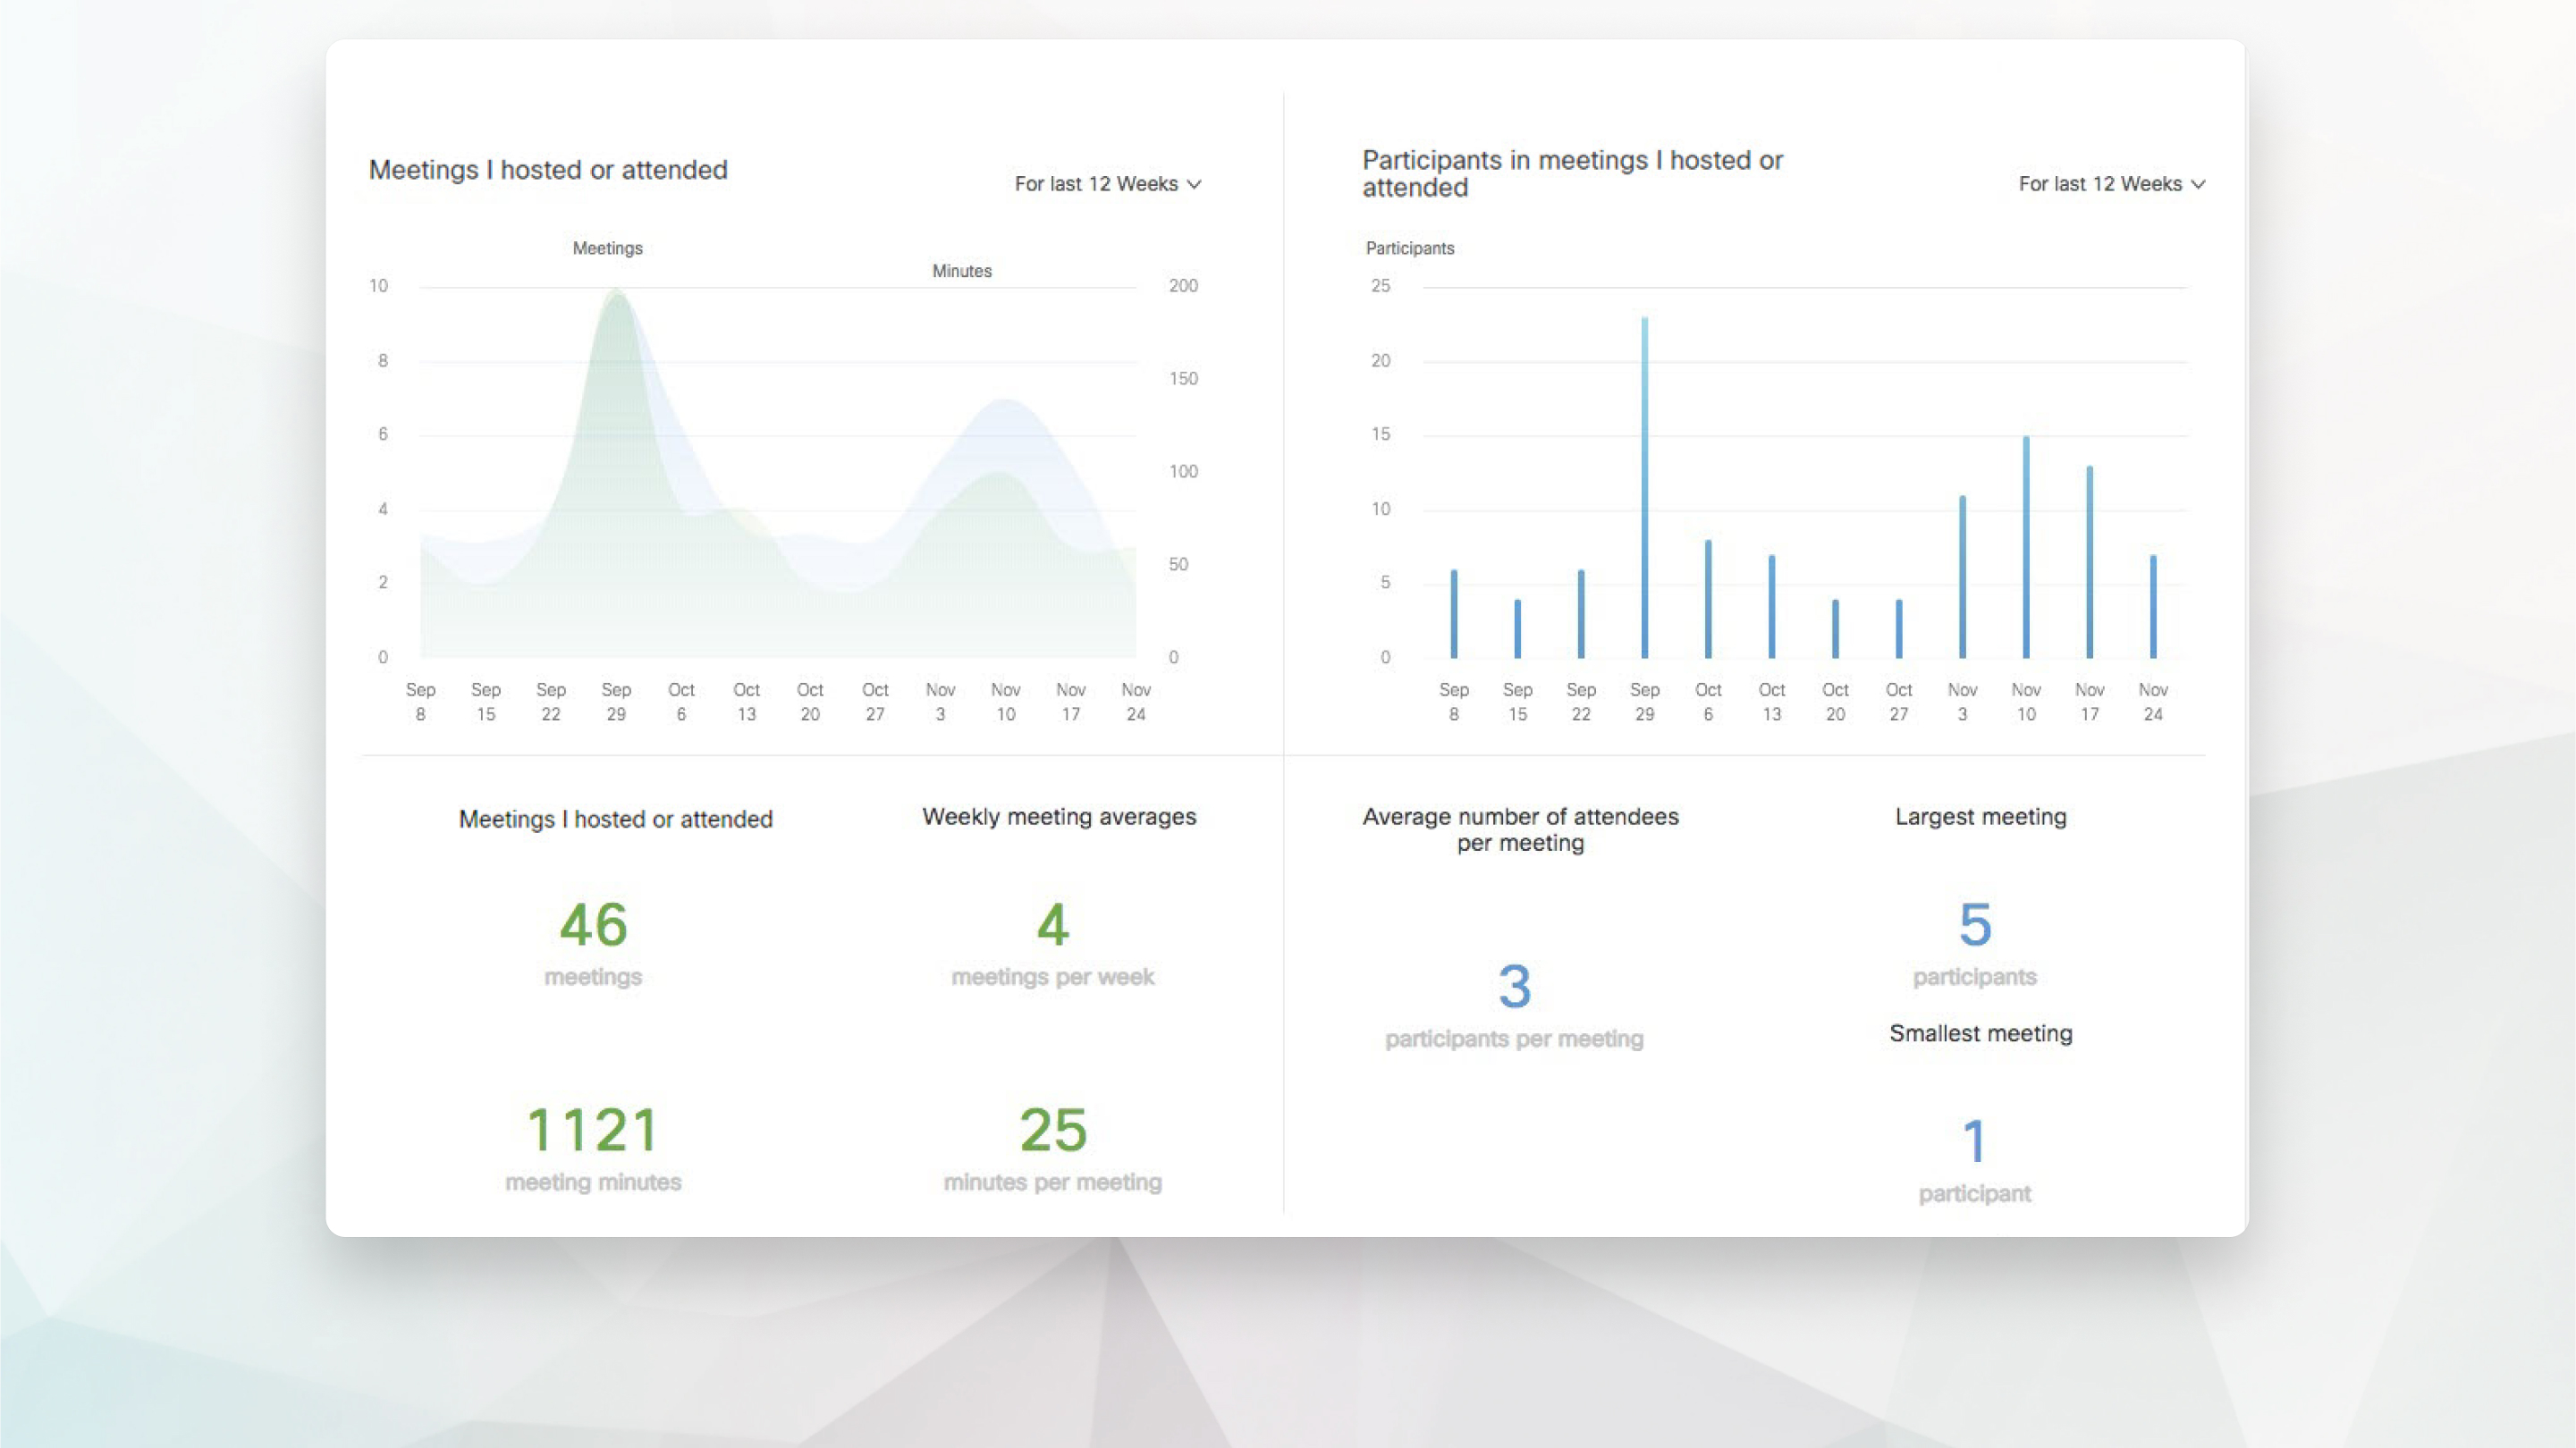
As meeting host, you can see a weekly summary of your meetings from the Insights section of your dashboard.
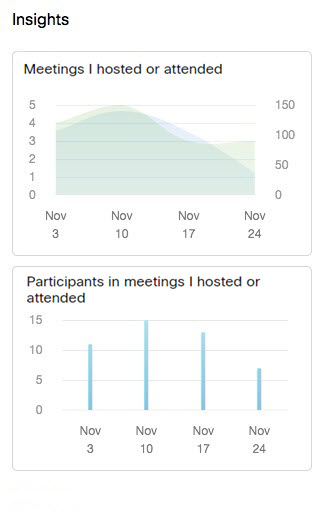
Select Insights from the More features list.
On the Insights page, see how many meetings you hosted, your total meeting minutes, your average number of attendees per meeting, and more.
When you're in User Hub, on the bottom right of the screen, you can click Webex
AI Assistant
 to ask for help on any User Hub features.
You can also select Help to see recommended articles from Webex Help Center. You can search for help articles, look at release notes, watch tutorials, and contact a support representative.
Customized support and contact information may appear for Control Hub-managed sites or for Site Administration-managed sites that are linked to Control Hub. Contact your site administrator for more information about your site.
| 1 |
Sign in to User Hub. |
| 2 |
Click your profile picture, and then select . Depending on your Webex plan, My reports may not be available. |
| 3 |
Select the report you want to generate.
|
| 4 |
Specify your search criteria and select Display Report. |
| 5 |
Click a link to see the report details. |
| 6 |
To export the report data in comma-separated values (CSV) format, select Export Report or Export. |
You can review a full list of Webex Meetings features in User Hub.
Audio and Video Preferences
If you select the audio connection type, Other teleconference service (in ), the setting won't apply to Personal Room meetings if Webex Personal Conference is selected as the default Meeting type in .
Planned Updates
These are the limitations and features to be updated.
-
Settings– Setting changes made in the Audio and Video tab and the Scheduling tab apply to both Modern View and Classic View. However, setting changes that are made in Classic View do not apply to Modern View.
No Planned Updates
These are the limitations and features that won't be updated.
-
Customer types– Meetings Server and Cisco Unified MeetingPlace sites.
-
Insight– FedRAMP-authorized Meetings sites don't support meeting insights, this includes the Weekly Meeting Report tile, and the Insight page.
-
Site Settings– Sites that have the Webex web app disabled are no longer able to keep this setting. Enabling the web app allows Modern View users to join meetings regardless of their device, platform, or operating system. Modern View users have access to the web app without exception.
-
Custom Links– Custom Links will not be available, but site administrators can customize the Support and Downloads links to redirect to their own pages.


