Webex App | Reshare files from Microsoft OneDrive or SharePoint Online
 Feedback?
To update files shared via Microsoft OneDrive or SharePoint:
-
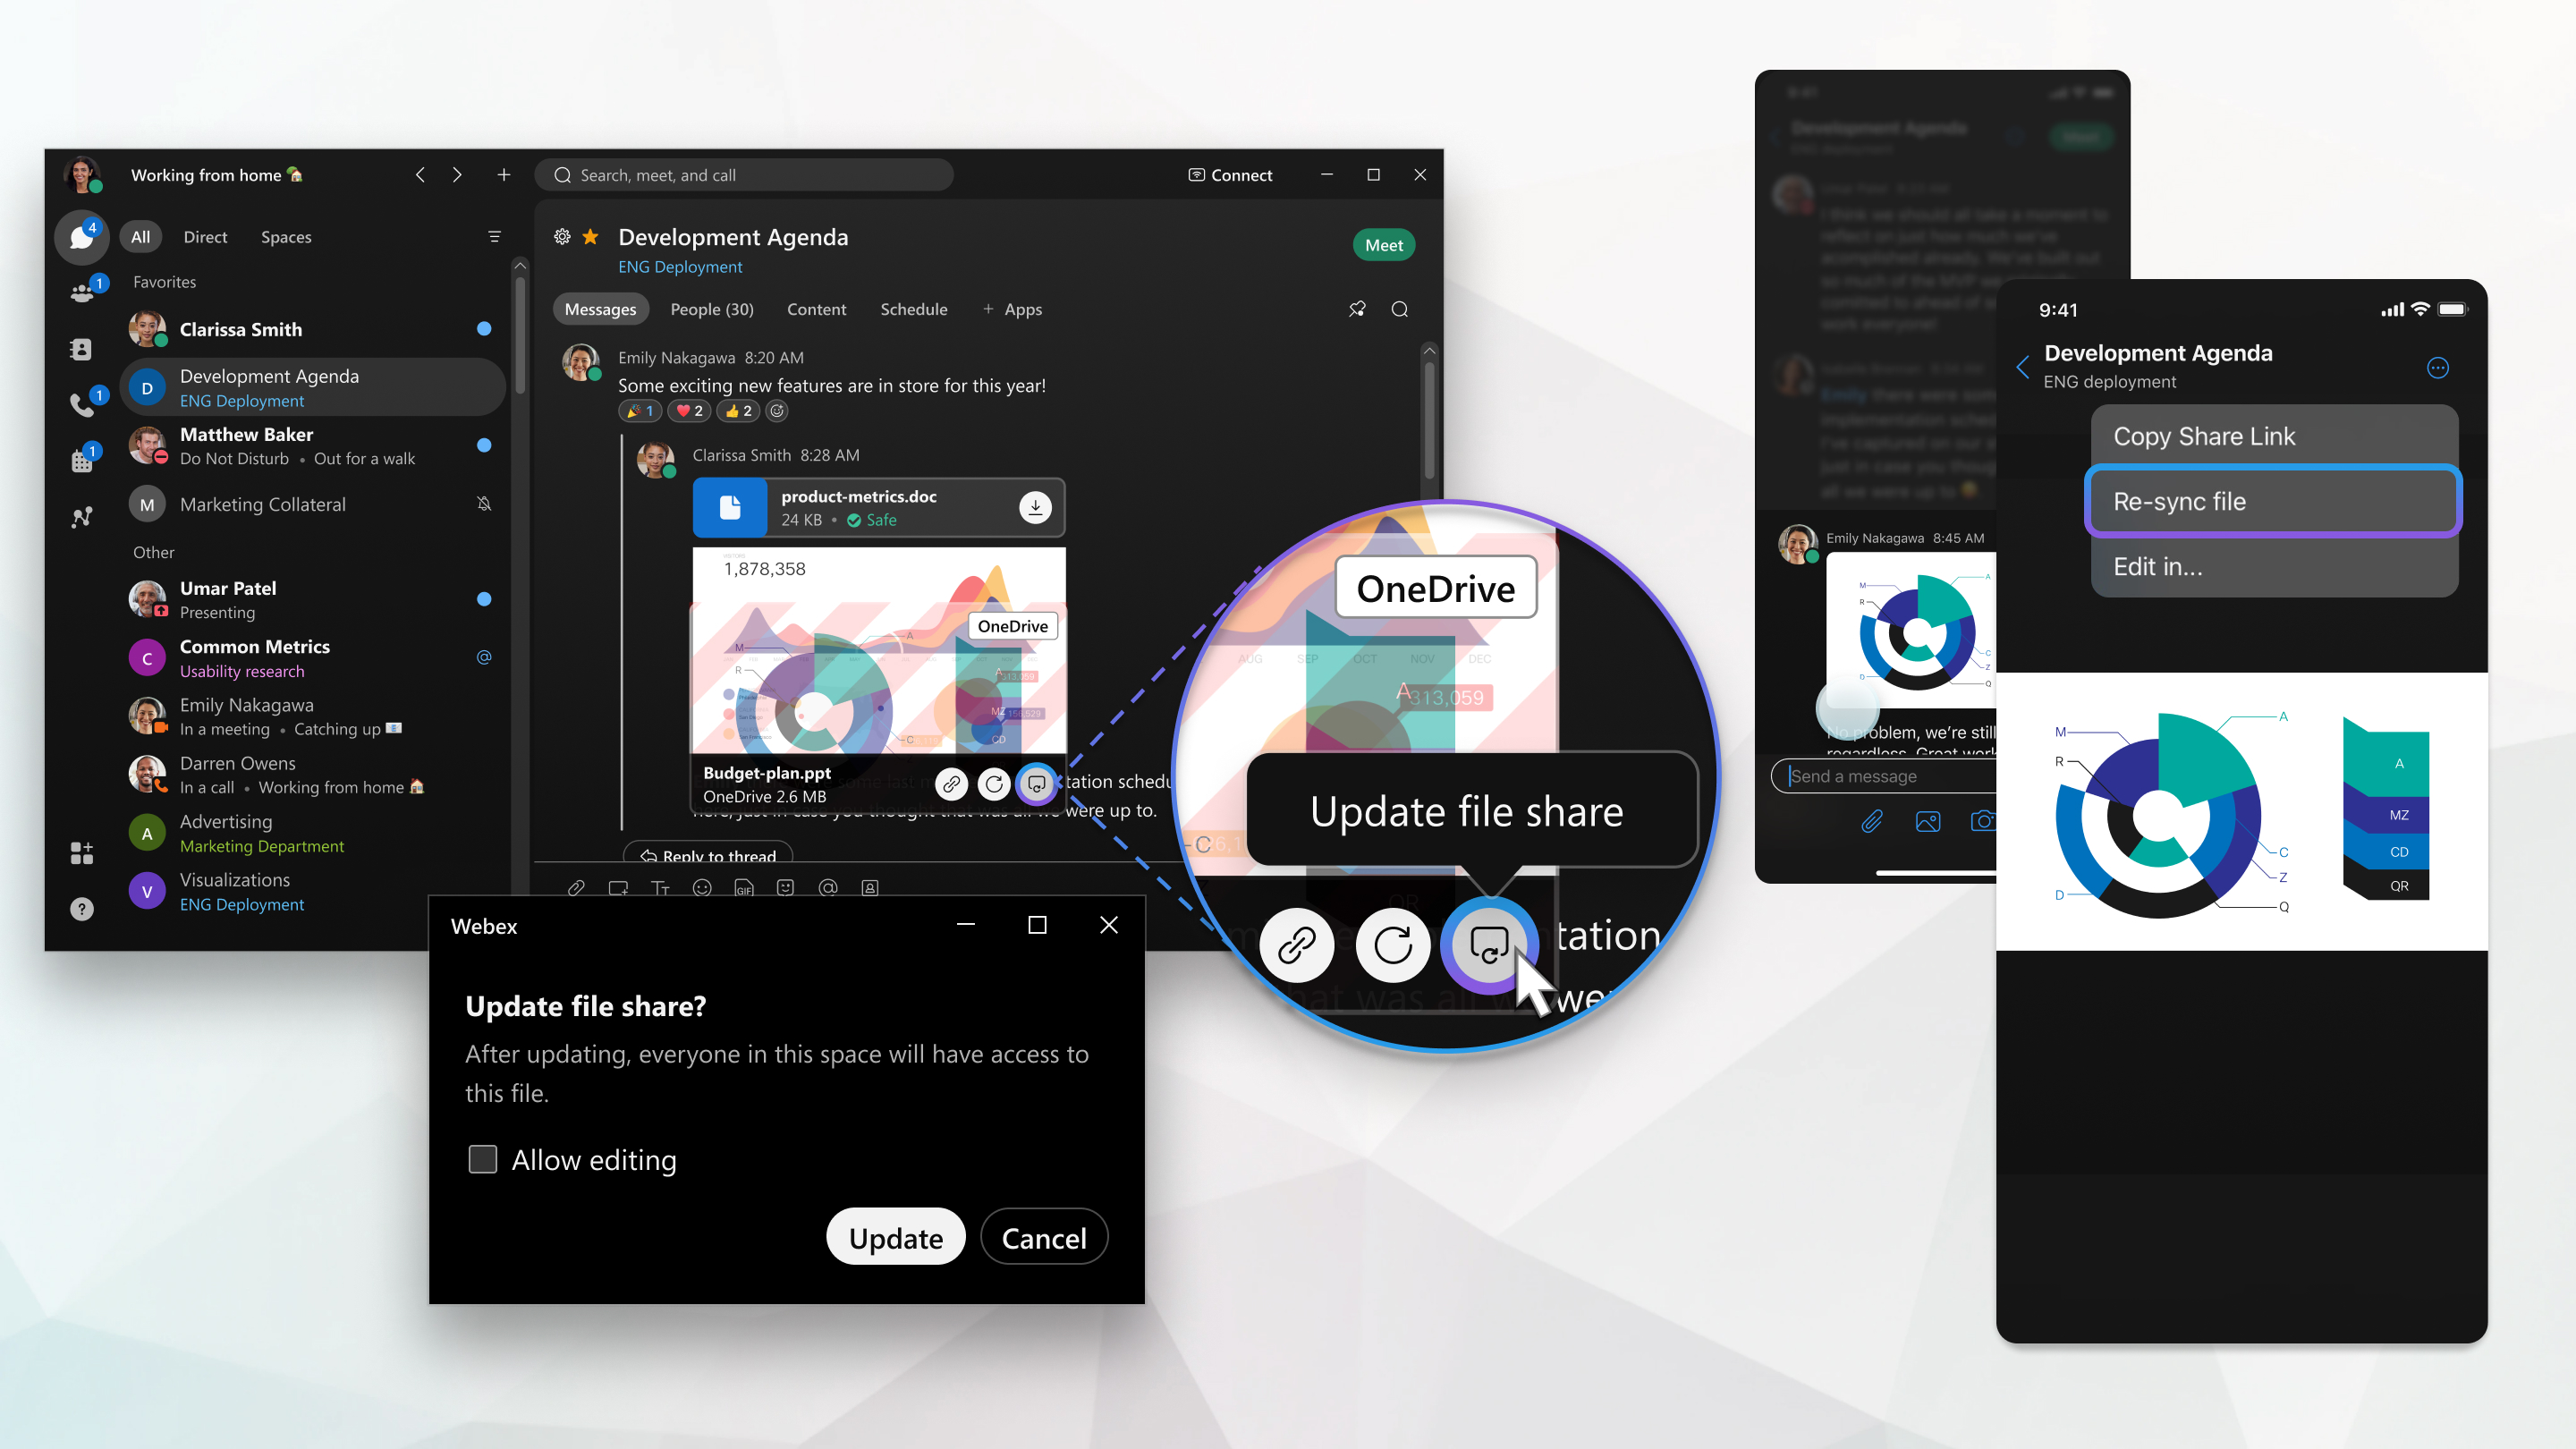
Go to the file in the space, hover on the file and click Update file share
 .
.
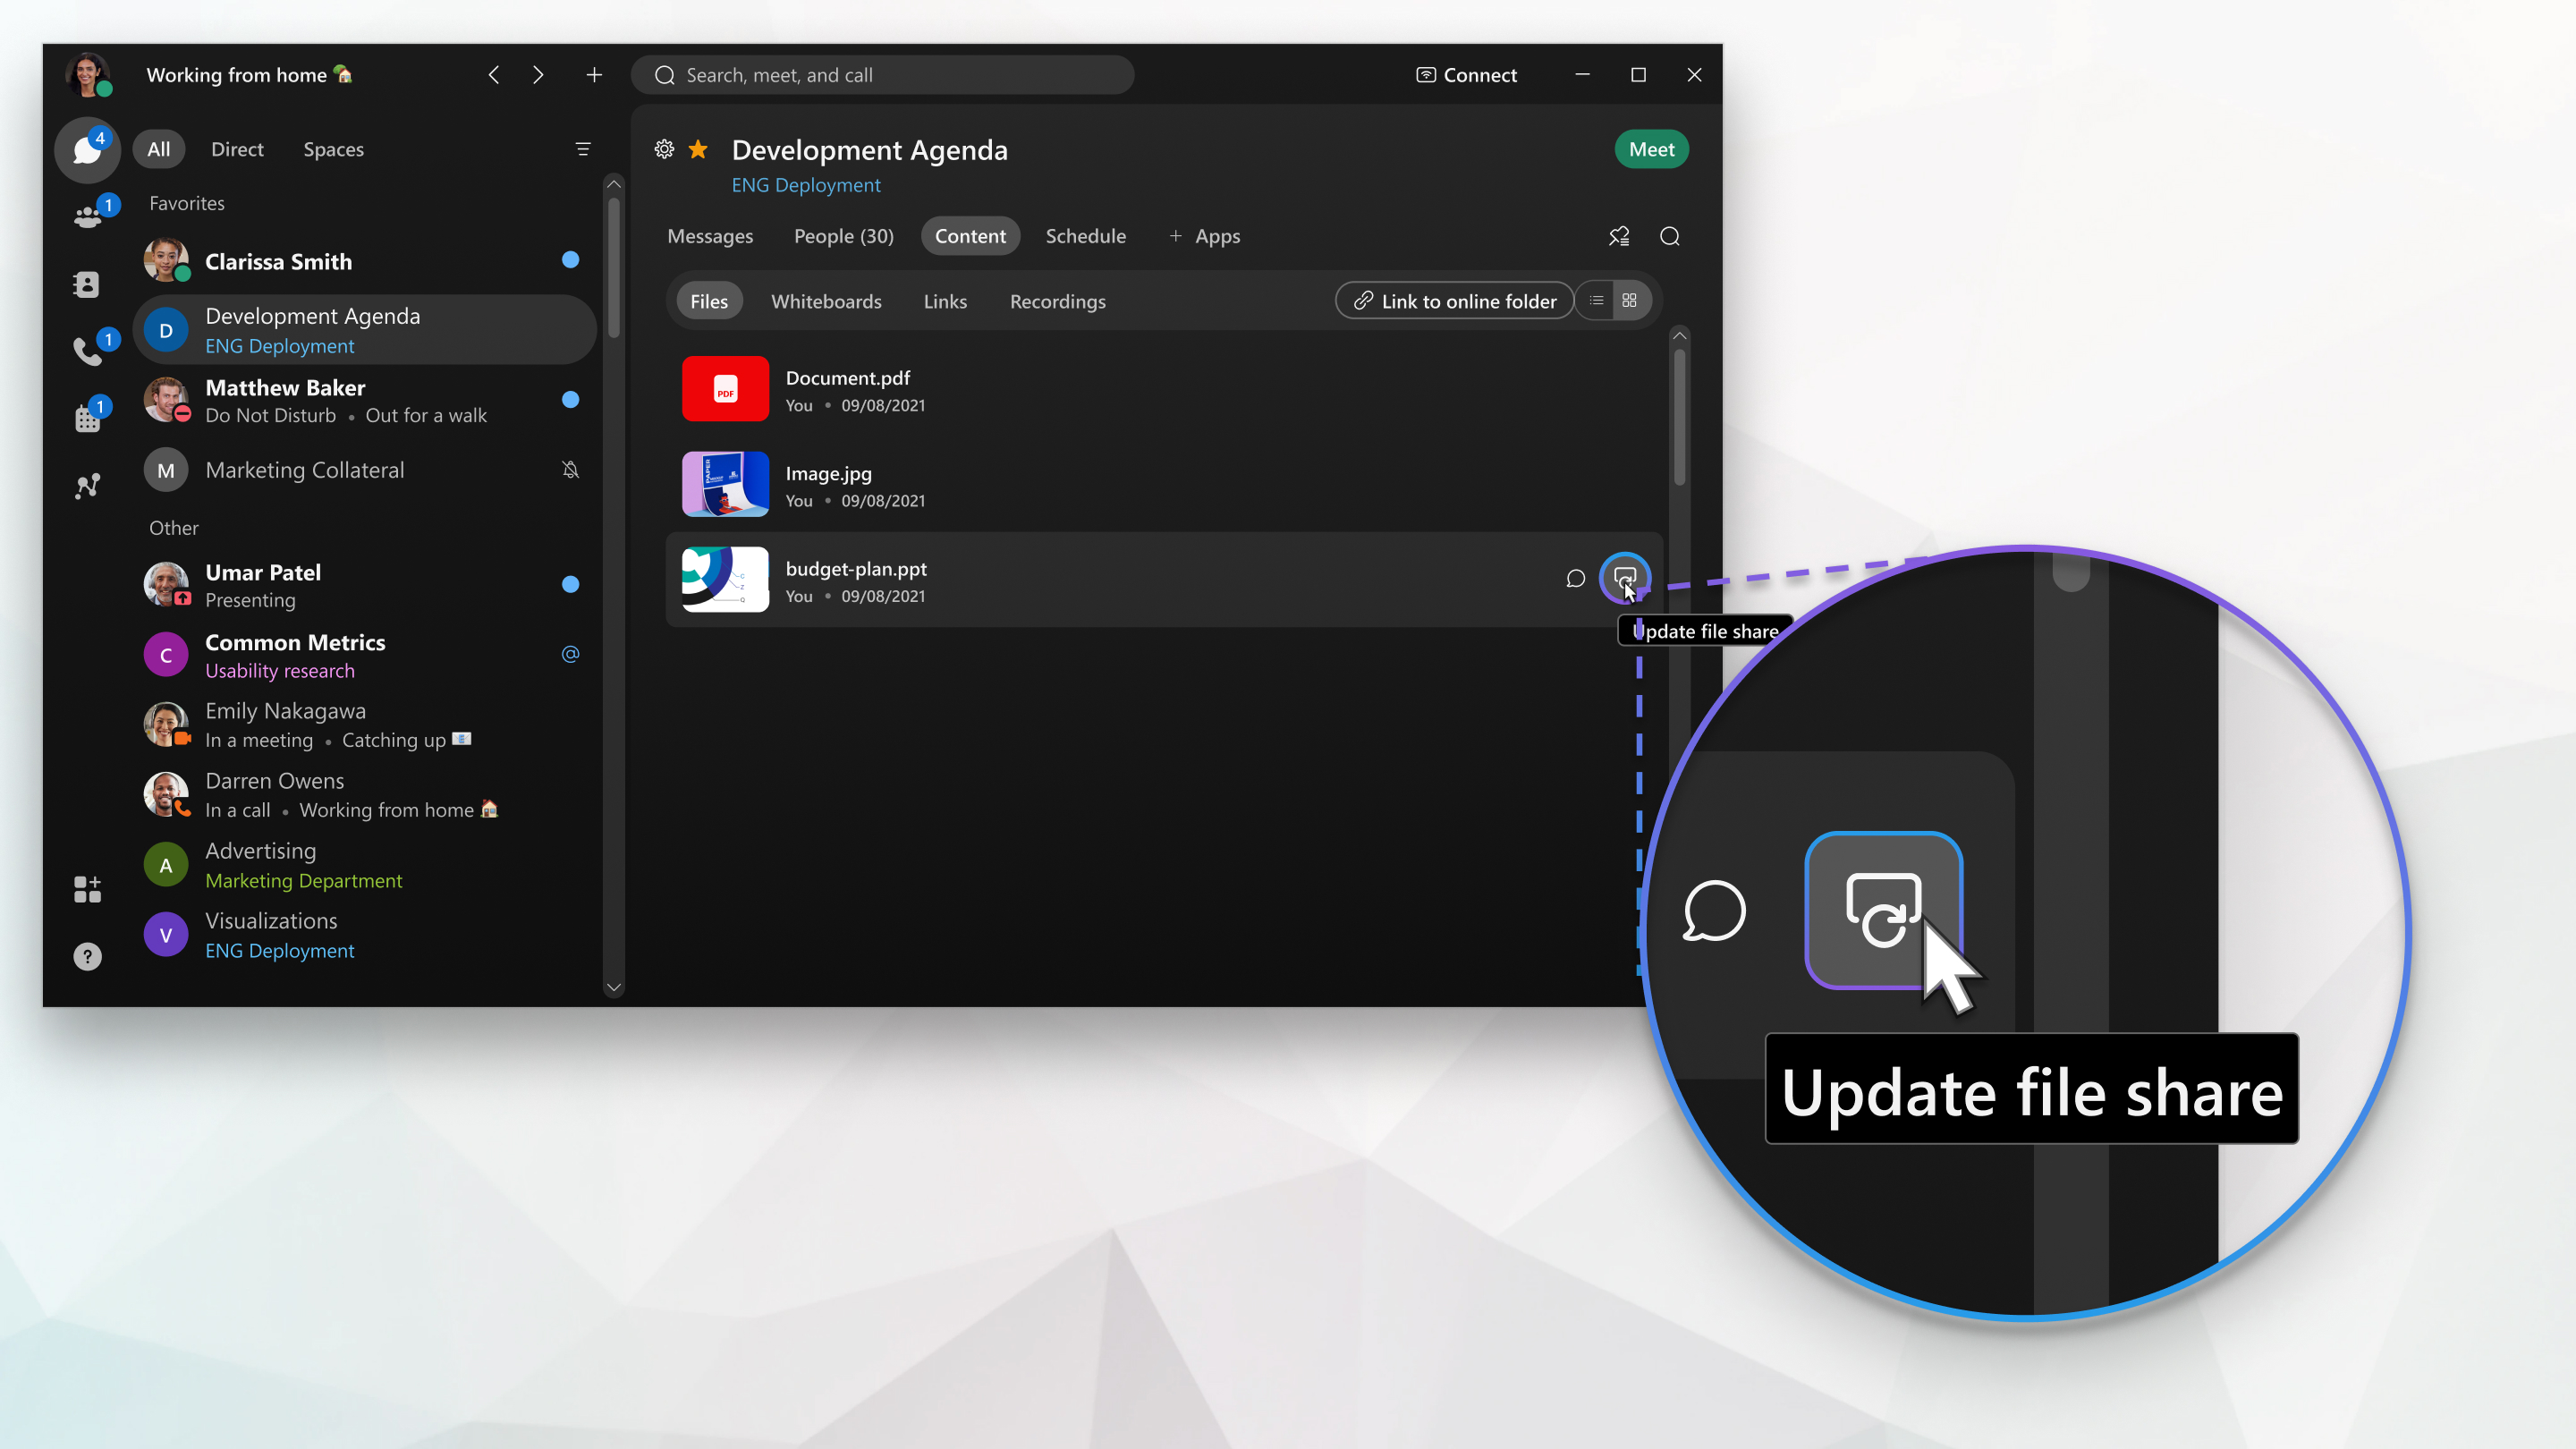
You can also click Content and then select Files. You can view files in List view
 or Grid view
 . Hover over the file and click Update file share
 .
.
- In the pop-up window click Allow editing if you want to give people permission to edit the file, and then click Update. When you update the permission everyone in the space has access to the file.
You can reshare a OneDrive or SharePoint Online file that has previously been shared in a space. When people don't have access to the file, they see the file name but they they can't edit, view, or preview the file.
| 1 |
In the space, tap |
| 2 |
Perform the following:
|
| 3 |
In the pop-up window, select Allow editing if you want to give people permission to edit the file, and then tap Update. When the permission is updated, everyone in the space will have access to the file. |

 , select
