
Thanks for your feedback.
Use digital pan, tilt, and zoom on your Cisco Desk Camera
 Feedback?
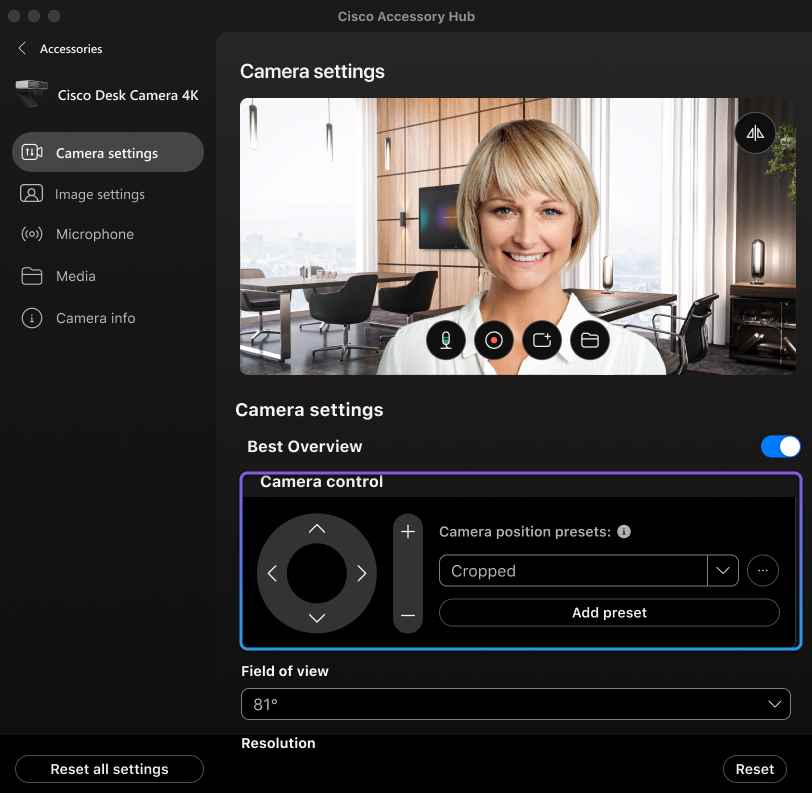
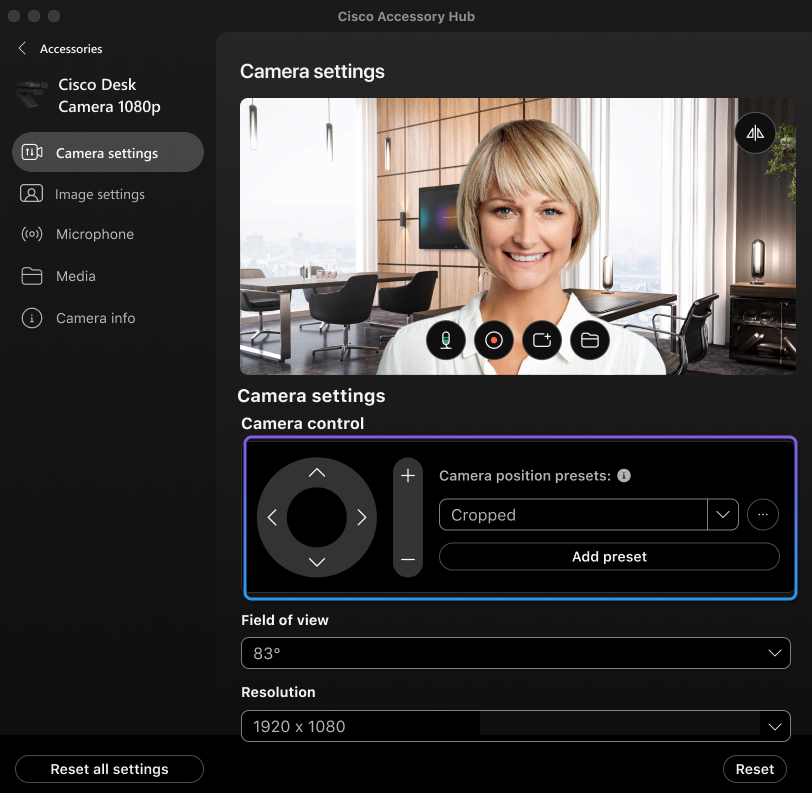
Use the Camera Control tool on the Cisco Accessory Hub desktop app to change the digital pan, tilt, and zoom settings.
Before you begin
Make sure that you turn off the Best Overview feature. You can't change the camera position settings when Best Overview is turned on.
| 1 |
Open the Cisco Accessory Hub desktop app. |
| 2 |
Click your camera on the Accessories tab to open the accessory settings. |
| 3 |
On the Camera settings tab, use the Camera control tool to adjust the settings.
|
| 4 |
If you want to clear your configuration on the Camera settings tab, click Reset. A reset on the Camera settings tab clears all customization on this tab, including the camera position presets. |
Presets of camera position allow you to quickly switch to the settings for specific use cases, such as video meeting, live streaming, and video recording in home office or in work spaces.
Use the Cisco Accessory Hub desktop app to configure camera pan, tilt, and zoom settings and save them as presets. You can save up to 3 presets for later use.
The presets don't save the Field of view, Resolution, and Frame rate settings.
Before you begin
Make sure that you turn off the Best Overview feature. You can't adjust the digital pan, tilt, or zoom settings when Best Overview is turned on. You can save up to three presets.
| 1 |
Open the Cisco Accessory Hub desktop app. |
| 2 |
Click your camera on the Accessories tab to open the accessory settings. |
| 3 |
Go to the Camera settings tab. |
| 4 |
Use the Camera control panel to change the pan, tilt, and zoom settings. |
| 5 |
Click Add preset to save the settings to the presets and enter a name for the preset. |
| 6 |
Manage your presets using the More menu
|
Use the Camera Control tool on the Cisco Accessory Hub desktop app to change the digital pan, tilt, and zoom settings.
Before you begin
| 1 |
Open the Cisco Accessory Hub desktop app. |
| 2 |
Click your camera on the Accessories tab to open the accessory settings. |
| 3 |
On the Camera settings tab, use the Camera control tool to adjust the settings.
|
| 4 |
If you want to clear your configuration on the Camera settings tab, click Reset. A reset on the Camera settings tab clears all customization on this tab, including the camera position presets. |
Presets of camera position help you quickly switch to the settings for specific use cases, such as video meeting, live streaming, and video recording in home office or in work spaces.
Use the Cisco Accessory Hub desktop app to configure camera pan, tilt, and zoom settings and save them as presets. You can save up to 3 presets for later use.
The presets don't save the Field of view, Resolution, and Frame rate settings.
| 1 |
Open the Cisco Accessory Hub desktop app. |
| 2 |
Click your camera on the Accessories tab to open the accessory settings. |
| 3 |
Go to the Camera settings tab. |
| 4 |
Use the Camera control panel to change the pan, tilt, and zoom settings. |
| 5 |
Click Add preset to save the settings to the presets and enter a name for the preset. |
| 6 |
Manage your presets using the More menu
|
 as needed:


