
Thanks for your feedback.
Manage app access and token policy settings in Control Hub
 Feedback?
Administrators can allow or deny access to web, mobile or desktop clients. Administrators can define which clients can be accessed within their organization.
Administrators can create a custom token policy for your Webex App for web, mobile or desktop users. A custom token policy gives you control over the following:
-
Turn on or off auto-extend refresh token
-
Specify the time-to-live (TTL) of the JSON web token (JWT)
-
Specify the TTL of the refresh token
With these features, you can control how often users are required to sign in on mobile, desktop, or web clients. As a compliance requirement, you may want your users to reauthenticate to make sure they are using the latest security policy in your organization.
Your Control Hub-managed organization must be enabled for Pro Pack. If you're not subscribed to Pro Pack, the token policy settings are greyed out when access organization settings in Control Hub.
You can allow or deny access to Webex mobile, desktop, and web clients. You can define which client types can be accessed within your organization. The following client types are supported:
- Mobile (iOS and Android)
- Desktop (MAC and Windows)
- Web client
| 1 |
Sign in to Control Hub. |
| 2 |
Go to . |
| 3 |
Scroll to the App access and token policy section. |
| 4 |
Click Configure. |
| 5 |
Go to the required Client type, and toggle Client access on to allow app access. |
| 6 |
Click Save. |
What to do next
You can customize the refresh and access token TTLs. See the next sections for more information.
With these settings, you can manually specify the refresh and access token intervals.
The default setting is that auto-extension of refresh tokens is disabled. Only change this setting if you want to manually specify the Time-to-Live (TTL) for the refresh tokens and access tokens for users in your organization.
| 1 |
Sign in to Control Hub. |
| 2 |
Go to . |
| 3 |
Scroll to the App access and token policy section. |
| 4 |
Click Configure. |
| 5 |
Go to the specific Client type, and toggle Client access on. |
| 6 |
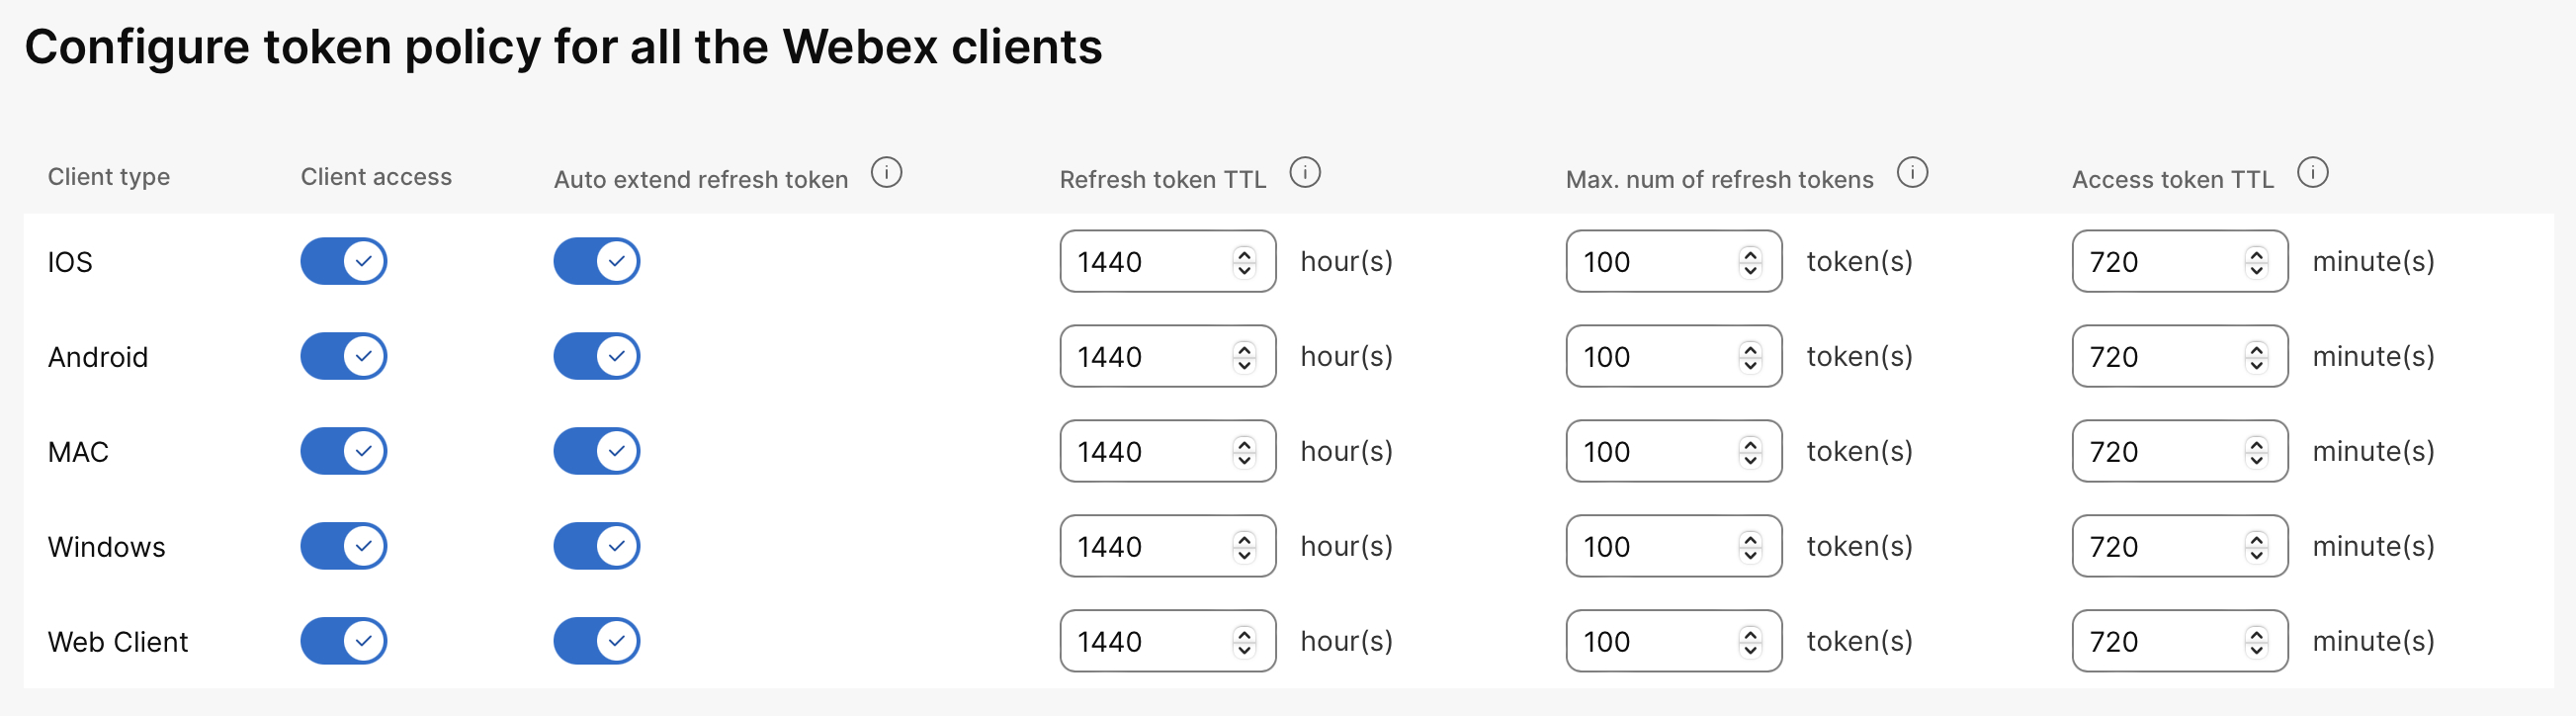
Toggle Auto-extend refresh token on for the Client type. This setting gives a new Time-to-Live (TTL) for the refresh token. Changing this setting changes the TTL the next time a user is issued a refresh token. As long as user accounts are not revoked in your directory, users get a new refresh token and maintain a valid session. |
| 7 |
Specify a value for Refresh token TTL. This setting controls the time that the refresh token is valid, allowing new access tokens to be created for users. The valid range is 24–1440 hours. |
| 8 |
Specify a value for Access token TTL. If the refresh token is valid, an access token is created within the time limit that you set. The valid range is 360–1080 minutes. |
| 9 |
Click Save. The settings are applied next time a user uses a mobile or desktop client. |
Configure this setting if you want to control how many Refresh Tokens can be issued per user per client. For example, you may want to minimize the simultaneous sign-ins for compliance or maximize the sign-ins for users who need to authenticate on multiple mobile devices or desktop workstations.
| 1 |
Sign in to Control Hub. |
| 2 |
Go to . |
| 3 |
Scroll to the App access and token policy section. |
| 4 |
Click Configure. |
| 5 |
Go to the required Client type, and toggle Client access on. |
| 6 |
Specify a value for Max. num of refresh tokens. The valid range is 10–100 sessions. |
| 7 |
Click Save. |
What to do next
A user who successfully authenticates from a client that exceeds the number of refresh tokens has one of their existing tokens revoked after authentication. If the token expires, users are forced to reauthenticate.


