Manage Polls in Events (classic)
 Feedback?
To conduct a poll, you must first create a poll questionnaire. You can create poll questionnaires by using one of these methods:
-
Webex Poll Questionnaire Editor: This standalone version of the Webex Poll Questionnaire Editor allows you to create poll questionnaires outside an event, save them, and open them during an event.
To download the Editor, go to the Downloads page by selecting Events (classic) Support > Downloads on the left navigation bar of your Webex Events site. Expand the Webex Poll Questionnaire Editor and select Download.
-
The polling panel inside an event: This allows you to create, save, and open poll questions during an event.
To add the polling panel open . On the Manage Panels page, select Polling from the Available panels and click Add. Then, click OK.
To save time in an event, you can start the event earlier than the scheduled time, create questionnaires using the Polling panel, save them, and then open them during the actual event.
| 1 |
Open the Webex Poll Questionnaire Editor or the Polling panel in an event. You can start the Webex Poll Questionnaire Editor by going to on your desktop. |
| 2 |
In the Question section, select one of these question types:
|
| 3 |
Select New, and then type a question. |
| 4 |
In the Answer section, select Add, and then type an answer. To type another answer, select Add. The question and answers appear in the Poll Questions area.
|
| 5 |
To add more questions, repeat steps 2 to 4. |
| 1 |
Open the Polling panel in the event. |
| 2 |
Select the Add a Question icon and then type the question. |
| 3 |
Select the Add an Answer icon and then type the answer. |
| 4 |
To add more answers, repeat step 3. |
| 5 |
To add more questions, repeat step 2. |
| 6 |
To change the question type, select the text Click here to change question type that appears under the specific question and then do one of the following:
|
As the host, you're the polling coordinator by default at the beginning of an event. However, you can assign the role of polling coordinator to a panelist.
| 1 |
From the list of Panelists on the Participants panel, right-click the name of the panelist whom you want to designate as the polling coordinator. Select . |
| 2 |
The polling functions become available on the designated panelist's Polling panel. |
|
Task |
Action |
|---|---|
|
Open a poll questionnaire file to display the questionnaire on your Polling panel |
Select , or click Open |
|
Change the question type |
Windows: Select the question that you want to change and then select the new question type from the drop-down list. Click Change Type. Mac: Select Click here to change question type, which displays under each question. |
|
Edit a question or answer |
Select the question or answer, click Edit |
|
Delete a question or answer |
Select the question or answer, then click Delete |
|
Rearrange questions or answers |
Select the question or answer, then click Move Up |
|
Delete an entire questionnaire |
Click Clear All at the bottom of the Polling panel. |
|
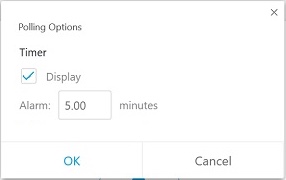
Display a timer during polling |
|
|
Save a poll questionnaire |
Select , or click Save |
|
Open a poll |
Click Open Poll. |
|
Close a poll |
Click Close Poll. |
|
Share poll results with participants |
In the Share with attendees section, check the Poll results check box or the Individual results check box, and then click Apply. |
|
Specify options for poll results |
|
|
Save the results of a poll |
You can save poll results during or after a meeting or webinar.
You can save poll results when you end the meeting or webinar. Check Save meeting files, then check Poll Questions and specify the location where you want to save the files. |
|
Download activity report for chat, Q&A, and polling |
As the host, if you recorded the webinar, you can download the in-webinar activity report for Q&A, chat, and polling once the recording completes. To download a report, sign in User Hub and click Calendar > Completed. Select your webinar. Click Activity, then click Download report next to the report you want. If you use Slido for Q&A or polling, you can find that information in Slido's report. |


