- Home
- /
- Article

Thanks for your feedback.

Webex Go with AT&T
 In this article
 Feedback?
Provision and enable the Webex Go capability for a user in Webex Calling.
Provision Webex Go with AT&T
The Webex Go feature in Webex Calling allows a mobile phone to function as the user’s Webex device. A phone number must be assigned to a user to enable Webex Go.
Webex Go with AT&T provides a mobile access device as an eSIM on a personal mobile device. You can purchase it as a Webex Calling add-on subscription.
To provision Webex Go with AT&T, the administrator adds a Webex Go device to a user.
Webex Go with AT&T enables a compatible mobile phone number and plan from a mobile operator be assigned as the user’s primary number.
The administrator provisions this feature by adding a phone number to a location as a mobile number type and assigns the number to the user to activate it.
The user must purchase a Webex Calling-enabled phone number and mobile subscription from a certified mobile provider. Certified providers are listed on the Connection Type page in Control Hub.
Webex Go with AT&T supports only one Foundational Account Number (FAN) per organization. If you attempt to add a mobile number associated with a different FAN than the one linked to your organization, your request will fail.
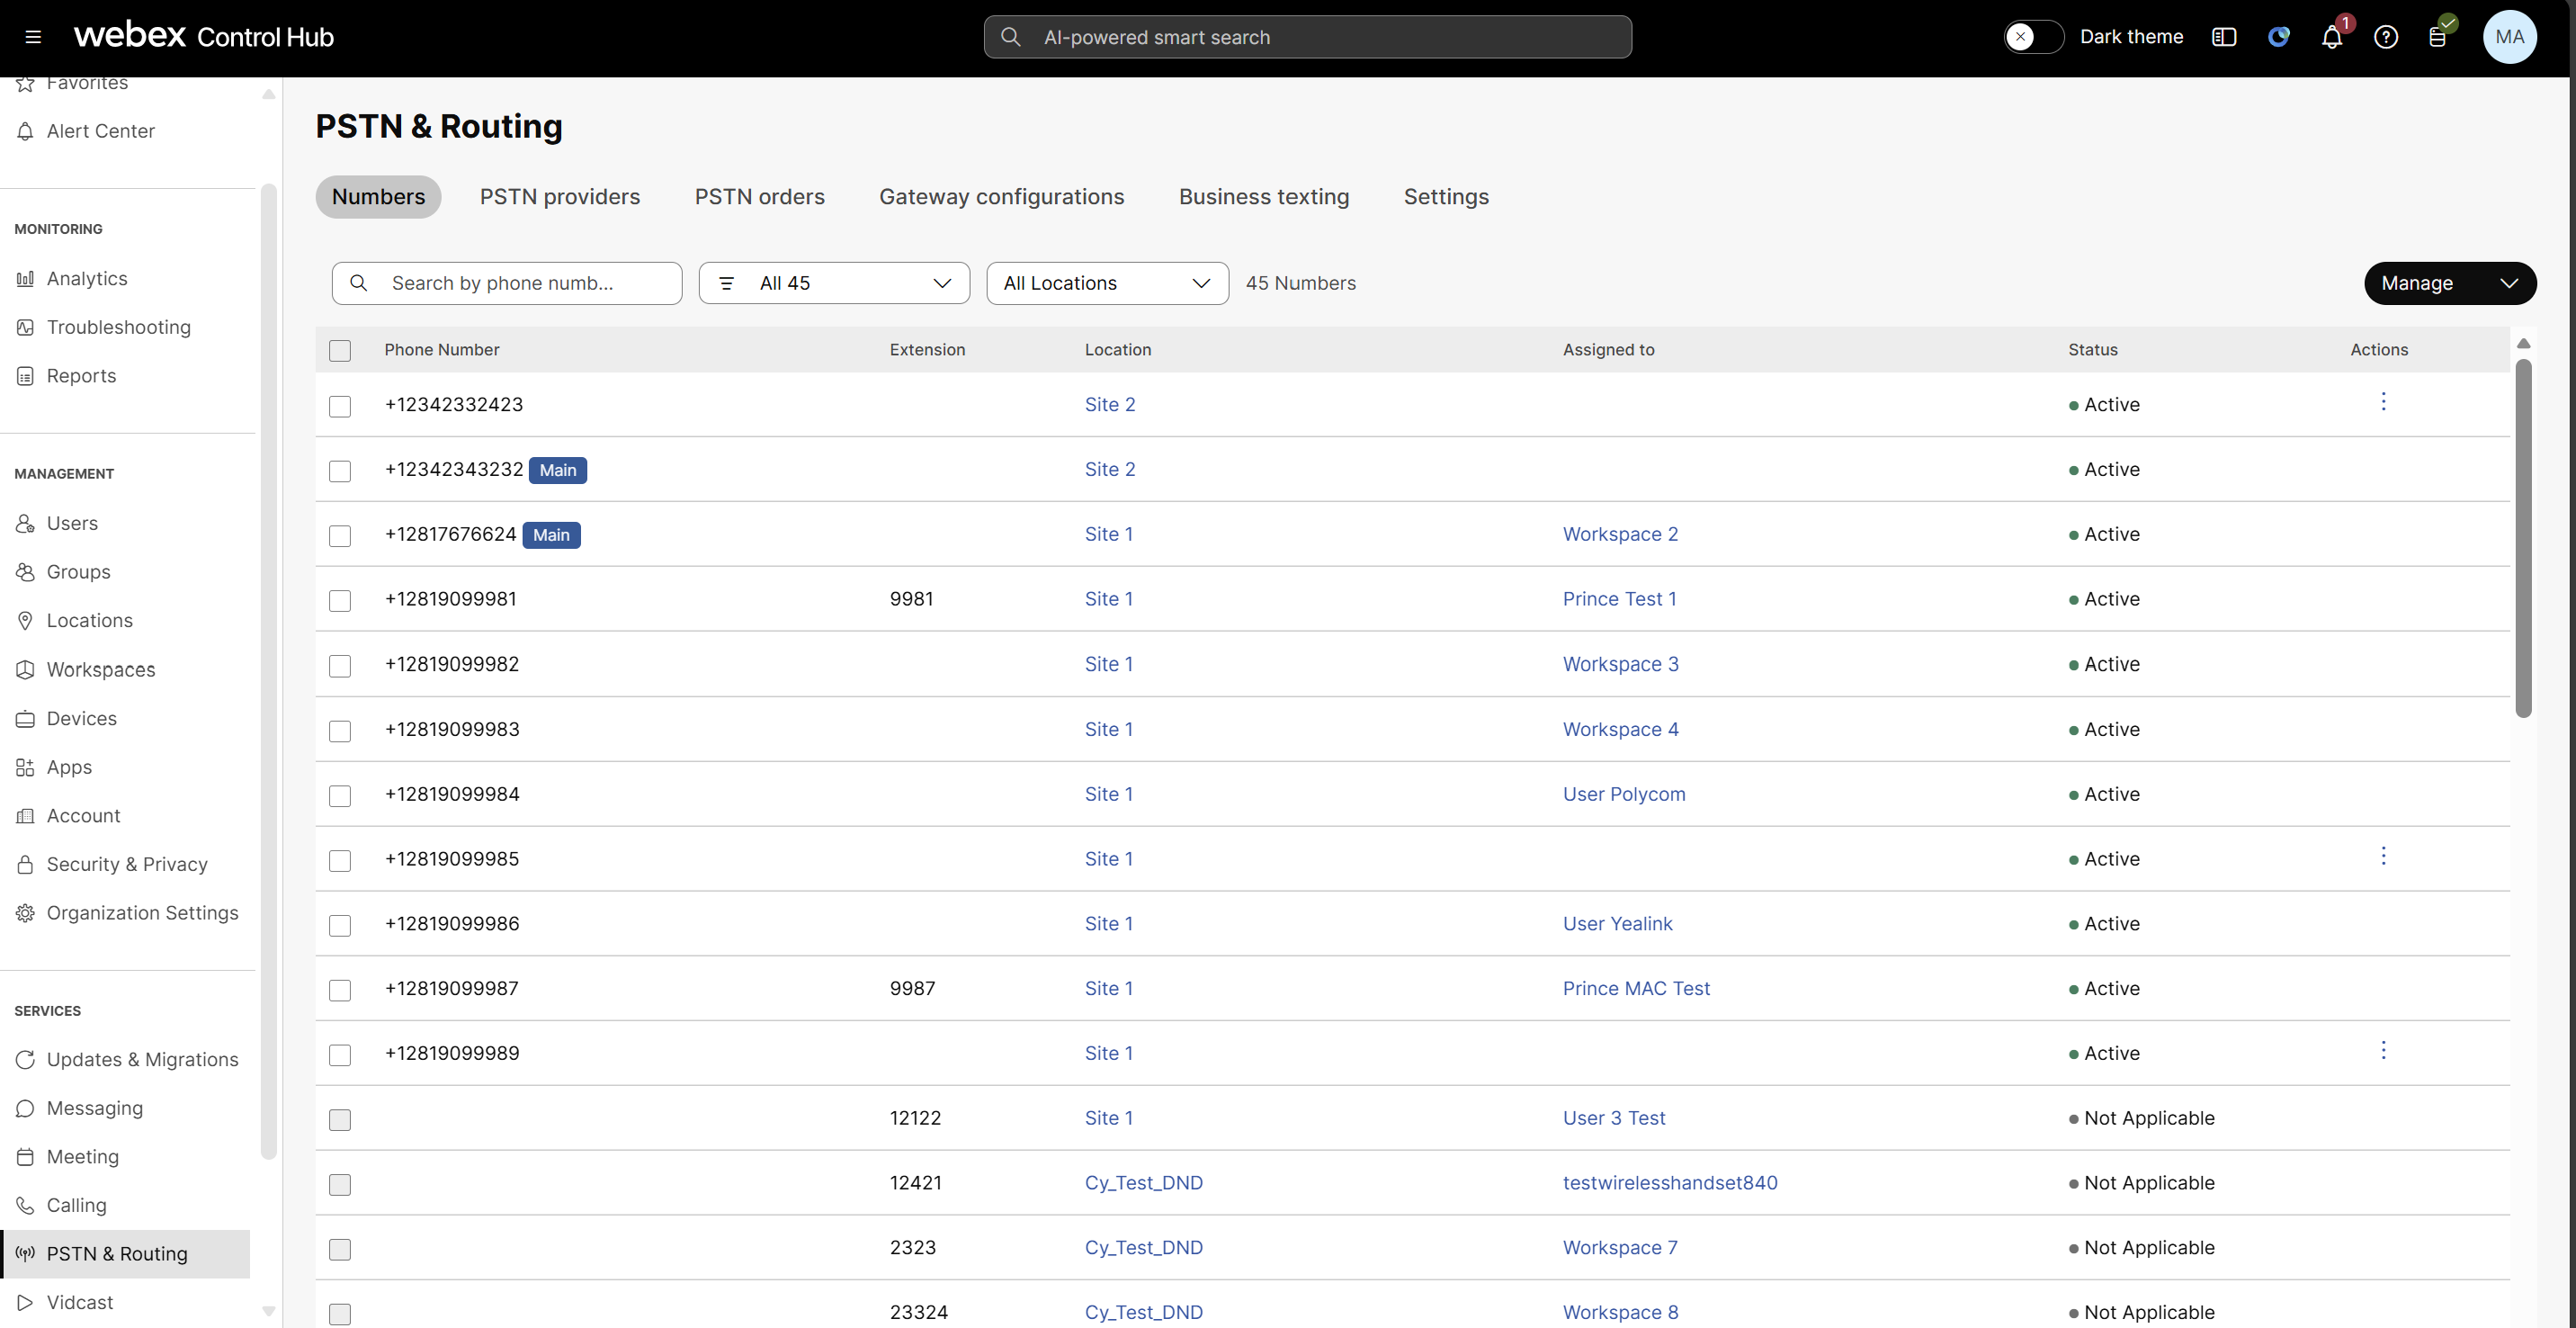
Add mobile numbers
Steps to add Webex Go AT&T numbers in Control Hub.
| 1 |
Sign in to Control Hub, go to . | ||||||||||||
| 2 |
Click .
| ||||||||||||
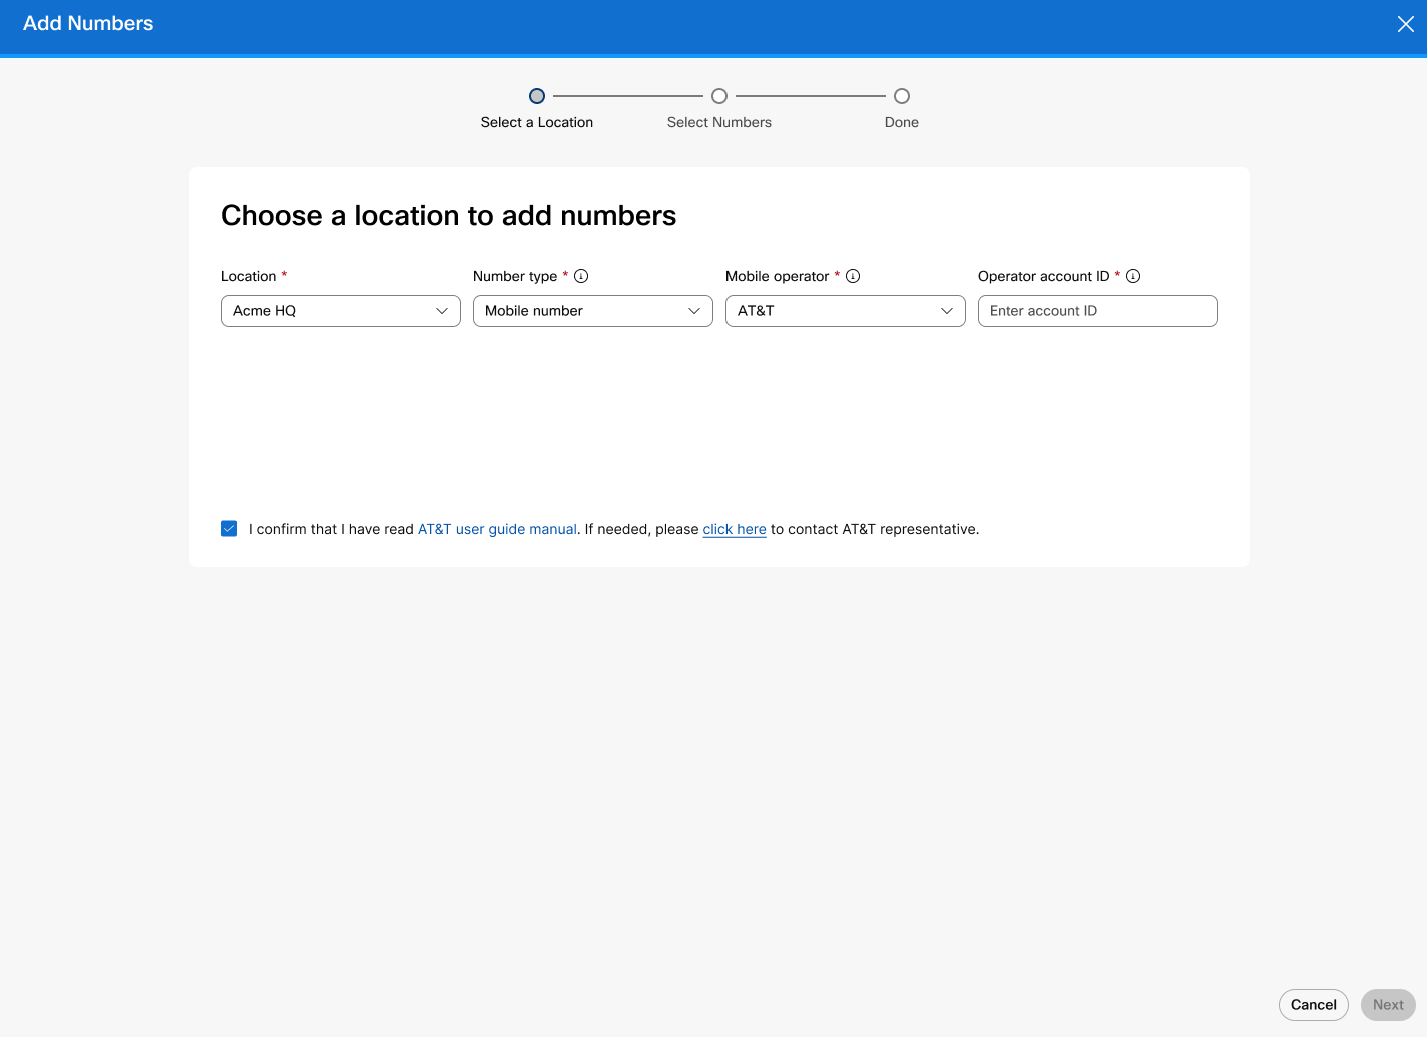
| 3 |
Choose a location from the Location drop-down menu. The mobile number must be added to the correct location of the intended Webex Calling subscriber to be assigned properly. | ||||||||||||
| 4 |
Under Number type, select Mobile Number. For more information on mobile number, see Manage Phone Numbers in Control Hub. | ||||||||||||
| 5 |
Select AT&T Wireless from the Mobile operator list.
If you are adding AT&T mobile numbers for the first time, a check box appears that requires you to confirm that you have read the AT&T user guide. You must check this check box before you can enter the operator account ID. When you select AT&T as the mobile operator, a message appears with a link to the AT&T user guide, which you should review before you continue. If you need support from AT&T, you can use the link provided in the message to contact an AT&T representative. | ||||||||||||
| 6 |
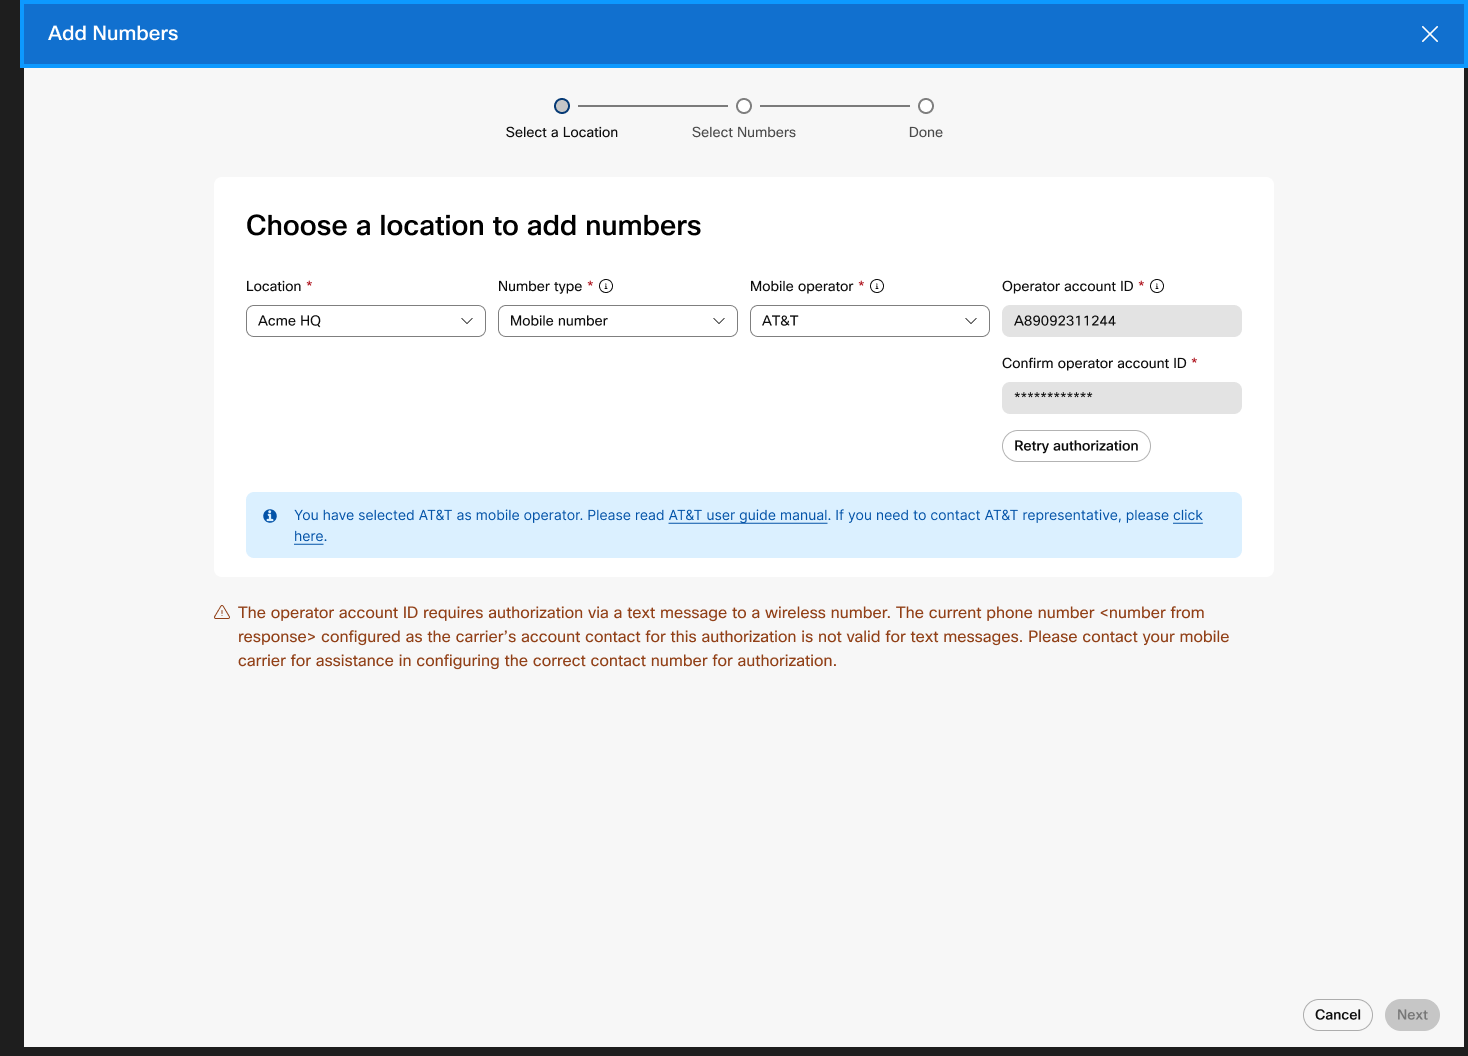
Enter the Operator account ID, and then reenter it in the Confirm operator account ID field.
This is the business account number provided by the mobile operator for the company-provided mobile plan. | ||||||||||||
| 7 |
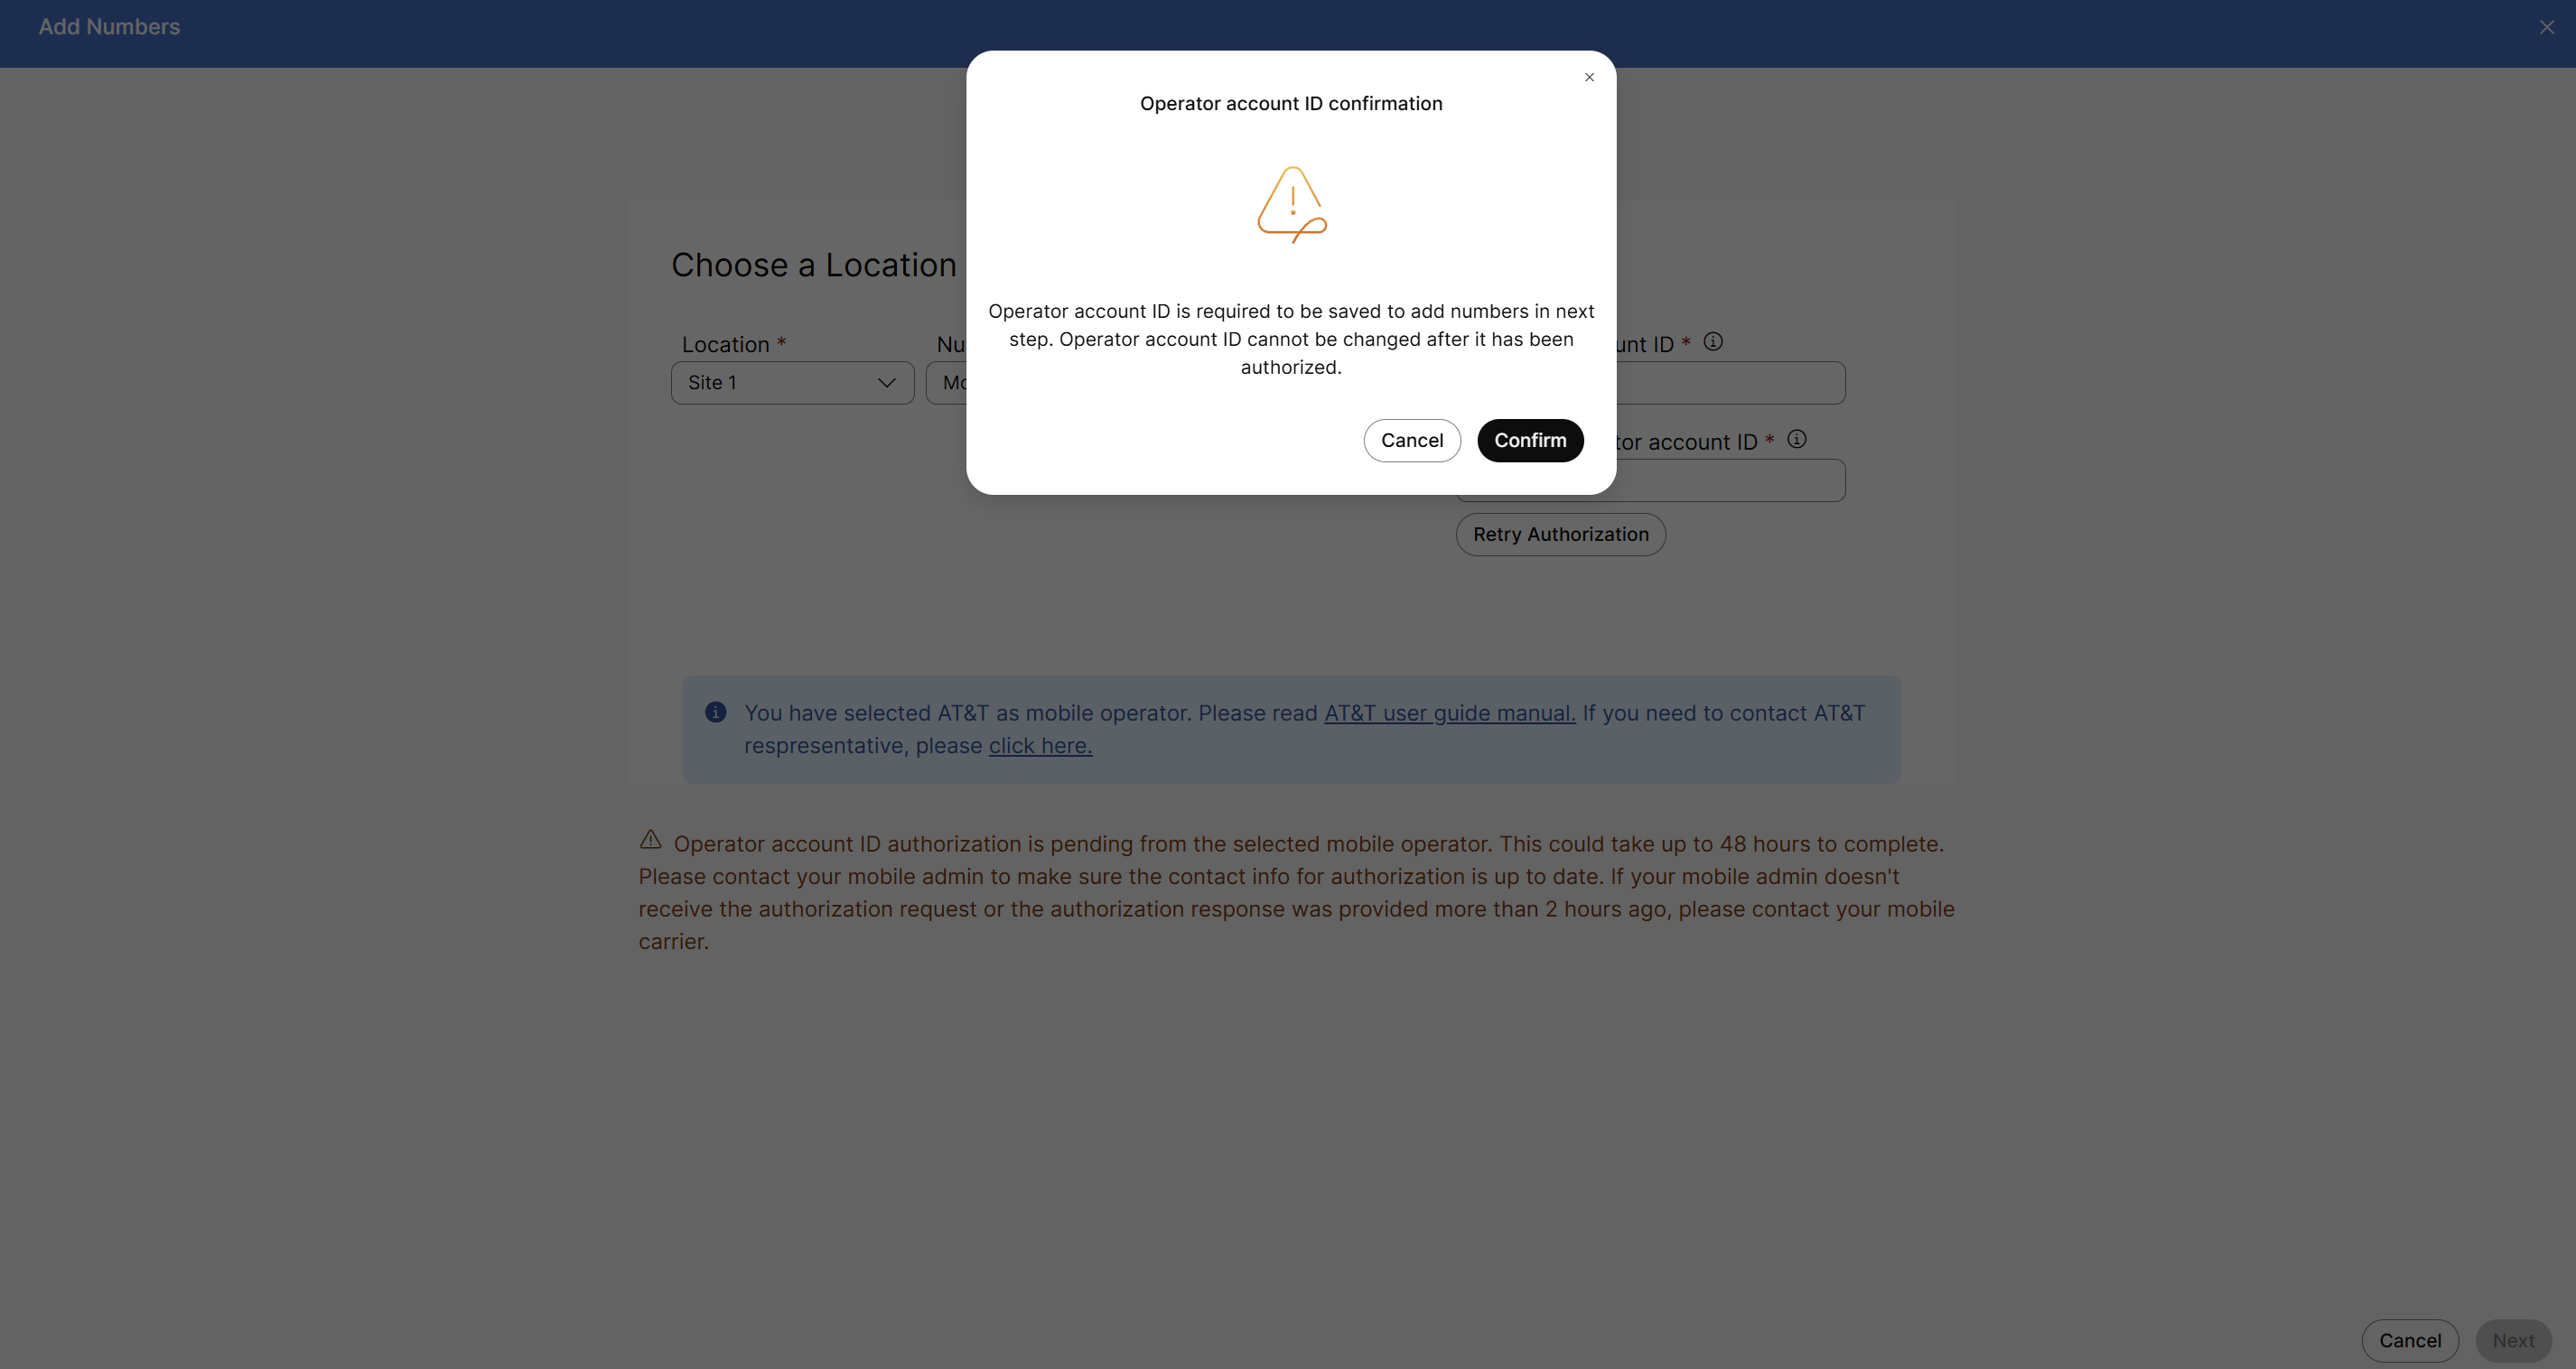
After you enter the Operator account ID, click Retry authorization. When the Operator account ID confirmation dialog box appears, click Confirm.
After the operator account ID is confirmed, you cannot change it.
| ||||||||||||
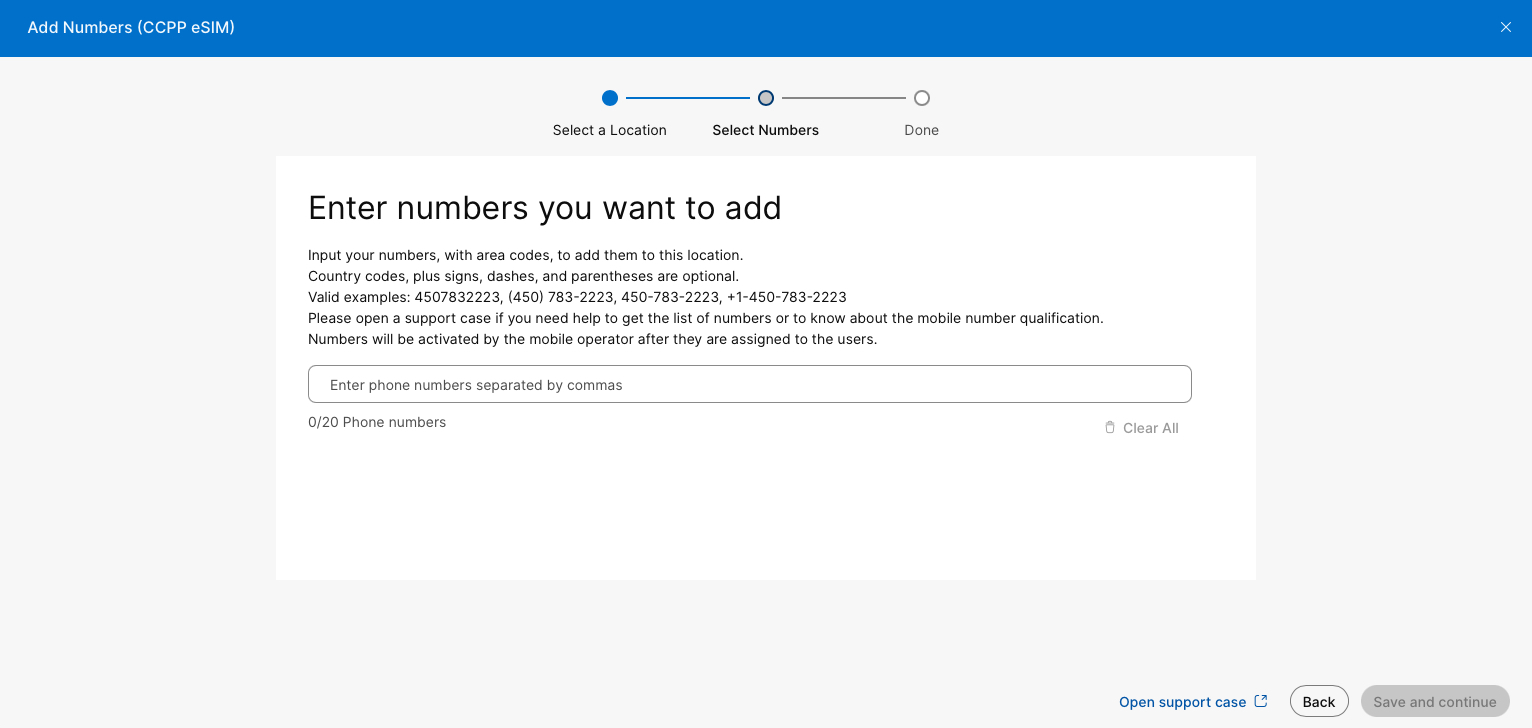
| 8 |
Do one of the following:
After the numbers are provisioned successfully, you'll see that the mobile phone numbers appear in the number list. You'll also see a badge next to each number that indicates that it is a Webex mobile number. New mobile numbers are onboarded as inactive numbers. |
What to do next
Assign the mobile number to a user.
Assign a mobile number to a user
After your Webex Go AT&T numbers are added to the number management inventory in Control Hub, you can assign them to users.
| 1 |
Sign in to Control Hub, then go to Users. |
| 2 |
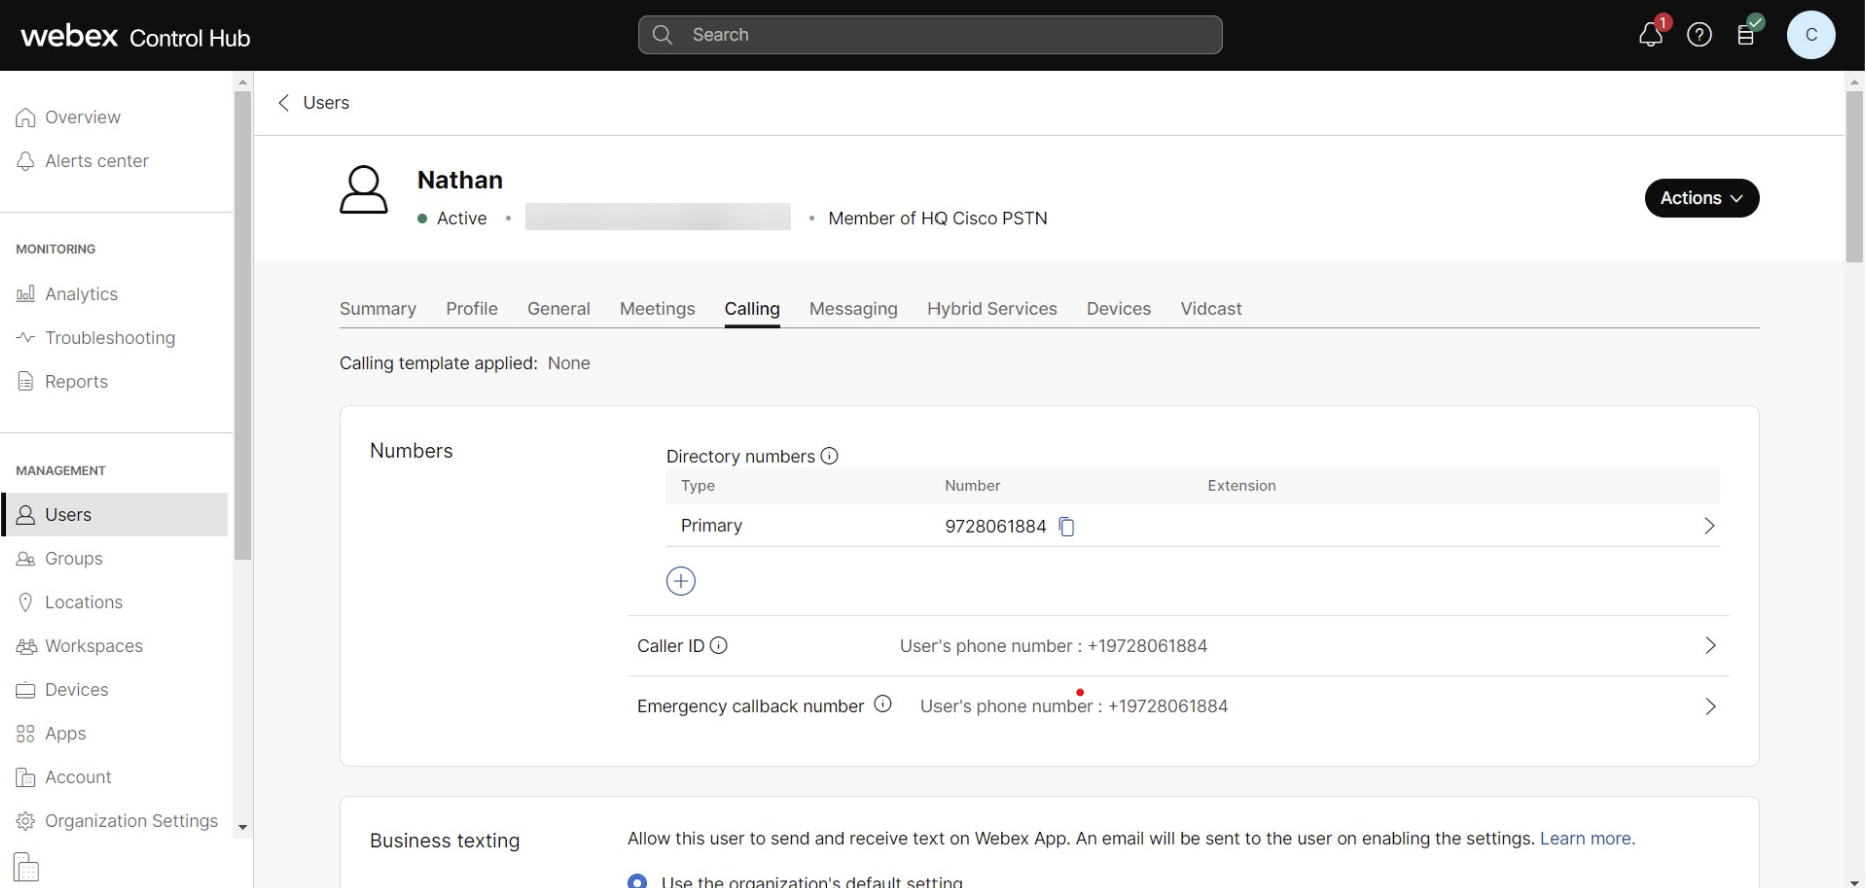
Select the user you want to assign the mobile number to. |
| 3 |
Select Calling. |
| 4 |
Under Directory Numbers, click Add Number. If a primary number is already assigned, click Primary to replace the primary number with the Webex mobile number.
|
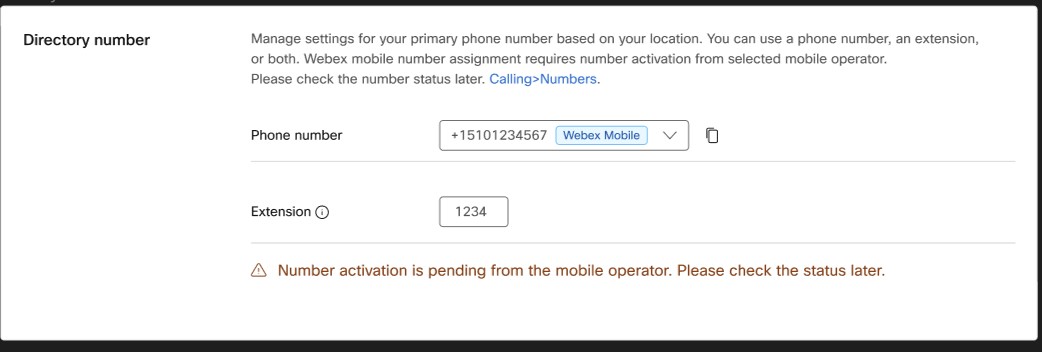
| 5 |
From the Phone number drop-down list, select the mobile number to assign. The drop-down list includes all available numbers. Use the Webex mobile tag to filter and see which mobile numbers are available to assign to users.
|
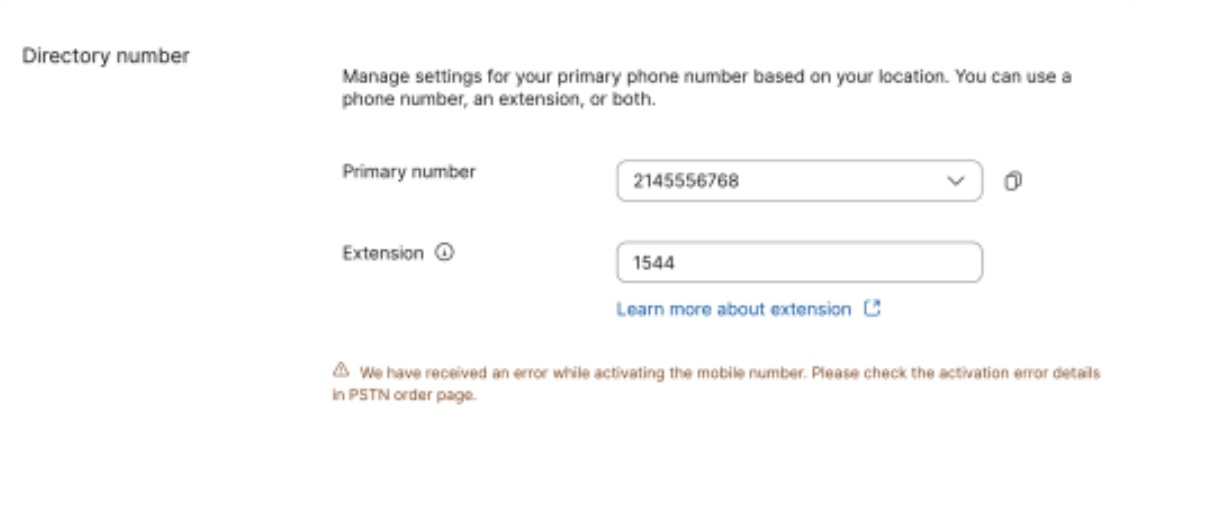
| 6 |
Click Save. The Webex Go mobile device is automatically assigned to the user and available on the user's
Devices tab.
|

What to do next
After you provision the mobile numbers, see the AT&T Cloud Voice with Webex Go - Quick Start Guide for details about user activation and device setup.


