- Home
- /
- Article

Thanks for your feedback.

Manage Call Recording with Webex Calling in Webex for Government
 In this article
 Feedback?
Webex Calling provides recording functionality for outgoing and incoming calls placed by certain users or virtual lines. Call recordings may be used for quality assurance, security, or training purposes.
Overview
Webex call recording provides the functionality to record incoming and outgoing calls placed on a desk phone or Webex App. As an administrator, you can enable call recording for all incoming and outgoing calls for specific users, workspaces, or virtual lines in your organization. Webex Calling supports On-demand recording, Always, and Always with Pause/Resume recording modes.
You must meet the following requirements:
-
Partners must enable a call recording service for your organization. By default, call recording is enabled for every customer and you can configure it for certain users. If you don't see call recording settings, your partner may have disabled call recording service for your organization. For call recording to be provisioned, the partner must enable a call recording service for your organization.
-
Users have a Professional or Basic Webex Calling license.
-
Workspaces have a Professional Webex Calling license.
-
Consult your legal department about regulatory requirements for recording calls.
All Webex Calling customers have access to Webex Call Recording. Webex Calling customers can record calls with these options at no additional cost.
Webex is available to all users and gives access to unlimited recordings. Webex recordings are currently configured with a retention period of one year, and the storage per organization is 100GB. Compliance officers can access and manage call recordings from Control Hub. Administrators can configure and manage a user's access to their call recordings but can't listen to recordings or view their transcripts. Users can manage their recordings using User Hub and Webex App.
Webex
Select call recording provider
Enable call recording at organization level
| 1 |
Sign in to Control Hub. |
| 2 |
Go to . |
| 3 |
Under Call Recording , select Webex as the preferred call recording provider from the drop-down list for your organization. 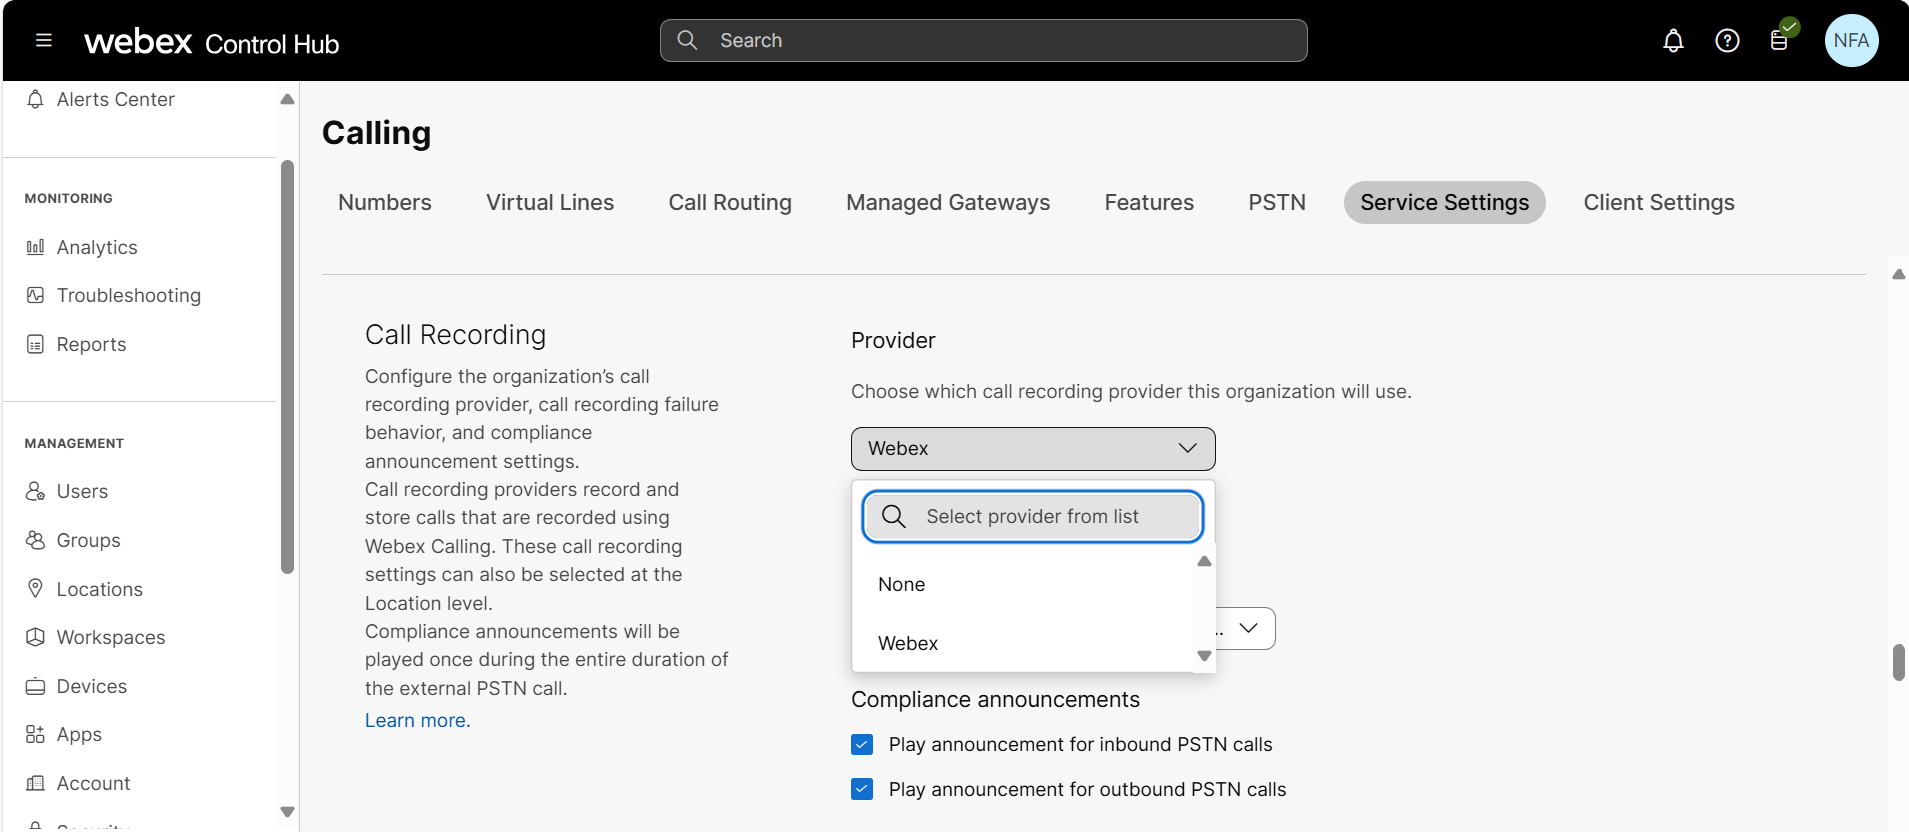
|
| 4 |
Click Save.
|
Disable call recording at organization level
| 1 |
Sign in to Control Hub. |
| 2 |
Go to . |
| 3 |
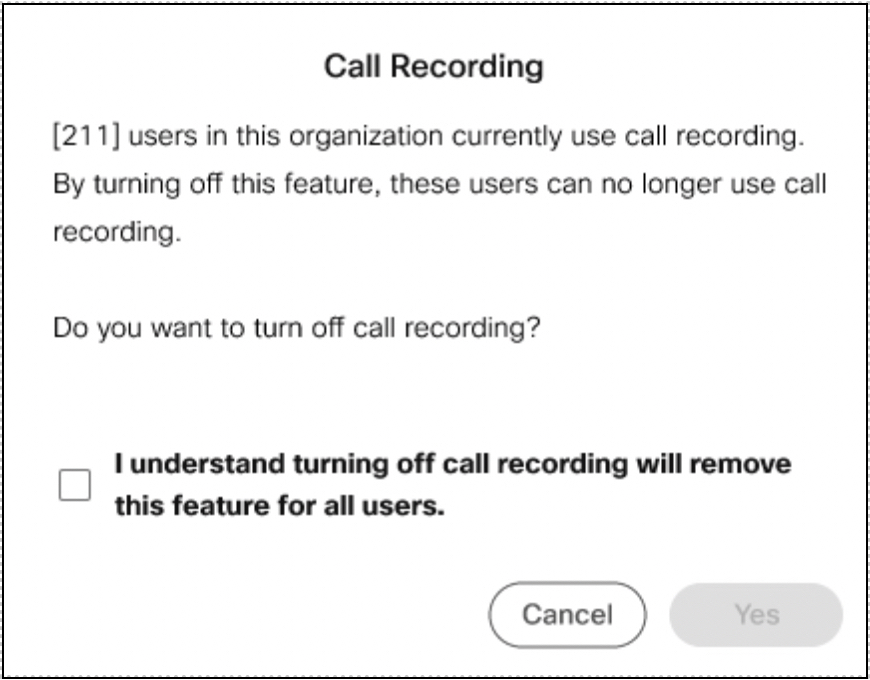
Under Call Recording Provider, select None from the drop-down list for the call recording provider for your organization. The Call Recording information window appears.
|
| 4 |
Check I understand turning off call recording will remove this feature for all users. |
| 5 |
Click Save. |
Enable compliance call recording announcement
You can enable the compliance announcement settings separately for inbound and outbound PSTN calls. On enabling the announcement, when the PSTN call is made or received, the caller (PSTN user) hears the announcement, “This call may be recorded” at the beginning of the call. The recording starts after the user with call recording enabled answers the call. Once the compliance announcement is played, the start/stop recording announcements are suppressed for the Webex Calling user. Even when the midcall operations such as transfer are initiated on that call, announcements aren’t played multiple times. The visual indicator displays in the Webex App or on supported phones to indicate that the call is recorded.
When a user receives a call directly, the compliance announcement is played in the language that is set for the user in .
When a workspace receives a call, the compliance announcement is played in the language that is set for the workspace in .
If an Auto Attendant, Call Queue, or Hunt Group feature receives a call directly, the compliance announcement is played in the language that is set for the Auto Attendant, Call Queue or Hunt Group in .
The list of supported languages is in the respective setting's drop-down menu. If a call comes directly to a virtual line, the compliance announcement is played in the language that is set for the virtual line in > select a virtual line > .
The compliance announcement audio doesn’t get recorded in the recording. However, if the call was recorded, the metadata sent to the call recording provider includes information about whether the compliance announcement or user/workspace announcements were played or not.
The user/workspace level announcement settings take precedence only if the compliance announcement isn’t played, and this applies only for the inbound calls. For more information, see Enable call recording for Webex Calling users and workspaces section.
We recommend that you enable user/workspace level announcement setting for all users/workspaces who have call recording enabled. This serves as a reliable alternative to play the regular announcements in case the compliance announcements fail to play for the inbound call.
You can enable the compliance announcement at the organization level and override it at the location level.
Enable compliance announcement at organization level
The compliance announcement is disabled by default at the organization level.
| 1 |
Sign in to Control Hub. |
| 2 |
Go to , and scroll down to the Call Recording section. |
| 3 |
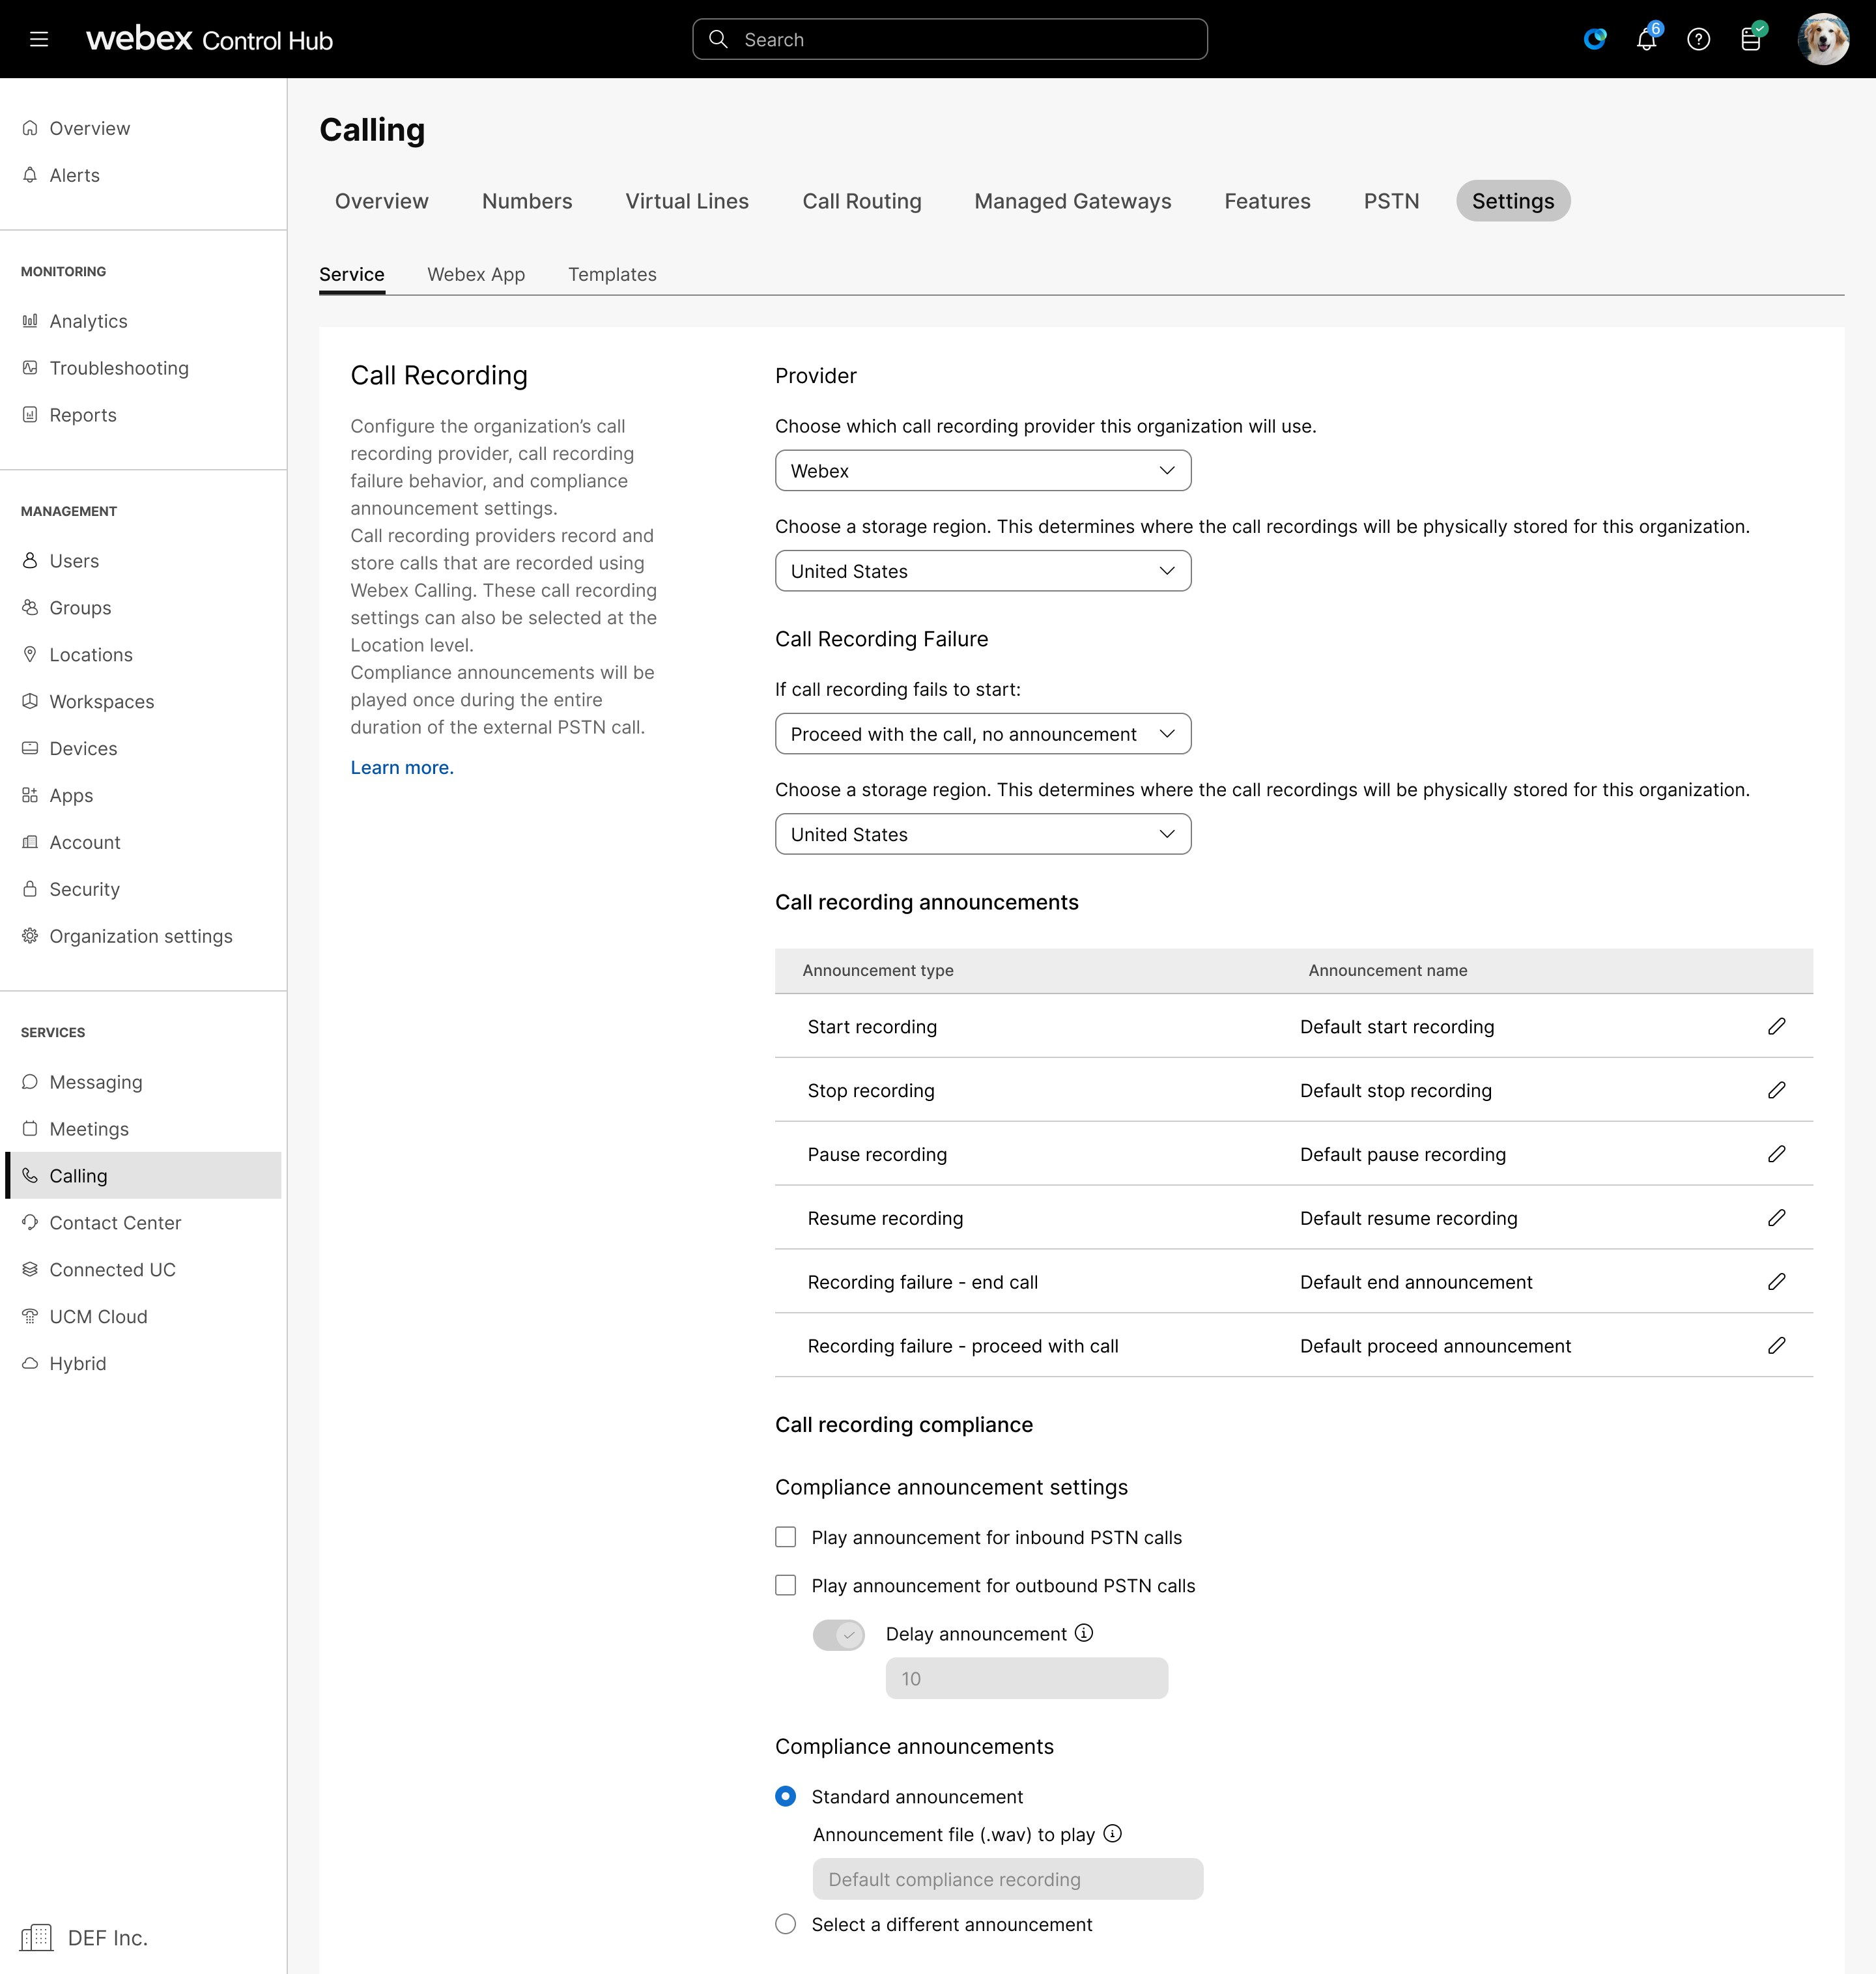
Under Compliance announcements, enable any of the following options:
|
| 4 |
Under Call Recording Failure, you can choose the recording failure behavior. 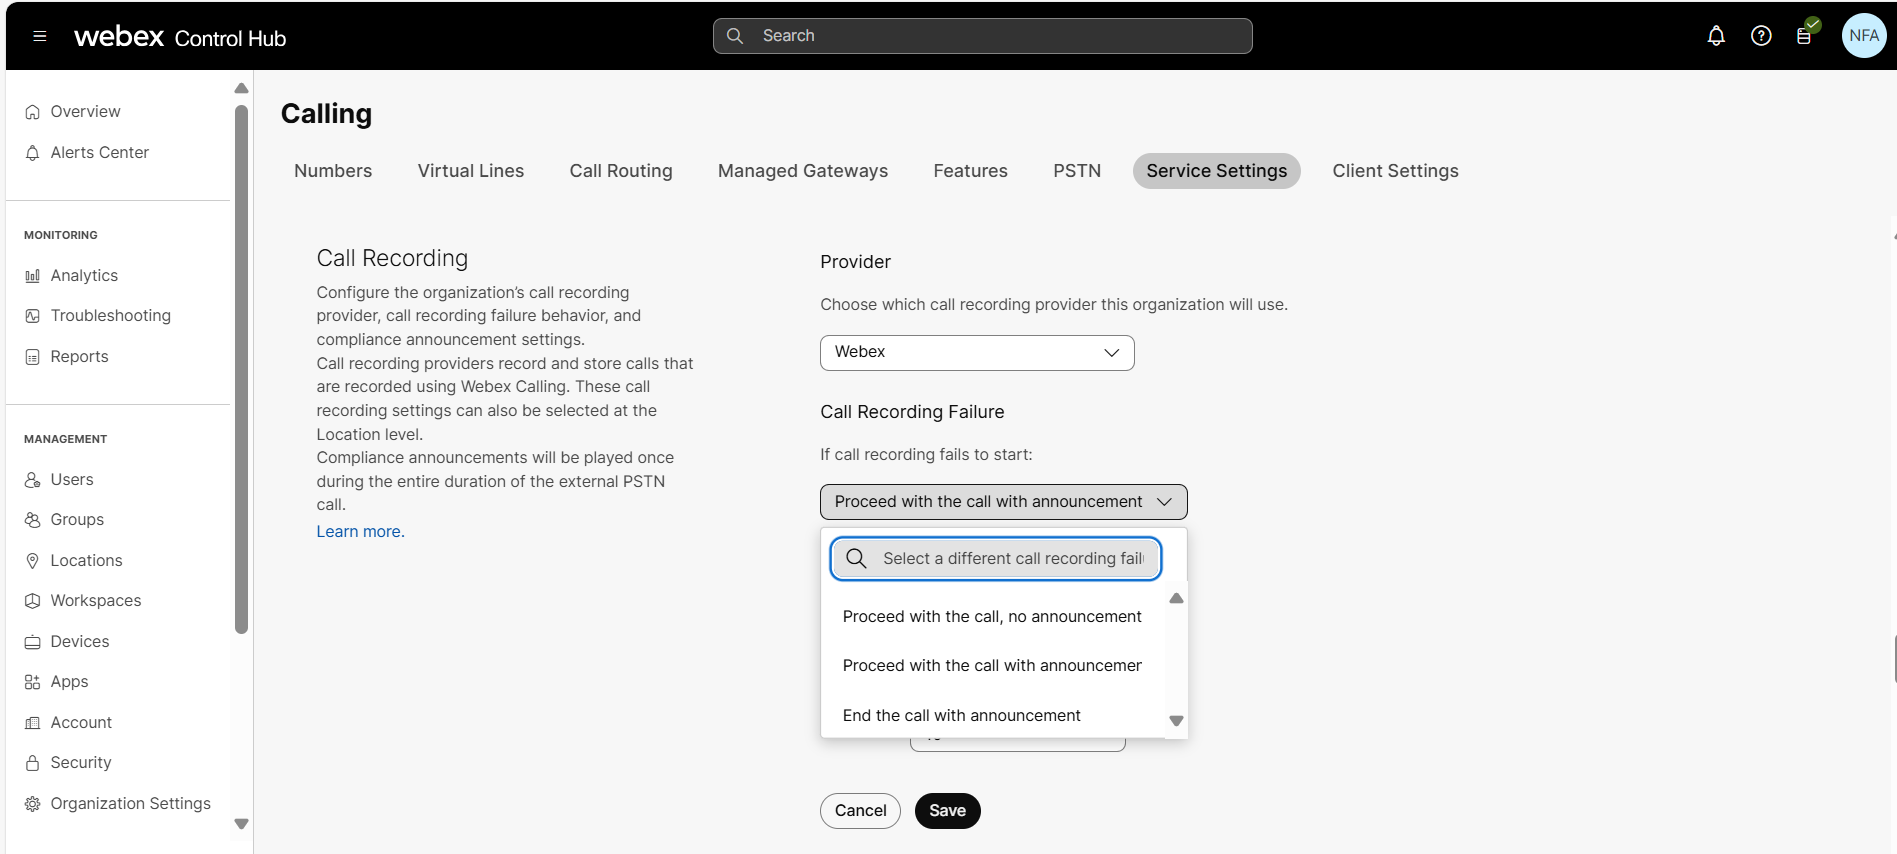
This configuration applies to all the recording platforms. |
| 5 |
Click Save. |
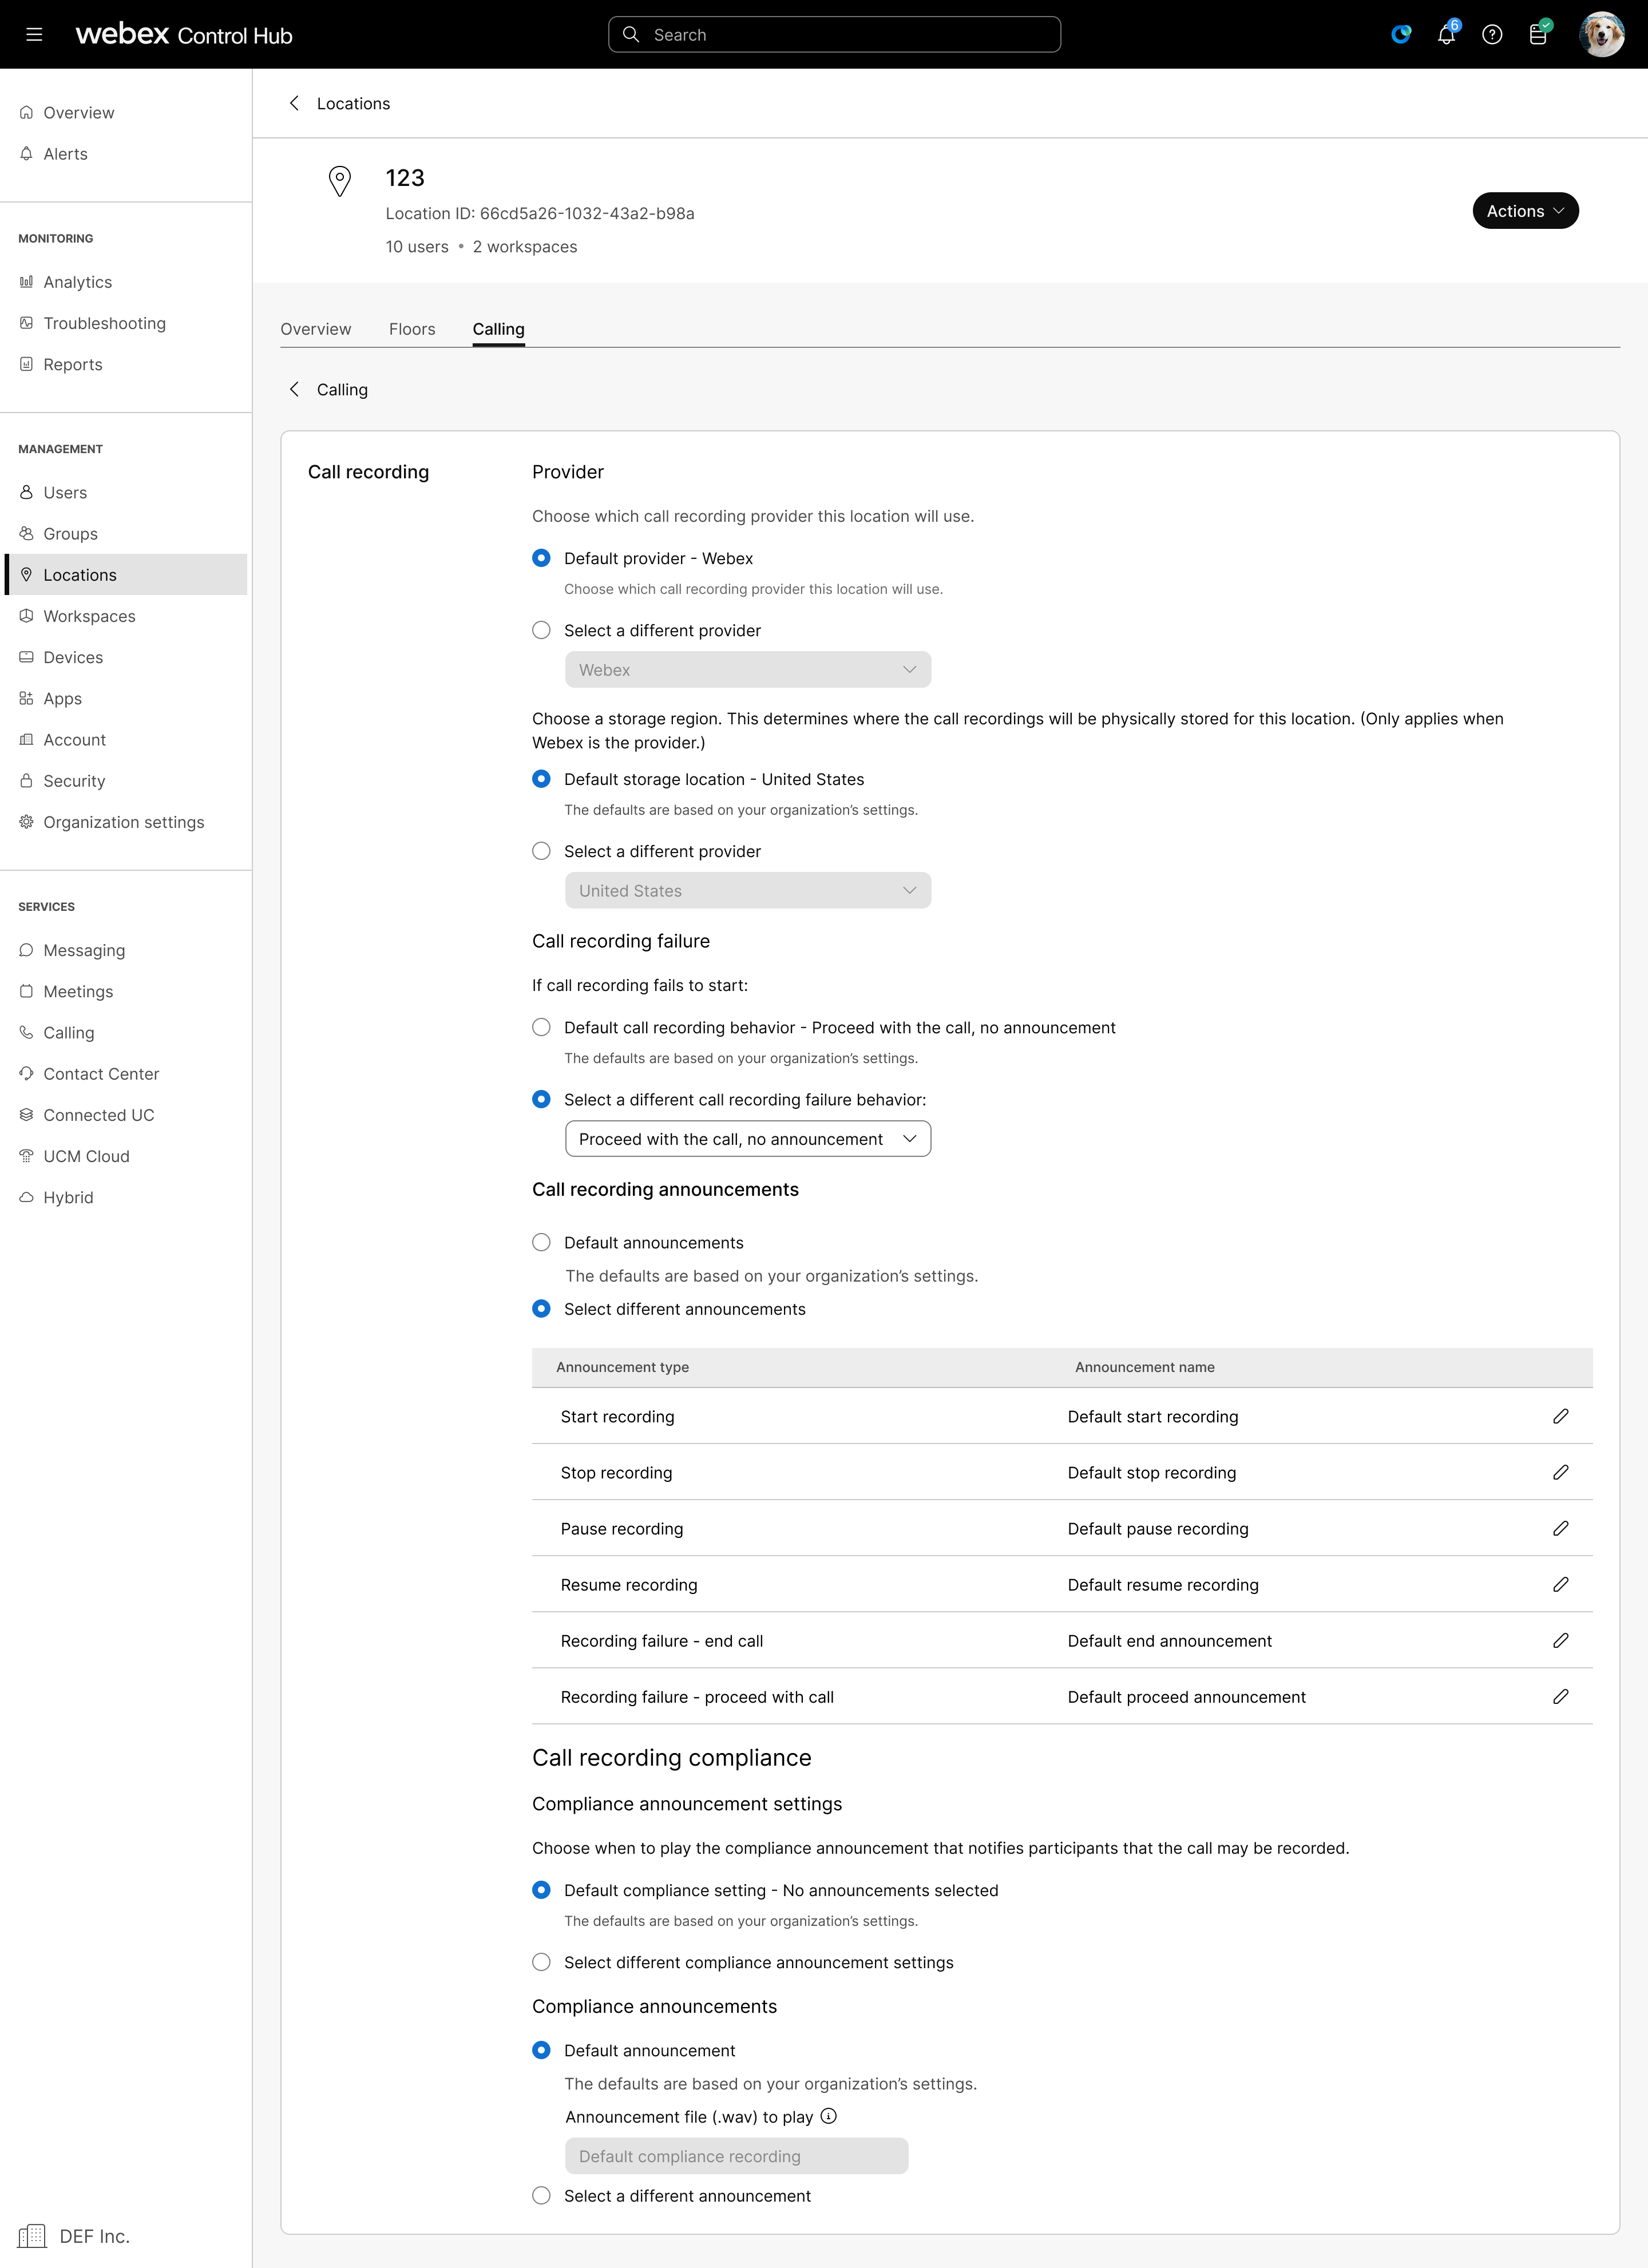
Override compliance announcement at location level
When a new location is created, the compliance announcement settings default to the organization level. You can override the settings at the location level.
| 1 |
Sign in to Control Hub. |
| 2 |
Go to . |
| 3 |
Select the location for which you want to modify the compliance announcement settings. |
| 4 |
Go to . |
| 5 |
Click Call recording settings and enable any of the following options under the compliance announcements.
|
| 6 |
Click Save. |
Enable call recording for Webex Calling users and workspaces
Before you begin
-
Ensure that users have a Professional or Basic Webex Calling user license assigned.
-
Ensure that workspaces have a Professional Webex Calling license assigned.
| 1 |
Sign in to Control Hub. |
| 2 |
Go to the respective path:
|
| 3 |
Turn on Call Recording. The user's call recording settings are cleared. Any calls that were recorded before this change are still maintained on the call recording provider platform. If a partner administrator enables call recording for their customers, the same partner administrator user isn’t allowed in multiple customer accounts. For a user with a standard license, Control Hub shows the call recording option when the location associated with the user has Webex as the call recording provider. The call recording option displays for the user only when the location call recording provider is set to default org call recording provider, and the org call recording provider is set to Webex call recording provider. |
| 4 |
After enabling call recording, if a user is still having issues with recording calls, you can contact the call recording support providers with the information available in the Show call recording platform information section. From the Users page, go to to find support. From the Workspaces page, go to to find support. |
| 5 |
Configure any of the following settings:
|
| 6 |
Click Save. |
What to do next
If an issue arises for users from the call recording administration portal, ensure that the following information is correct:
-
Product—Choose your product.
-
External Type—Enter BroadWorks.
-
Service Provider—Copy and paste the corresponding value from Control Hub.
Then click Save Changes.
For additional support, contact the support team for your call recording provider.
Access recordings for Webex call provider
To access the call recordings, complete these steps.
Before you begin
To view the Recordings tab under Calling, ensure that the organization is entitled with the Webex Calling license.
-
If the organization has Webex Calling entitlement but Recording is turned OFF, the Recording tab appears with a message that the Recording is OFF.
-
If a location has Call Recording, then no results display.
| 1 |
Sign in to Control Hub. |
| 2 |
Go to and then select Features. |
| 3 |
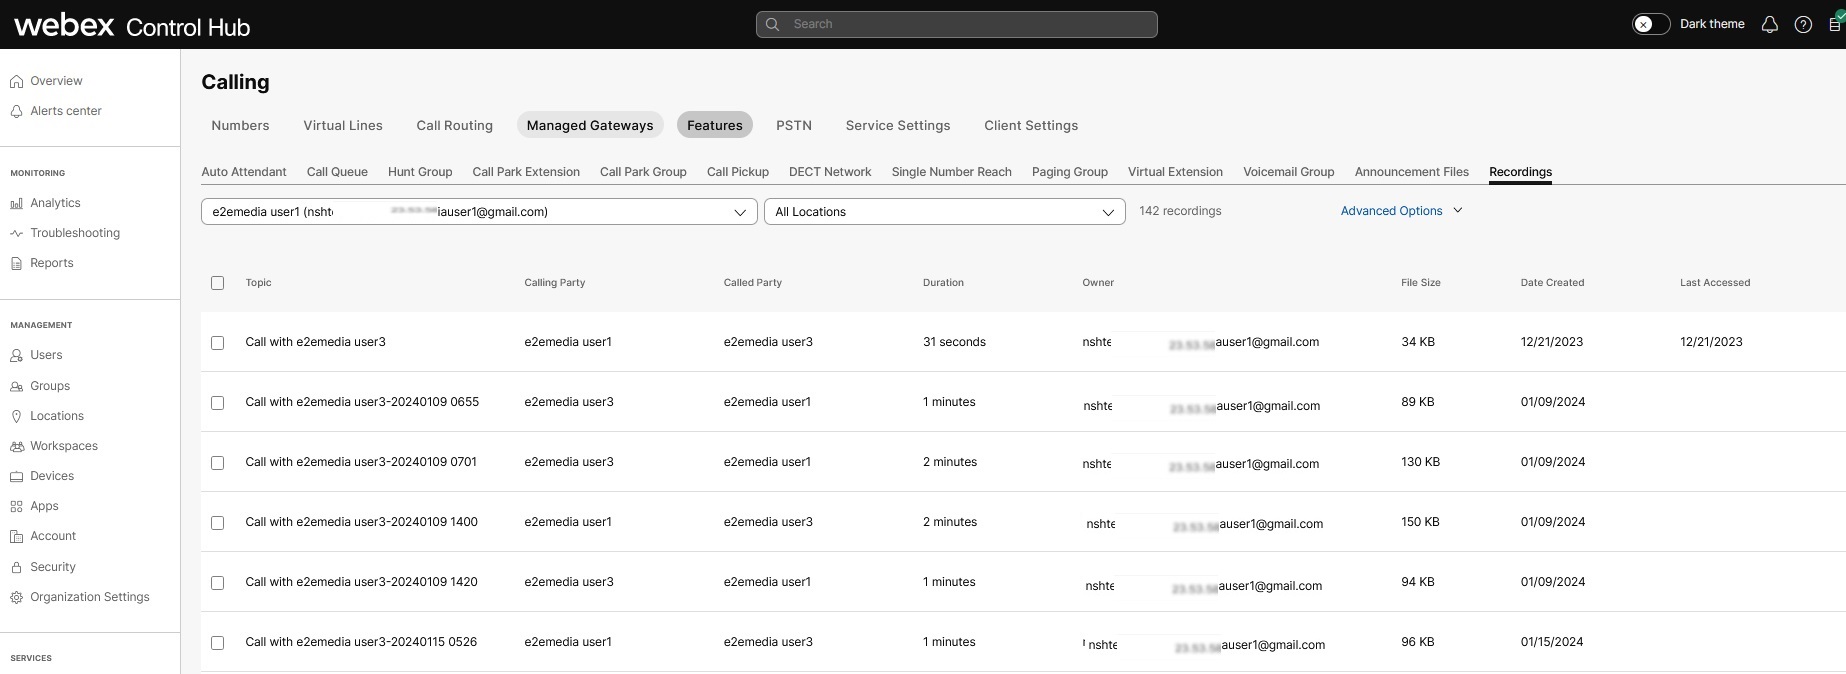
Select Recording tab, and the recording landing page displays. Use the search field to find the recording of your choice. The landing page initially doesn’t display any records until the administrator
initiates the search. You can choose from the two search modes:
Use the simple search field to look up recordings that are associated with a user based on the name or email ID. This search retrieves all recordings for the owner, but only displays the first 100 records. Scroll down to view the remaining recordings. Hover on the Calling Party to view the PSTN number or extension used for calling.
The Recordings page displays a list of calls with the following details:
|
| 4 |
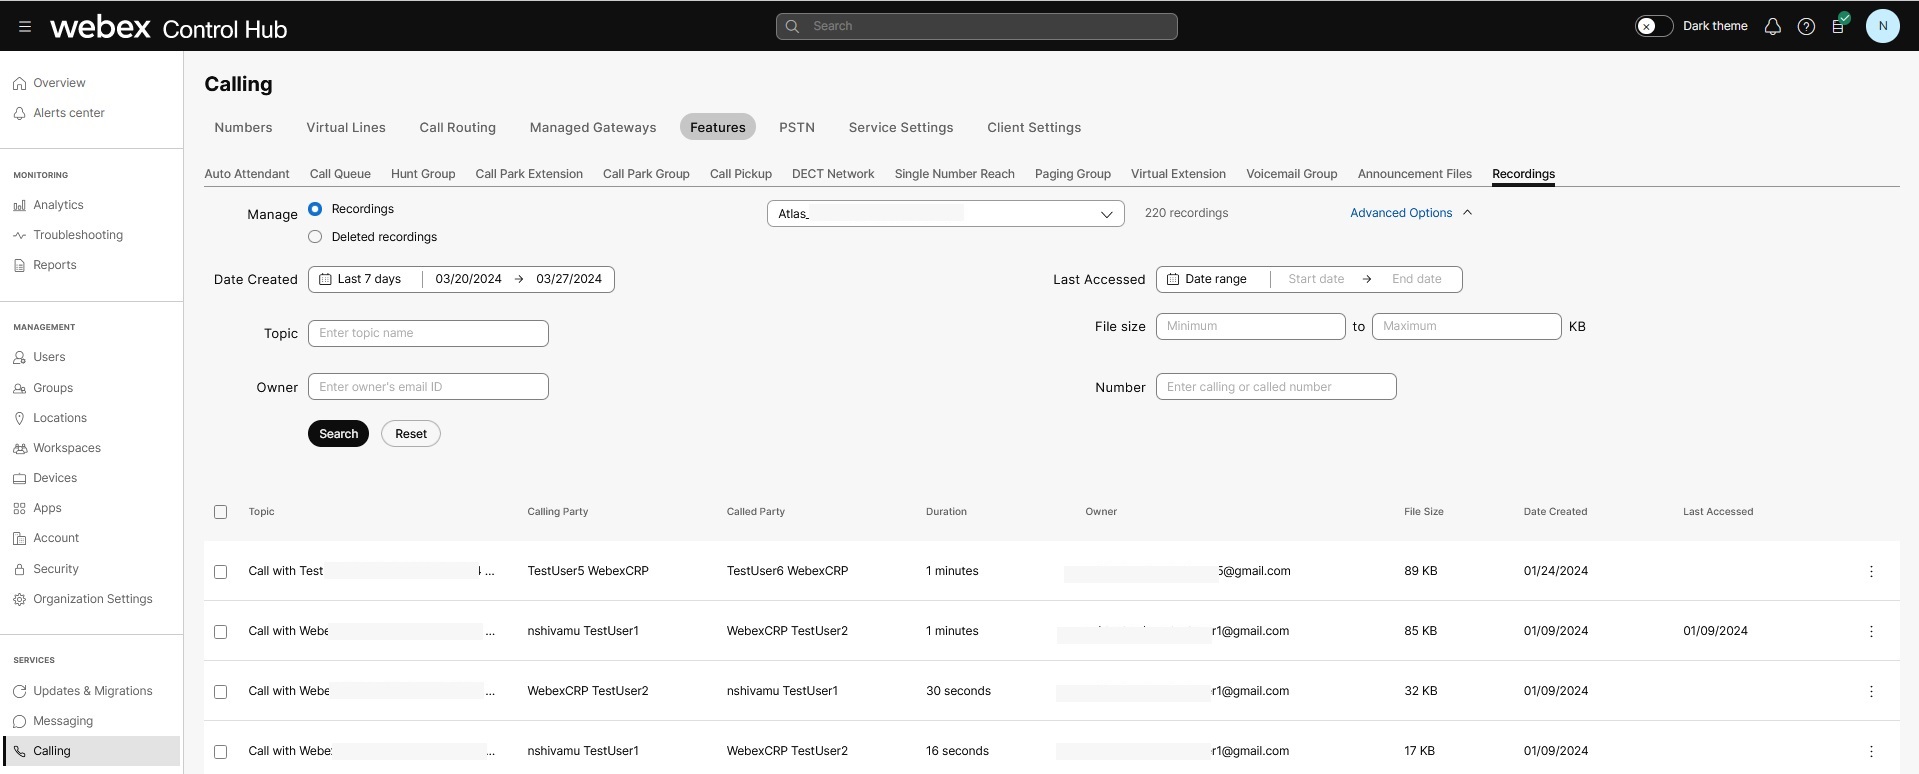
Click Advanced options to refine your search. Ensure that the Recordings repository is checked. Specify the following using the Advanced options:
By default, the call records stored in the last seven days display in the Advanced search option. The Webex call recordings are available for a year from the date it is recorded.
By default, the location field is set to All Locations. |
| 5 |
Click Search to search the recordings based on the selection. |
| 6 |
Select a recording from the list and the Actions bar displays. The supported actions are:
Use the Select all option to select multiple recordings. If
there are more recordings, then the first 200 recordings are selected.
|
| 7 |
A warning message displays for the action. You can choose to delete or cancel the request. |
Manage call recordings as a compliance officer
As a full administrator with Compliance officer access, you can Download and Play the recordings from the Call Recording screen. This capability is for Webex call recordings. You can cross-launch and use the Unified Player from the Control Hub to play the recordings.
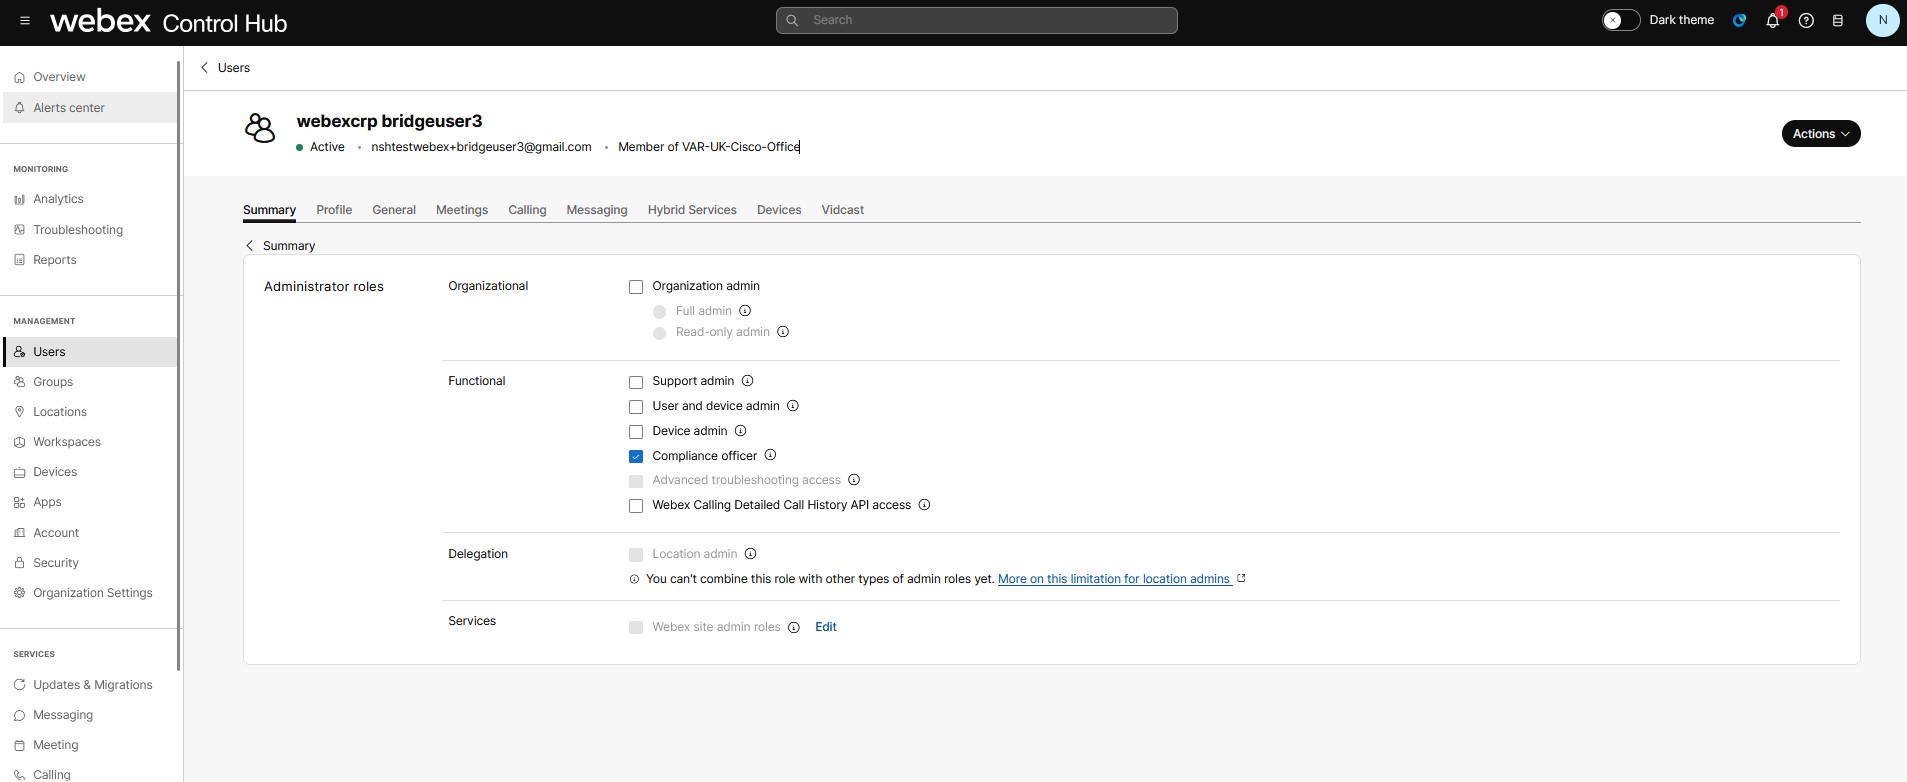
To verify if a role has Full administrator with Compliance officer permission, follow these steps:
| 1 |
Sign in to Control Hub. |
| 2 |
Go to Users under Management. The Users window displays. Select a user from the list to view the access
details.
|
| 3 |
On the Summary tab, scroll to Administrator roles. Click on Administrator role to view the permission. Under Functions, if the Compliance officer option is checked then the user has permission to play and download the recordings.
Ensure that the user is a Full Administrator and then check the Compliance officer role. Else, select the Full admin and the Compliance officer options to manage the call recordings.
Partner Administrators can’t provision for the Compliance officer role. Hence, the experience as a Partner administrators isn’t the same as an Administrator. |
Download and play call recordings
As a Compliance officer, you can download and play the recordings.
| 1 |
Sign in to Control Hub. |
| 2 |
Go to Calling under Services. Click . The Recordings window displays the following information: the topic of the recording, calling and called party details, owner information, and the duration of the call recording. It also shows the data storage used for call recordings, the file size, and the expiry date when the data will be deleted. Expires on column indicates the expiry date based on the retention policy configuration. For more information, see Calling retention. When a recording’s expiry date is approaching, the date will appear in orange to alert organization administrators that the recording is nearing deletion and appropriate action must be taken. As a Compliance officer, you can click on the recording and play it using the Unified Player.
|
| 3 |
Click the As a Compliance officer, when you select Download from the menu or hyperlink, the recording is downloaded. Depending on the browser, the administrator is notified about the download. When you select the Play option, a new window in the browser opens with the call recording. When you select the Reassign option, the Reassign recording owner window appears where you can select a user whom you want to assign as owner of this recording. Administrators without the Compliance officer permission can only see the Delete and Reassign options. They can’t see that the Topic Name is hyperlinked, as they can’t play the recordings, nor can they see the information icon explaining the Play interaction. To reassign or delete multiple recordings, you can select the recordings and click Reassign or Delete. You can also use the Select all option to select multiple recordings. If there are more recordings, then the first 200 recordings are selected. |
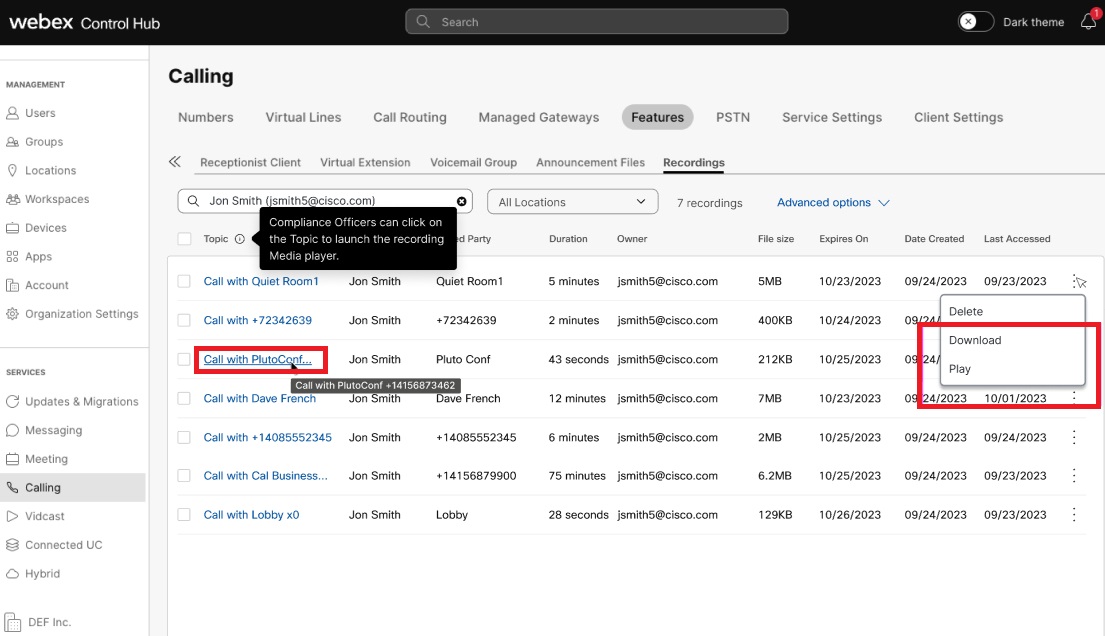
 icon in the row corresponding to a recording to access the
Generate a transcript for calls recorded by Webex call provider
You can configure automatic transcription for recorded calls. Users can see the transcript in the player when they play the recording from Webex App or User Hub.
Speaker identification in a transcript is currently not supported for FedRAMP.
Before you begin
- Transcripts are available only for calls recorded by the Webex call recording provider.
- Transcripts are available only when the call is in English.
Enable transcripts at user, workspace, or virtual line level
The individual user, workspace, or virtual line level settings override the organization-level settings. On configuring these settings for user, workspace, or virtual line, you can make further modifications at those levels. These individual settings won’t automatically return to the organization’s default setting.
| 1 |
Sign in to Control Hub. |
| 2 |
Go to the respective path:
|
| 3 |
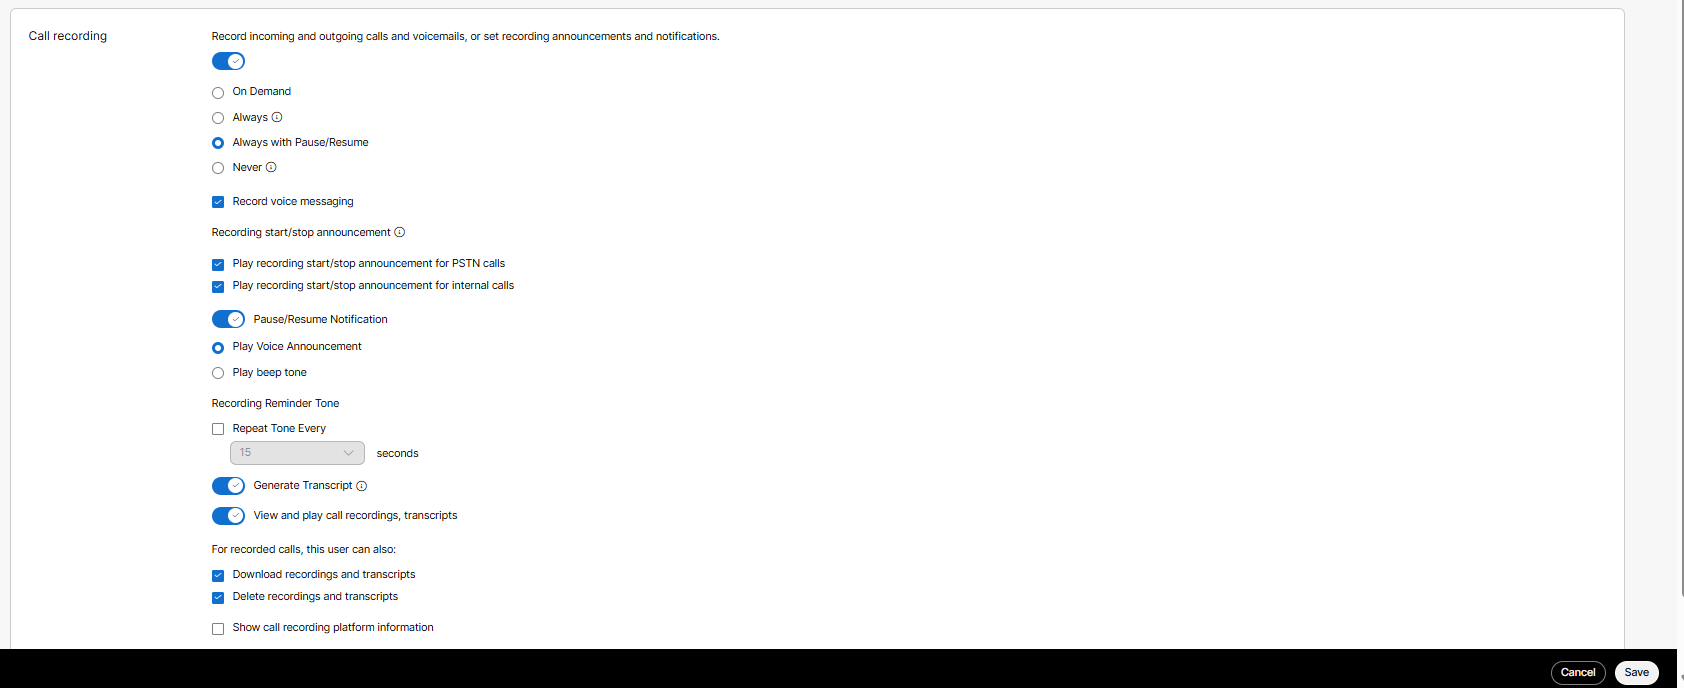
Slide the toggle, to enable Call recording. |
| 4 |
Slide the toggle, to enable Generate Transcript.
If the Generate Transcript toggle is not visible, change the announcement language to English for the user or location. To update the language:
|
| 5 |
To allow a user, workspace, or virtual line to view, download, and delete the transcript, enable View and play call recordings, transcripts, and then select Download recordings and transcripts and Delete recordings and transcripts. The options to view, download, and delete the transcript appear only if you enable Generate Transcript. If you disable View and play call recordings, transcripts, then the user can’t access the call recordings and transcripts. |
| 6 |
Click Save. 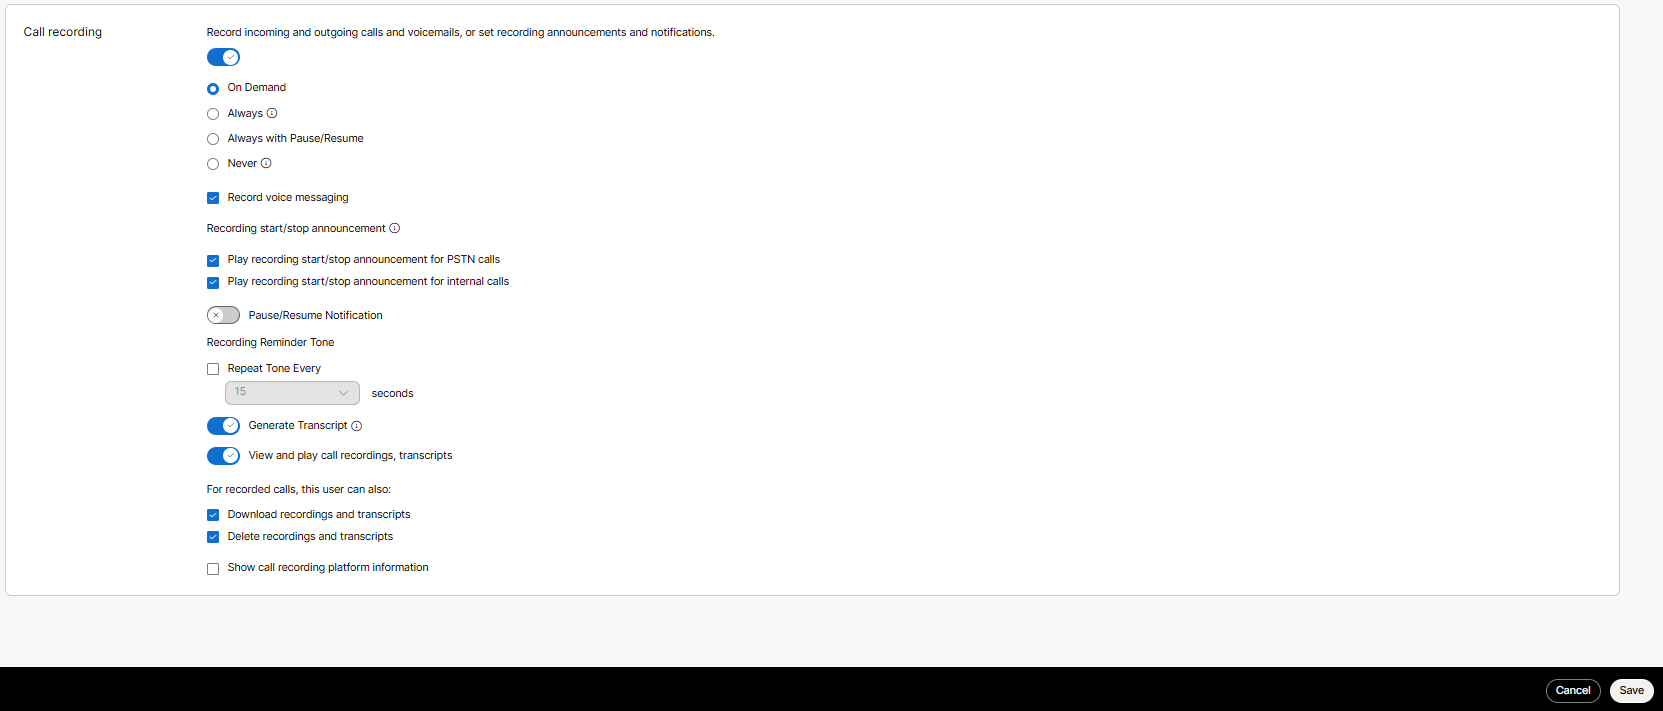
|
Call recording behavior
Key behaviors related to call recording in Webex Calling:
-
Users see an icon on their Multiplatform phone (MPP) and the Webex App showing that a call is being recorded.
-
Users and workspaces with On-demand recording mode see a Record soft key (button) to initiate the recording.
-
Users and workspaces with On-demand and Always with Pause/Resume dynamically see the soft key (button) to pause and resume the recording if the settings are enabled for the users.
-
When an announcement is played during start, stop, pause, or resume operations, Webex Calling sends information to the call recording provider that an announcement was played as a SIPREC meta-data message.
-
ICE (Media optimization) and Call Recording features independently introduce a small audio delay at the beginning of the call and, when used together, the audio delay is slightly longer and more noticeable to customers.
Known issues
- Users may encounter one-way media or no media during PSTN calls when they hold and resume the call. This issue in FedRAMP arises under specific conditions when a user holds and resumes a call that has been ongoing for about 23 minutes.


