- Home
- /
- Article

Thanks for your feedback.

 In this article
 Feedback?
Go live like never before with Studio Broadcast! Instantly stream to your audience, share your screen or camera, manage your event, and engage viewers, all in one seamless experience.
Set up your event
Unlock new ways to connect and captivate your audience with this powerful new livestreaming feature.
Studio Broadcast is a per request Enterprise feature. Learn more.
| 1 |
To create an event, click on New video button and select Studio Broadcast tile. Alternatively, navigate to you Library -> Events tab and click on New event button in the top right corner. 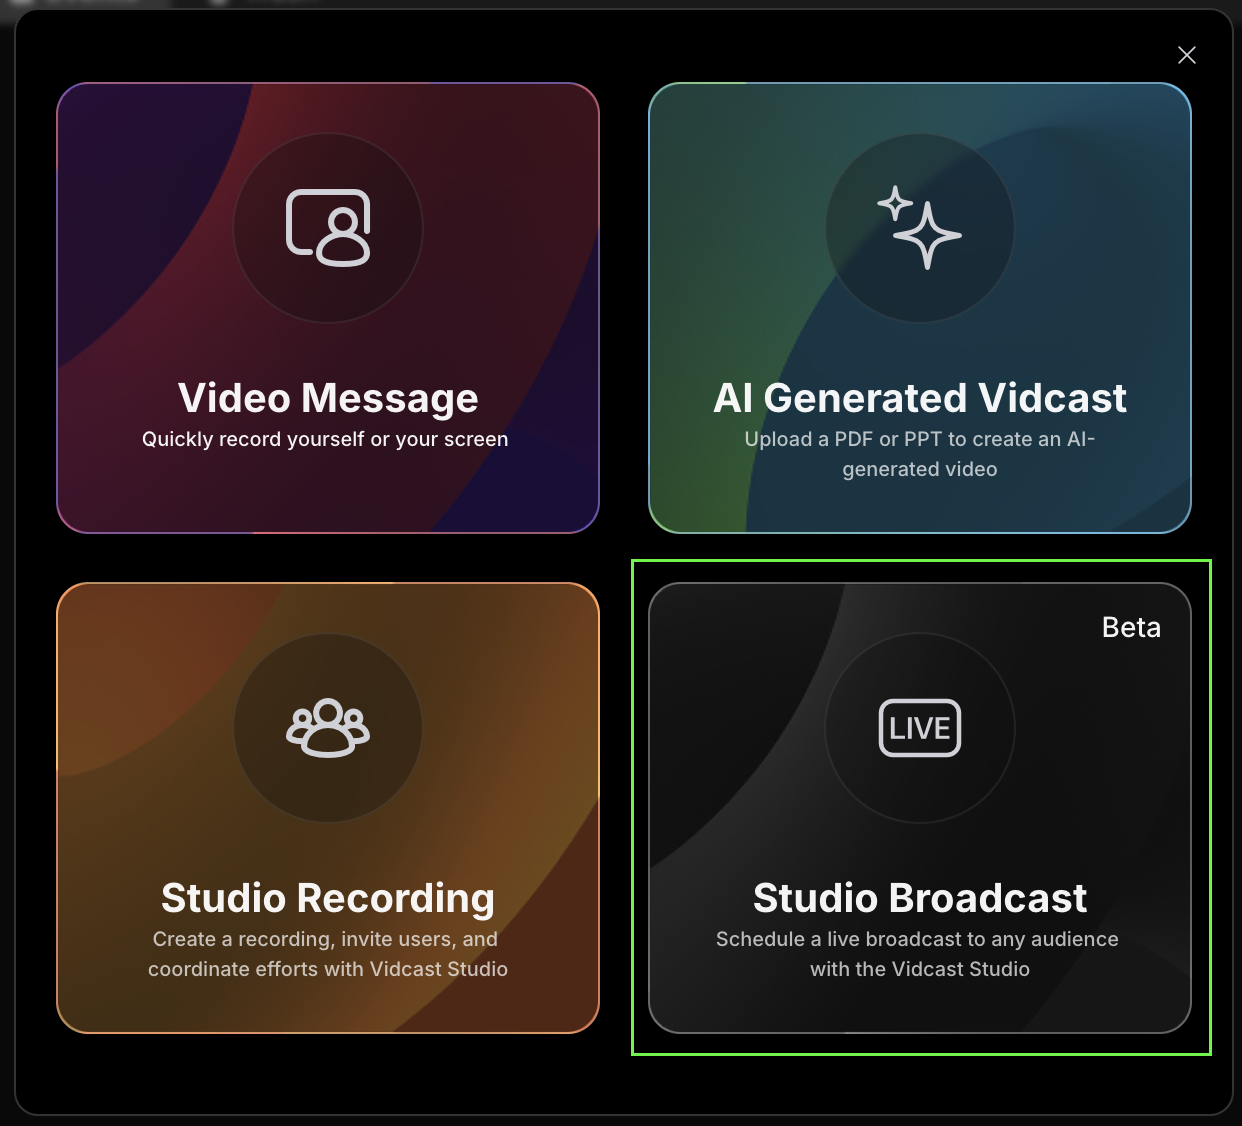
|
| 2 |
This will get you to the event set up screen. You will be able to name your event, add description and even change it's scheduled date & time. 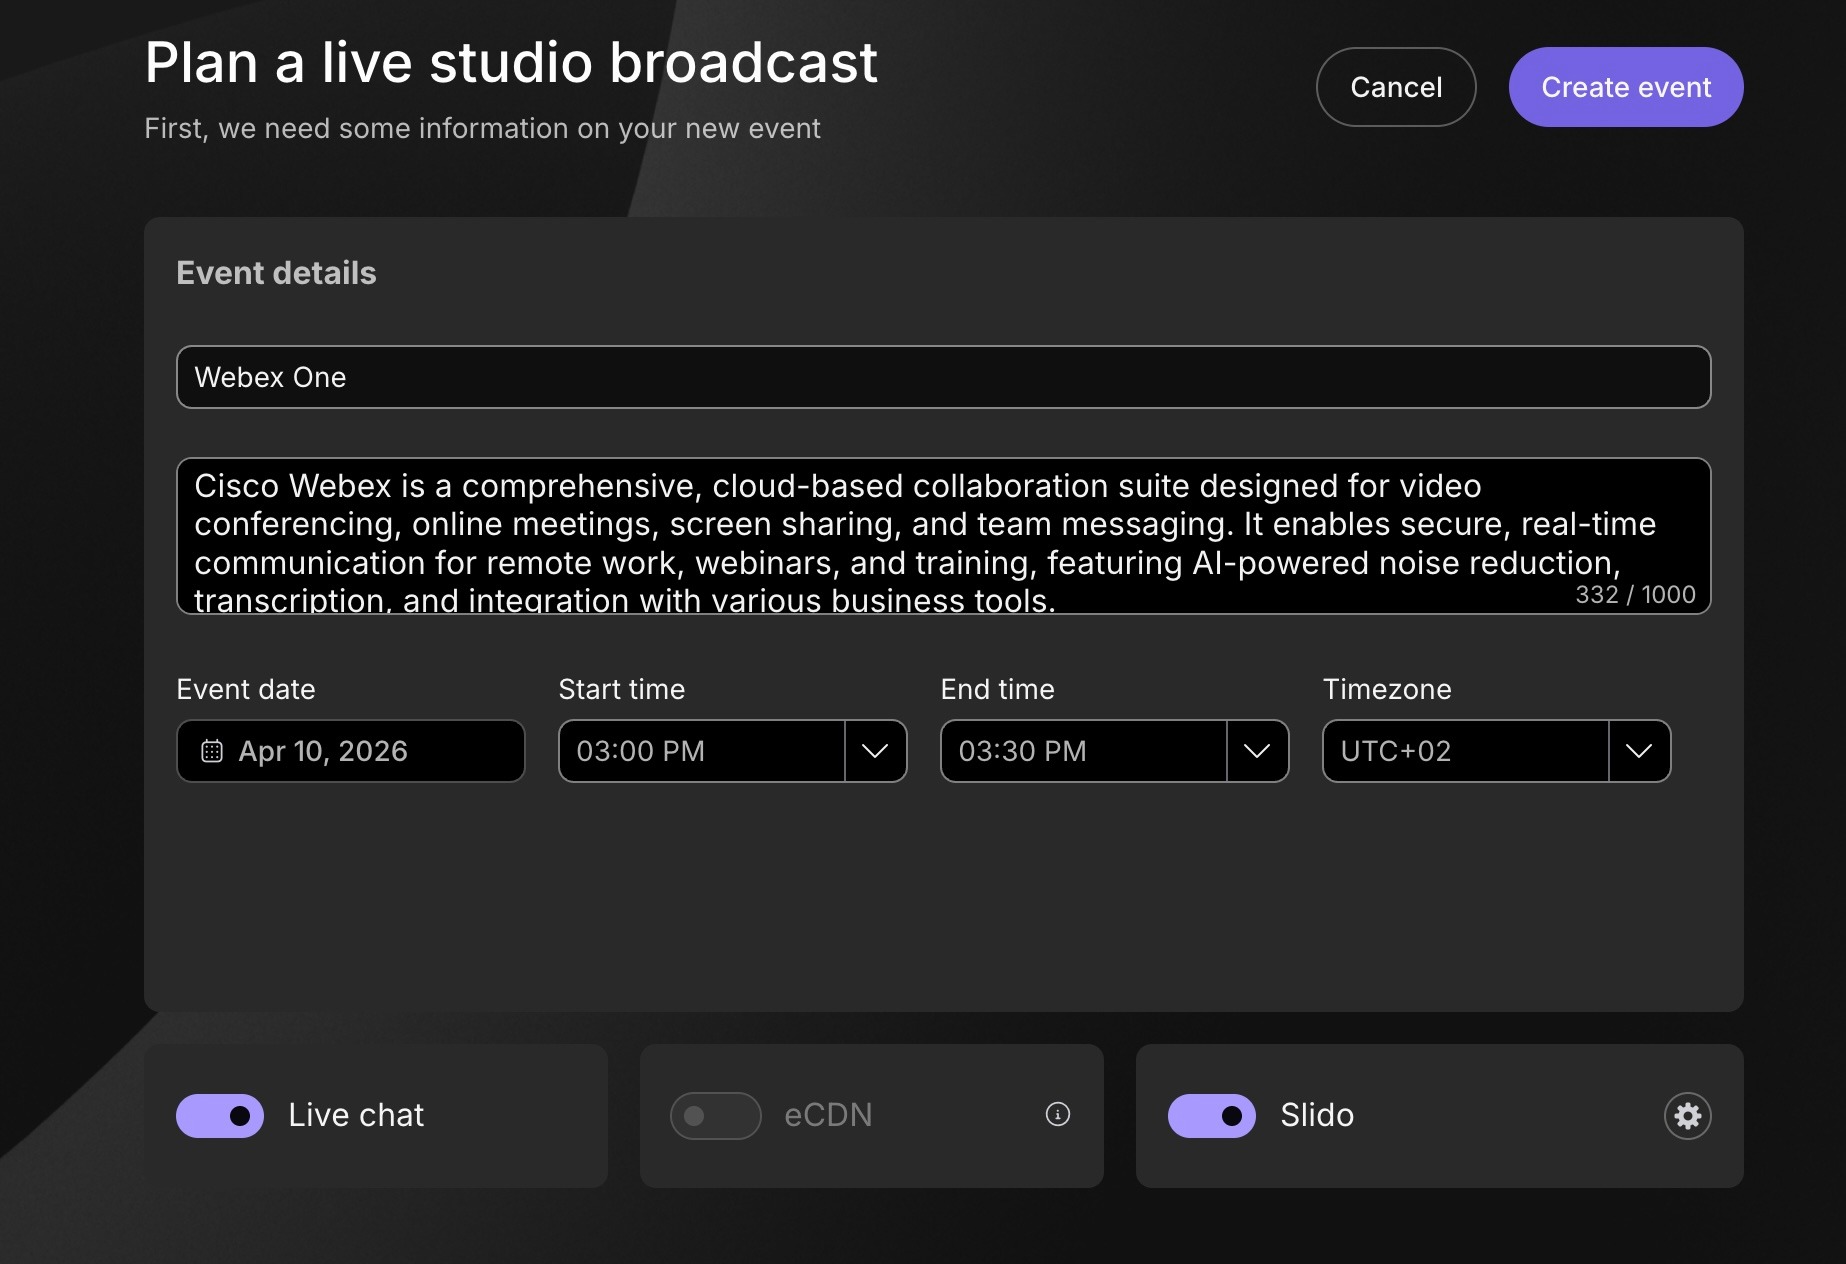 |
| 3 |
You will also be able to toggle on Slido and live chat for your audience. Clicking on the cogwheel next to the Slido toggle allows you to select from already existing Slidos, or you can create a new Slido specific for this event. 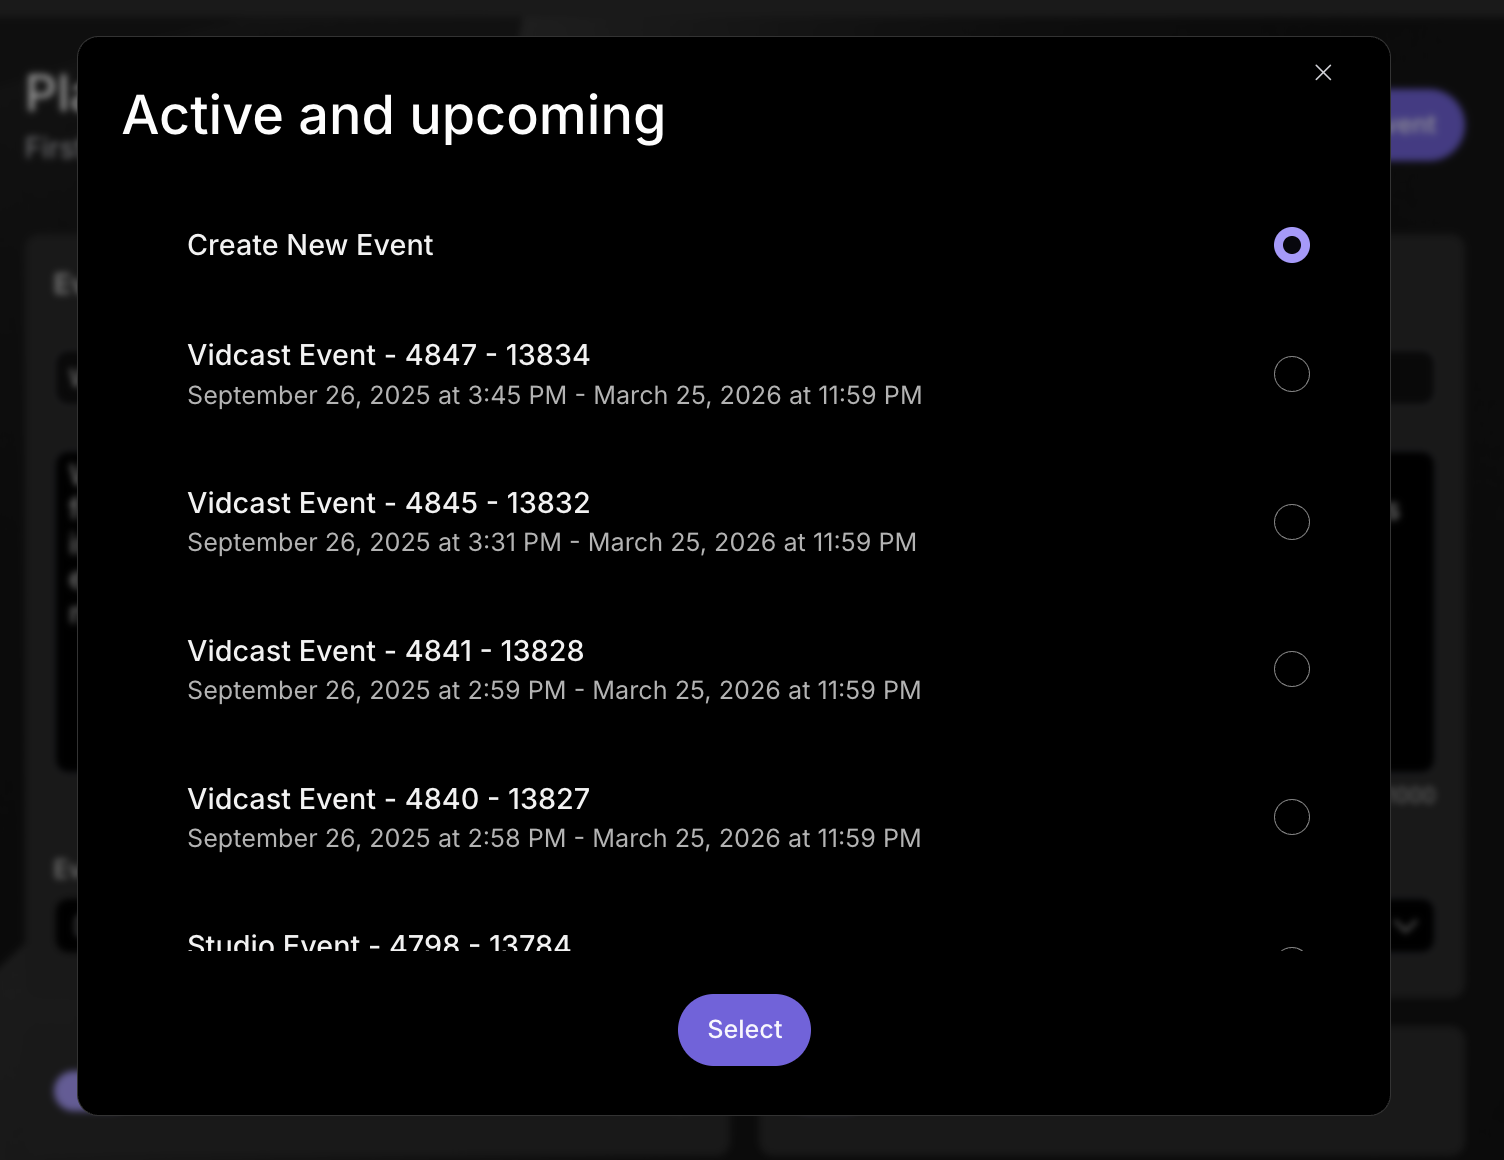
|
| 4 |
Once you are happy with the event setup, click on Create event button. 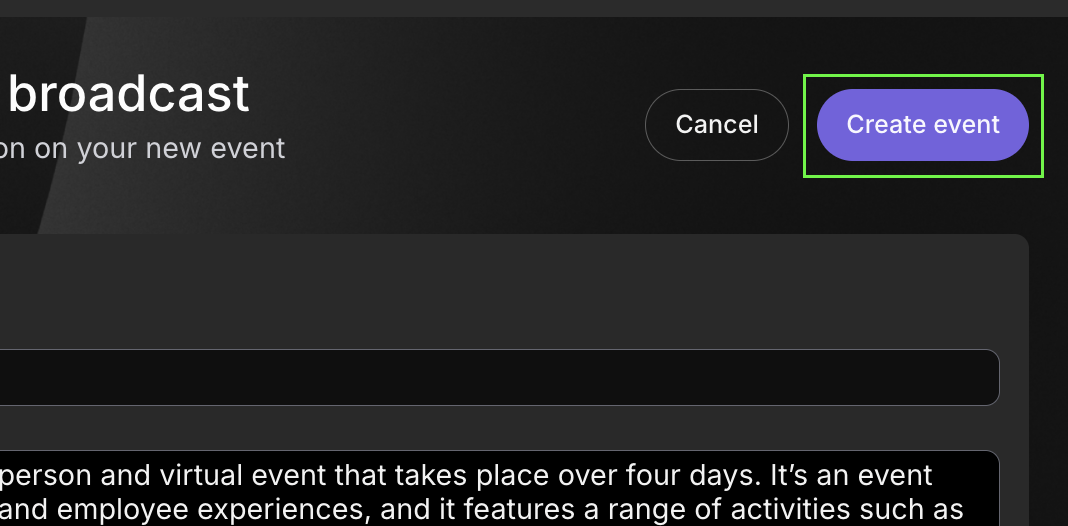
|
| 5 |
This will take you to the next screen, where you can further edit event details, invite Producers and Speakers, and assign attendee access rights to your audience. These work the same as share permissions for regular Vidcasts- you can limit who can access the broadcast via attendee link. 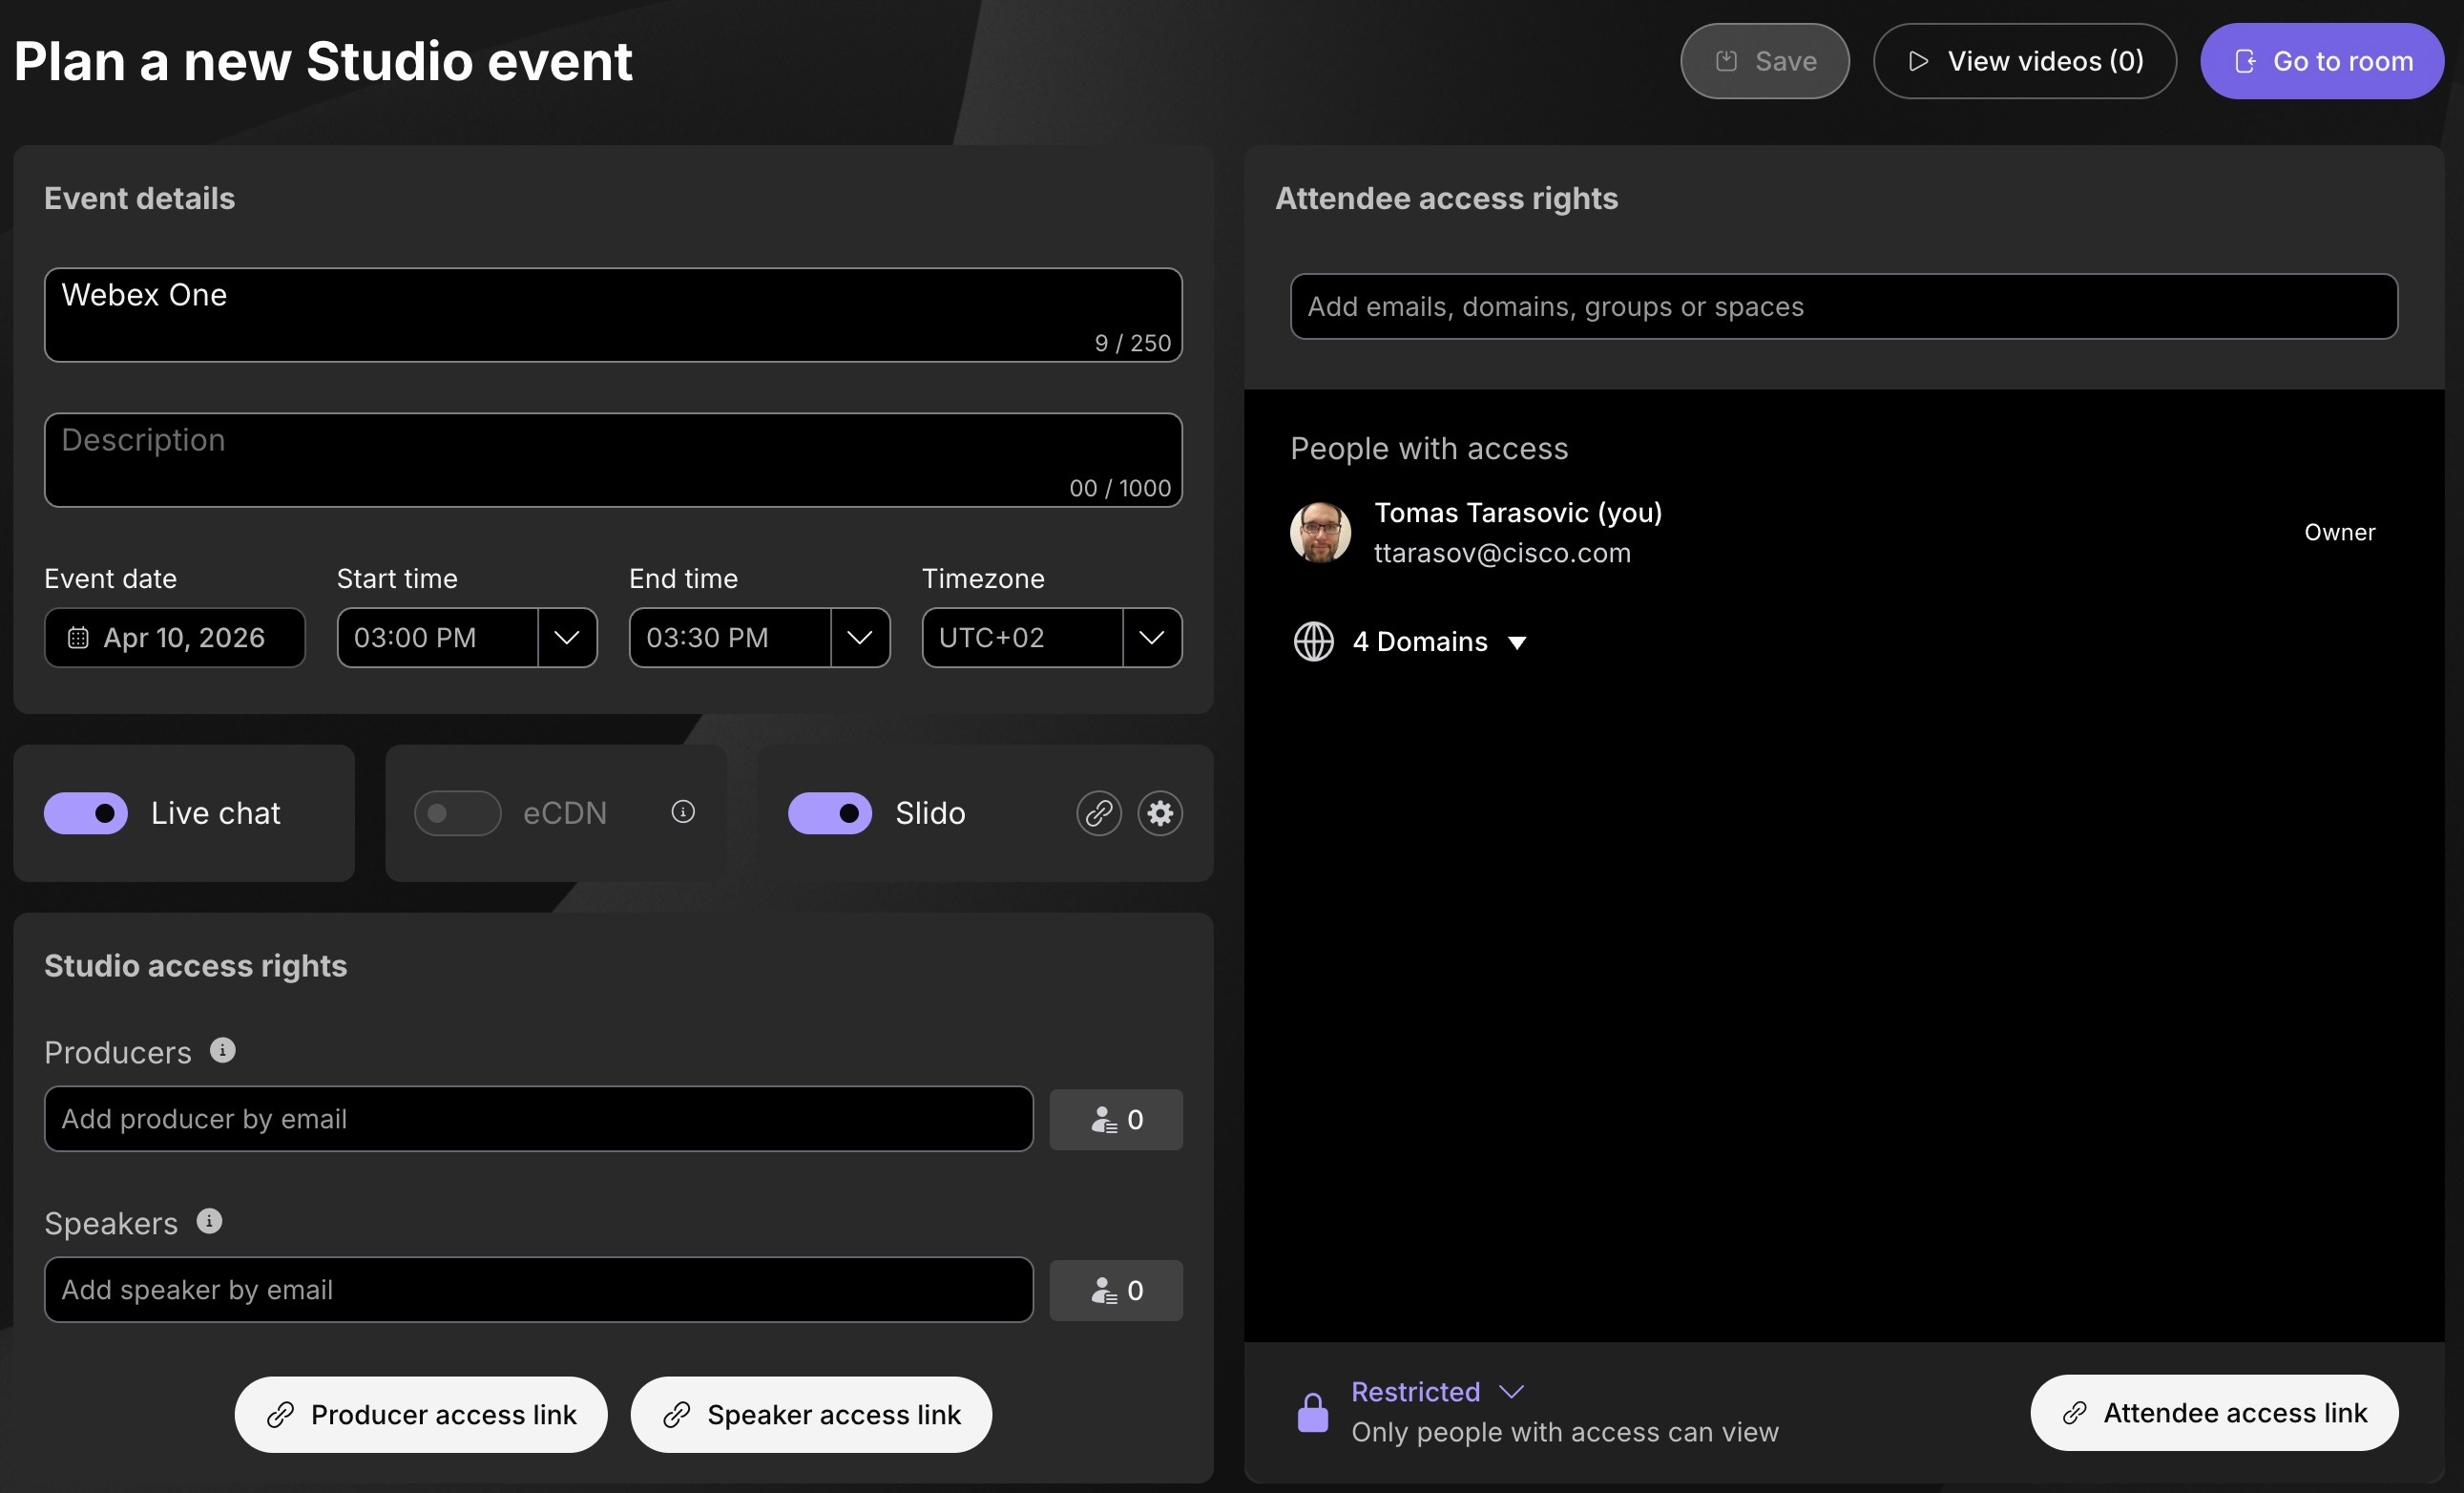
|
| 6 |
You will be also able to copy Event management links:
|
| 7 |
Finally, after all is set up, click on Go to room to start Studio Broadcast for this event. |
Studio Broadcast setup
The Studio Broadcast room setup is the same as for Studio recording.
| 1 |
First, you will be prompted to adjust your audio and video settings, name and tagline. 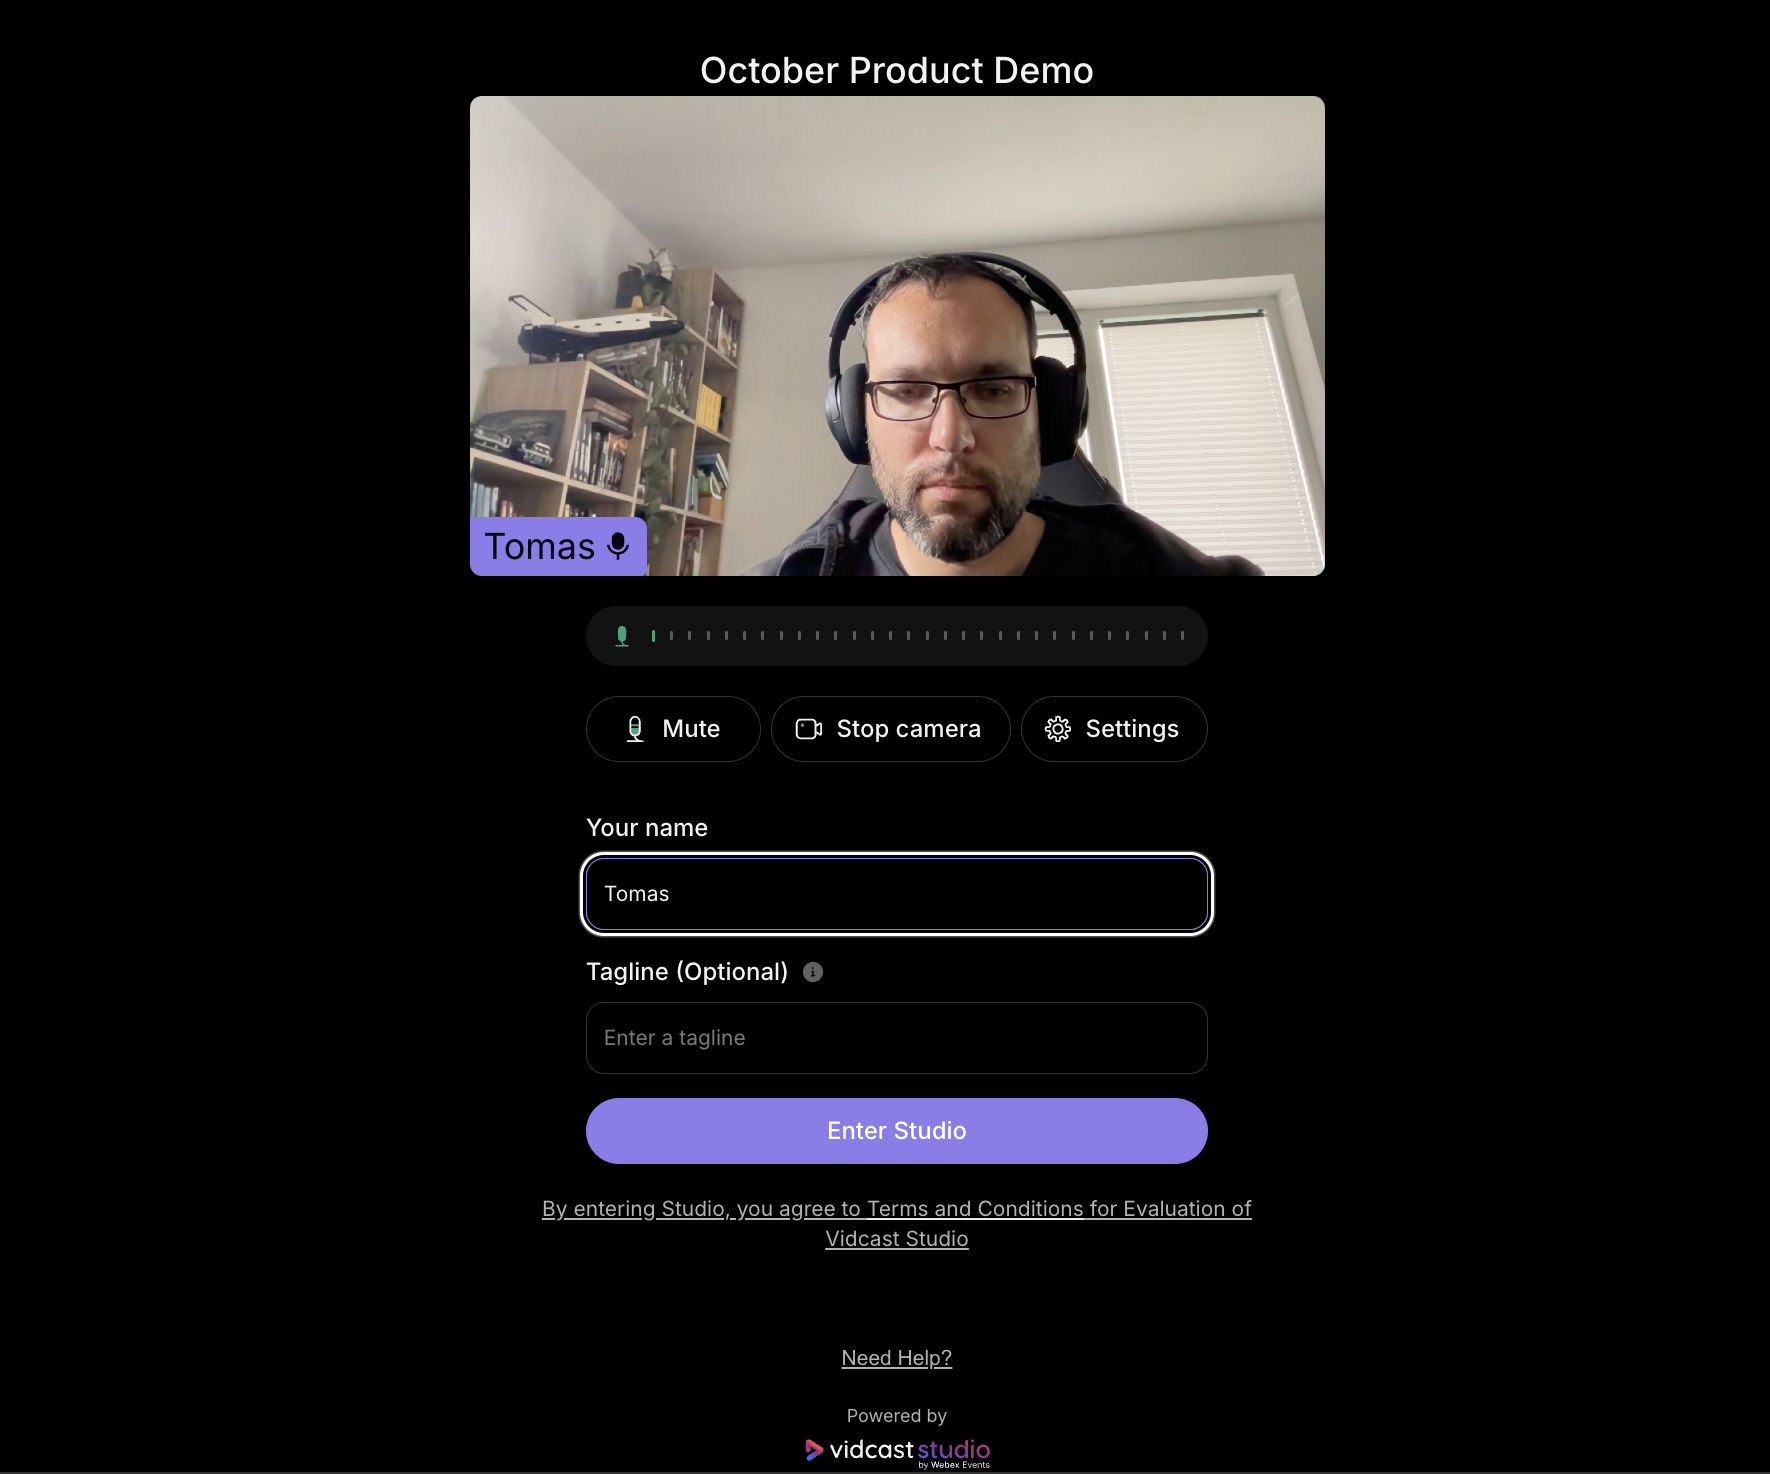
|
| 2 |
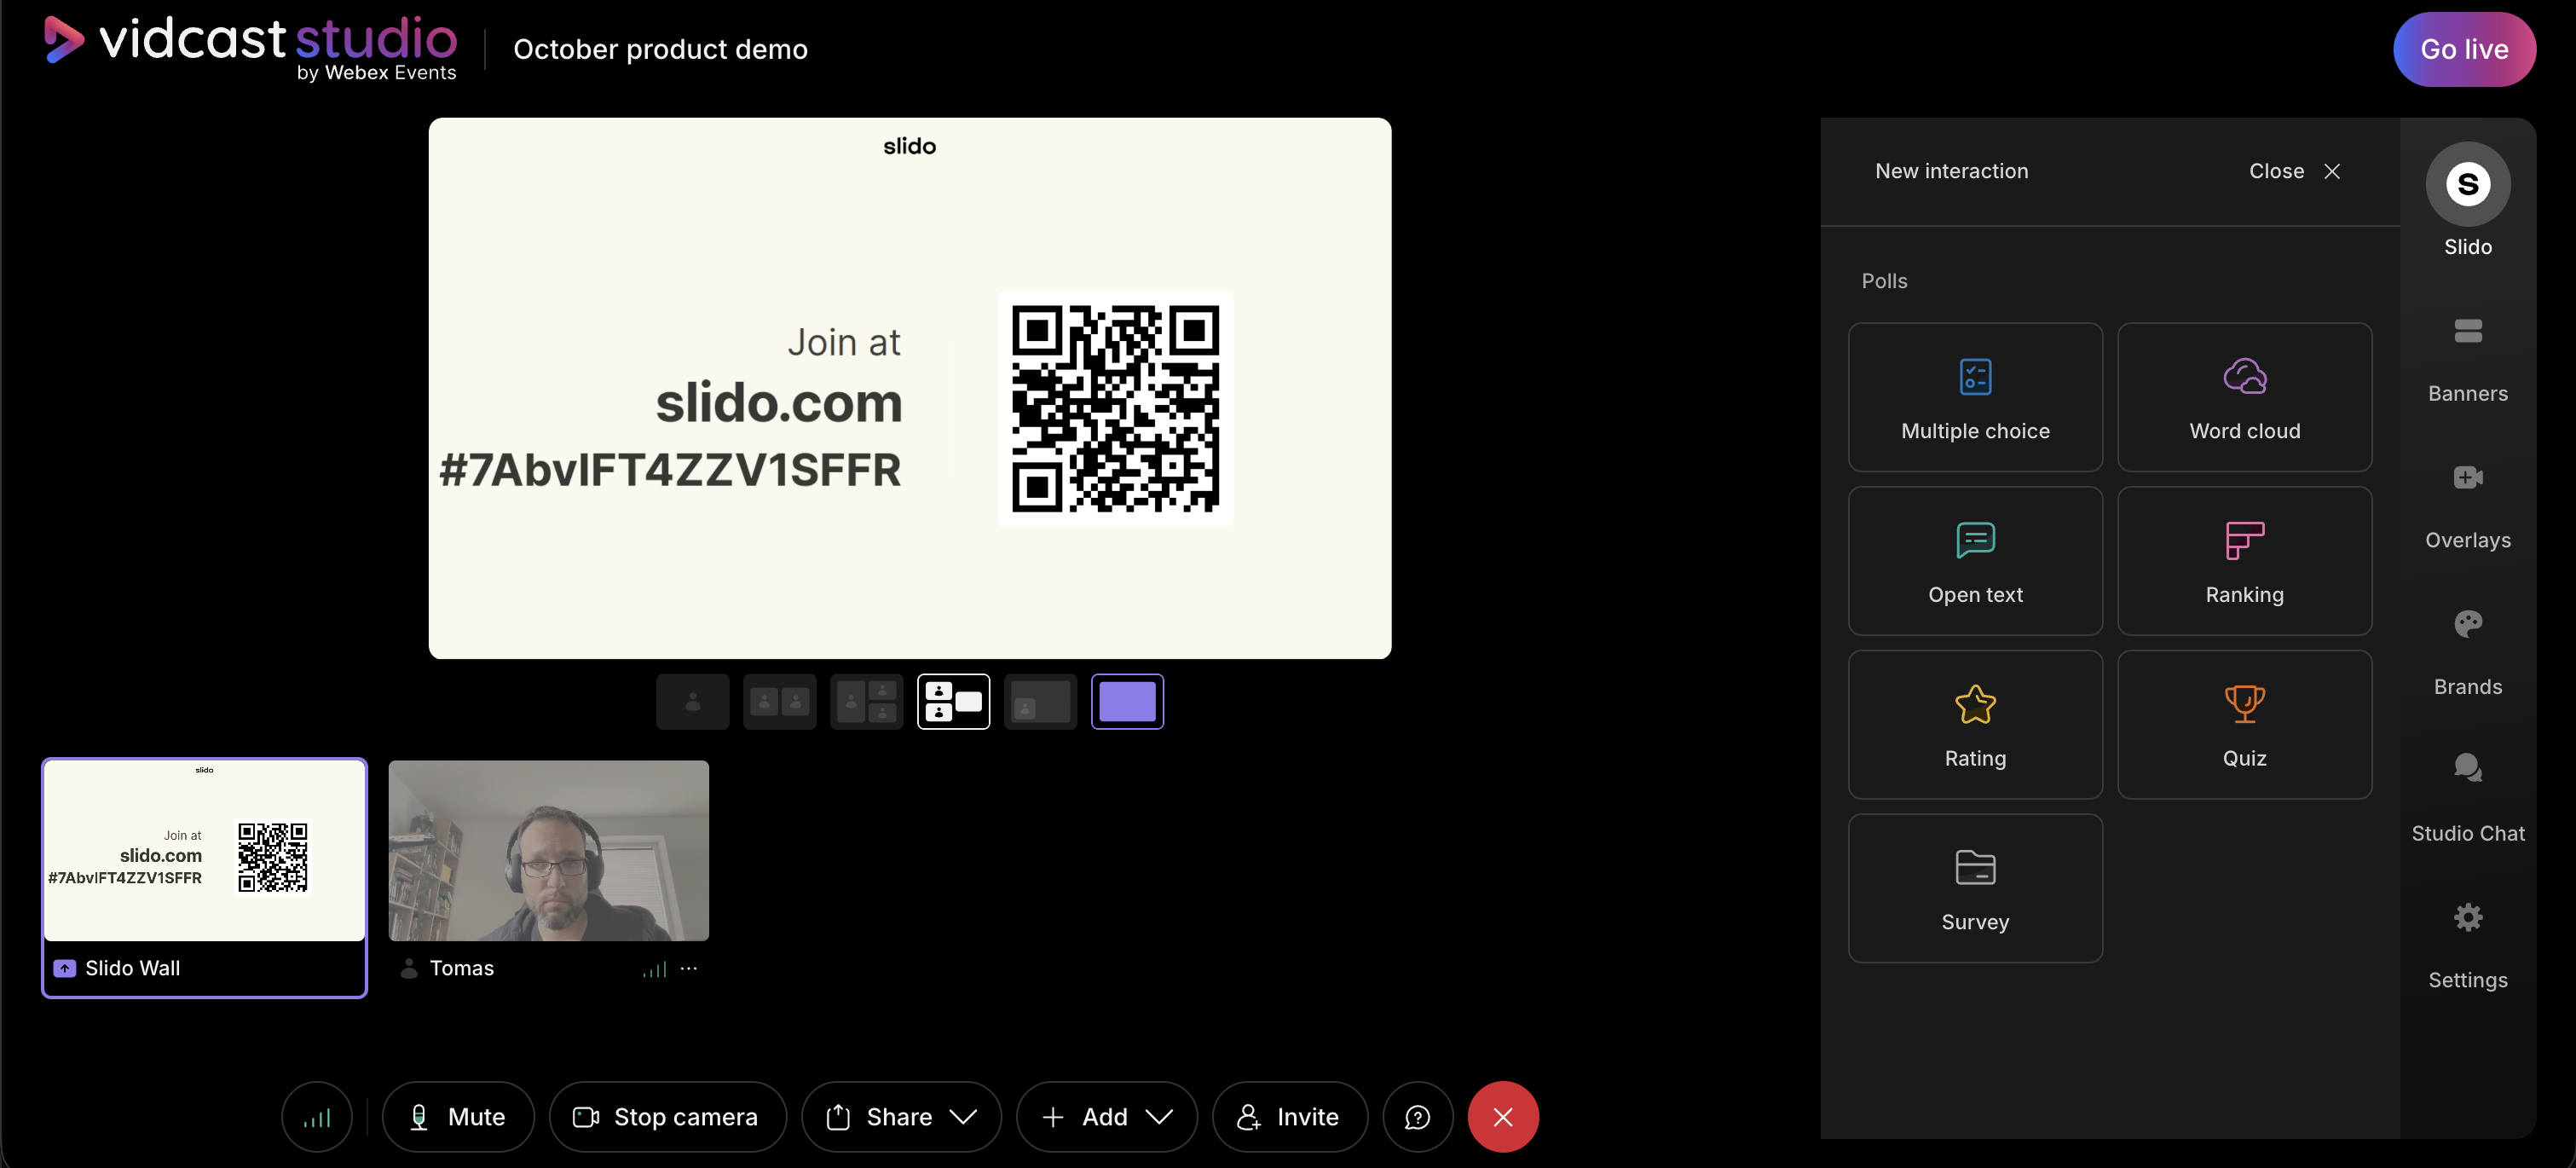
Once in the room, the only differences to Studio recording are the Engagement tab (when Slido or audience chat are enabled) and Go live button to start your broadcast.
Clicking on Go live will also make a recording of the session, which will be available in your library after the broadcast ends. |
Audience chat moderation
When the Live chat is toggled on in the event setup, your audience will be able to interact with you and other audience members. You will see any new messages in Studio's Engagement tab -> Audience chat.
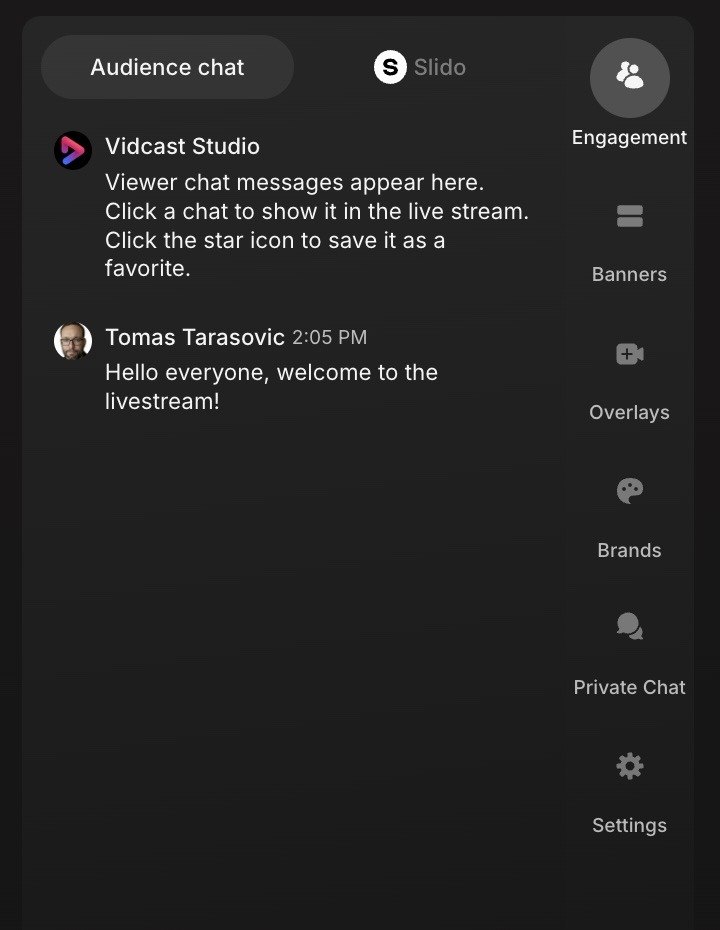
When you hover your cursor over individual chat messages in Studio, you will be able to moderate the message.
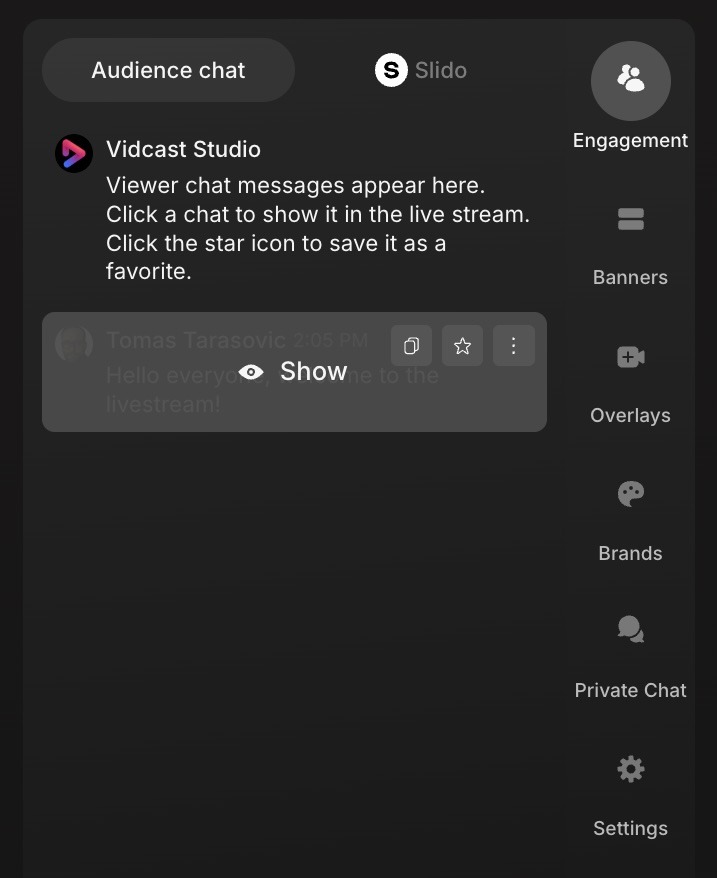
Clicking on chat message itself will automatically show it on your stream.

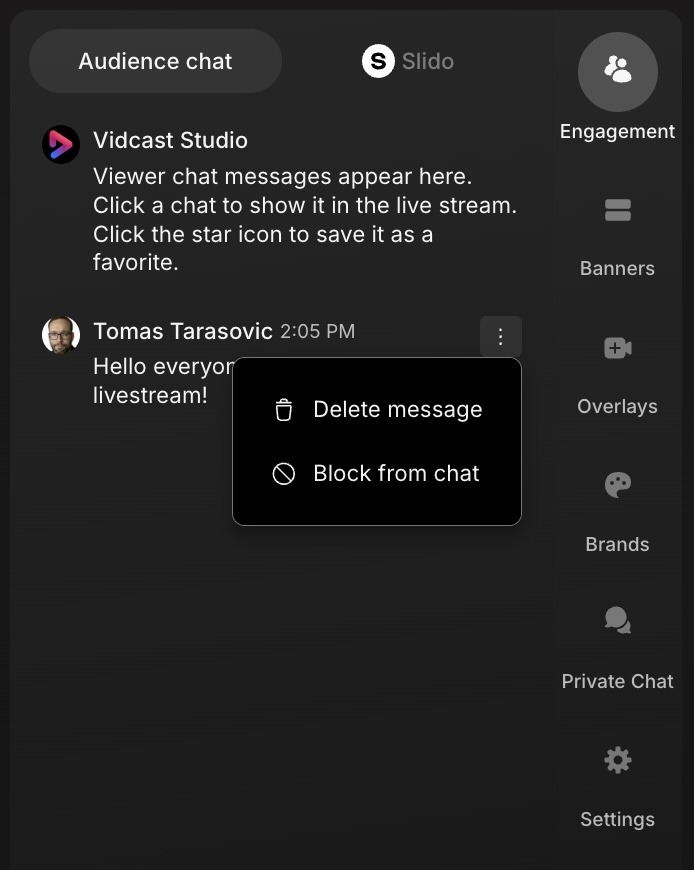
Once you click on the three dot menu, you will be able remove the message or even block the participant if necessary.
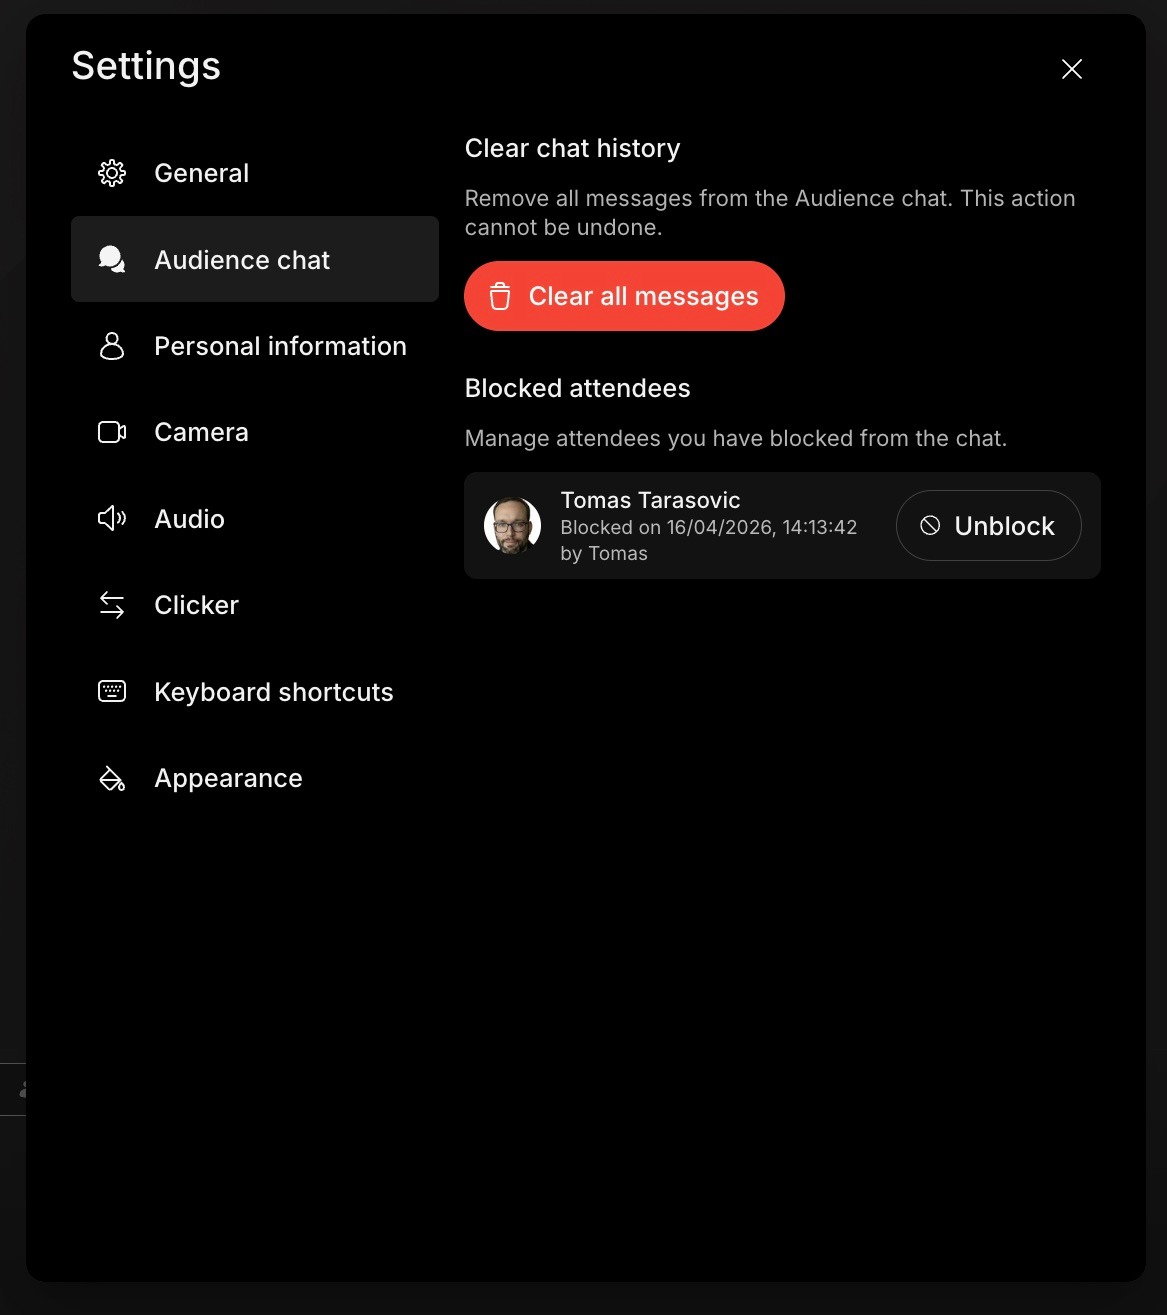
In your Studio settings, navigate to Audience chat to manage blocked users. Alternatively you can also clear the chat by deleting all messages.
Events management
Once the you schedule an event, it will be automatically saved into your Library -> Events.
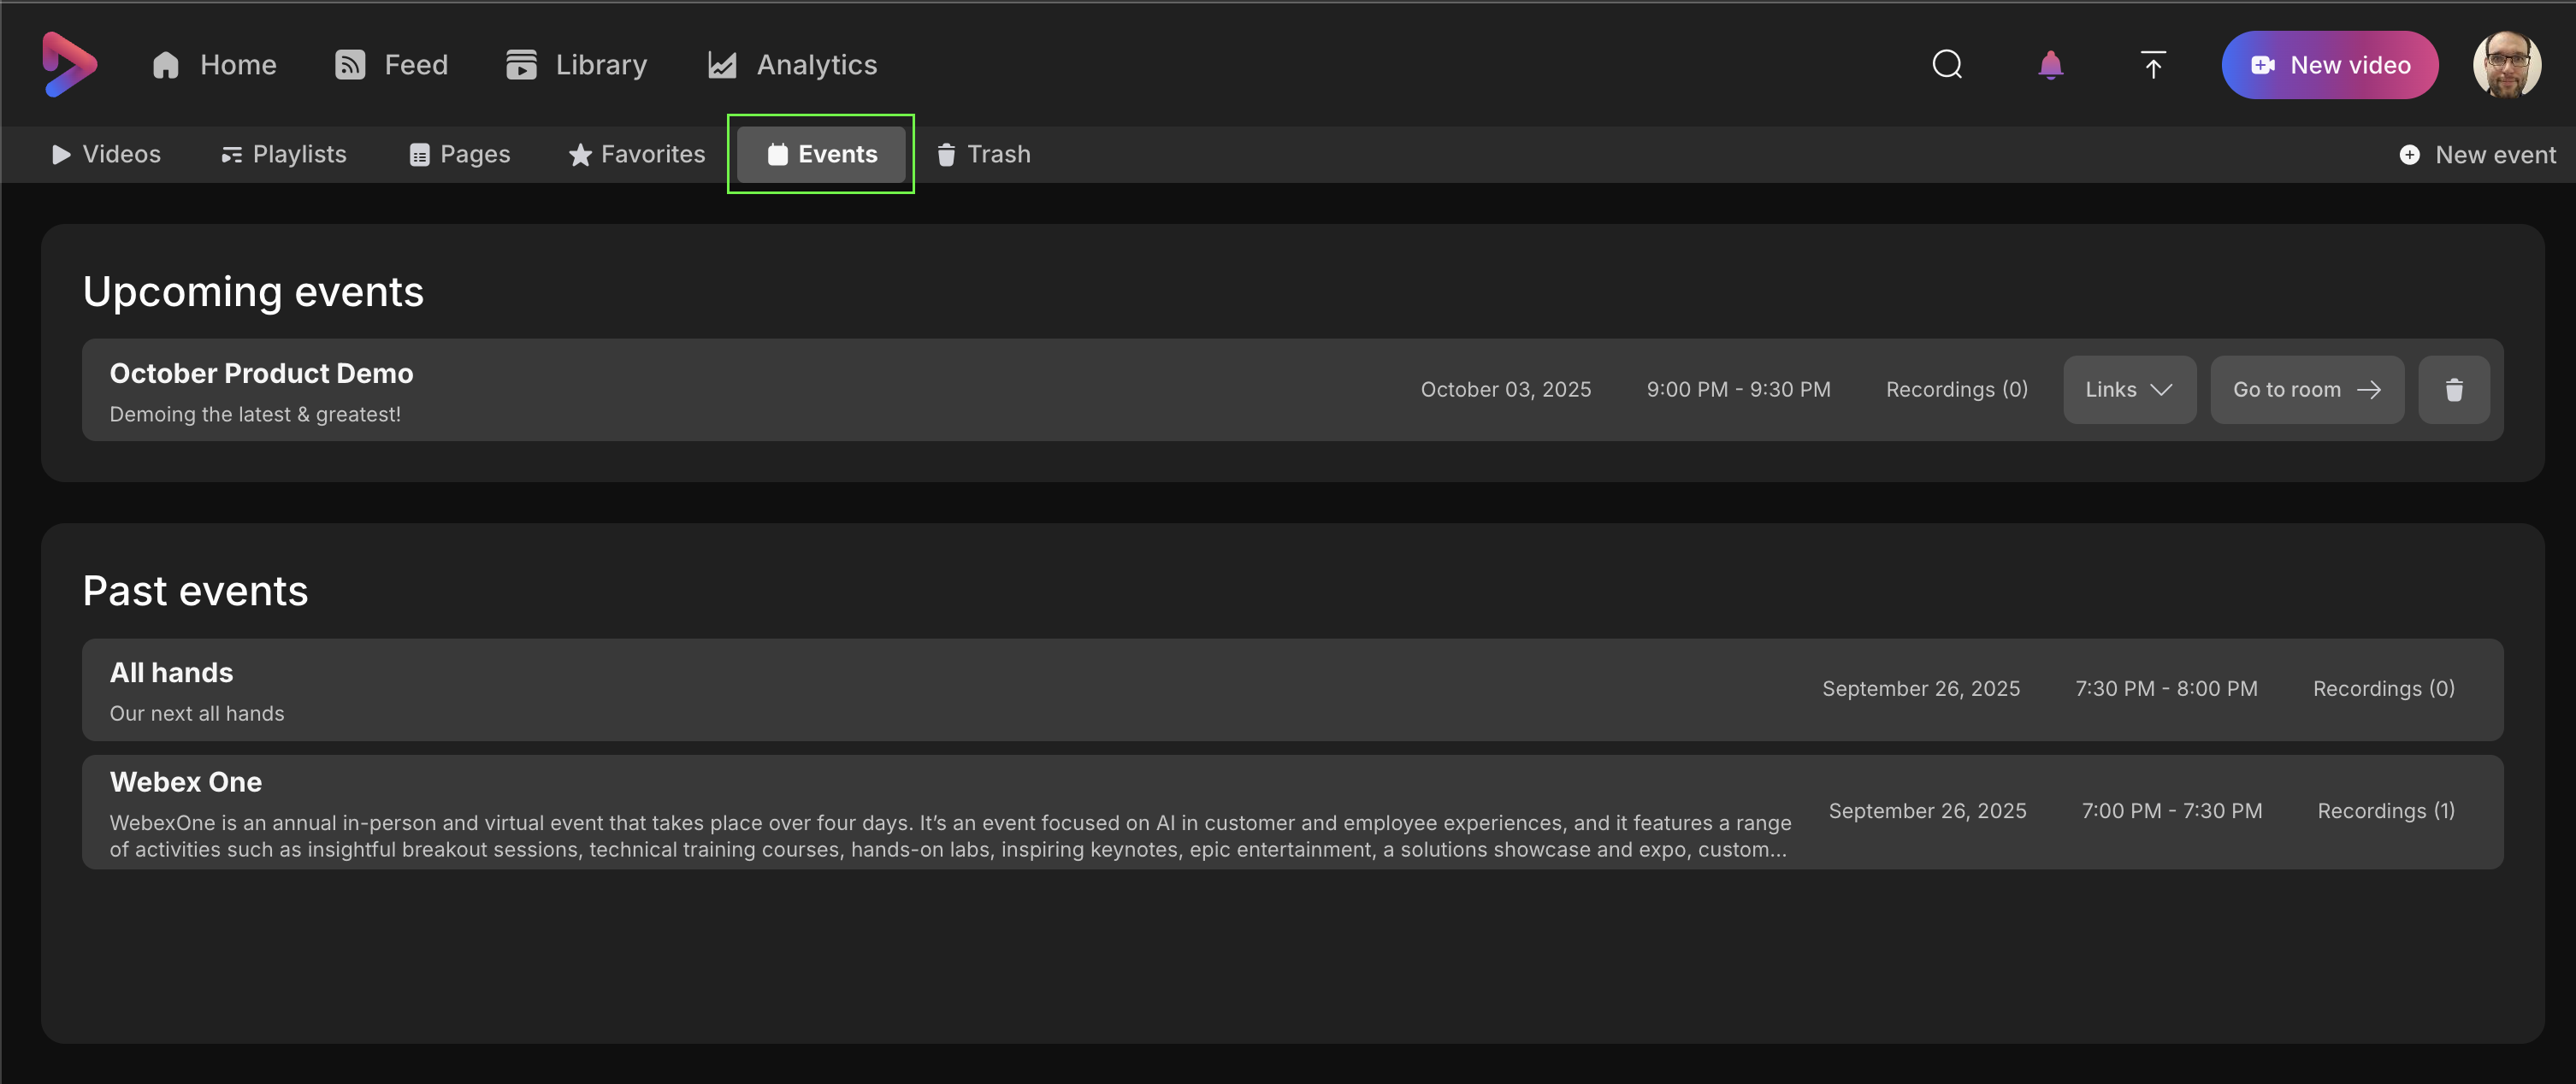
There you can go to event settings by clicking on any upcoming event tile. You can also quickly access attendee, producer, speaker, and Slido (where enabled) links go to Studio room directly and delete the event.
Clicking on tile of past events will take you to the list of broadcast recordings.
Questions? Start a chat with our support team or reach us at help@vidcast.io


