
Thanks for your feedback.
 Feedback?
Use the Microsoft Store to deploy the Webex Scheduler to users. Use Webex Administration or Control Hub to configure the settings.
To deploy the Webex Scheduler for Microsoft Outlook, install it from the Microsoft AppSource and follow the instructions in Deploy add-ins in the admin center. You can also install it locally.
Before you deploy the Webex Scheduler for Microsoft Outlook, check to make sure you meet the minimum system requirements. See the list of requirements and the current known issues and limitations.
You may need to configure your network to allow the Webex Scheduler to access these URLs:
-
https://appsforoffice.microsoft.com/lib/1/hosted/office.js(for OfficeJS library).
Webex Scheduler authorization options
This page describes how to use your Microsoft 365 tenant administrator account to authorize the Webex Scheduler for everyone in your tenant.
If you prefer that individual users authorize Webex to access their M365 accounts, do not Add New Authorization as suggested below.
Enable and authorize the Webex Scheduler for your site
- Open the site options page for your Webex site and choose either Webex Administration or Control Hub.
- In Webex Administration, go to .
- In Control Hub, go to , choose the site from the Sites tab, select Settings, and then go to .
-
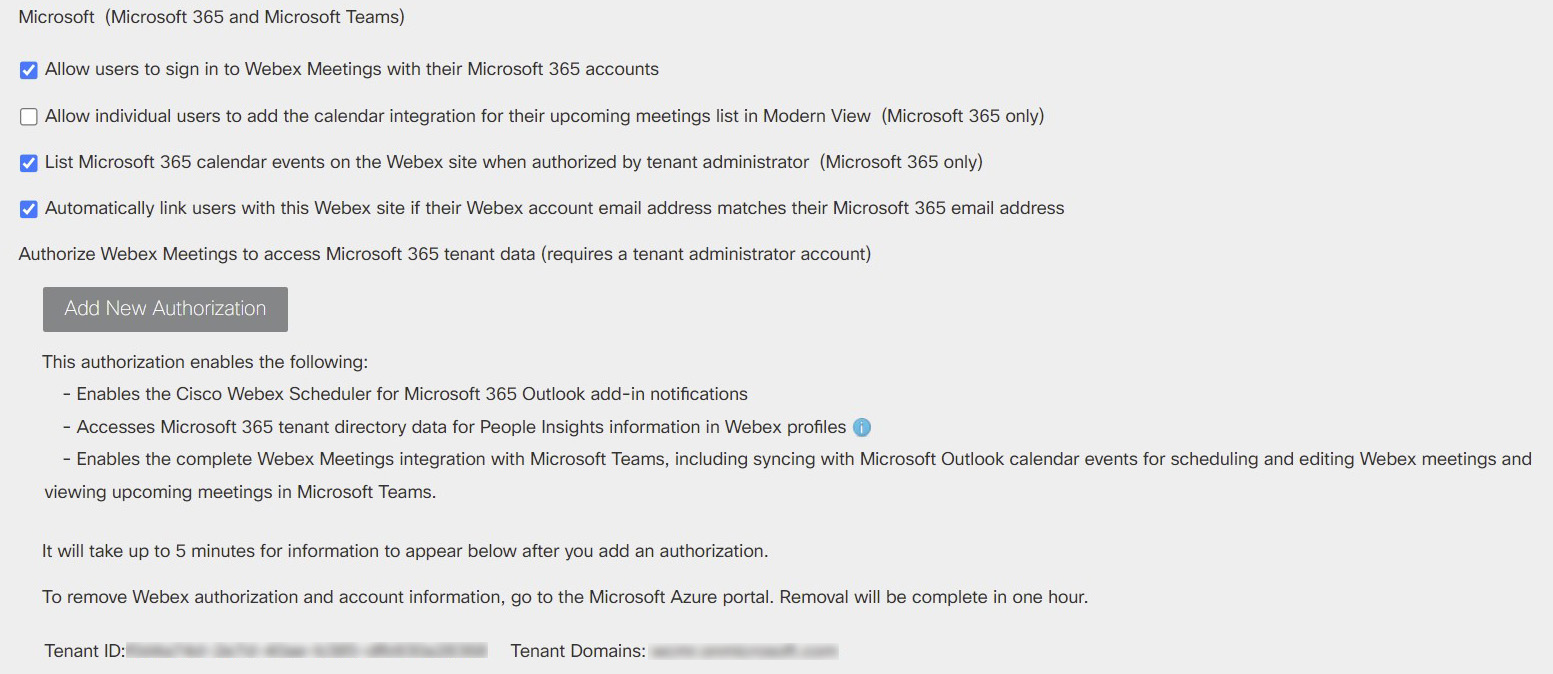
In the Third-Party Integration section, find Microsoft (Microsoft 365 and Microsoft Teams).
-
(Recommended) Check the Automatically link users with this Webex site if their Webex account email address matches their Microsoft 365 email address box to simplify user sign-in.
- Authorize Webex to access Microsoft 365:
-
Click Add New Authorization.
A new window opens where you can sign in. You may need to select an account.
-
Sign in with your Microsoft administrator account.
After successful sign-in, you can see the permissions you're granting to Webex.
-
Review the Permissions requested, and click Accept.
-
You can see the updated Tenant ID and Tenant Domains fields when you refresh the page.
If your organization is not bound by US government regulations, see Configure the Webex Scheduler for Microsoft 365 (conmmercial) above.
Before you begin
This task describes how to use your Microsoft 365 GCC / GCC High tenant administrator account to authorize the Webex Scheduler for everyone in your US government-related organization.
If you prefer that individual users should authorize Webex to access their M365 accounts, do not Add New Authorization as suggested below. See the permissions required for authorization.
| 1 |
Open the site options page for your Webex site and choose either Webex Administration or Control Hub.
|
| 2 |
In the Third-Party Integration section, find Microsoft (Microsoft 365 and Microsoft Teams). 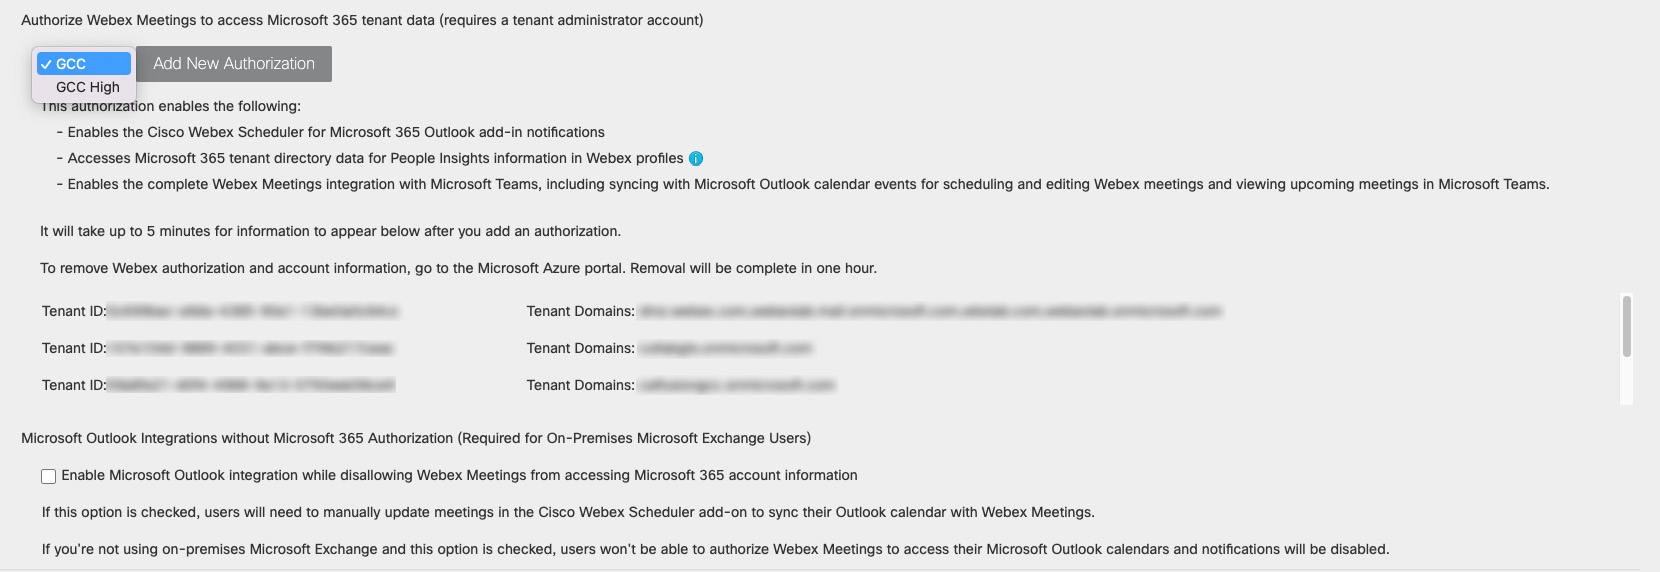
|
| 3 |
Select GCC or GCC High. Your choice depends what level of FedRAMP authorization your organization requires (Moderate or High).
|
| 4 |
(Recommended) Check the box Automatically link users with this Webex site if their Webex account email address matches their Microsoft 365 email address to simplify user sign-in. |
| 5 |
Authorize Webex to access Microsoft 365: You can see the updated Tenant ID and Tenant Domains fields when you refresh the page. |


