Thanks for your feedback.
Domain Verification Process for SIP Video Devices
 Feedback?
With cloud-registered video devices, there is an established chain of trust and we know whether those devices belong to your organization or not. To be able to achieve the same level of security with standards-based SIP video devices, complete the steps below. These will ensure that only your own organization’s SIP video devices can join meetings without the need for PINs and keys.
To complete the domain verification process:
| 1 |
Sign in to Control Hub, then go to . |
| 2 |
Enter your domain name and click Add. 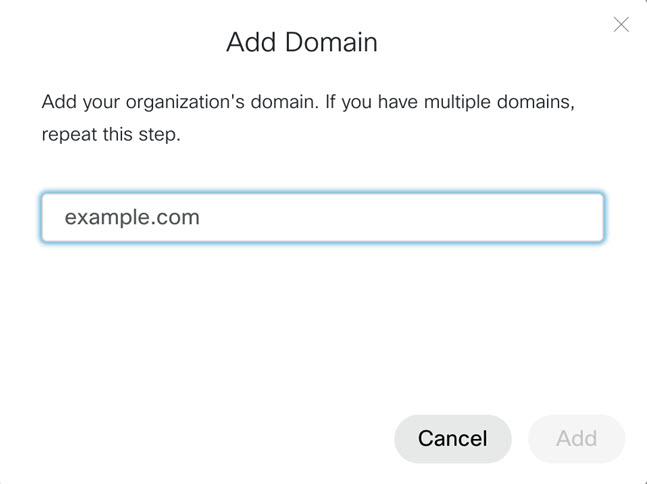
For more information, see Manage your domains. |
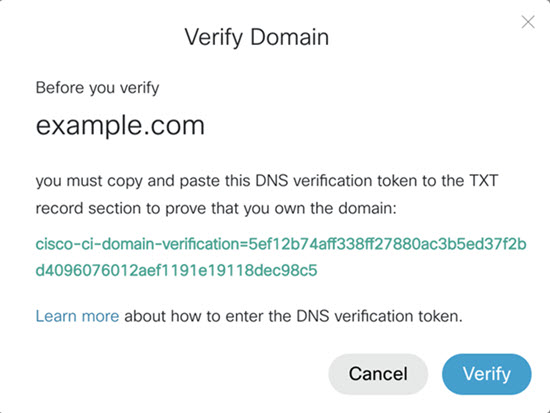
| 3 |
Click 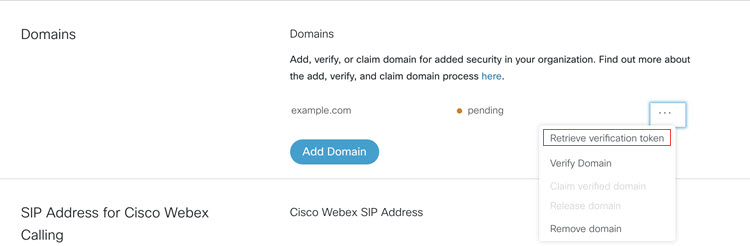
|
| 4 |
Copy the verification token into your DNS TXT record.
|
| 5 |
Choose one:
example.com is the SIP video domain. It can be the same as the company name, or list it as a SAN (Subject Alternative Name) as a trusted CA. |
| 6 |
Click Verify next to each domain. Make sure that the Domain Verification is completed, as it is a required step. The Domain Claim process is optional for SIP video devices. |
 beside your domain and choose Retrieve verification token.