Thanks for your feedback.
Set up a meeting zone on Board, Desk, and Room devices
 Feedback?
For spaces like open offices or glass-walled meeting rooms, this feature is particularly useful as it minimizes distractions caused by including people in the background during meetings. When someone stands outside the defined meeting zone, they won't be included in the automatic framing of the video. Only people within the meeting zone will be counted.
You can easily configure the meeting zone using the touch interface. You can also configure it through the API (see the API reference guide here).
By enabling this feature, you can make sure that your meetings focus on the right people and minimize disruptions from the surrounding environment.
Note that Speakertrack 60 is not supported.
Set up from the device
| 1 |
Swipe from the right side or tap the control panel button on the top right corner of the device or touch controller's home screen. Select Settings. |
| 2 |
Scroll down to the Camera section and select Meeting zone. |
| 3 |
Choose between the two standard meeting zones layout: rectangular zone or round zone.
|
| 4 |
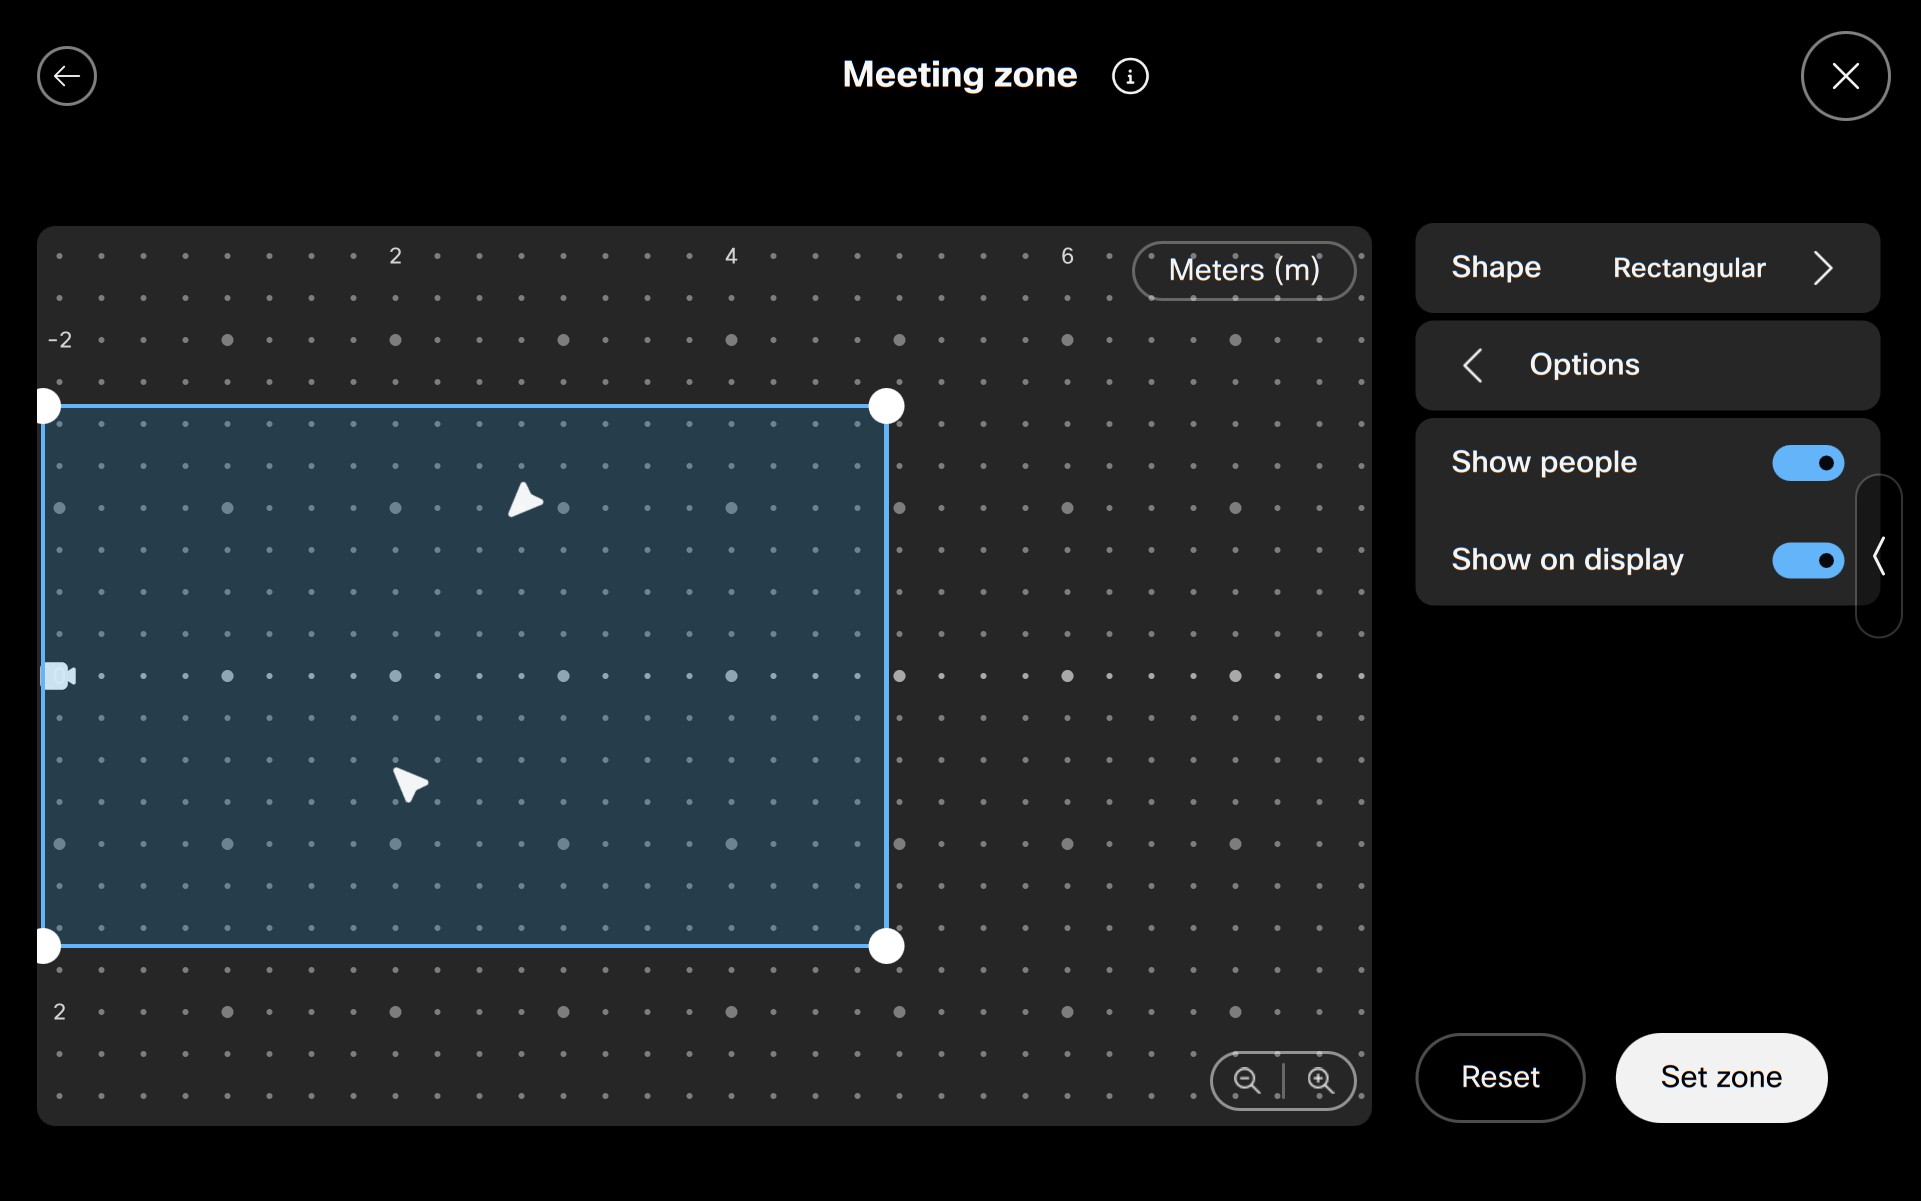
You can make changes to the layout by dragging the anchor points to the desired
position. Press anywhere on the grid to add a new anchor point, and long press a point to
delete it. In order to check where people are in the room, you can tap Options and toggle on Show people. A white arrow representing people will move according to their positions in the room. The meeting zone interface is now visible on the on-screen display, making it easier to view and adjust the configured zone while moving around the room. Toggle off Show on display if you don't want to display the interface on the screen. To change the measurement units, tap either Meters (m) or Feet (ft). |
| 5 |
Once you are done, tap Set Zone . Toggle the Meeting zone active button to set the meeting zone mode to On or Off. |

Set up in Control Hub
In Control Hub, you can manage and enable Meeting Zones in bulk. Read here to see how to access the device configurations and how to set them up for individual devices or in bulk.
In Control Hub, once you have selected your device and accessed all its configurations, you can add the Meeting Zone settings:
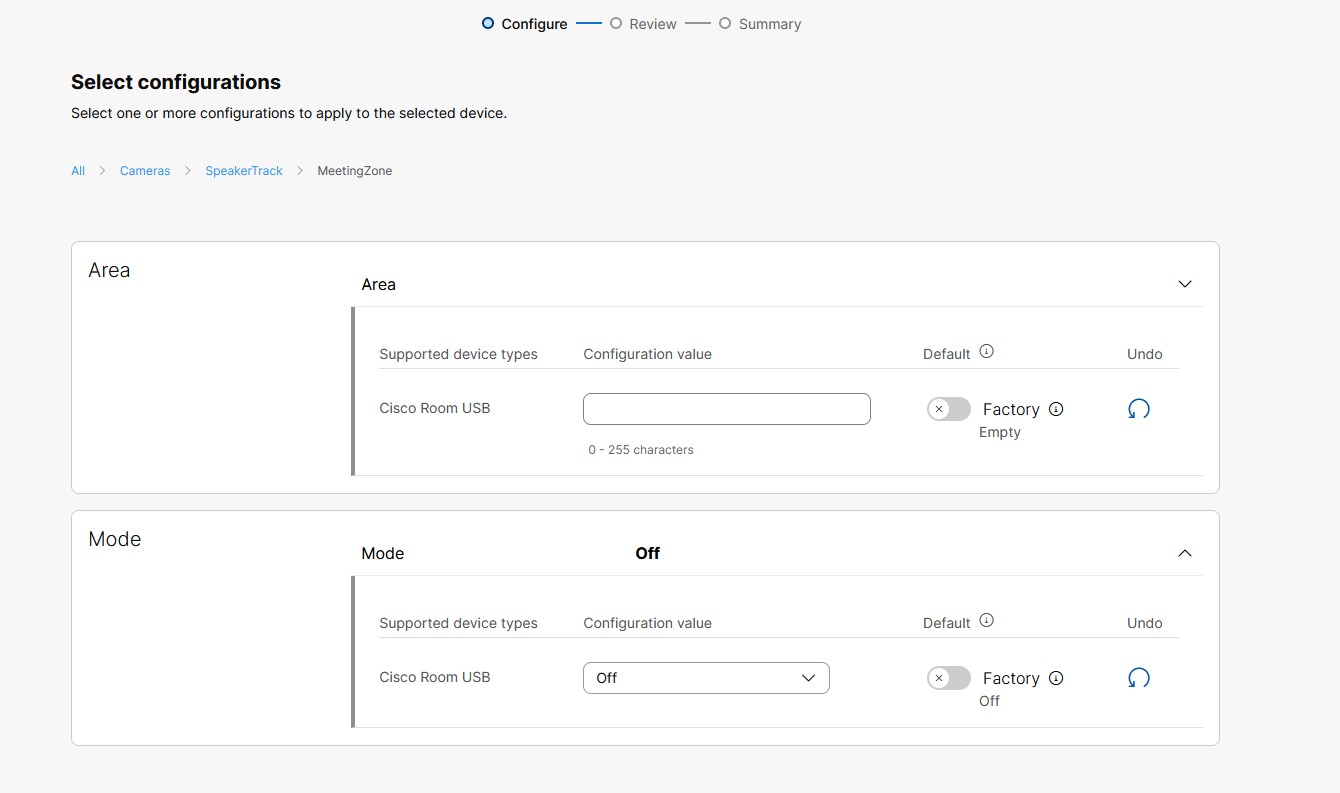
-
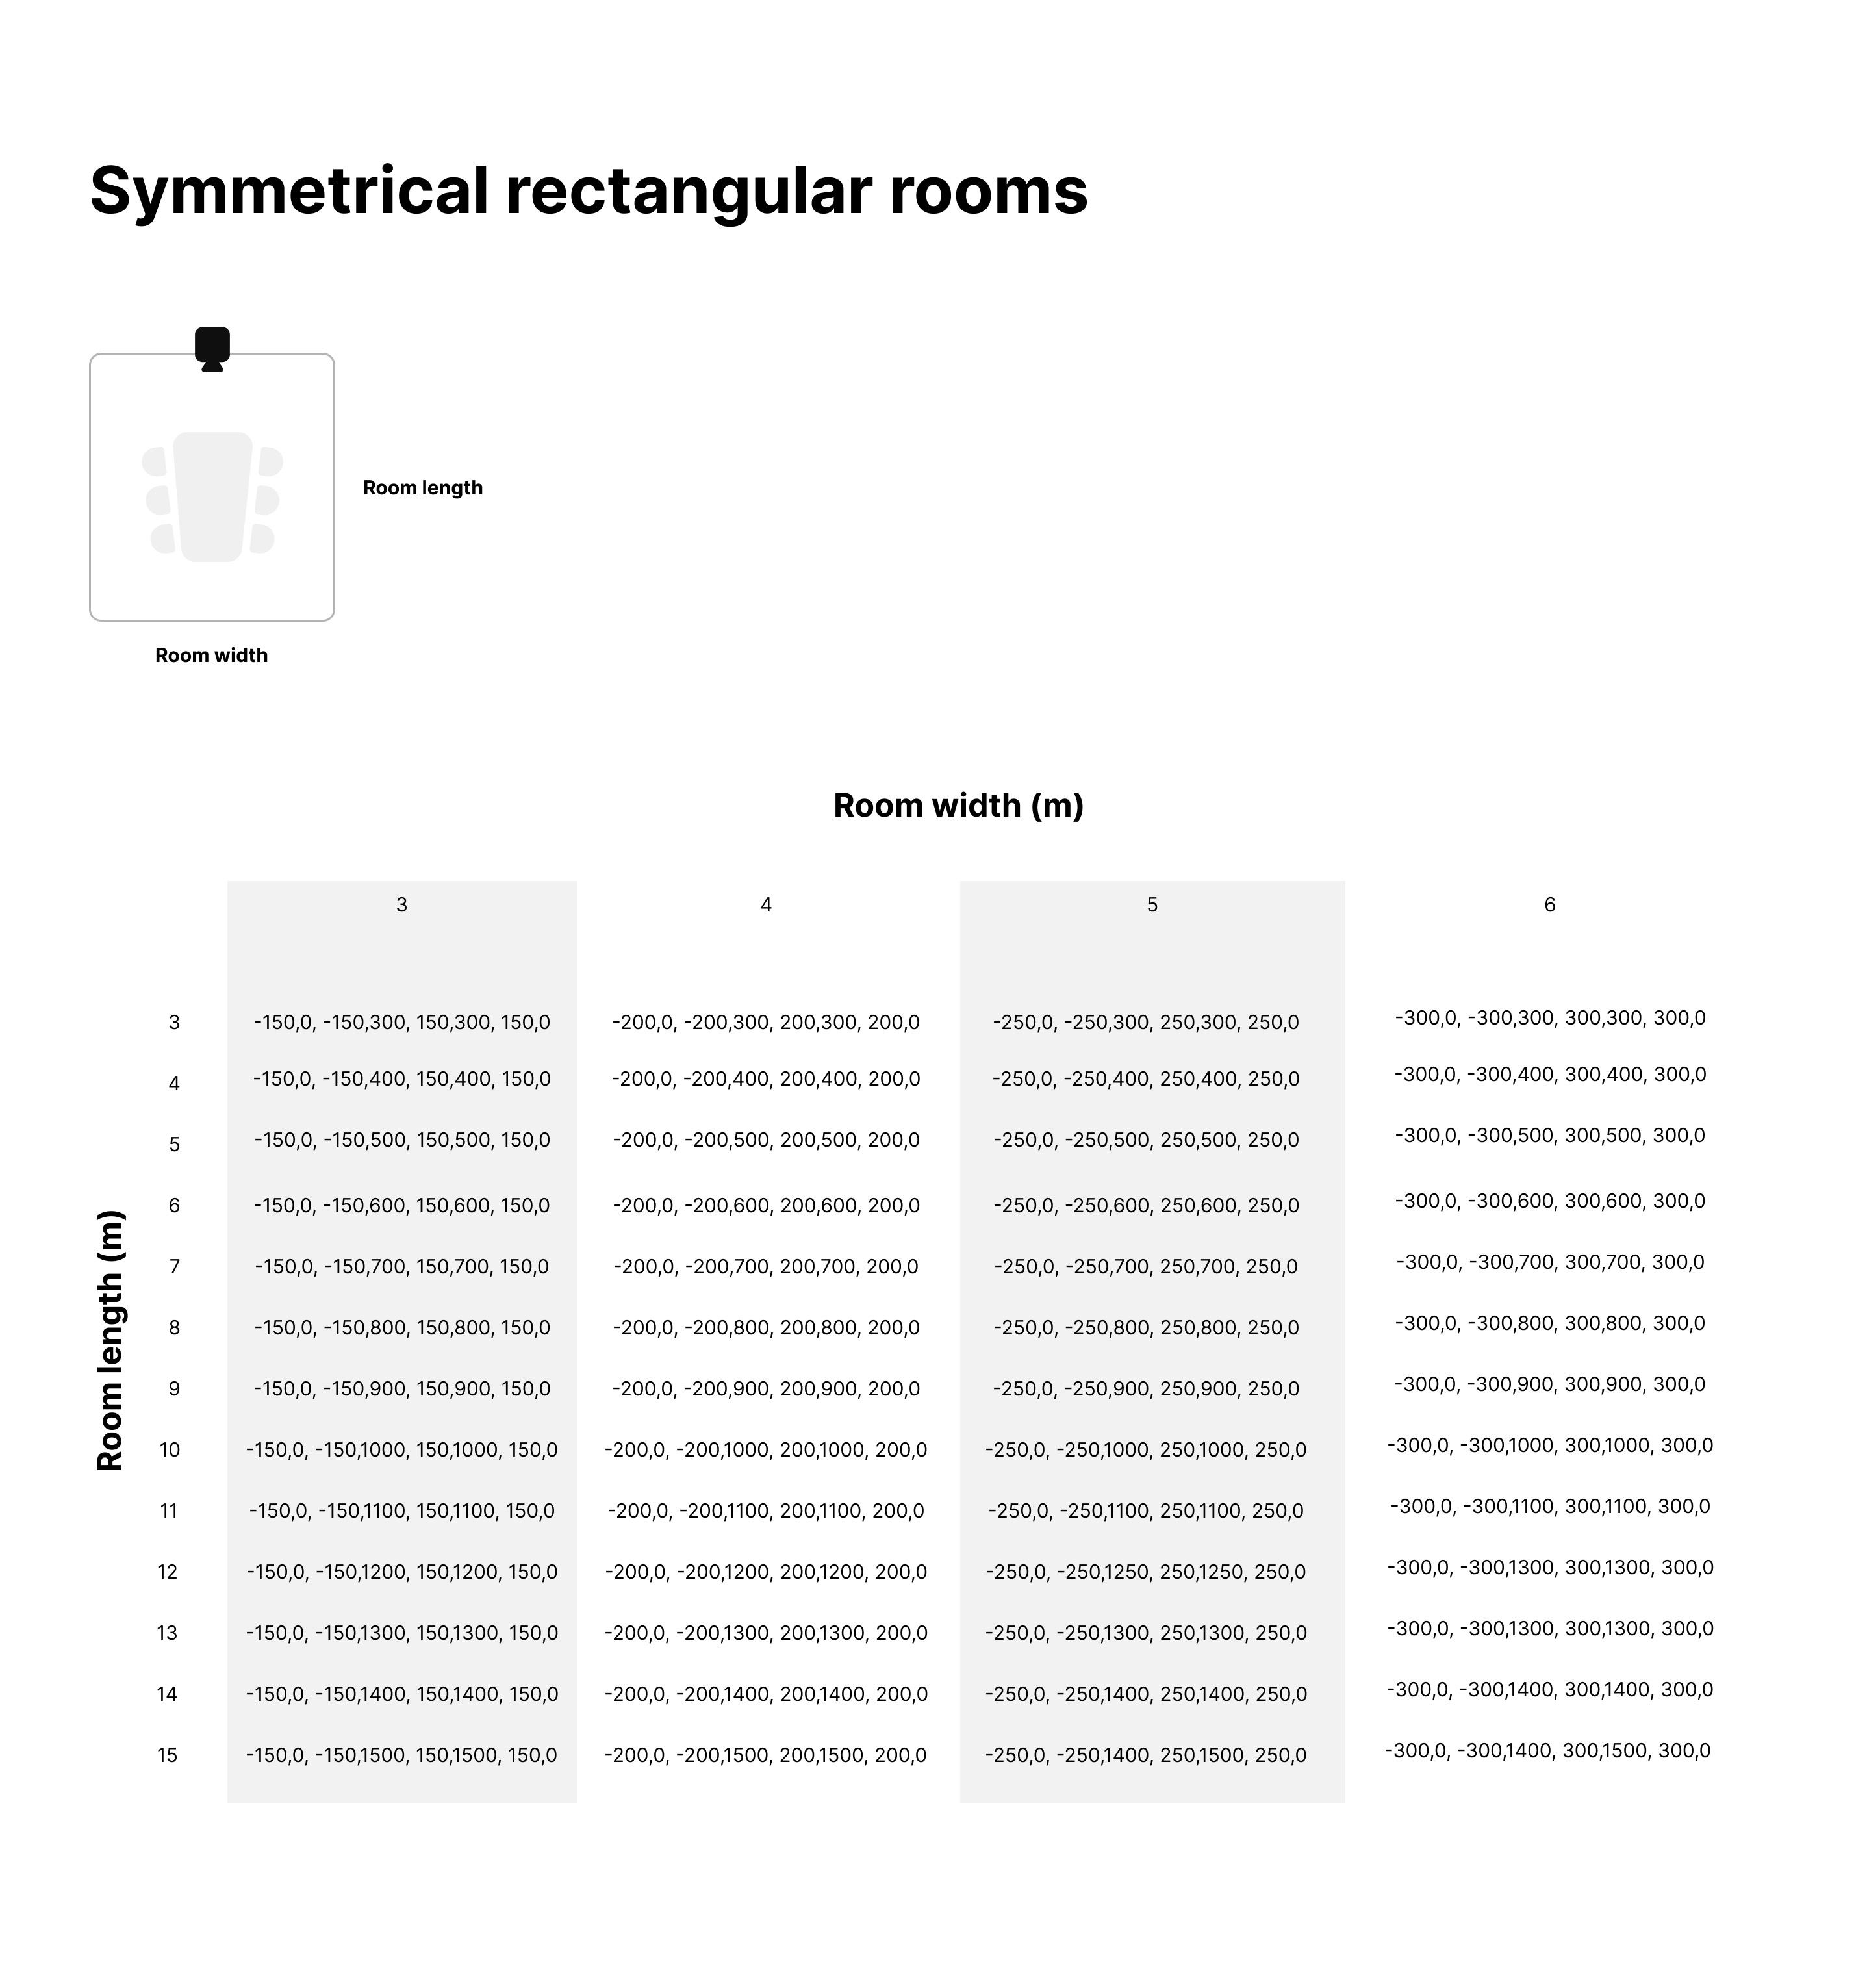
Write the string of coordinate pairs that defines the meeting zone. A meeting zone is polygonal and is defined by a string of (x,z) coordinate pairs: "x1,z1, x2,z2, ..., xn,zn", where the coordinate pairs define the vertices of the polygon. When viewing the room from above, the coordinate pair (0,0) represents the position of the camera; (0,z) represents a point z cm from the camera along the center line of its view; and (x,0) represents a point x cm to the side of the camera. Viewed from the room facing the camera, a positive x-value is to the right and a negative x-value is to the left of the camera. Negative z-values are not used as they would be behind the camera.
-
Choose Auto .
If you have enabled a meeting zone for one device, you can easily copy the settings to other devices where you would like a meeting zone with the same dimensions.
Tip:
If you want to set up a symmetrical meeting zone, you can use the table below to find the configuration value for your meeting room. You can download the image below in .pdf format here.