- Home
- /
- Article

Thanks for your feedback.

 In this article
 Feedback?
Add Webex to Microsoft Entra ID and then synchronize users from the directory into your organization managed in Control Hub. The synchronization requires no on-premises infrastructure or connectors. This integration keeps your user list in sync whenever a user is created, updated, or removed from the application in Entra ID.
System for Cross-domain Identity Management (SCIM)
The integration between users in the directory and Control Hub uses the System for Cross-domain Identity Management ( SCIM) API. SCIM is an open standard for automating the exchange of user identity information between identity domains or IT systems. SCIM is designed to make it easier to manage user identities in cloud-based applications and services. SCIM uses a standardized API through REST.
Entra ID doesn't synchronize null values. If you set an attribute value to NULL, it is not deleted or patched with a NULL value in Webex. If this limitation affects your users, contact Microsoft for support.
Entra ID Wizard App
Use the Entra ID Wizard App in Control Hub to simplify the synchronization of users and groups with Webex. The Wizard App allows you to easily configure which attributes, users, and groups to synchronize, and to decide whether to synchronize user's avatars to Webex. See Set up the Entra ID Wizard App in Control Hub to learn more about the benefits of using the wizard.
Add Webex from the Azure application gallery
Before configuring Control Hub for automatic user provisioning with Entra ID, you need to add Webex from the Azure application gallery to your list of managed applications.
| 1 |
Sign in to the Azure portal at https://portal.azure.com with your administrator credentials. |
| 2 |
Go to Entra ID for your organization. |
| 3 |
Go to Enterprise Applications and click . While there’s a prebuilt Webex application in the portal, it’s limited to the old SCIM 1.0 protocol. We recommend creating your own application that uses the full synchronization scope of SCIM 2.0. For information on the scope of different Entra ID synchronization methods, see Supported synchronized objects. |
| 4 |
Enter a name for your new application and select Integrate any other application you don't find in the gallery (Non-gallery). |
| 5 |
Click Create. |
| 6 |
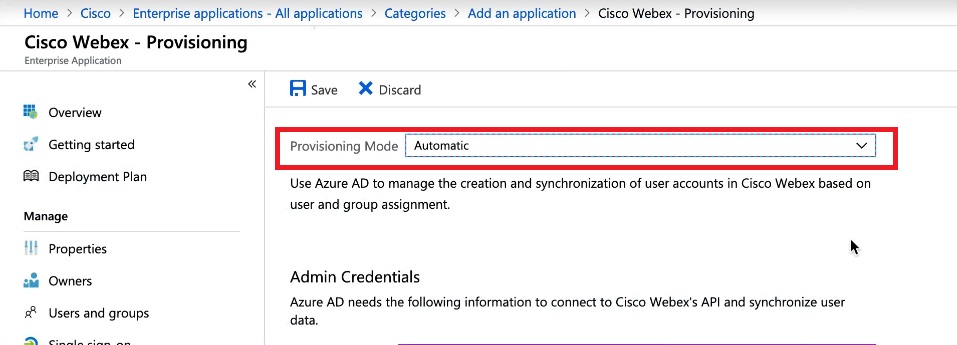
Open the new application, go to and select, Automatic. |
| 7 |
To make sure that the Webex application you've added for synchronization doesn't show up in the user portal, open the new application, go to Properties, and set Visible to users? to No. |
Assign groups/users to the application in Entra ID
This procedure lets you choose users to synchronize to the Webex cloud.
Entra ID uses a concept called "assignments" to determine which users should receive access to selected apps. In the context of automatic user provisioning, only the users and/or groups of users that are "assigned" to an application in Entra ID are synchronized to Control Hub.
Use the Entra ID Wizard App in Control Hub to synchronize both users within Entra ID groups and individual group objects. Webex can't synchronize individual groups outside the Entra ID Wizard App.
If you are configuring your integration for the first time, we recommend you assign one user for testing, and then add other users and groups after a successful test.
| 1 |
Open the Webex application in the Entra ID portal, then go to Users and groups. |
| 2 |
Click Add Assignment. |
| 3 |
Find the users/groups you want to add to the application:
|
| 4 |
Click Select and then click Assign. Repeat these steps until you have all the groups and users you want to synchronize with Webex. |
Authorize Entra ID to synchronize users with your Control Hub organization
Use this procedure to set up provisioning from Entra ID and obtain a bearer token for your organization. The steps cover necessary and recommended administrative settings.
If your organization enforces that all users must have a verified domain, then future sync doesn't allow user creation for unverified domains. Most Webex for Government organizations require verified domains.
Before you begin
Get your organization ID from the customer view in Control Hub. Click your organization name on the bottom left and then copy the
Organization ID into a text file. You need this value when you
enter the tenant URL. We use this value as an example in this article:
a35bfbc6-ccbd-4a17-a488-72gf46c5420c
| 1 |
Sign in to the Azure portal and then go to | ||||||
| 2 |
Choose Cisco Webex from your list of enterprise applications. For information on the scope of different Entra ID synchronization methods, see Supported synchronized objects. | ||||||
| 3 |
Go to Provisioning, and then change the Provisioning Mode to Automatic.
The Webex App includes some default mappings between Entra ID user attributes and Webex user attributes. These attributes are enough to create users, but you can add more as described later in this article. | ||||||
| 4 |
Enter the Tenant URL. The following table shows the URL for your Webex offer. Replace
For example, your tenant URL might look like this:
| ||||||
| 5 |
Do only one of the following to get the bearer token value for the Secret Token:
| ||||||
| 6 |
Return to the portal and paste the token value into Secret Token. | ||||||
| 7 |
Click Test Connection to make sure that Entra ID recognizes the organization and token. A successful result states that the credentials are authorized to enable user provisioning. | ||||||
| 8 |
Enter a Notification Email and check the box to get email when there are provisioning errors. | ||||||
| 9 |
Click Save. |

At this point, you've successfully authorized Entra ID to provision and synchronize Webex users, and completed the steps to set up synchronization.
What to do next
If you want to map more Entra ID user attributes to Webex attributes, continue to the next section.
For info on making changes to the synchronized organization, see the Manage Synchronized Entra ID Users help article.
Map user attributes from Entra ID to Webex
Follow this procedure to map additional user attributes from Entra ID to Webex, or to change existing user attribute mappings.
Entra ID to Webex mapping does not synchronize every single user detail. Some aspects of user data are not synchronized:
-
Avatars
-
Rooms
-
Attributes not listed in the table below
We recommend that you do not change the default attribute mappings unless absolutely necessary. The value that you map as the username is particularly important. Webex uses the user's email address as their username. By default, we map userPrincipalName (UPN) in Azure AD to email address (username) in Control Hub.
If the userPrincipalName does not map to the email in Control Hub, users are provisioned into Control Hub as new users instead of matching existing users. If you want to use another Azure user attribute that is in email address format instead of UPN, you must change that default mapping in Entra ID from userPrincipalName to the appropriate Entra ID user attribute.
Before you begin
You have added and configured the Cisco Webex app to your Entra ID, and tested the connection.
You can modify the user attribute mappings before or after you start synchronizing users.
| 1 |
Sign in to the Azure portal and then go to Enterprise applications > All applications. | ||||||||||||||||||||||||||||||||||||||||||
| 2 |
Open the Webex application you created in the application gallery. | ||||||||||||||||||||||||||||||||||||||||||
| 3 |
Go to and click Provision Entra ID Users. | ||||||||||||||||||||||||||||||||||||||||||
| 4 |
Check the Show advanced options check box and then click Edit attribute list. | ||||||||||||||||||||||||||||||||||||||||||
| 5 |
Choose the Webex attributes to be populated from Entra ID user attributes. | ||||||||||||||||||||||||||||||||||||||||||
| 6 |
Click to confirm. The Attribute Mapping page opens, so you can map Entra ID user attributes to the Webex user attributes you chose. | ||||||||||||||||||||||||||||||||||||||||||
| 7 |
Near the bottom of the page, click Add new mapping. | ||||||||||||||||||||||||||||||||||||||||||
| 8 |
Choose Direct mapping. Select the Source attribute (Entra attribute) and the Target attribute (Webex attribute), and then click OK.
| ||||||||||||||||||||||||||||||||||||||||||
| 9 |
Repeat the previous two steps until you have added or modified all the mappings you need, then click Save and Yes to confirm your new mappings. You can Restore default mappings if you want to start again. | ||||||||||||||||||||||||||||||||||||||||||
Your mappings are done and the Webex users will be created or updated on the next synchronization.
Supported synchronized objects
The following tables show the differences between Entra ID's Enterprise App Store sync, the Entra ID Wizard App for Control Hub, and Entra ID SCIM 2.0 implimentation.
|
Objects |
Entra ID SCIM 1.1 |
Entra ID Wizard app |
Entra ID SCIM 2.0 |
|---|---|---|---|
|
Users |
Yes |
Yes |
Yes |
|
Groups |
No |
Yes* |
Yes |
|
Rooms |
No |
Yes* |
No |
|
Avatars |
No |
Yes* |
No |
*—You can only synchronize groups, rooms, and avatars to Control Hub through the Entra ID Wizard app through the Microsoft Graph API.
|
Attribute |
Entra ID SCIM 1.1 |
Entra ID Wizard app |
SCIM 2.0 |
|---|---|---|---|
|
userName |
Yes |
Yes |
Yes |
|
displayName |
Yes |
Yes |
Yes |
|
name.familyName |
Yes |
Yes |
Yes |
|
name.givenName |
Yes |
Yes |
Yes |
|
externalID |
Yes |
Yes |
Yes |
|
title |
Yes |
Yes |
Yes |
|
addresses[type eq "work"].country |
Yes |
Yes |
Yes |
|
addresses[type eq "work"].locality |
Yes |
Yes |
Yes |
|
addresses[type eq "work"].streetAddress |
Yes |
Yes |
Yes |
|
addresses[type eq "work"].region |
Yes |
Yes |
Yes |
|
addresses[type eq "work"].postalCode |
Yes |
Yes |
Yes |
|
phoneNumbers[type eq "work"].value |
Yes |
Yes |
Yes |
|
phoneNumbers[type eq "mobile"].value |
Yes |
Yes |
Yes |
|
phoneNumbers[type eq "fax"].value |
Yes |
Yes |
Yes |
|
manager |
No |
Yes |
No |
|
department |
No |
No |
Yes |
|
employee ID |
No |
No |
Yes |


