
Thanks for your feedback.
Manually adjust camera settings on Board, Desk, and Room Series
 Feedback?
You can create custom views with predefined zoom and camera direction using the manual camera controls on Board, Desk, and Room Series devices. For example, you can save a zoomed out preset for meetings with multiple participants, and a zoomed in preset for smaller meetings. The presets will be available in the camera control screen and you can easily switch between them for different types of meetings.
| 1 |
Swipe from the right or tap the |
| 2 |
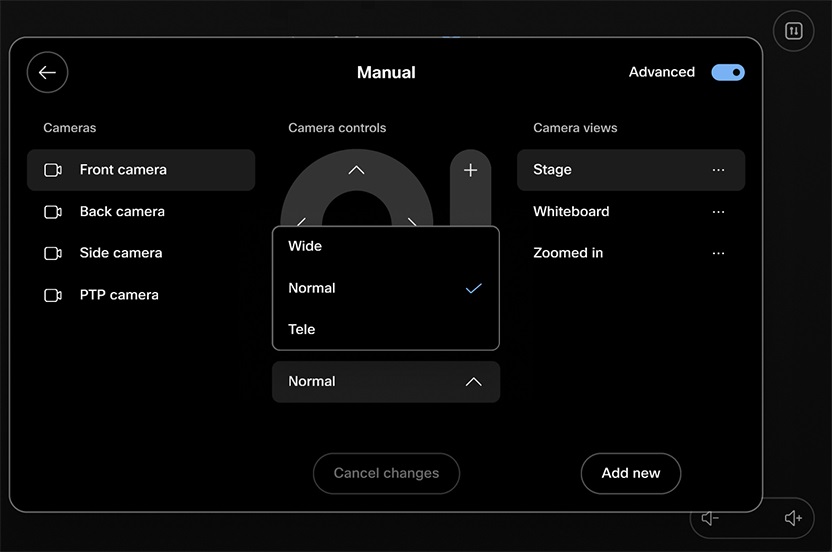
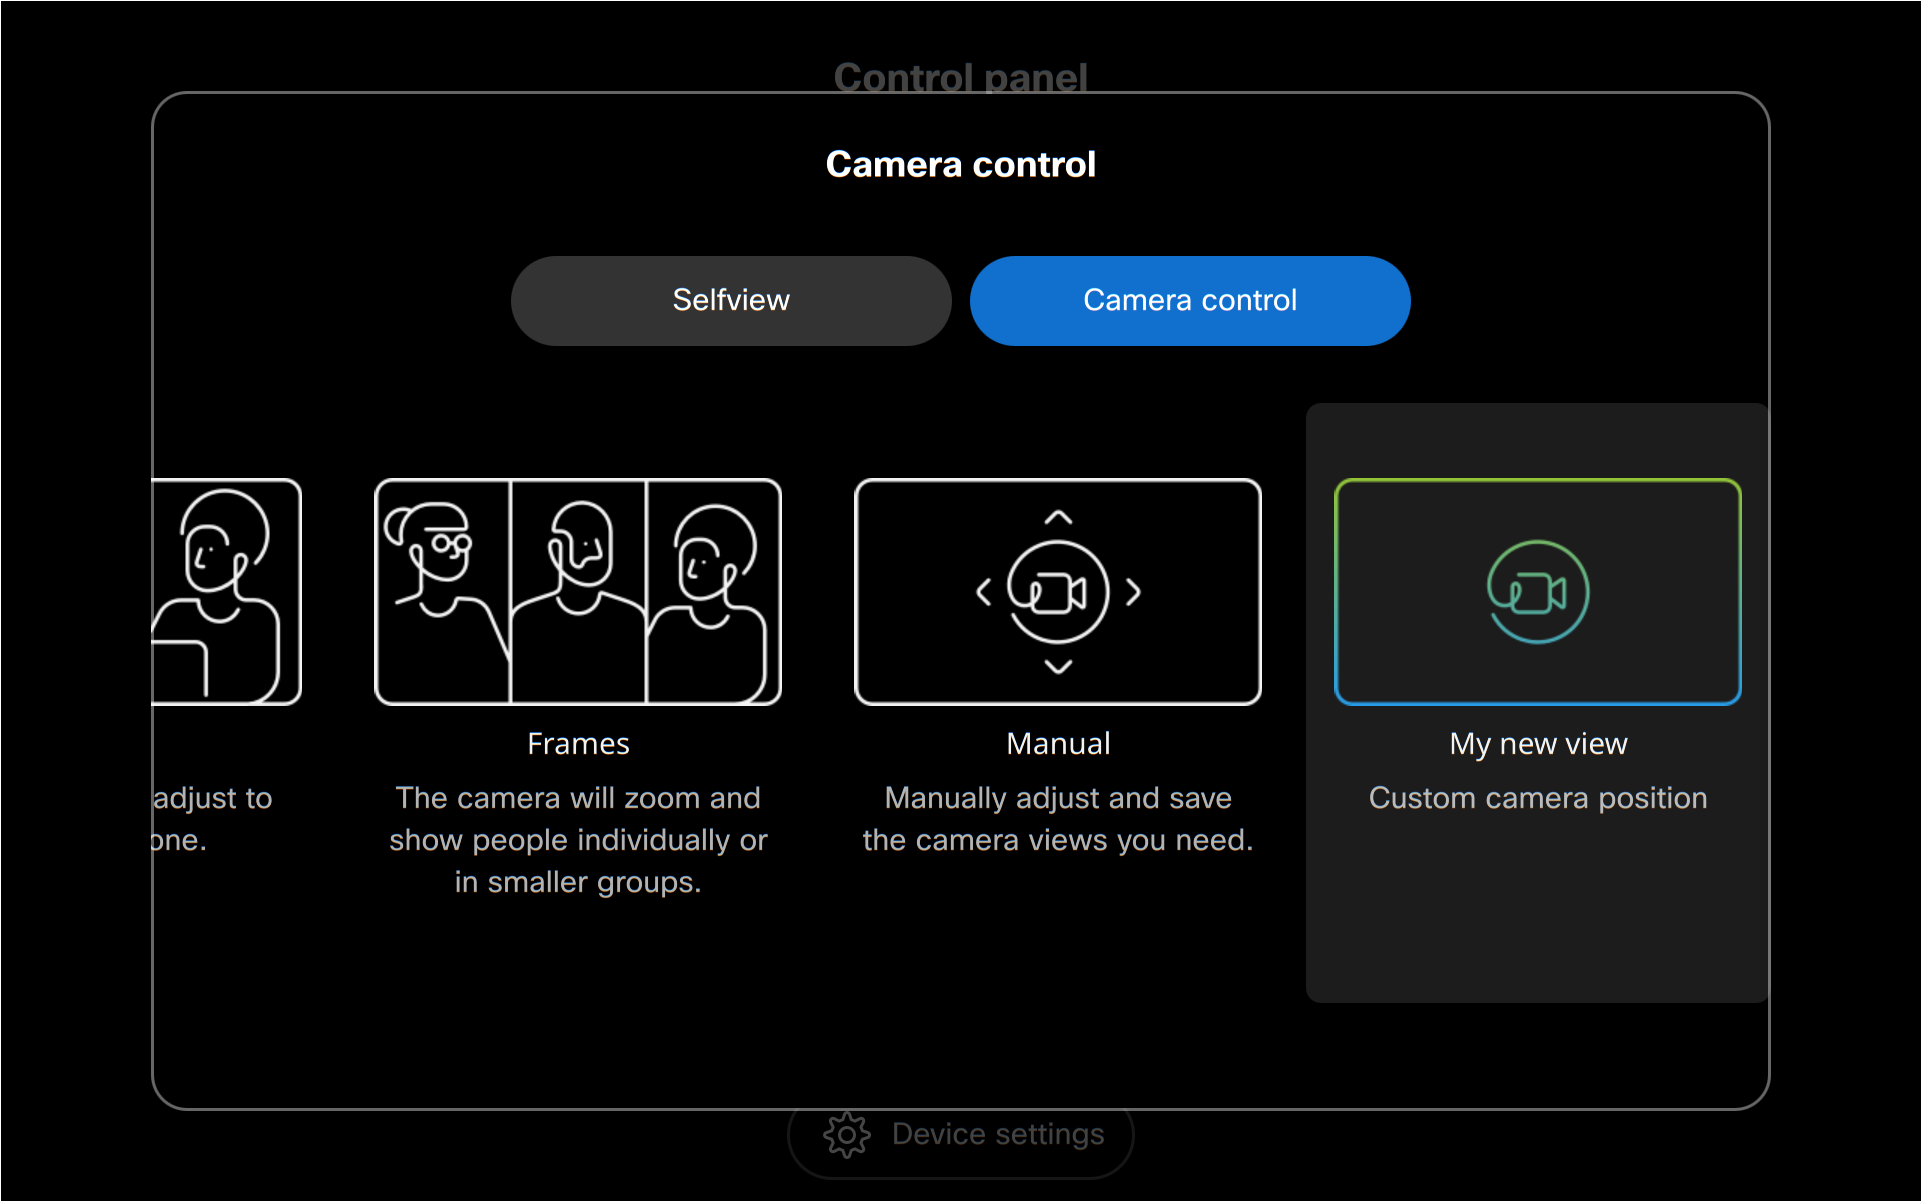
Select Manual and choose the camera you want to adjust. If the device is using more than one camera, you see them under the Manual button. 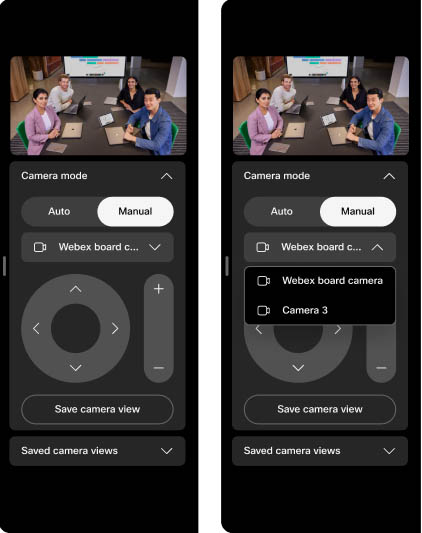
|
| 3 |
Use the camera controls to adjust pan, tilt, and zoom. When you're all set, tap Save camera view. Name and Save the preset. It will appear under Saved camera views. 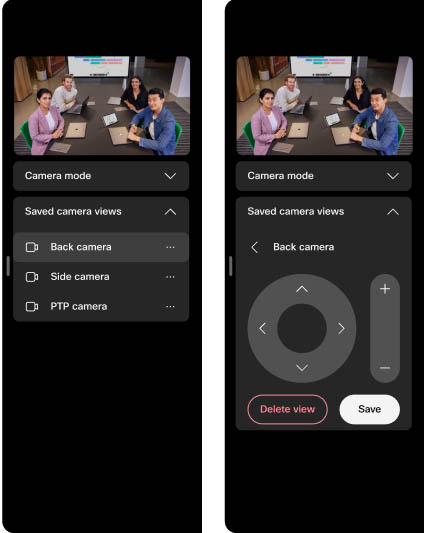
To edit or delete an existing preset, select the preset under the Saved camera views list. Adjust and save the preset again, or delete it. |
The default camera preset is not available for Panorama.
Open the camera controls
To open the camera controls and manually adjust the camera:
-
Swipe from the right or tap the
 button on the touch controller's homescreen. Tap Camera.
 When you open the camera settings on a touch controller, you also get the Selfview settings. See this article about adjusting your selfview.
-
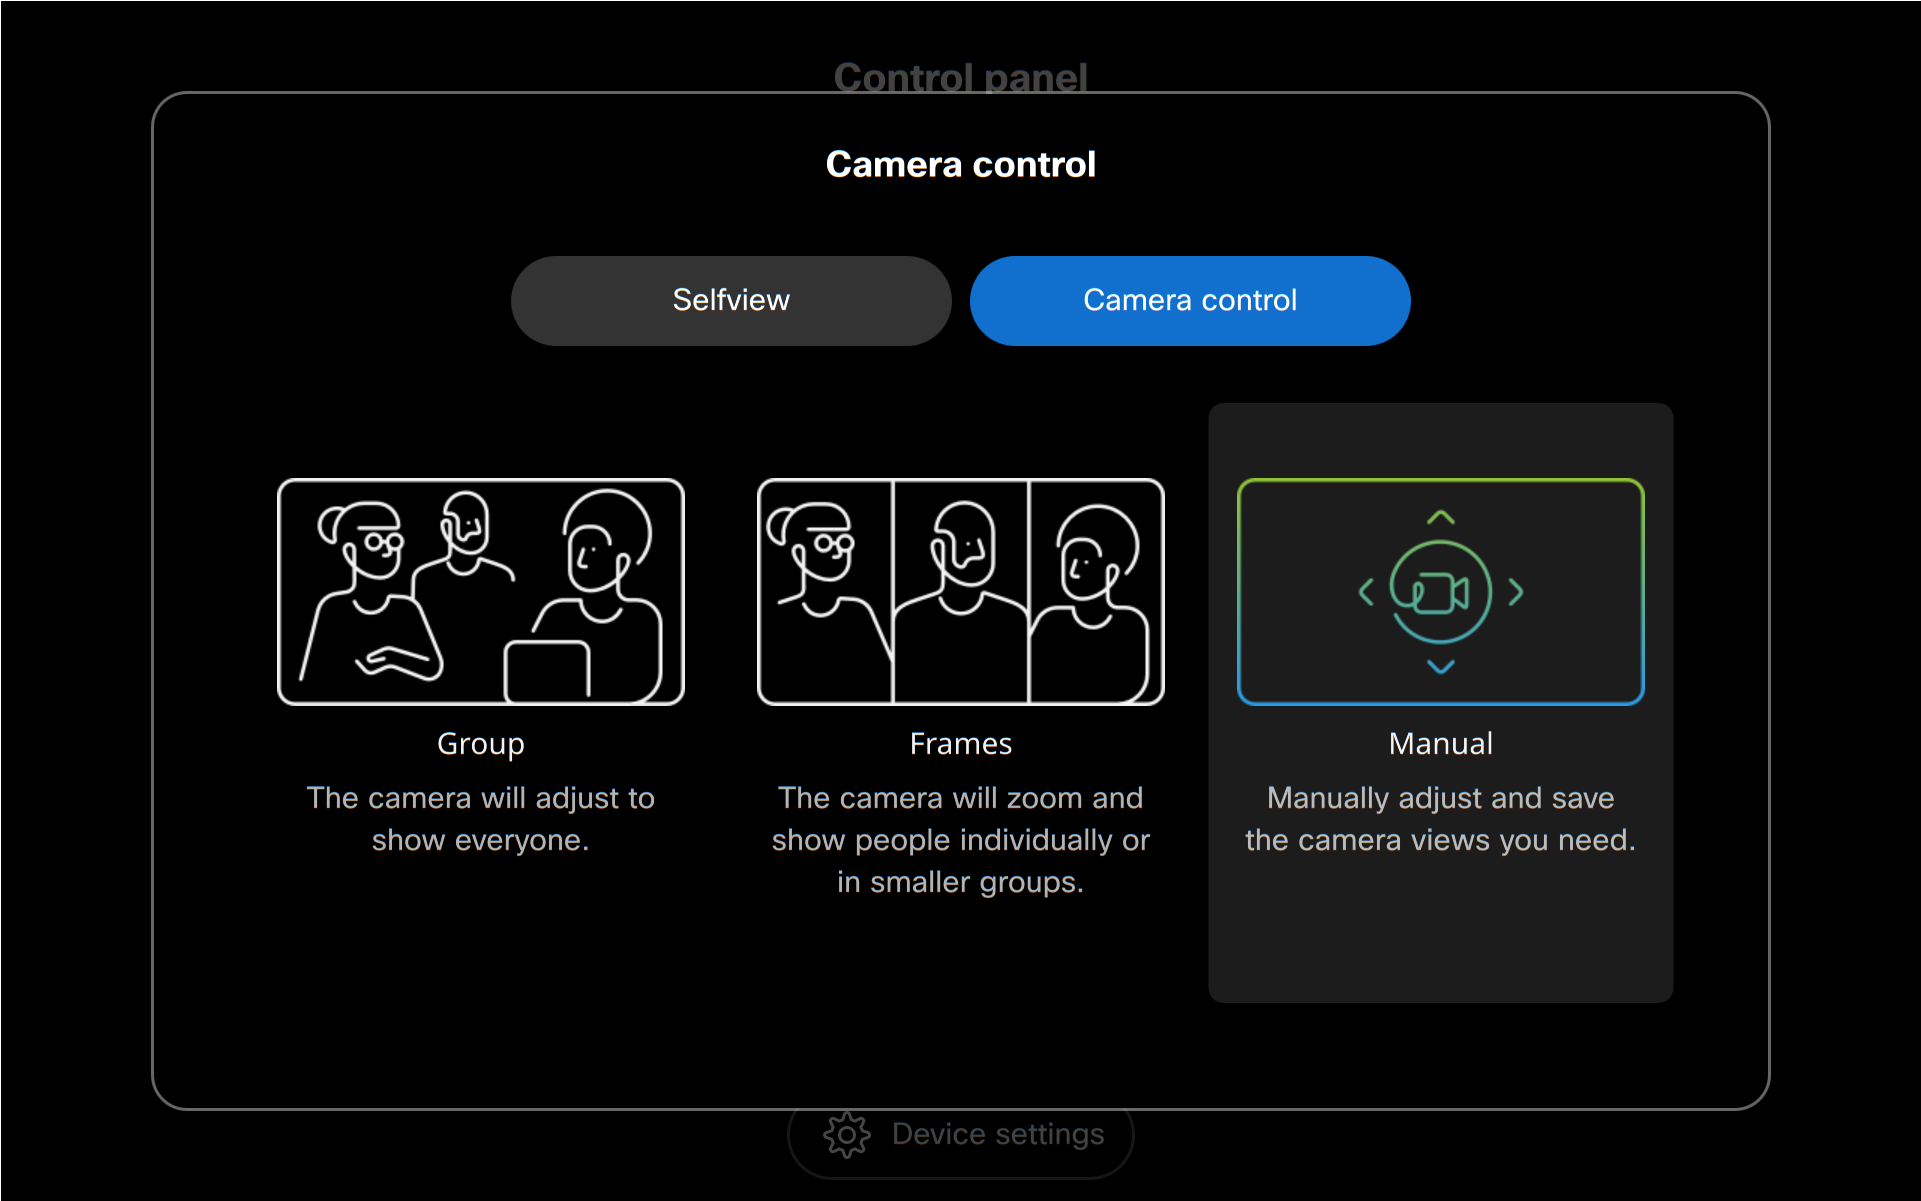
Tap Camera control and select Manual.
-
Use the camera controls to adjust pan, tilt, and zoom.
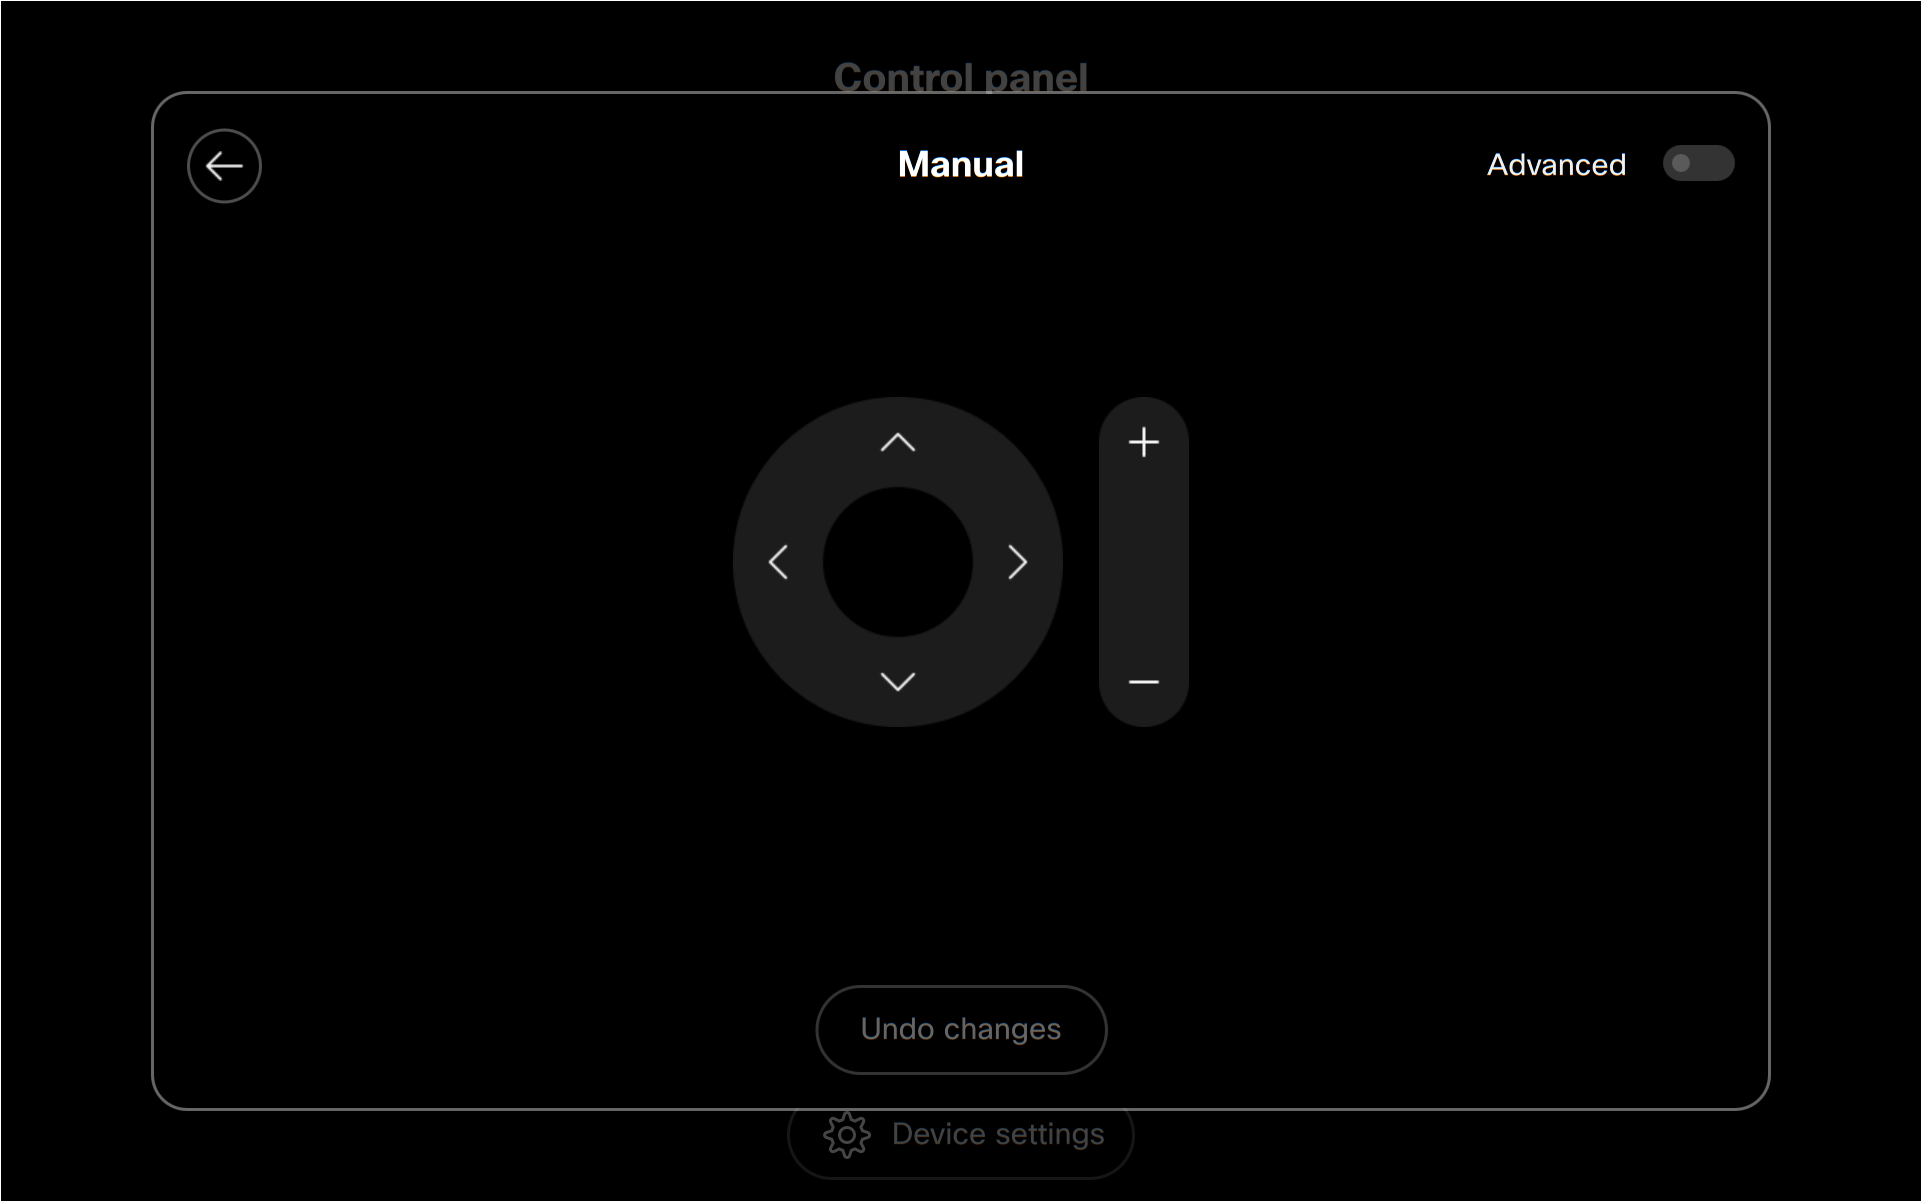
If the camera has multiple lenses, toggle on Advanced in the upper right corner of the camera controls and then choose the lens you want to adjust:
There are also automatic camera modes available for selection. Read more about automatic camera modes in this article.
Add and edit camera presets
To save a new camera preset or edit an existing one:
-
Toggle on Advanced in the upper right corner of the camera controls.
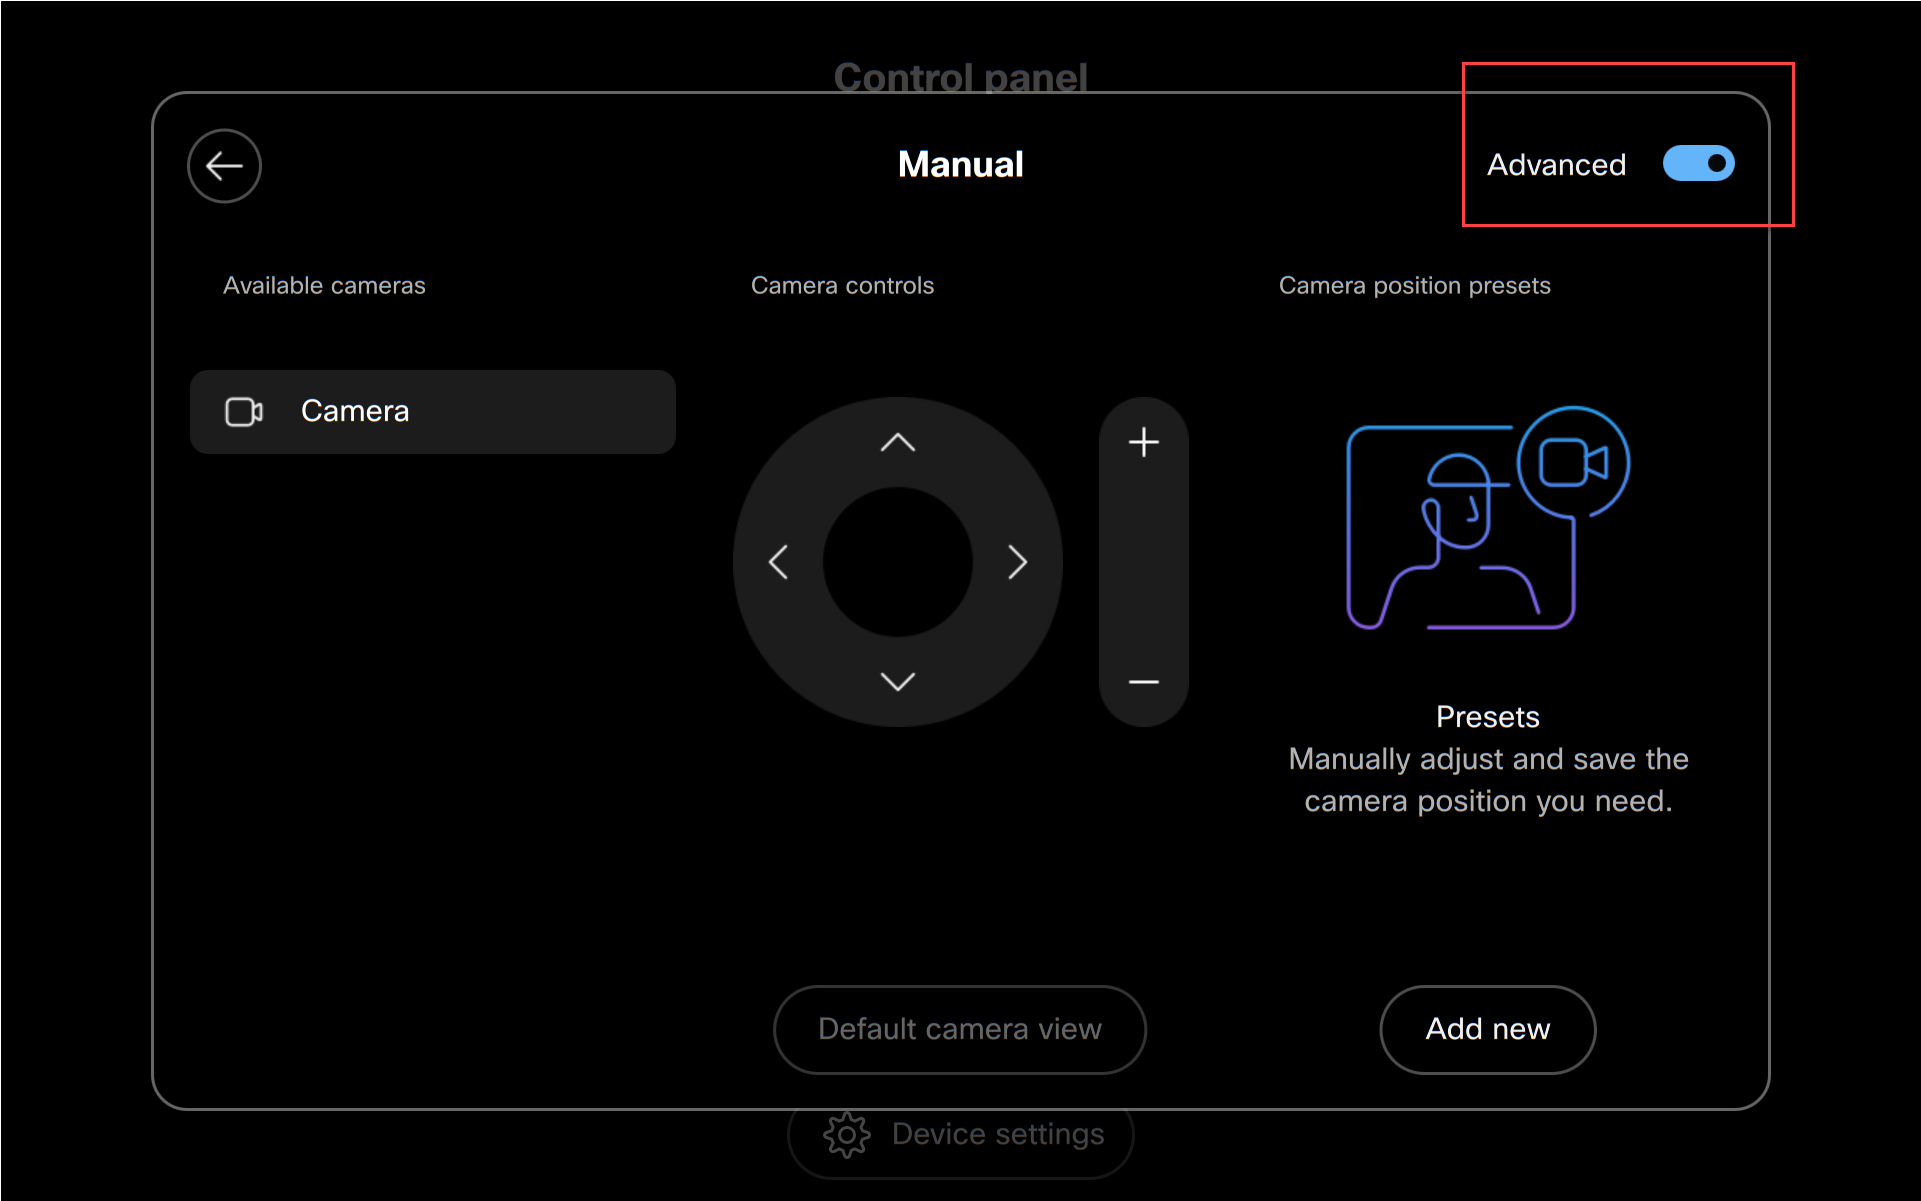
If the device is using more than one camera, you see them on the left side. In that case, choose which camera you're going to adjust.
If the device has a camera with multiple lenses, you choose which lense you want to adjust.
-
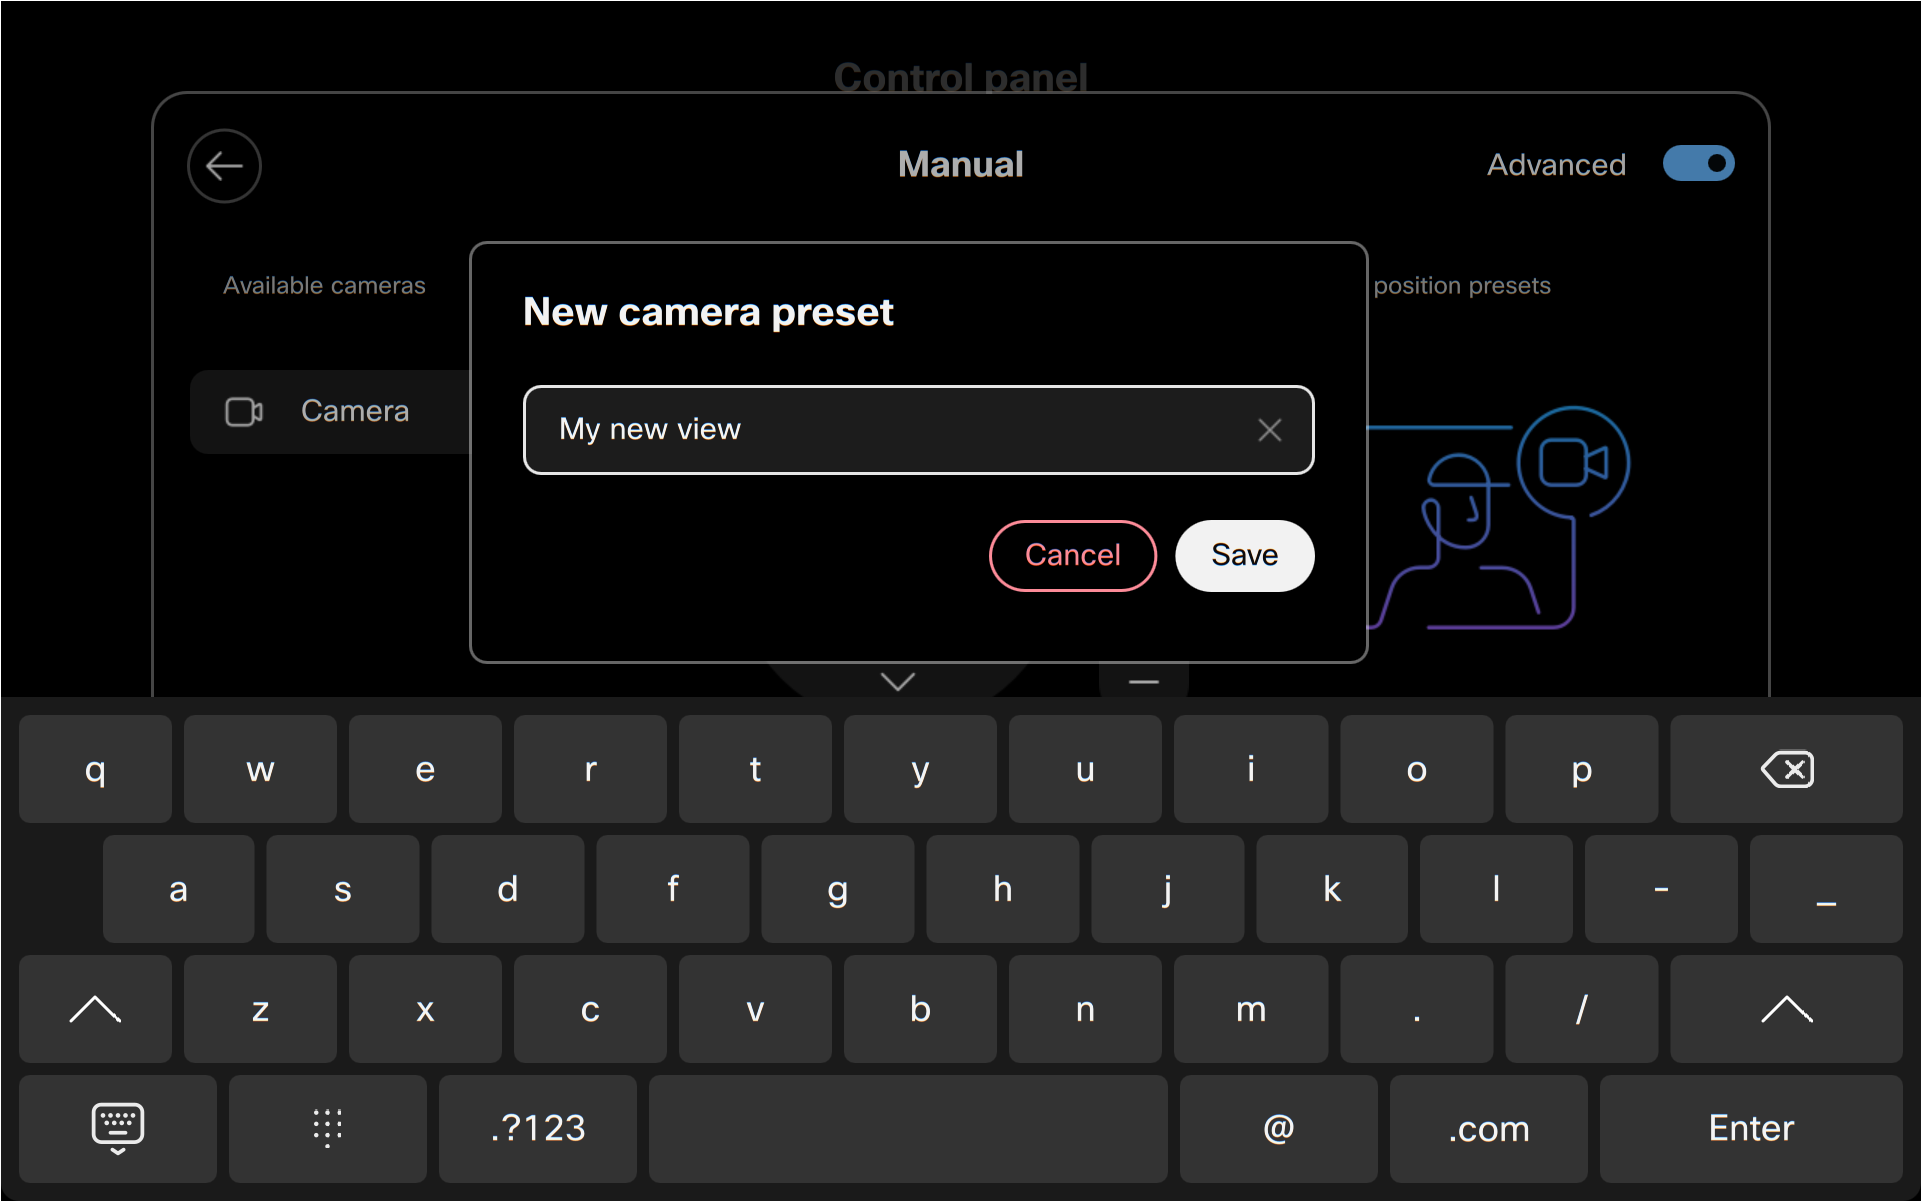
To add a new preset, use the camera controls to adjust pan, tilt, and zoom. When you're all set, tap Add new. Name and Save the preset.
It will appear on the right side.

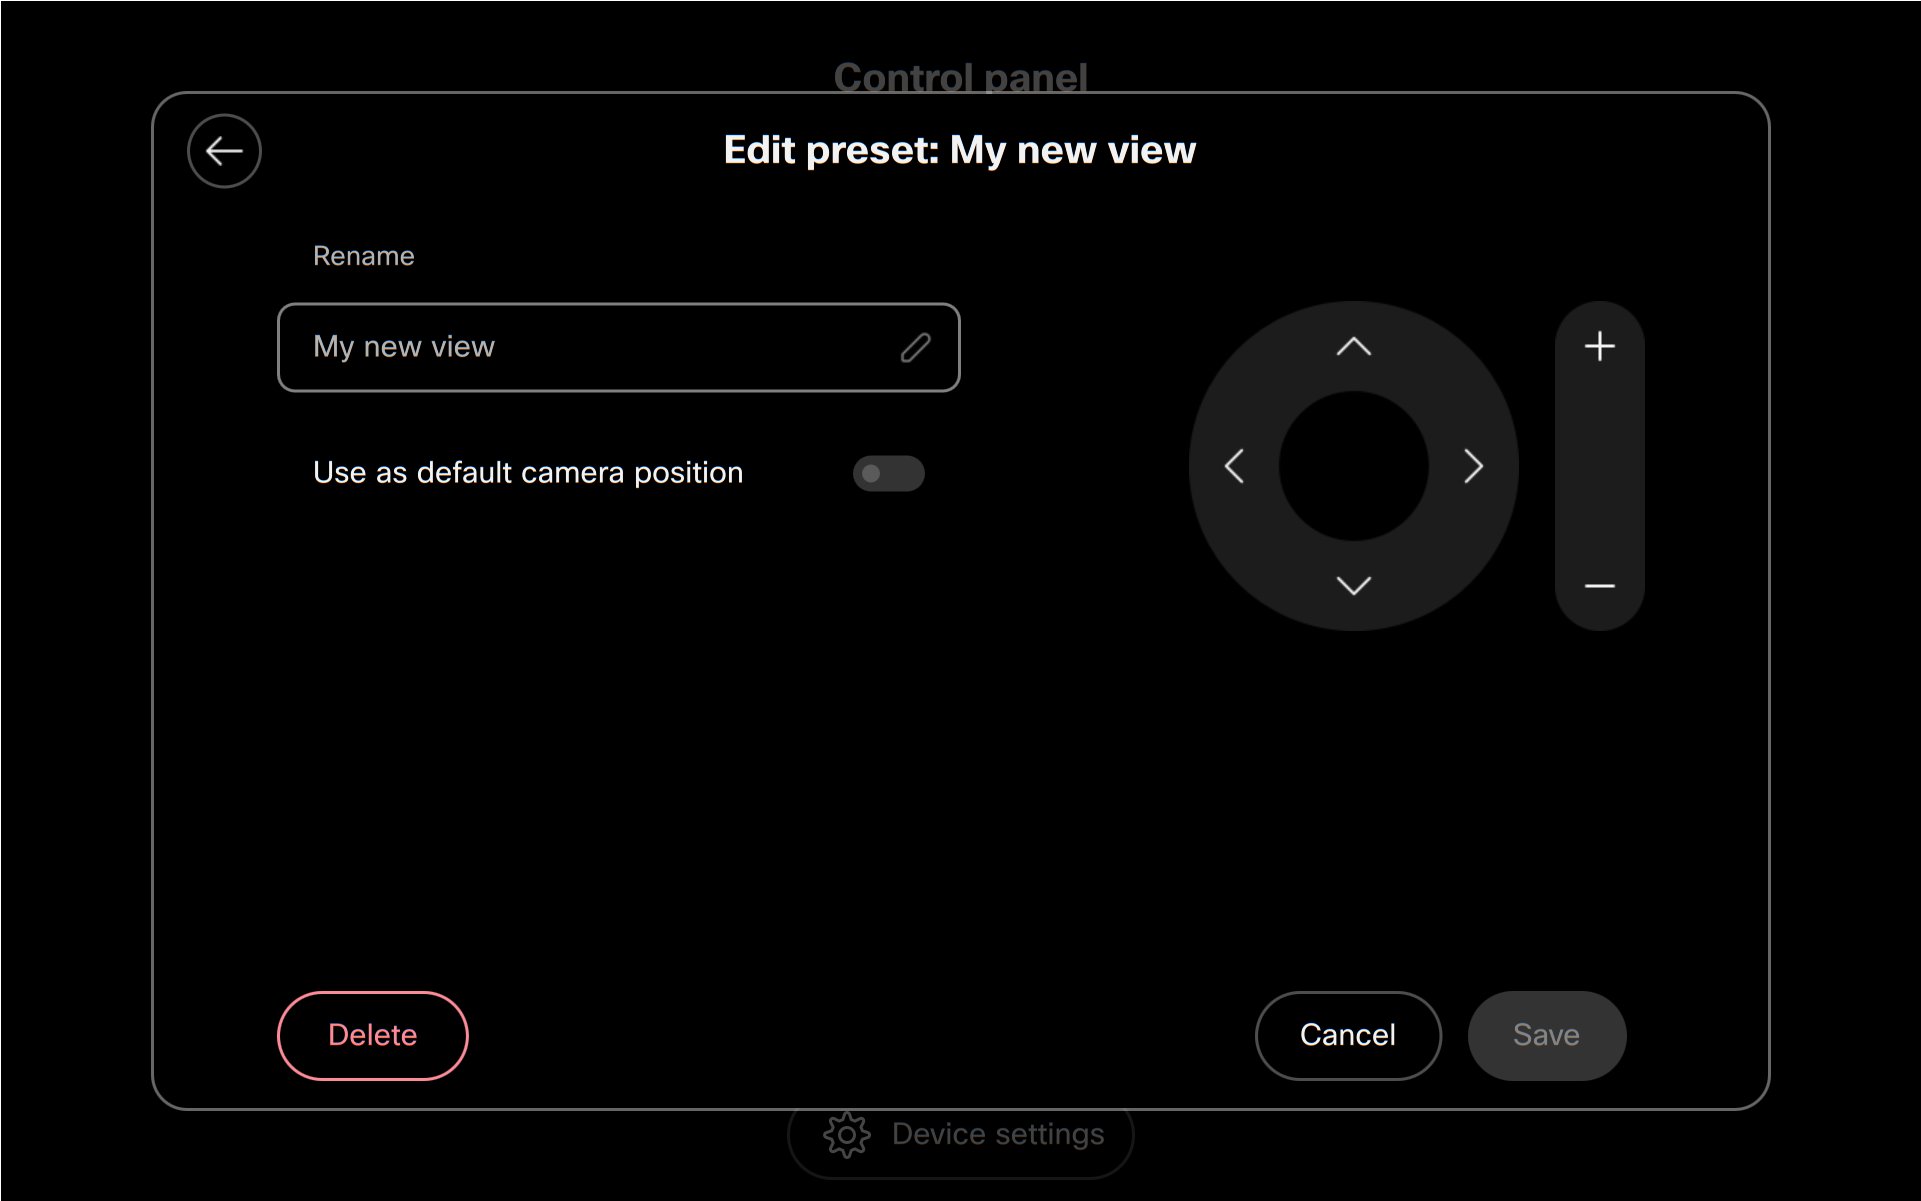
To edit an existing preset, tap the More (…) button beside it in the list. Rename it, set it as default, adjust and save, or delete the preset.
-
Tap the back arrow to leave the manual camera controls. When you return to the camera control screen, any presets will appear there for selection along with the automatic modes.
-
To return to the control panel, tap anywhere outside the camera control screen.


