Configure Expressway for Mutual TLS authentication
 Feedback?
To host Webex Meetings without a PIN on on-premises devices, your Cisco Expressway-E must offer signed certificates from a trusted Root Certificate Authorities (RCA) for Mutual TLS (mTLS) connections. You can find the list of root CAs that Cisco trusts in this article. We only allow connections that have valid signed certificates.
| 1 |
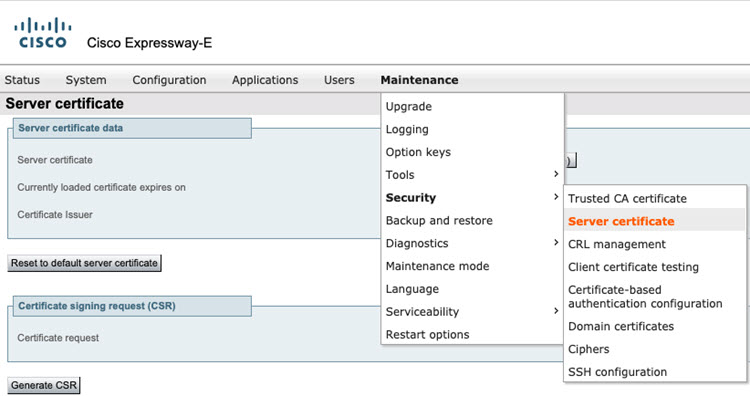
Go to .
 |
| 2 |
Check whether the current Expressway certificate is exists and is accurate.
 |
| 3 |
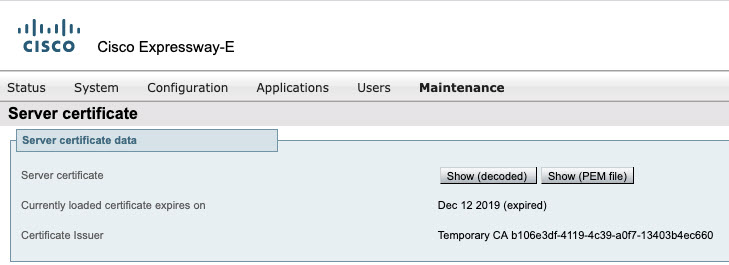
If the certificate is installed, check the expiry date of the certificate to see if is valid or not and replace it with a valid certificate.
 |
| 4 |
Check which root CA signed this certificate and ensure that the name is listed in the Enterprise Deployment Guide. 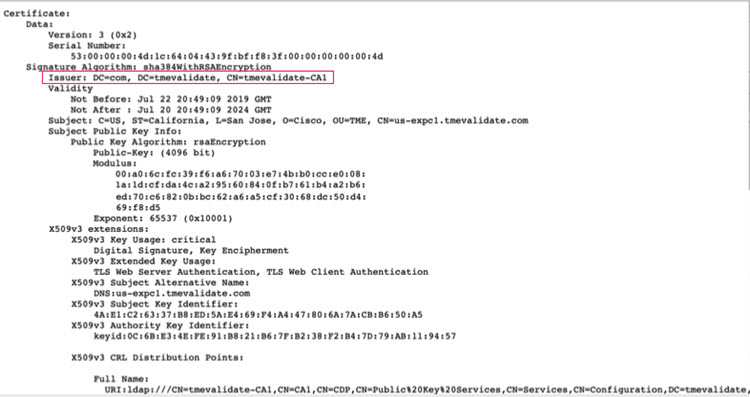
For more information, see What Root Certificate Authorities are Supported for Calls to Cisco Webex Audio and Video Platforms. |
| 5 |
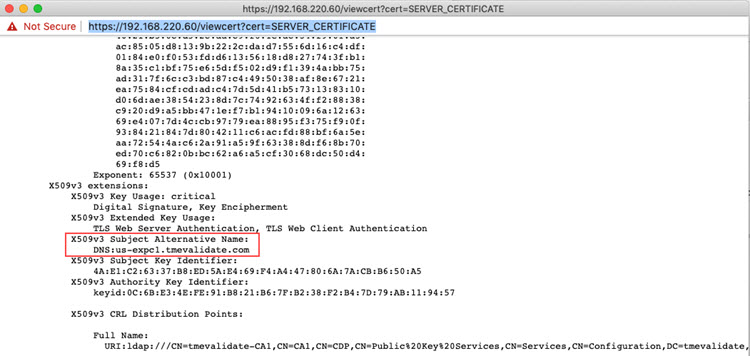
Check if the certificate has the proper SAN (Subject Alternative Name) configured that matches the organization settings.
 |
| 6 |
Using a video device, call into your personal room. If you are able to connect, then the connection is successful. |
| 7 |
After you complete the configurations move to the next section. |
If any of the following are true, then generate a CSR.
-
If you don’t have an Expressway server certificate
-
If the certificate has expired
-
If the SAN needs to be updated, that is the SAN name doesn't match the SIP user name
| 1 |
Generate the CSR (Certificate signing request) process.
 |
| 2 |
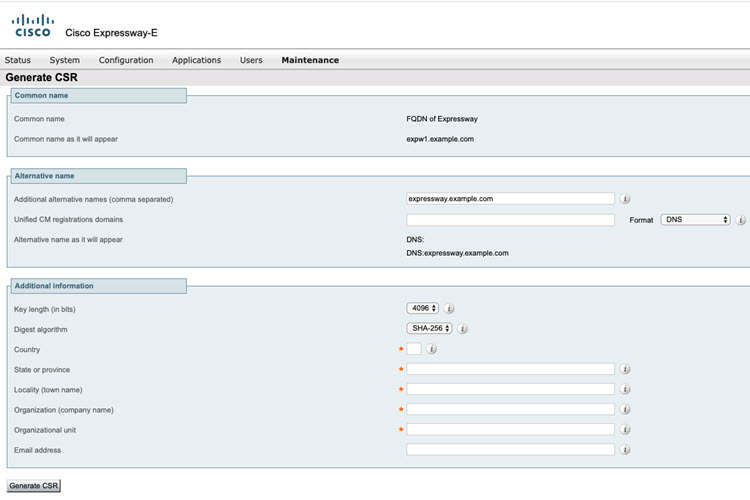
Make sure that the SAN that you need in the certificate is listed on the Additional alternate name field.
 |
| 3 |
Submit your CSR to the root CA of your choice. Choose a CA from the supported list. Refer to the Generate Certificate Signing Request section in the Cisco Webex Meetings Enterprise Deployment Guide for Video Device-Enabled Meetings. |
| 4 |
Get the certificate signed from the root CA. |
| 5 |
If you used an external system to generate the CSR, you must also upload the server private key PEM file that was used to encrypt the server certificate. (The private key file will have been automatically generated and stored earlier if the Expressway was used to produce the CSR for this server certificate.)
|
| 6 |
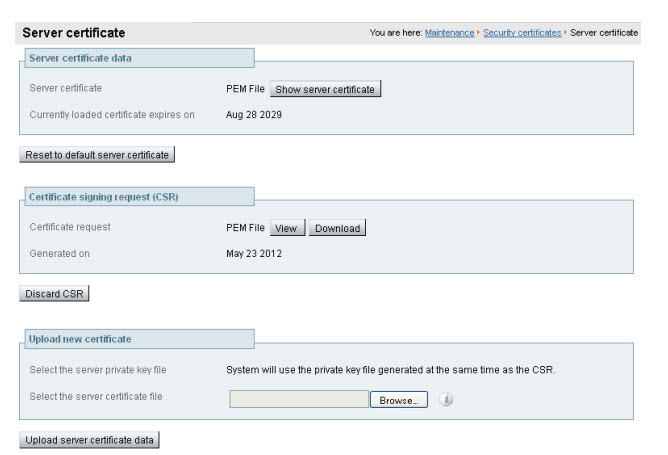
Click Upload server certificate data.
 |
| 7 |
After you complete the configurations move to the next section. |
| 1 |
Download the IdenTrust Commercial Root CA 1 and save it locally
with filename |
| 2 |
On all your Expressways used for hybrid services, navigate to . |
| 3 |
Go to Browse, upload the |
| 4 |
Verify the certificate successfully uploaded and is present in the Expressway Trust Store. |
-
Check if you have a Domain Name System (DNS) zone configured on your Expressway.
-
Two types of calls that use DNS are B2B (existing) and Webex calls. If the B2B calls are already set up, we recommend a unique DNS zone for Webex calls that force it to use mTLS.
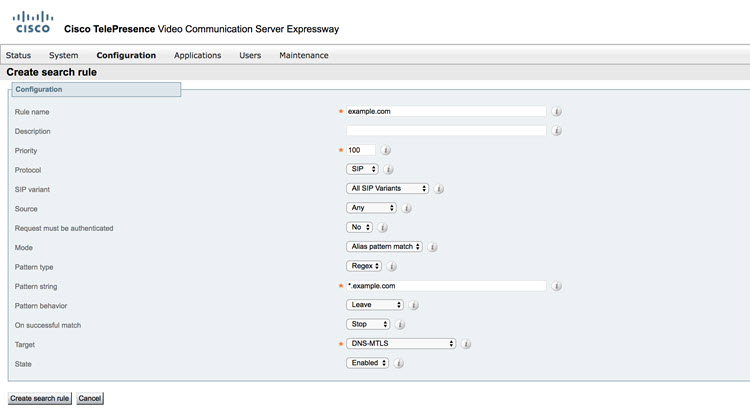
On Expressway versions X8.10 and above, use the steps to modify and create and DNS Zone.
Before you go ahead with the expressway configurations, take a back up of your existing settings, so you can always revert your settings and go back to an operational state.
| 1 |
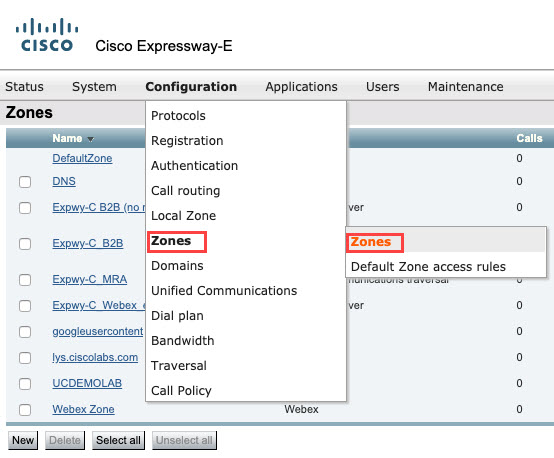
Go to
 |
| 2 |
If you have an existing DNS Zone, select the zone and edit it.
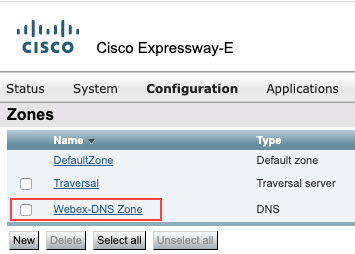 |
| 3 |
If a DNS zone doesn't exist, perform the steps below:
|
| 4 |
Make sure that the calls are validated and the B2B calls are not affected. To avoid DNS resolution issues, click here. |
| 5 |
After you complete the configurations move to the next section. |
Configure the firewall for your network components so that you get the highest quality Webex experience on your computers, mobile devices, and video devices.
-
Check the Media port ranges used by video devices.
These ports are provided as a reference. Refer to the deployment guide and manufacturer recommendation for full details.
Table 1. Default Ports used by Video Collaboration Devices Protocol
Port Number(s)
Direction
Access Type
Comments
TCP
5060-5070
Outbound
SIP signaling
The Webex media edge listens on 5060 - 5070. For more information, please see the configuration guide on the specific service used: Cisco Webex Meetings Enterprise Deployment Guide for Video Device-Enabled Meetings.
TCP
5060, 5061, and 5062
Inbound
SIP signaling
Inbound SIP signaling traffic from the Cisco Webex cloud
TCP / UDP
Ephemeral Ports 36000-59999
Inbound and Outbound
Media ports
If you're using a Cisco Expressway, the media ranges need to be set to 36000-59999. If you’re using a third-party video device or call control, they need to be configured to use this range.
For more information on Firewall settings, see How Do I Allow Webex Meetings Traffic on My Network.

