Create schedules for call settings
 Feedback?
Before you begin
-
Your administrator must have enabled this feature for you to access and configure it. If you don’t see this setting, check with your administrator.
-
You can configure all the call settings from the User Hub by navigating to .
The Calling option is available only for users with the Webex Calling license. If you don’t see the Calling option, it means you don’t have the Webex Calling license.
If you want to find out which calling service you’re set up with, you can check from the Webex App. For more details, see Find out what calling service you have.
| 1 |
Sign in to User Hub. |
| 2 |
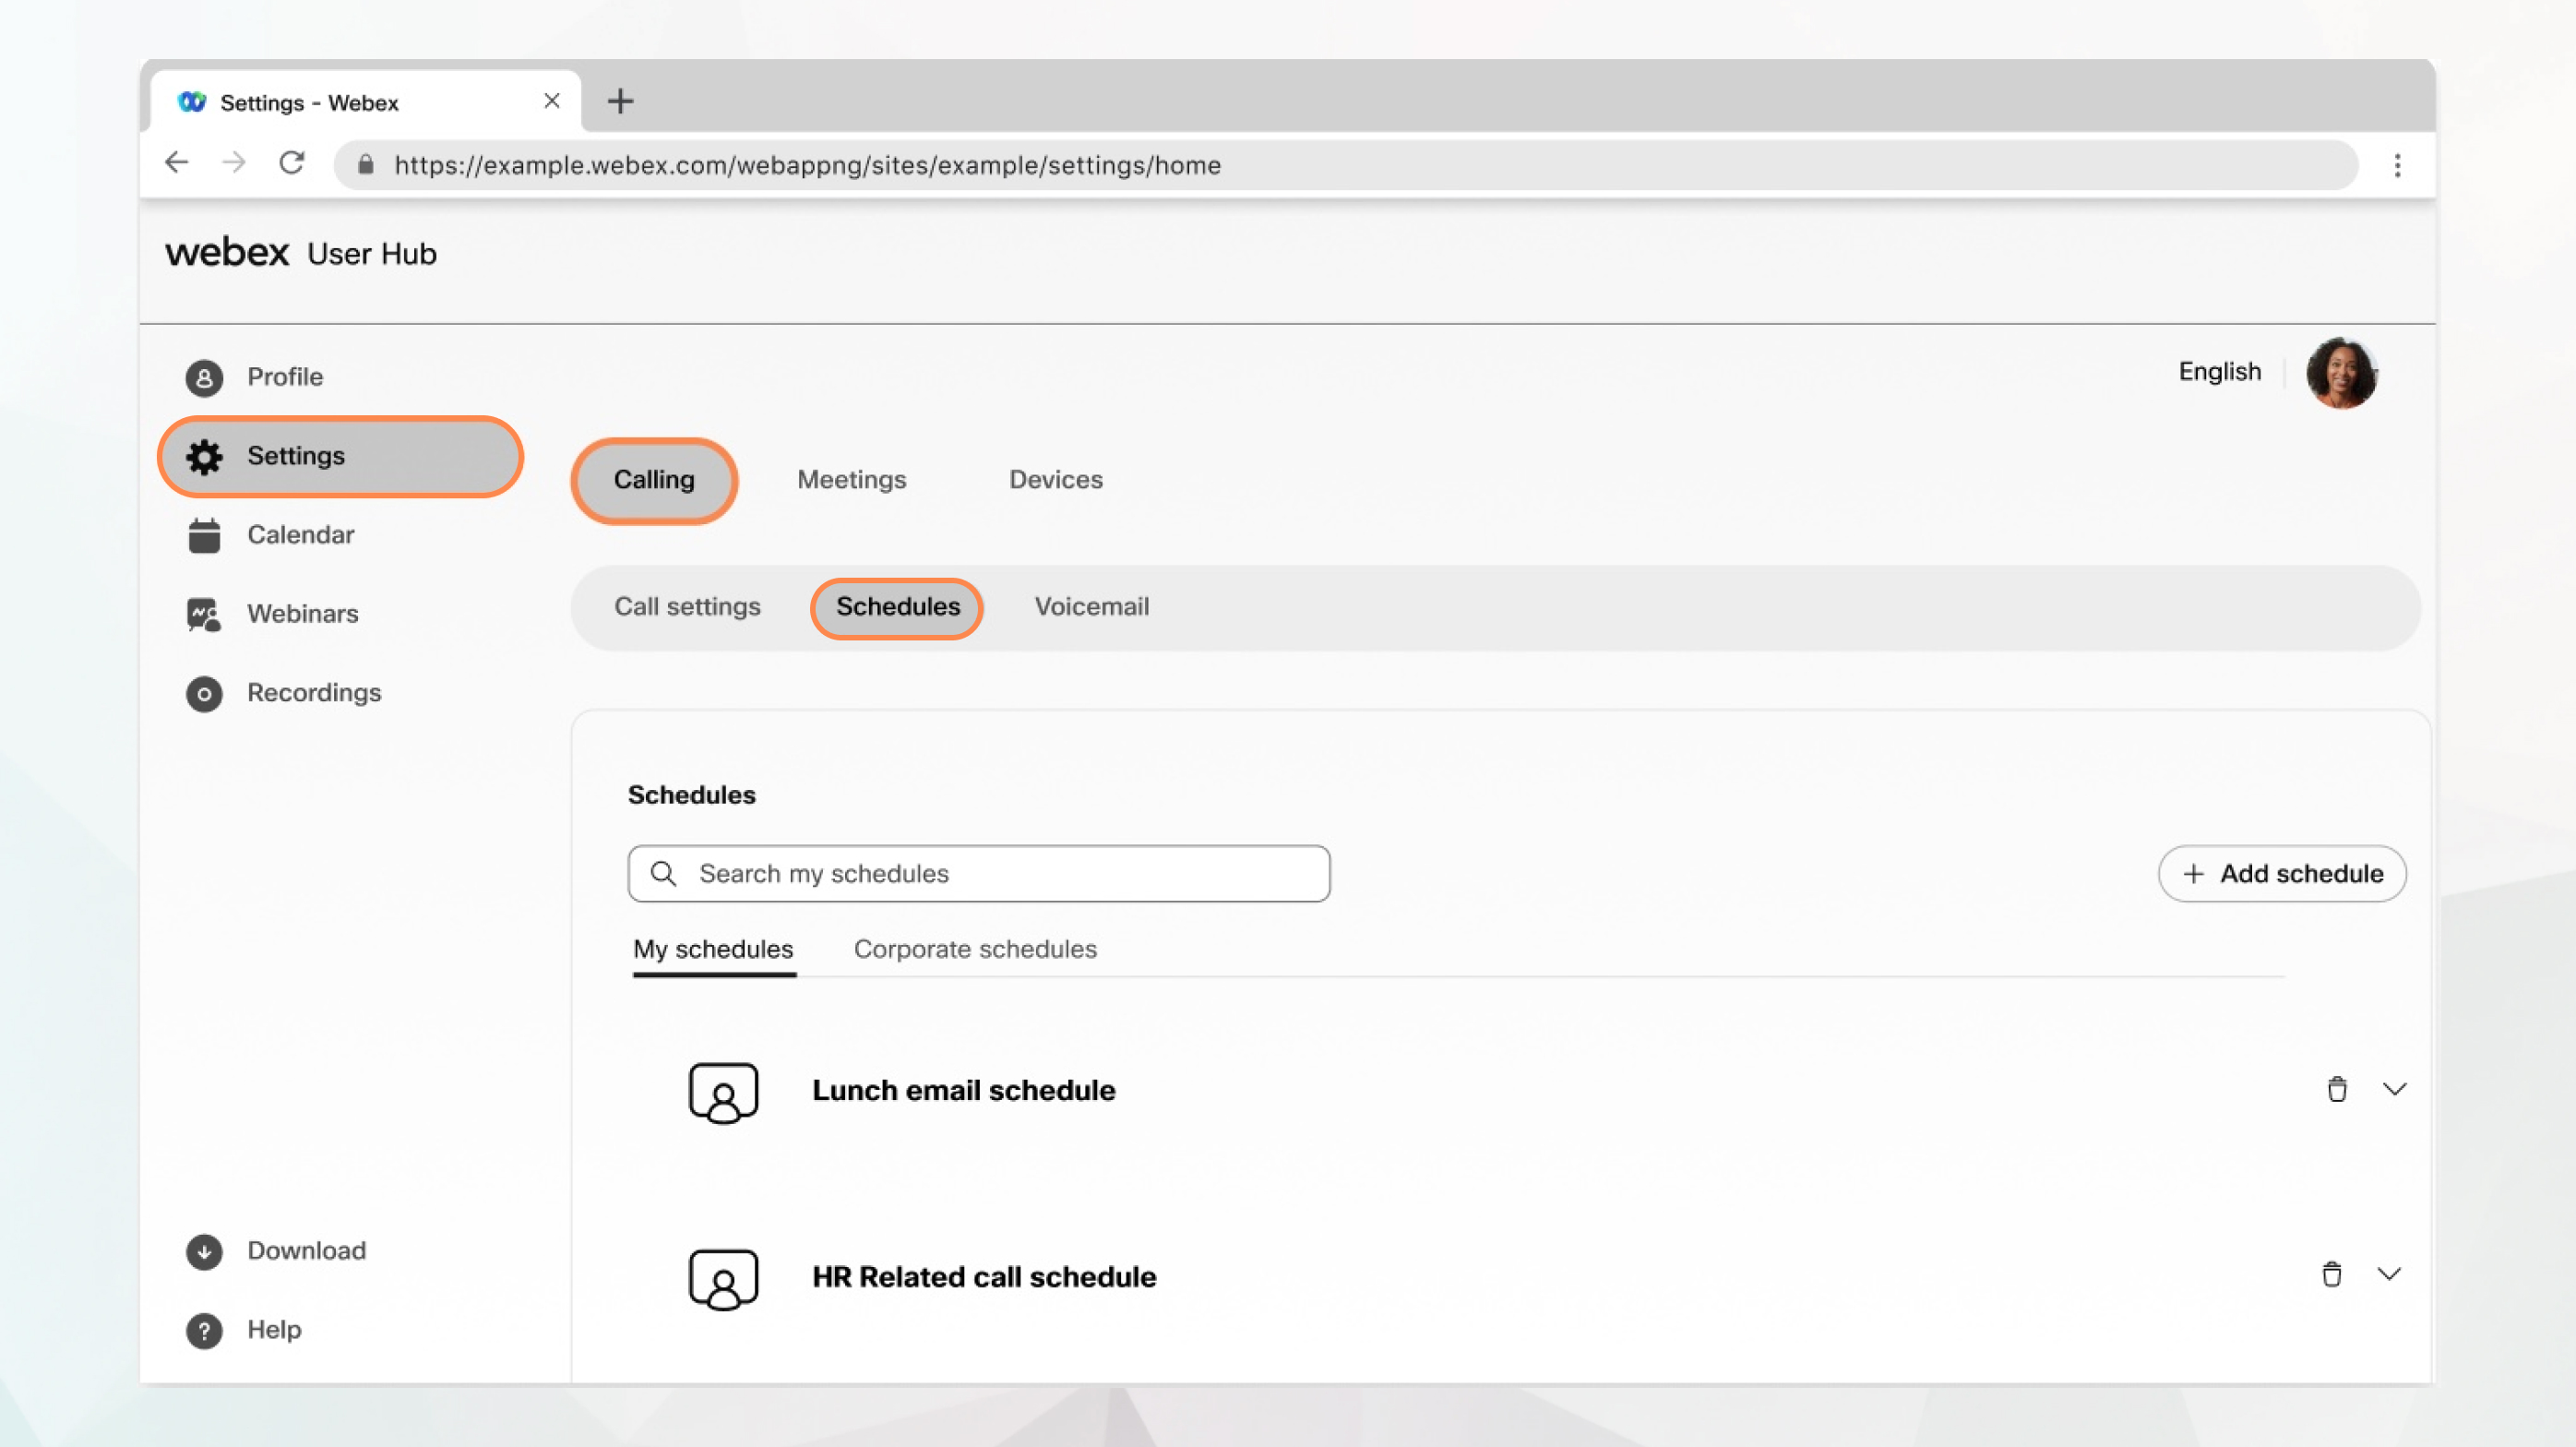
Go to . The following two schedule types appear:
|
| 3 |
Go to My schedules and click Add Schedule to create your schedule. |
| 4 |
Enter a Schedule Name. |
| 5 |
Select the appropriate Start Date/Time and End Date/Time. |
| 6 |
Check All day event or Repeats, if needed. |
| 7 |
Click Save. The created schedule appears under My schedules. You can expand the created schedule and click Add event to add more events to it. |
What to do next
Now that your schedule is created, you can apply it to your selective call settings such as sequential ring, priority alerts, and simultaneous ring.


