
Thanks for your feedback.
Remove the Cisco Webex Hybrid Calendar Service
 Feedback?
Before you begin
-
You must be the Global administrator for the Office 365 tenant or work with the administrator to complete the back-out process.
| 1 |
From the customer view in https://admin.webex.com, go to Services, and then click Edit settings on the Hybrid Calendar Office 365 card. |
| 2 |
Scroll to the Deactivate section and click Deactivate. |
| 3 |
Read the caution that appears, and then proceed if you're sure. The service is no longer available to your organization and users no longer have access to its features. |
| 4 |
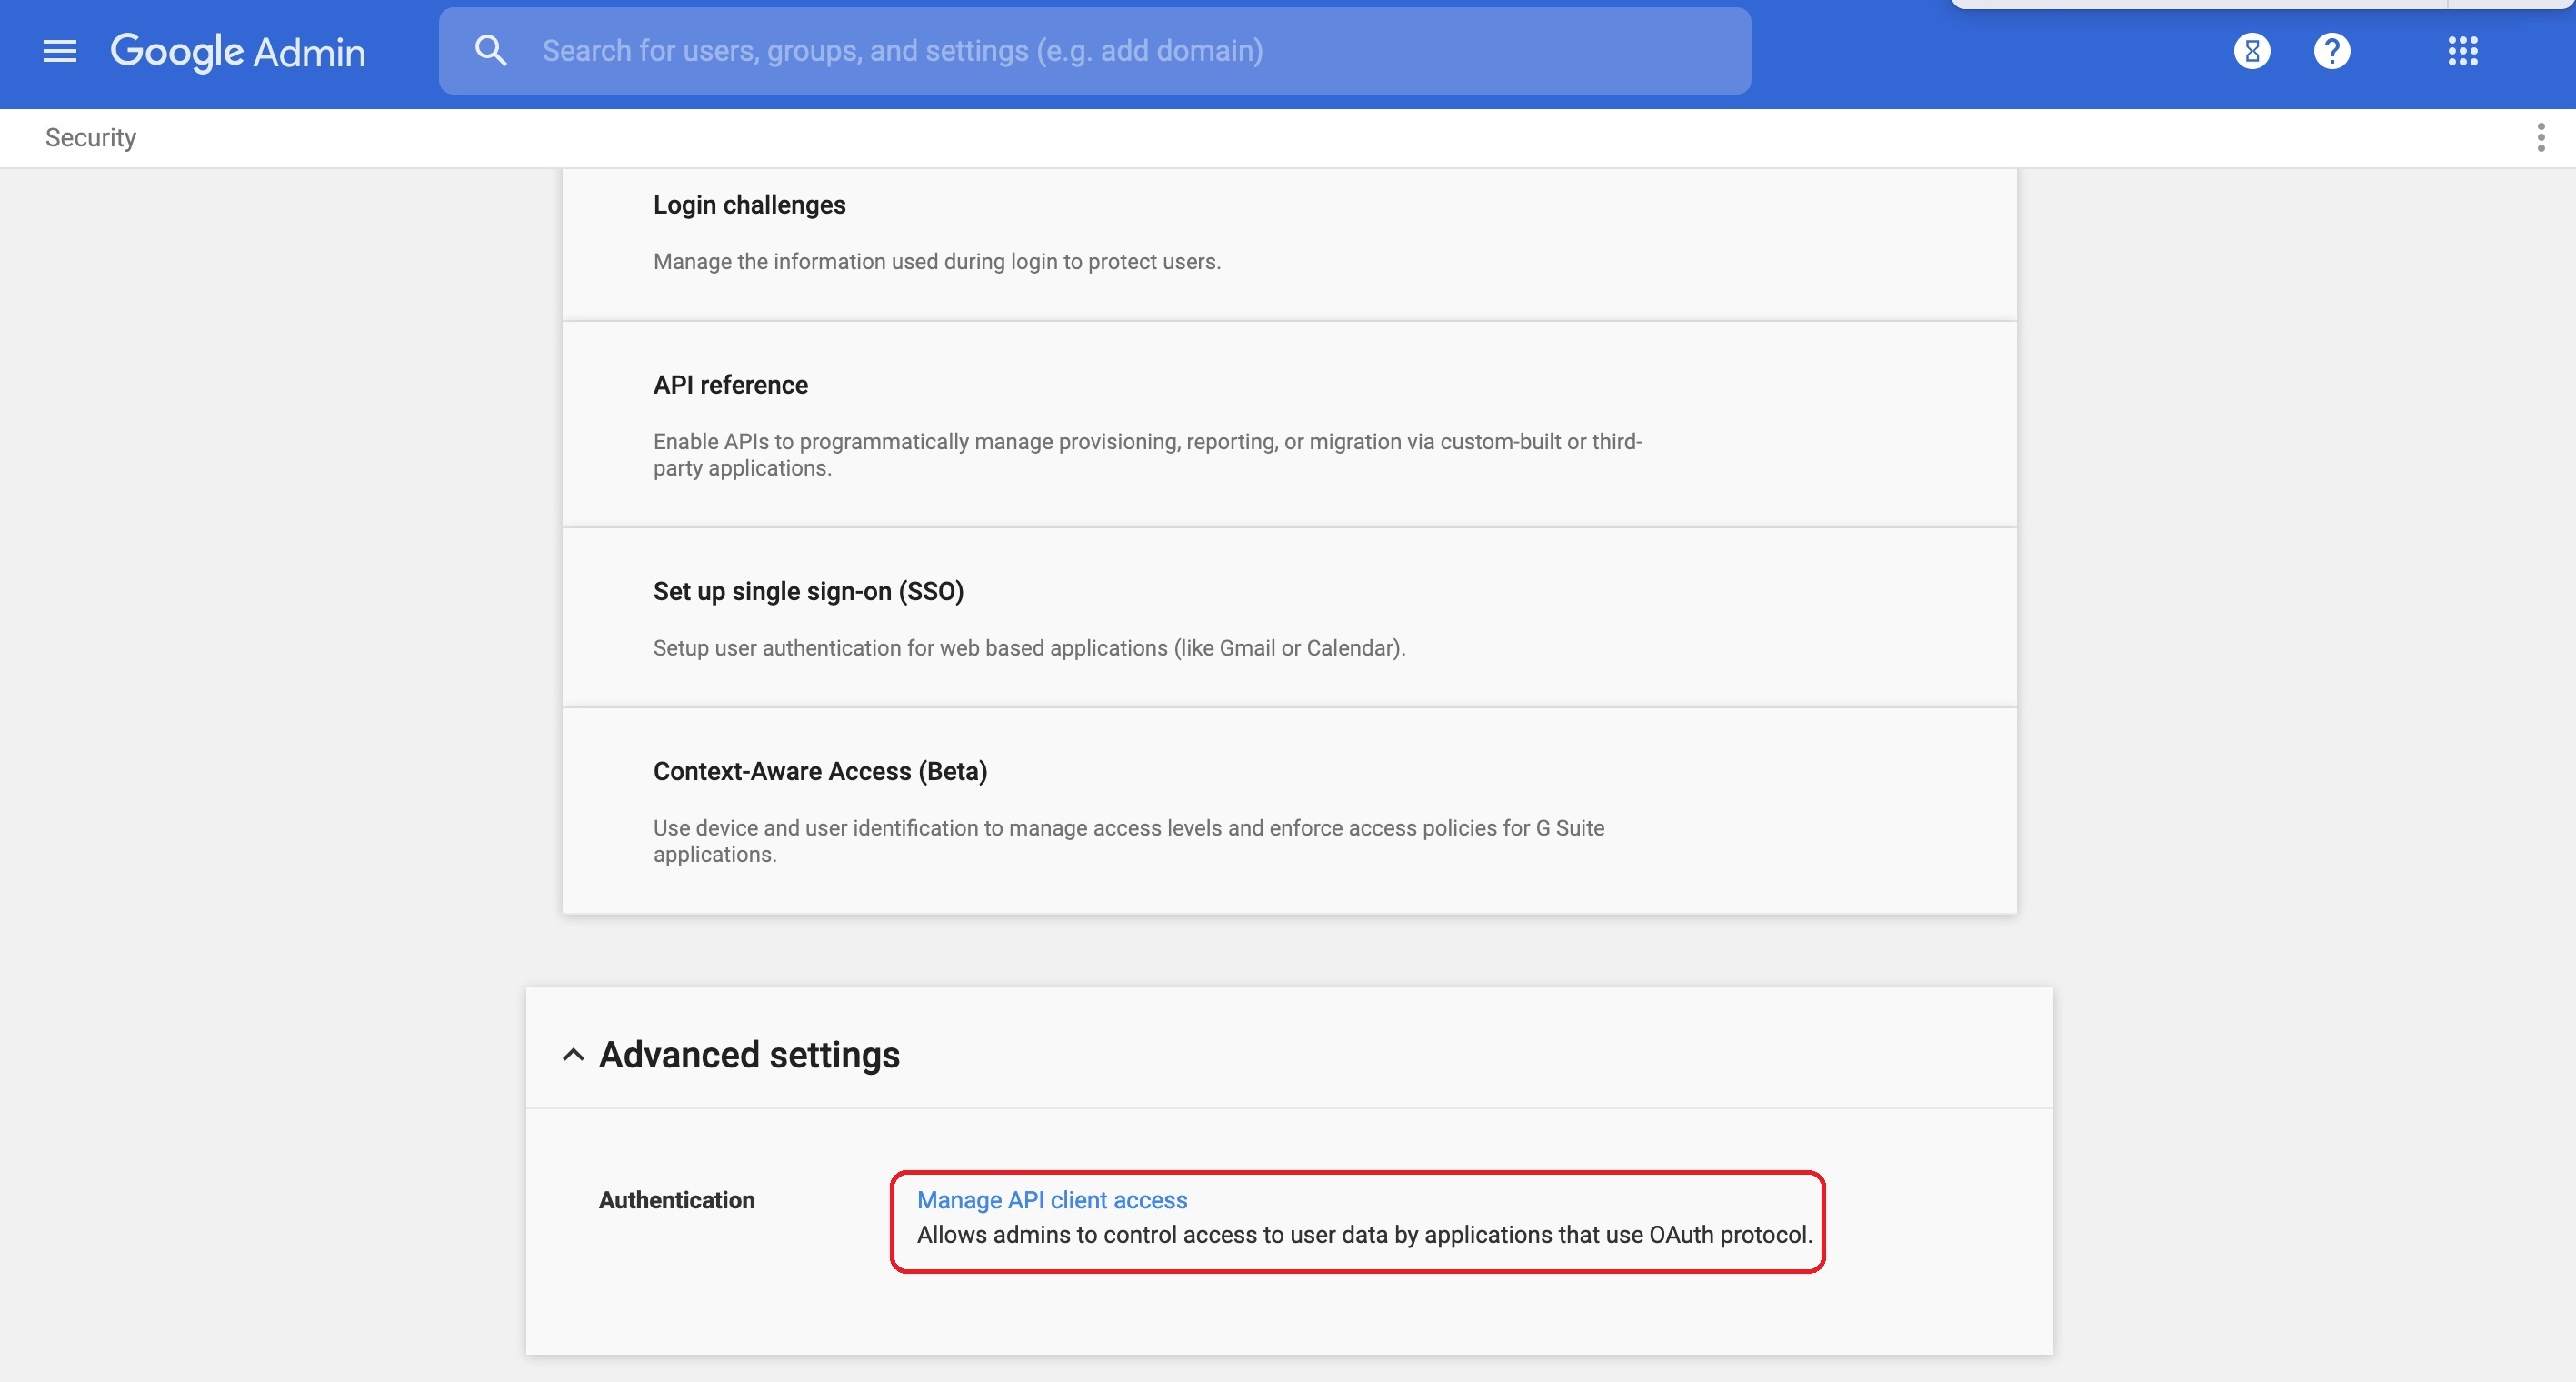
Remove Webex cloud authorization from your Office 365 tenant: |
| 1 |
From the customer view in https://admin.webex.com, go to Services, and then click Edit settings on the Hybrid Calendar Google card. |
| 2 |
Scroll to the Deactivate section and click Deactivate. |
| 3 |
Read the caution that appears, and then proceed if you're sure. The service is no longer available to your organization and users no longer have access to its features. |
| 4 |
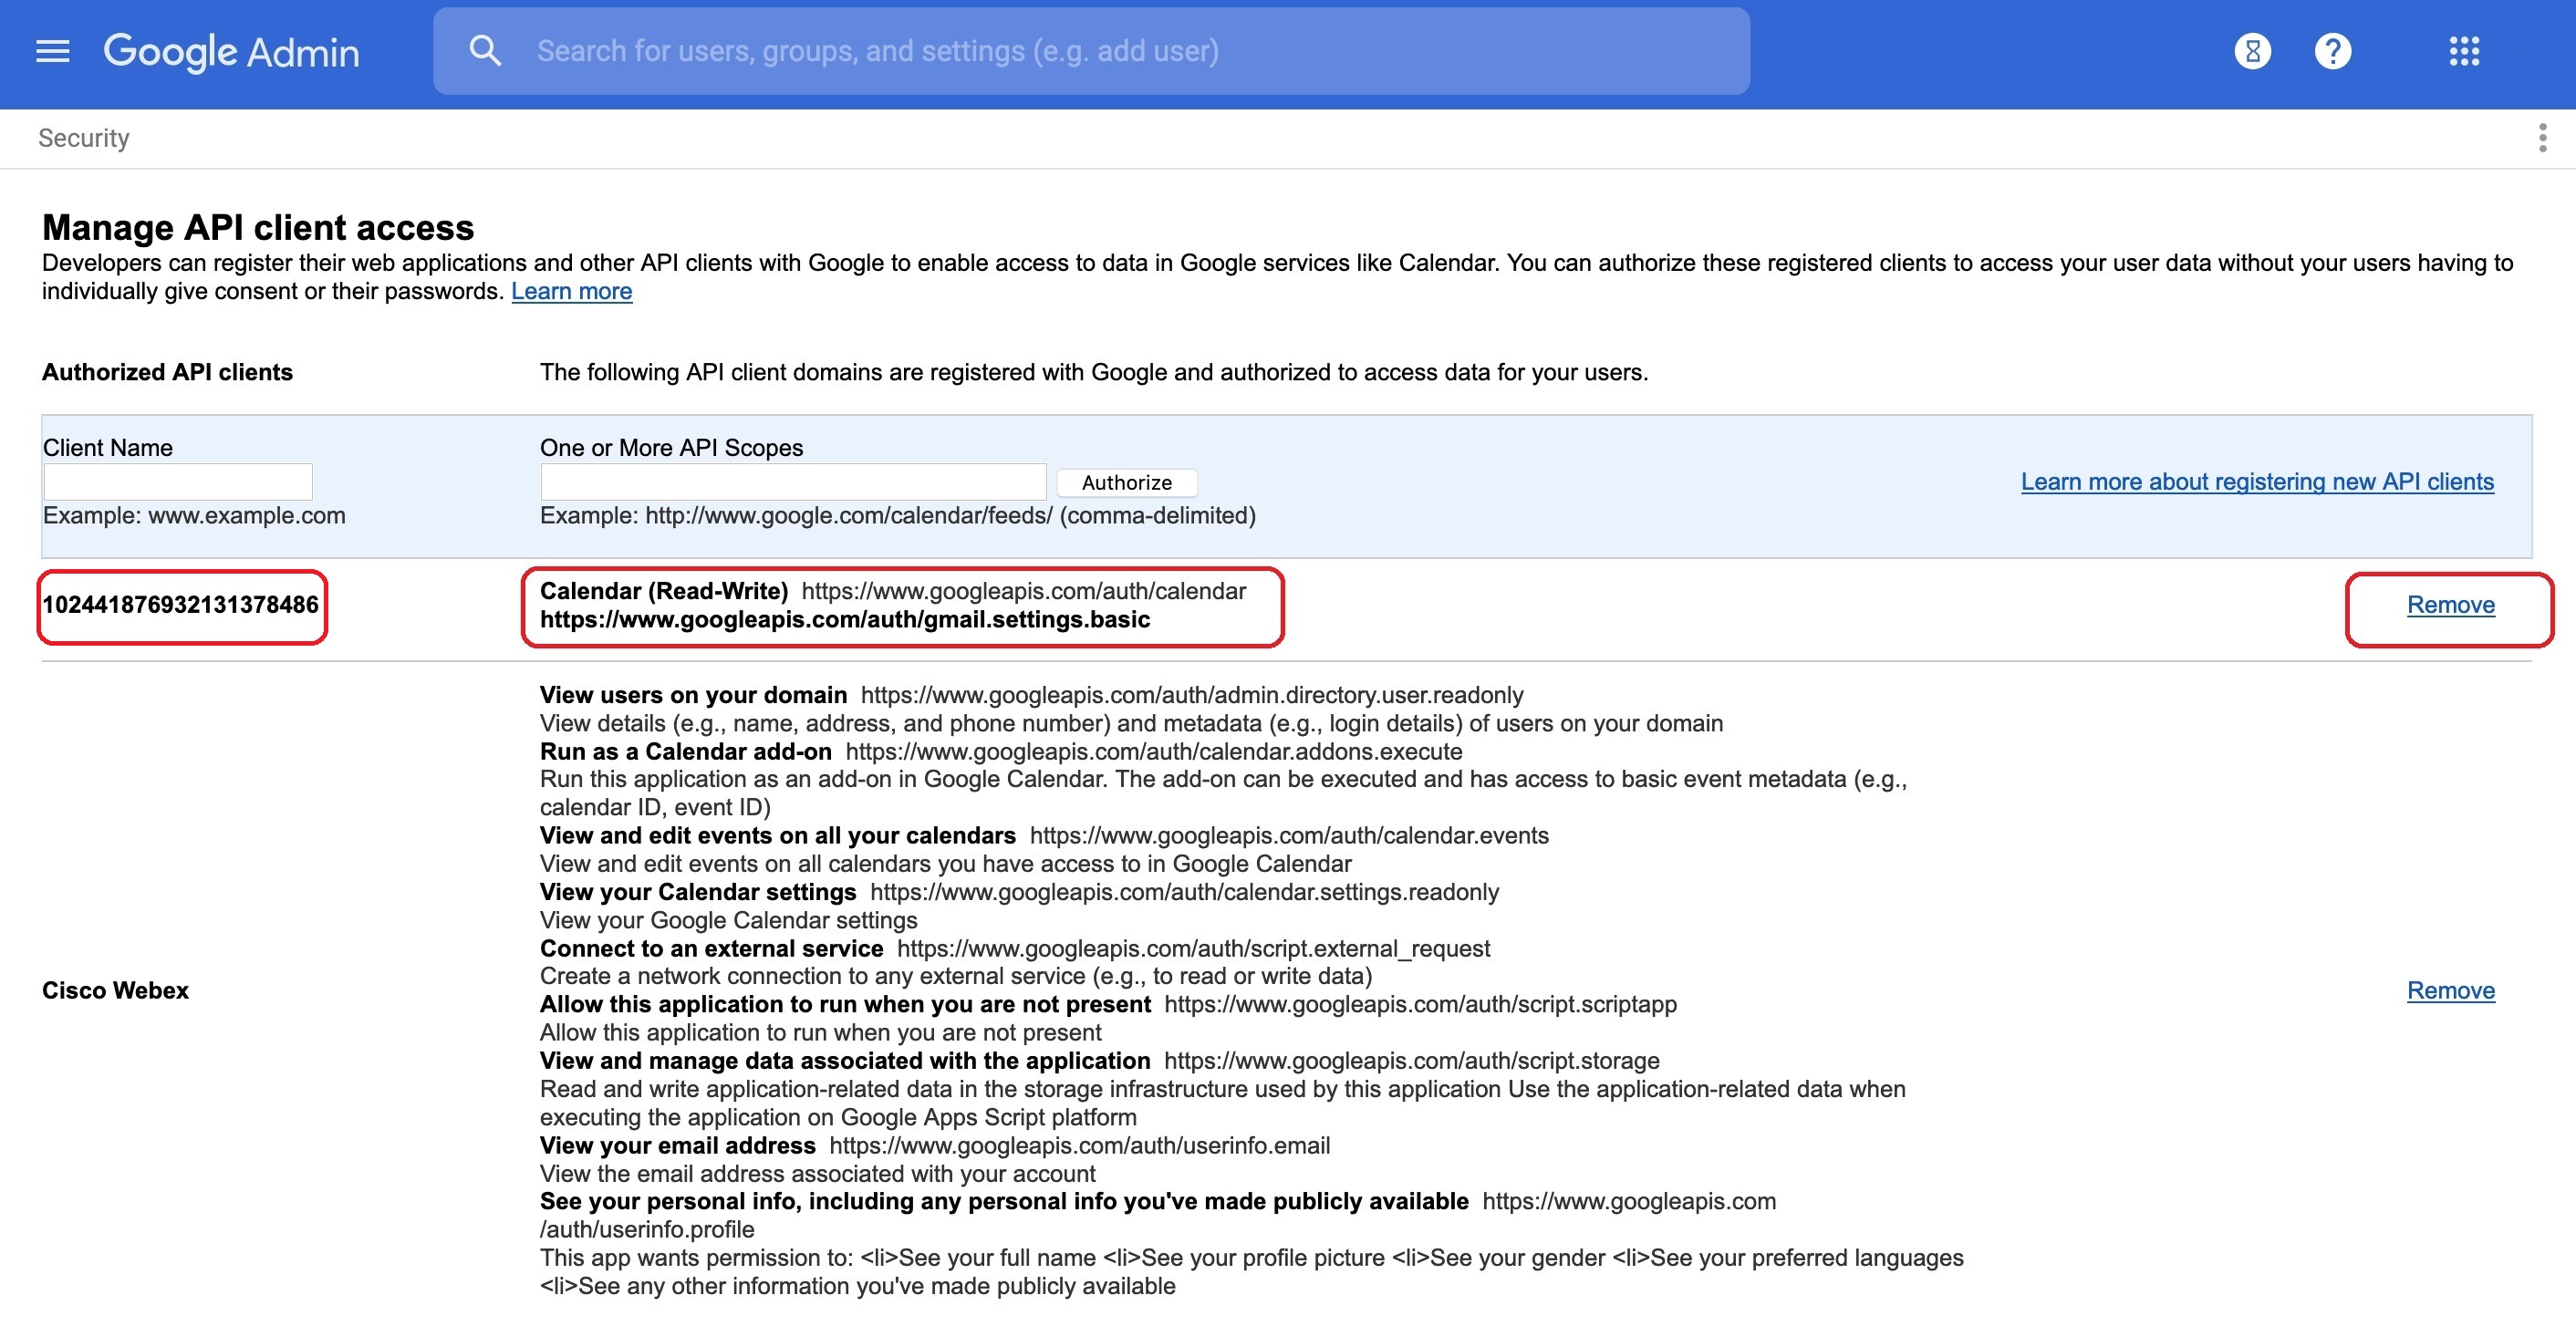
Remove Webex cloud access from your G Suite account:
|
By removing the Hybrid Calendar Service from your on-premises resources, you are not only removing user access to the features. You are also removing the related configuration from the Expressway connector host.
| 1 |
From the customer view in https://admin.webex.com, go to Services, and then click Edit settings on the Hybrid Calendar Microsoft Exchange card. |
| 2 |
Scroll to the Deactivate section and click Deactivate. |
| 3 |
Read the caution that appears, and then proceed if you're sure. The service is no longer available to your organization, the configuration is deleted, and the Calendar Connector software is removed from your registered resources. |
| 4 |
If you are no longer running any hybrid services on the Expressway connector host, deregister the resource from the Webex cloud:
|
What to do next
Use these steps as guidelines. Your exact steps may vary depending on your configuration and version of Microsoft Exchange. The examples use Exchange Management Shell commands and sample names that may not be applicable in your deployment.
Use these steps as guidelines to undo the changes that your organization made when deploying the Expressway-based Hybrid Calendar Service for Microsoft Exchange or Office 365. Your exact steps may vary depending on your configuration and version of Microsoft Exchange. The examples use Exchange Management Shell commands and sample names that may not be applicable in your deployment.
| 1 |
If you intend to retain any impersonation accounts that were created for the Calendar Connector and the accounts are not being used for other custom applications, do the following substeps for each account: |
| 2 |
If the custom throttling policy is not being used for other custom applications, and you did not modify it in step 1, remove it. Remove-ThrottlingPolicy -Identity CalendarConnectorPolicy
|
| 3 |
If you do not need to retain any impersonation account that was created for the Calendar Connector, and the account is not being used for other custom applications, delete it. |


