- Home
- /
- Article

Join and Assist a Events (classic) as a Panelist
 In this article
 Feedback?
Hosts can delegate a panelist in Events (classic) to take on certain roles and responsibilities during your event.
Panelist Roles and Privileges
A panelist can do the following during an event:
-
Participate in discussions to which other attendees listen.
-
Serve as a subject matter expert in a Q & A session.
-
View and answer questions from attendees in a Q & A session.
-
Respond to public and private chat messages.
-
Participate in a practice session.
-
Annotate shared documents.
-
Annotate shared applications, web browsers, and desktops, if the presenter grants annotation control to the panelist.
-
Become a polling coordinator to manage polls.
-
View feedback.
-
Save chat messages to a file.
-
Download files that the presenter publishes.
A panelist cannot mute or unmute other participants.
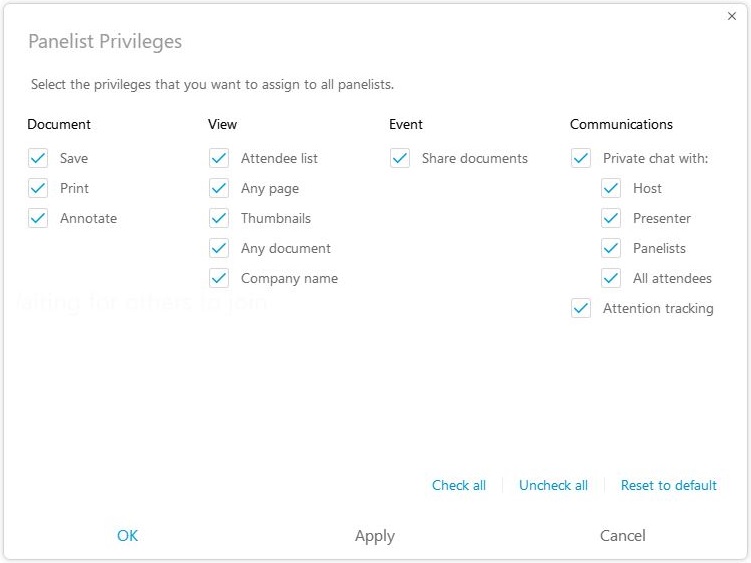
The host can change the panelist privileges during an event from the Panelist Privileges page.

Join through Video Systems
Events (classic) panelists can join events using video systems. Attendees can't join through a video system. Event attendees must be promoted to a panelist to share video. The event host and panelists can always share their video during an event. Up to 25 panelists can share their video during an event. To find out which version you’re using, see Find Your Cisco Webex Meetings Version Number.
| 1 |
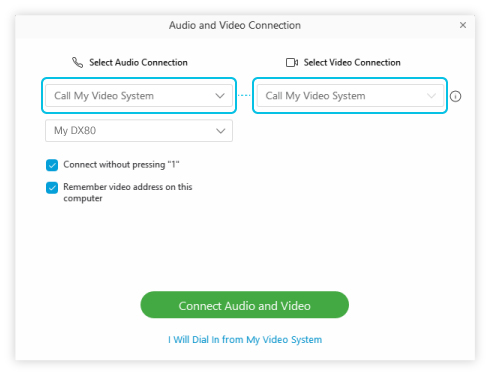
Panelists can dial in to the event directly, or select Call my video system when they join from the Webex desktop app.
|
| 2 |
Select Connect Audio and Video. Panelists can also dial in from their video system. Select I Will Dial In from My Video System and enter the Video Address and the Panelist numeric password. |
Upload and Share Documents to an Event
When a host schedules an event, they can specify that panelists can provide documents or presentations. The files uploaded by panelists appear on the host's Event Information page.
To upload documents, do the following:
| 1 |
Go to the Event Information page for the upcoming event. |
| 2 |
Under Event files: select , navigate to and select the file you want to upload. |
| 3 |
Select |


