
Thanks for your feedback.
Add chapters for recordings of meetings and webinars
 Feedback?
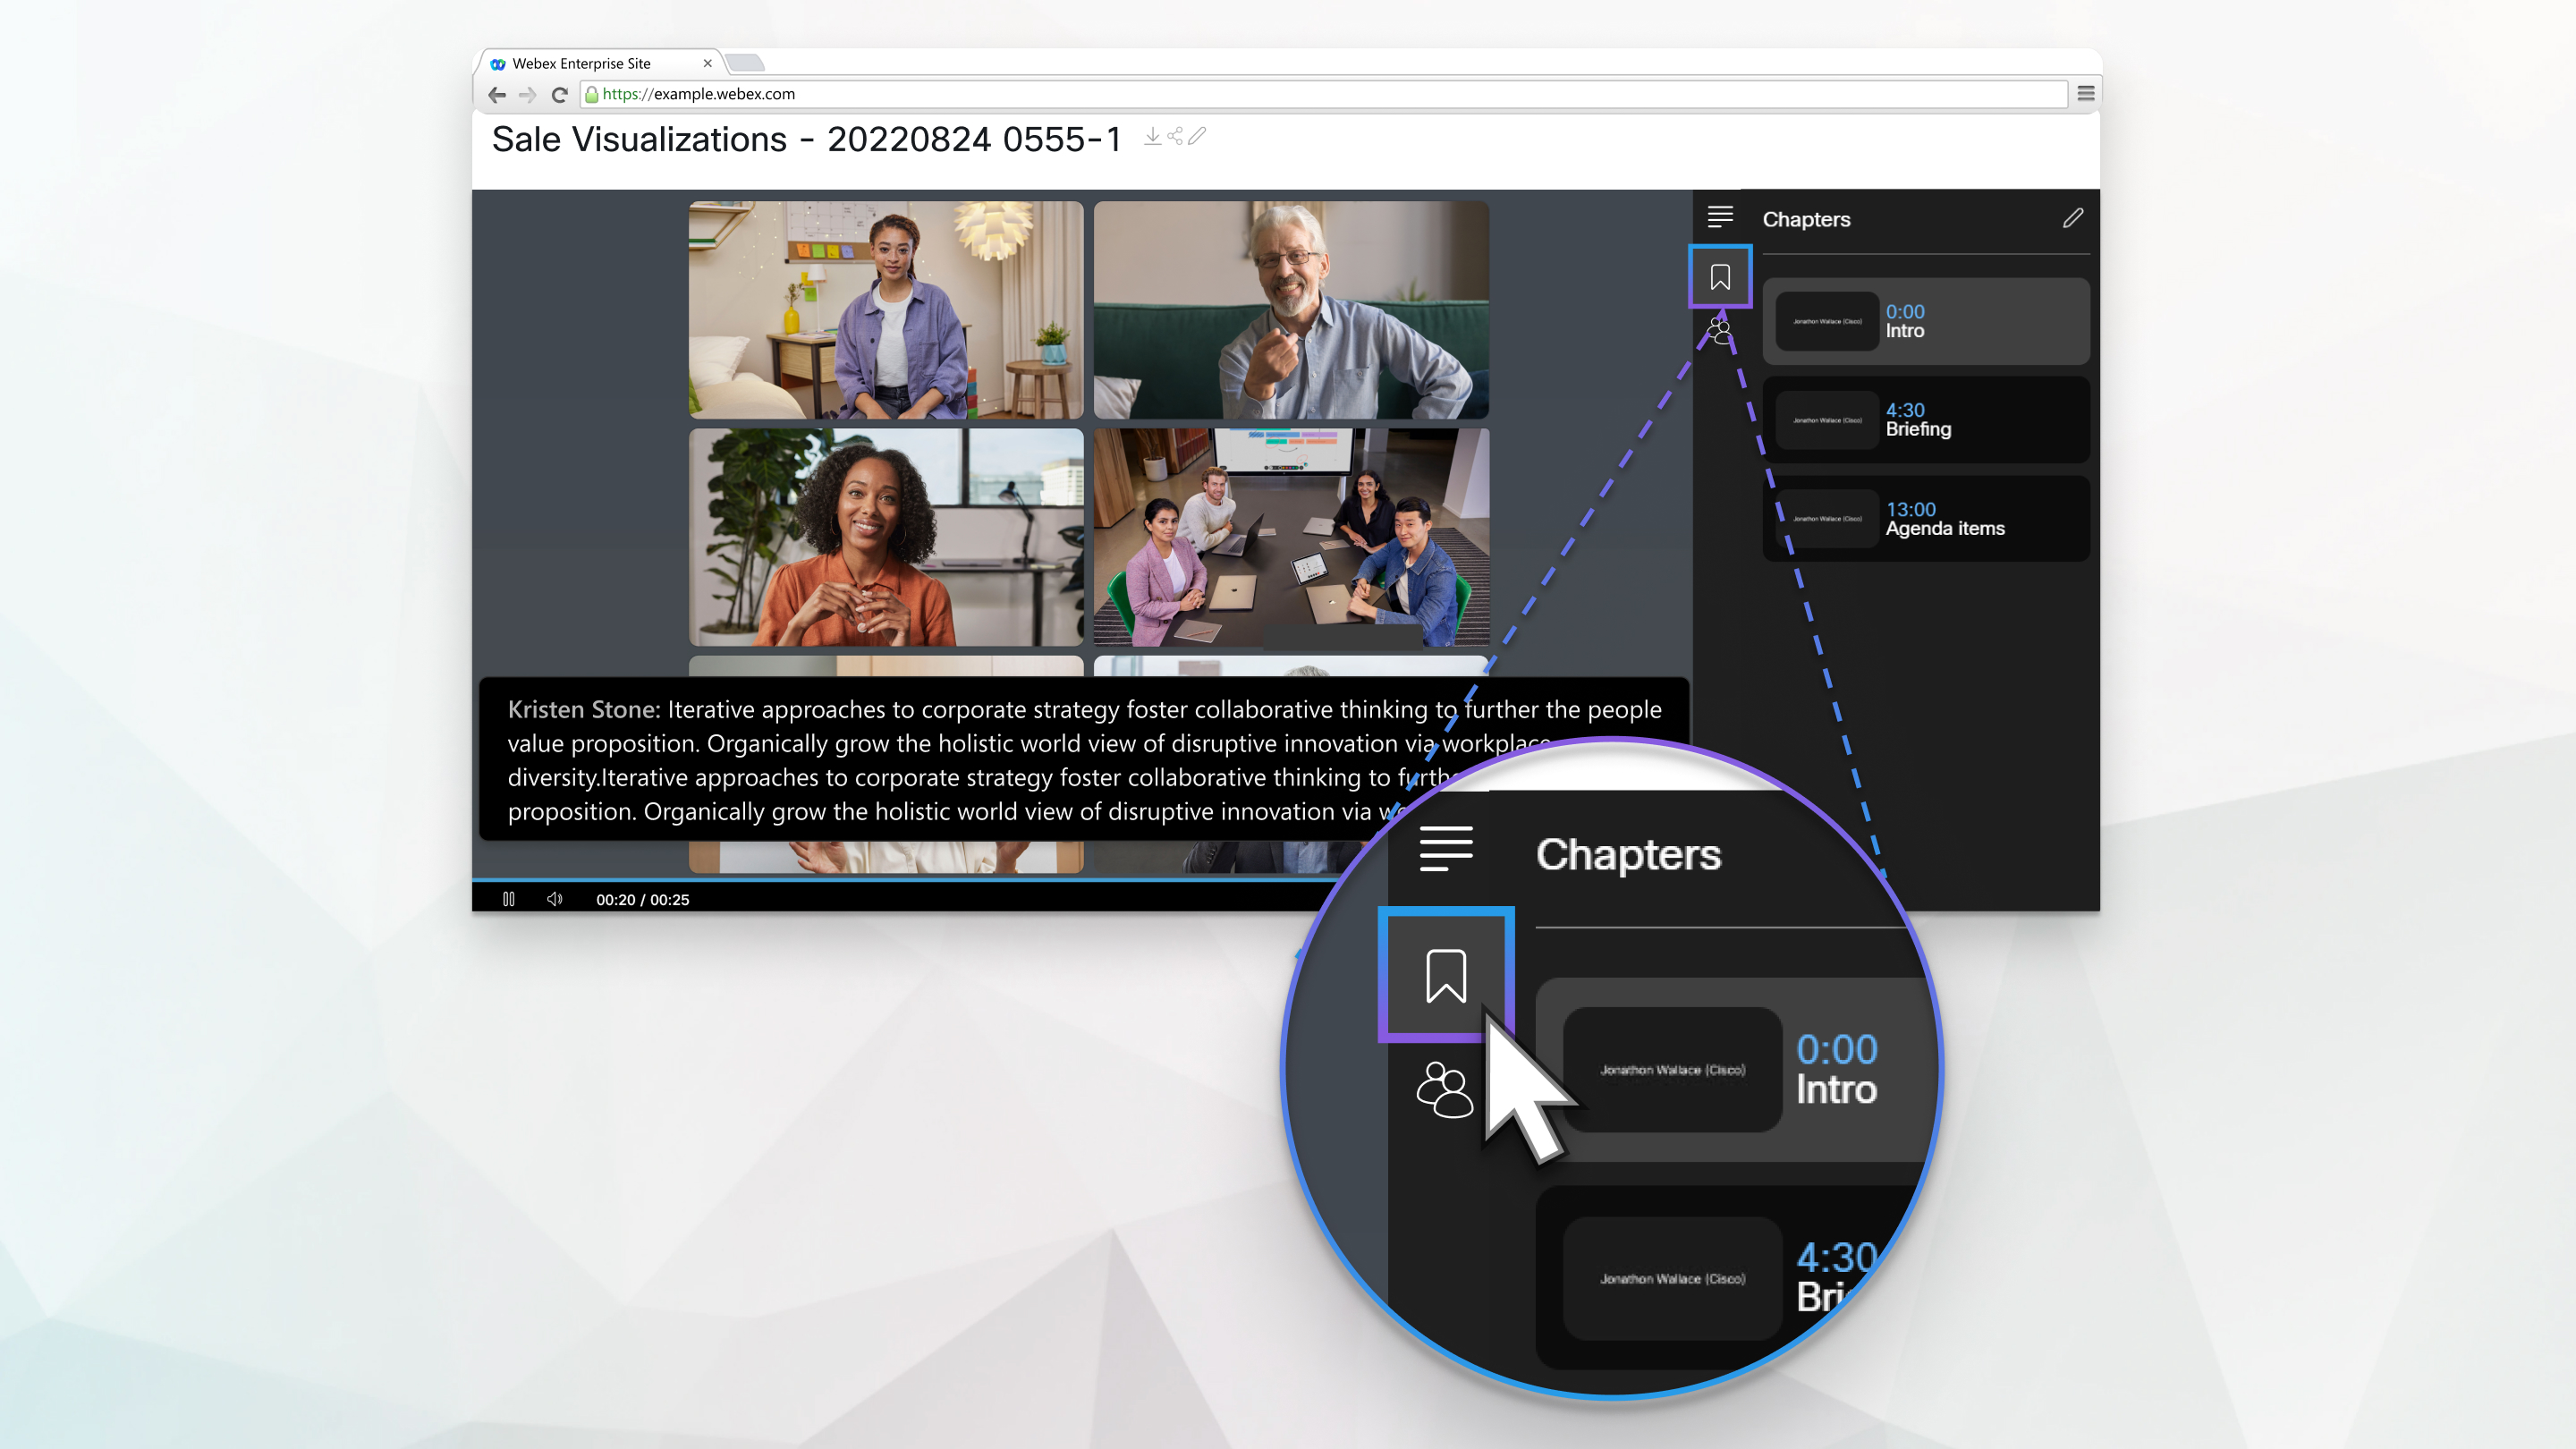
You can create chapters for video-centric network-based MP4 recordings that you recorded in the cloud in the MP4 format.
This feature requires Webex video platform version 2.0. If you don't know what video platform version you use, you can find your Webex Meetings version number. You can't create chapters for recordings that you record to your computer.
| 1 |
Sign in to your Webex site, go to Recordings and select a recording. |
| 2 |
In the Chapter tab, click the chapter box, then enter the timestamps and chapter names that you want to add. Format your chapters using minutes and seconds (mm:ss) or hours, minutes, and seconds (hh:mm:ss) for the timestamp, followed by the name of the chapter. Each chapter must be on its own line and the first chapter must have the timestamp 00:00. For example: 00:00 Intro 04:30 Briefing 01:04:23 Summary |
| 3 |
Click Save.
To edit the recording chapters, click the pencil icon, add
or remove chapters from the list, then select Save. Anyone who plays back the recording can click a chapter name to go to it or
select it from the video progress bar.
|


