
Thanks for your feedback.
Create breakout sessions
 Feedback?
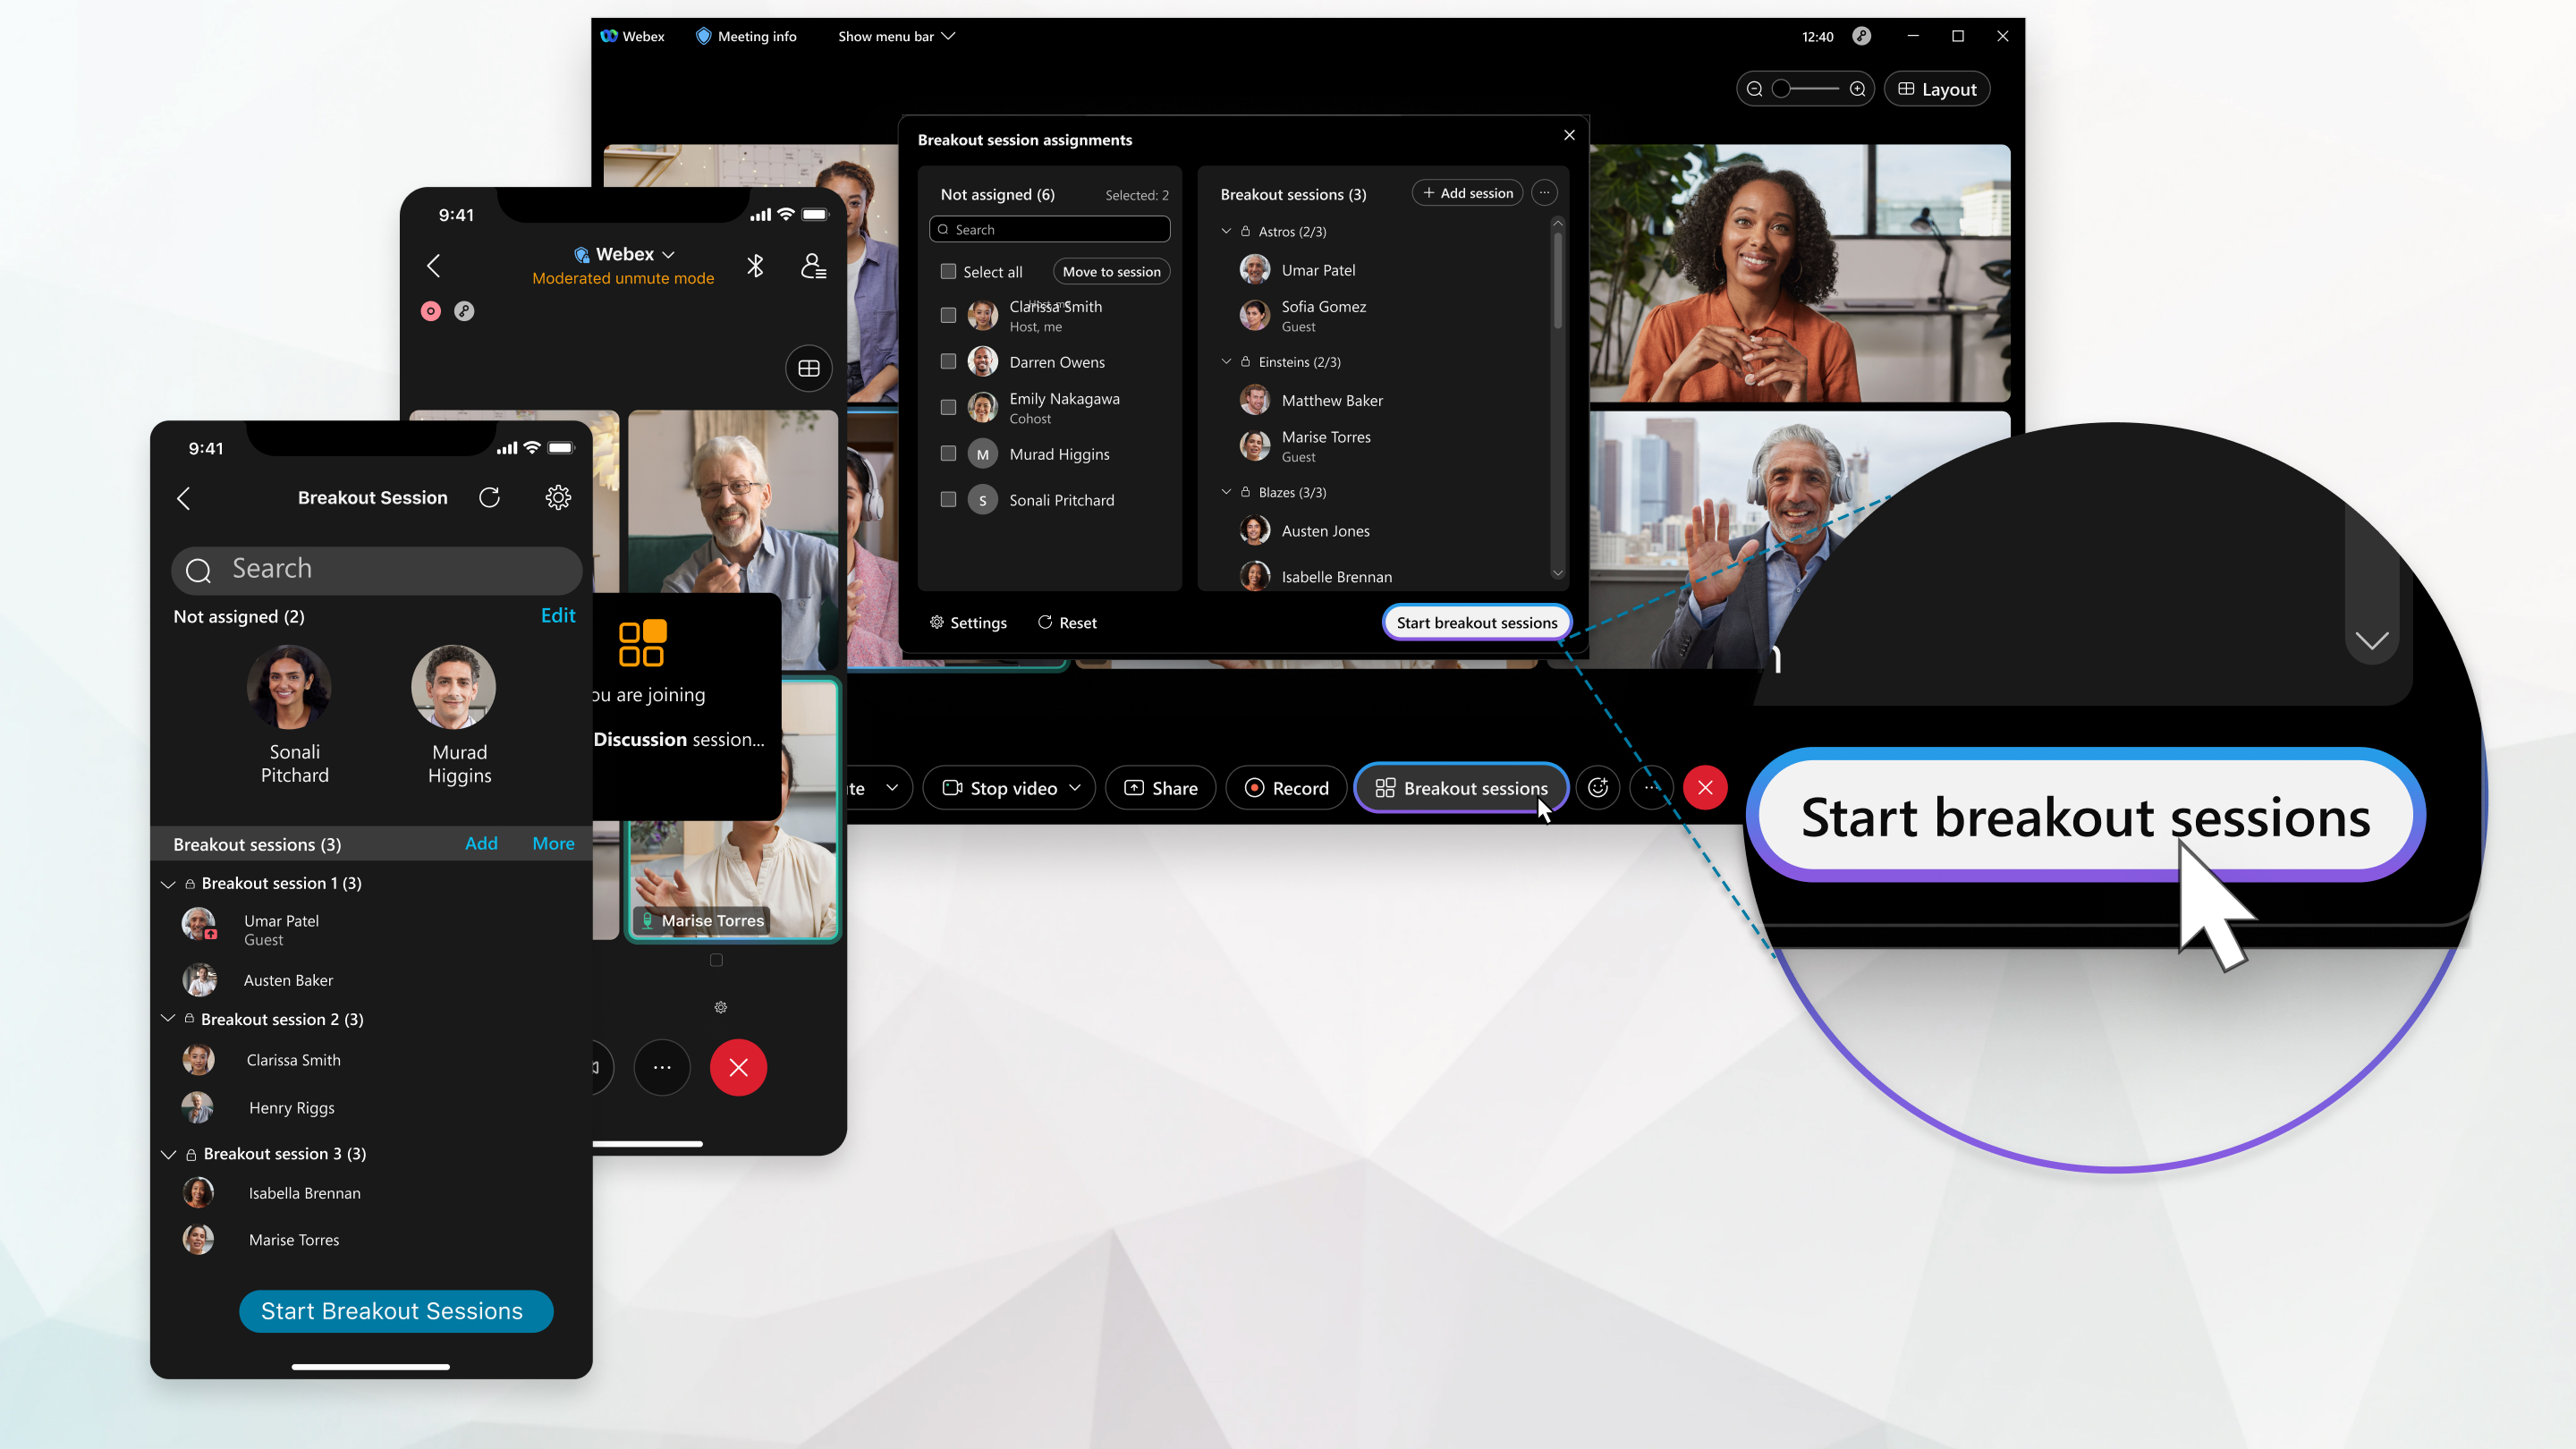
Hosts and cohosts can also create the breakout sessions and preassign participants when they schedule a meeting, as well as allowing participants to join any session.
This feature is supported on Webex Meetings and Webex Webinars. On Webex App, this feature is available on our Webex Suite meeting platform. Find out if your meetings use the Webex Suite meeting platform.
If you use Webex Meetings or Webex Webinars on Linux, use our web app for breakout sessions.
Find out what you can do in breakout sessions, depending on your role in a meeting.
| 1 |
From the Breakout menu, click Enable Breakout Sessions. You can also enable the breakout session feature when you schedule a meeting or schedule a webinar. When you turn on breakout sessions, the Breakout sessions button appears in the meeting controls. |
| 2 |
In your meeting, select Breakout Sessions. Only one host or cohost can open the Breakout session assignment dialog box at a time. |
| 3 |
Select the number of breakout sessions you want to create and how you want to assign your participants:
In webinars, you can only assign panelists to breakout sessions. You can't assign attendees. Once you start breakout sessions, attendees can choose which one they want to join. |
| 4 |
Click Create Assignments. By default, breakout sessions are named Breakout session 1, Breakout session 2, and so on. You can rename the breakout sessions later. If you chose Automatically for assigning participants, the participants get assigned. If you chose Manually, assign participants to breakout sessions. If you want to change the number of breakout sessions or how the participants get assigned, click Reset and repeat the previous steps. The new breakout sessions replace all existing sessions. |
| 5 | |
| 6 |
(Optional) To prevent unassigned participants from joining breakout sessions, More, then select Only assigned participants can join. This option doesn't appear in webinars. |
| 7 |
When you're ready to start all breakout sessions, click Start Breakout Sessions. |
What to do next
| 1 |
Tap More Options If the Breakout Session button is unavailable, someone else is editing the breakout sessions. Ask the host or cohost if they're making changes. |
| 2 |
Select the number of breakout sessions that you want to create and how you would like to assign your participants:
|
| 3 |
Tap Create Assignments. By default, breakout sessions are named Breakout session 1, Breakout session 2, and so on. You can rename the breakout sessions later.
If you chose Automatically Assign for assigning participants, the participants are assigned. If you chose Let Participants Choose Any Sessions, assign participants to breakout sessions. If you want to change the number of breakout sessions or how the participants were assigned, tap Reset
|
| 4 | |
| 5 |
When you're ready to start all breakout sessions, tap Start Breakout Sessions. |

 and repeat the previous steps. The new breakout sessions will replace all existing sessions.
What to do next
| 1 |
Tap More Options If the Breakout Session button is unavailable, someone else is editing the breakout sessions. Ask the host or cohost if they're making changes. |
| 2 |
Select the number of breakout sessions that you want to create and how you'd like to assign your participants:
|
| 3 |
Tap Create Assignments. By default, breakout sessions are named Breakout session 1, Breakout session 2, and so on. You can rename the breakout sessions later.
If you chose Automatically for assigning participants, the participants are assigned. If you chose Manually, assign participants to breakout sessions. If you want to change the number of breakout sessions or how the participants were assigned, tap Reset
|
| 4 | |
| 5 |
When you're ready to start all breakout sessions, tap Start Breakout Sessions. |
What to do next
| 1 |
Tap More options If the Breakout Session button is unavailable, someone else is editing the breakout sessions. Ask the host or cohost if they're making changes. |
| 2 |
Select the number of breakout sessions that you want to create and how you'd like to assign your participants:
|
| 3 |
Tap Create Assignments. By default, breakout sessions are named Breakout session 1, Breakout session 2, and so on. You can rename the breakout sessions later.
If you chose Automatically Assign for assigning participants, the participants are assigned. If you chose Manually, assign participants to breakout sessions. If you want to change the number of breakout sessions or how the participants were assigned, tap Reset
|
| 4 | |
| 5 |
When you're ready to start all breakout sessions, tap Start Breakout Sessions. |
What to do next
If the breakout sessions aren't set to end automatically after a specified number of minutes, you can end all breakout sessions when you're finished using them.


