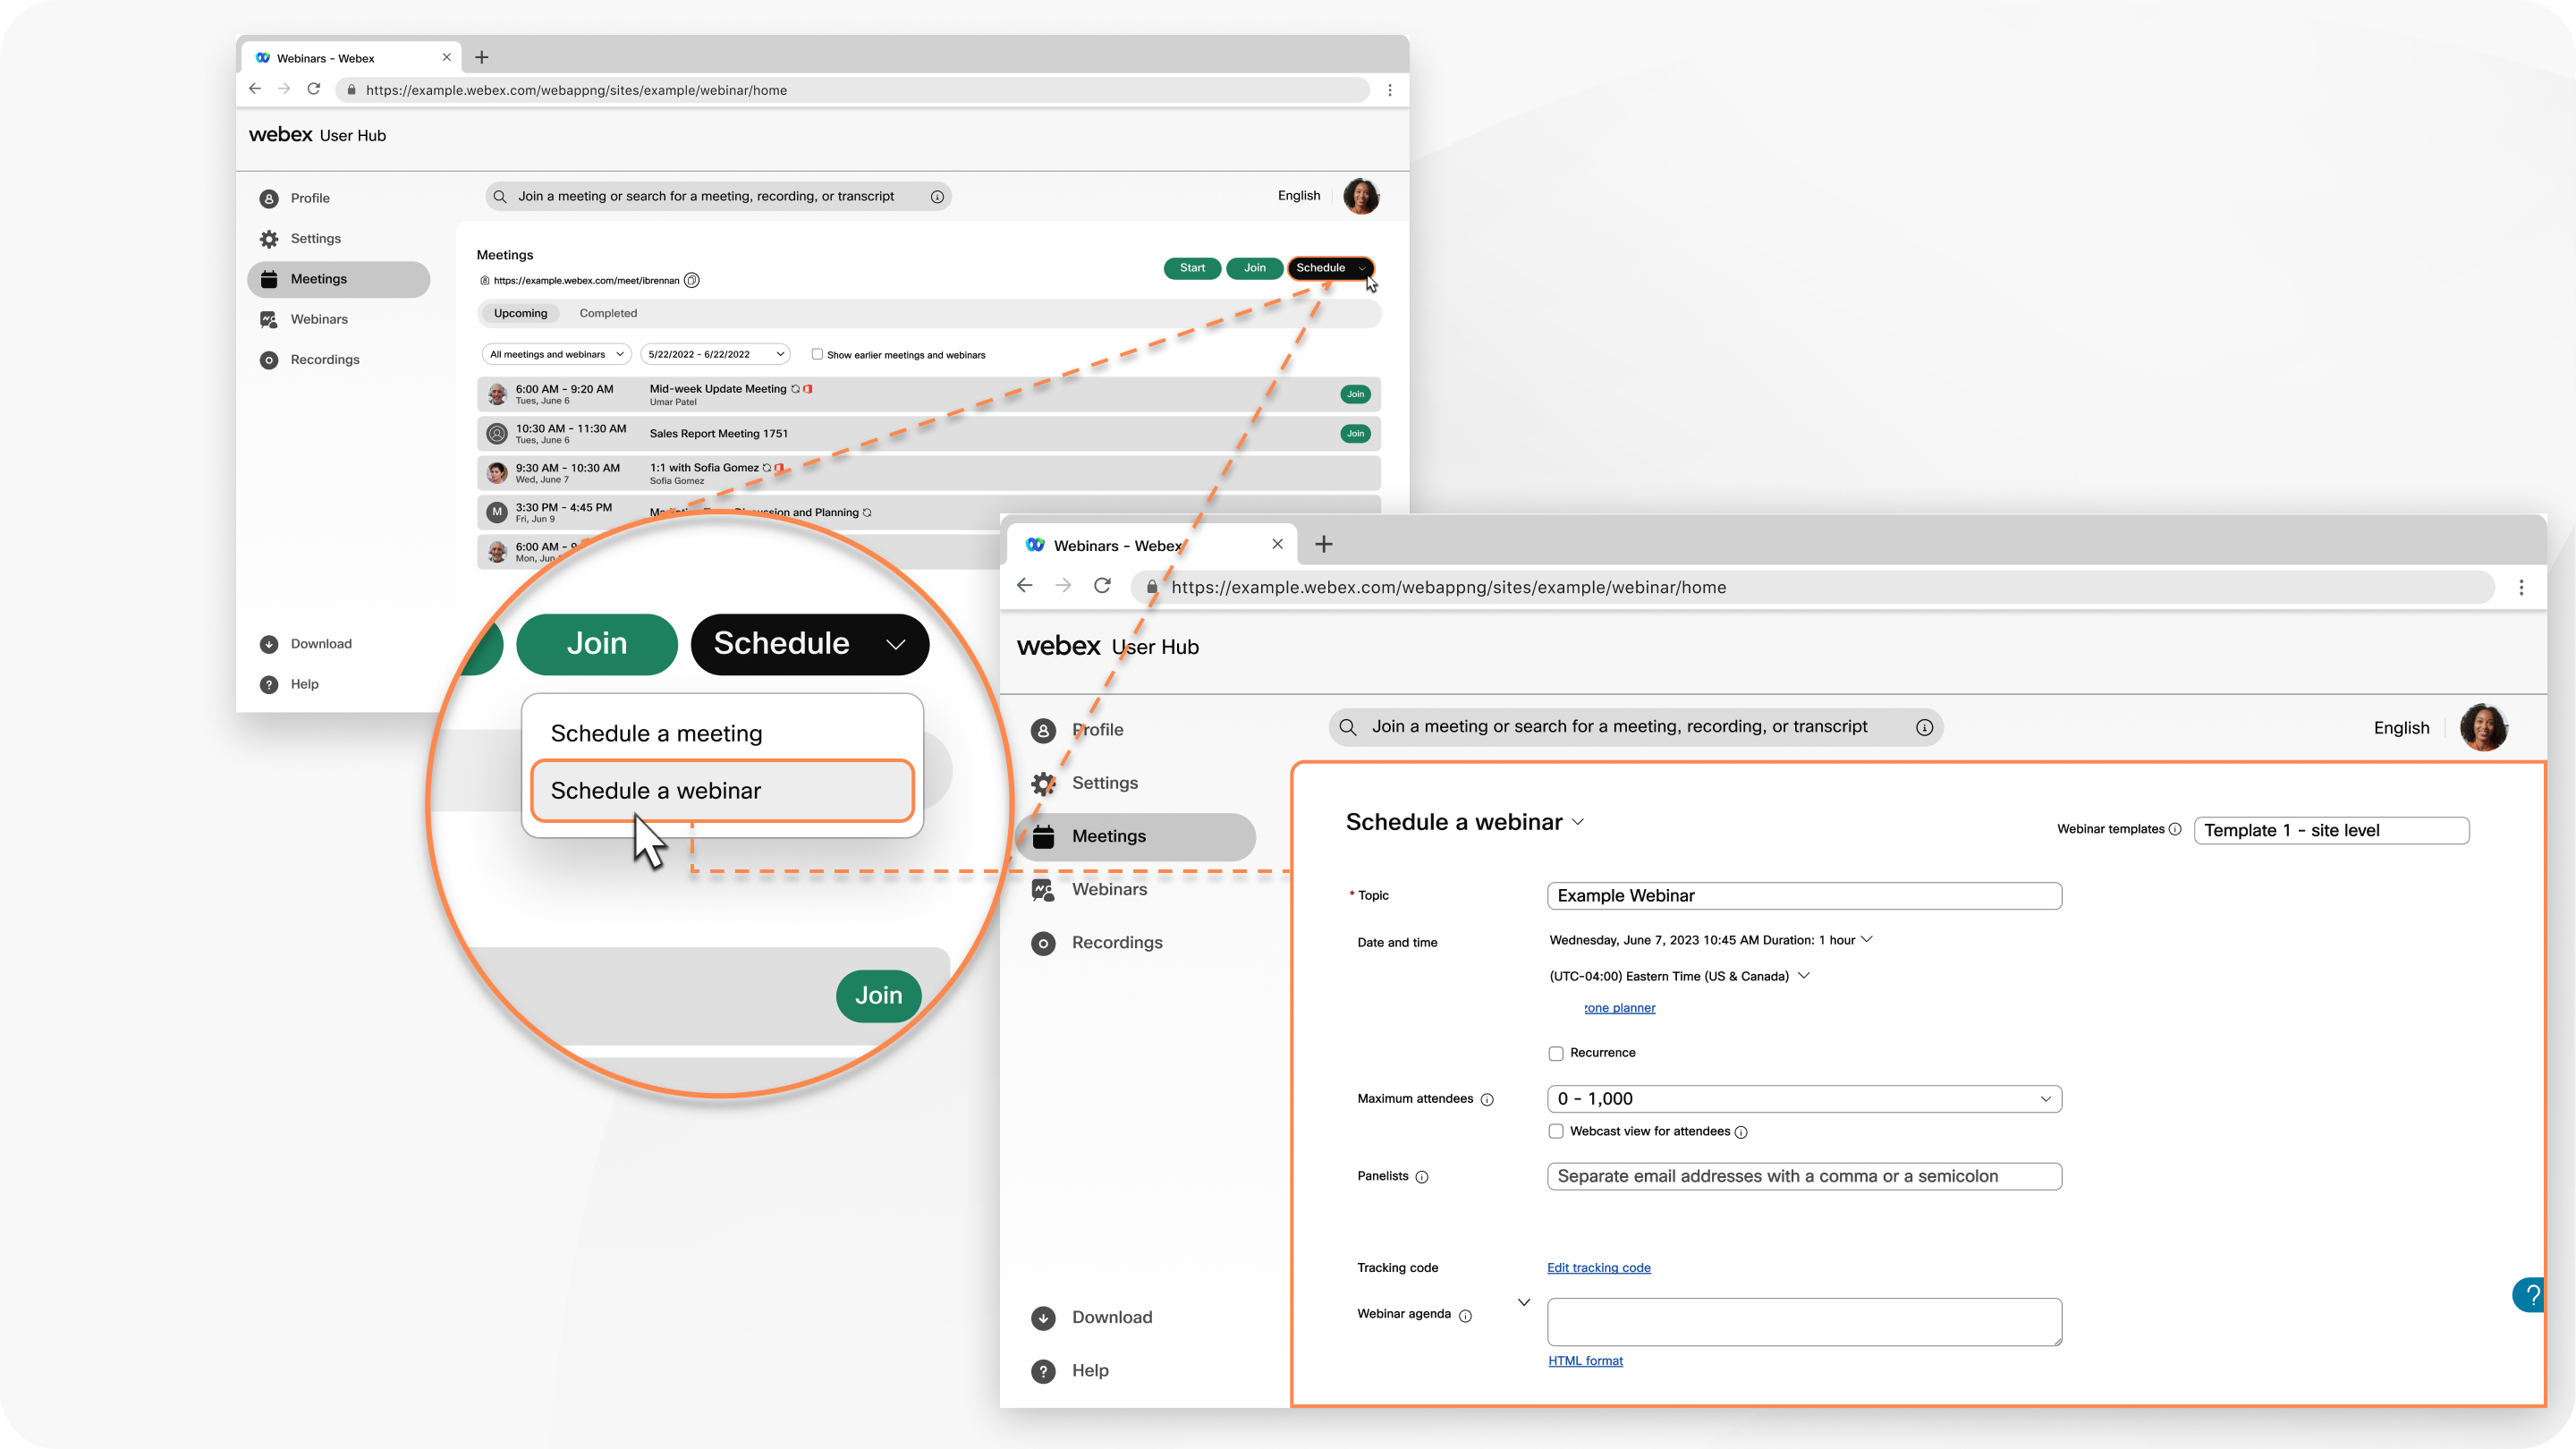
The number of people you can invite to a webinar depends on the license purchased. Webinars can include up to 10,000 people. Schedule a webinar in webcast view for more than 10,000 attendees.

Webinars in webcast view aren't available for Webex for Government.

After you schedule a webinar, you get a confirmation email, and an email to forward to attendees.

1

Sign in User Hub, then click the Schedule drop-down menu and select Schedule a webinar.

2

(Optional) If you have any saved webinar templates, select one from the Webinar templates drop-down menu.

3

Add the basics by providing the following information:

  • Topic—Choose a topic that people recognize and get excited about.
  • Date and time—Indicate when the webinartakes place. If you're inviting people from different time zones, click the Time zone planner so you can find a time that works best for everyone.
  • Maximum attendees—Choose the maximum number of attendees and whether you want a webinar in webcast view. See Compare experiences in Webex Webinars for more information.
  • Panelists—Enter the email addresses of the people you’re inviting to help you run your webinar. You can have up to 500 panelists in your webinar. If they have an account on this site, you can select next to their name if you want them to be a cohost.
  • Webinar agenda—Add any context or details that you want your attendees to have about the upcoming webinar.
4

In the Security section, add the following information:

  • Webinar password—Use the provided password or enter your own. Attendees must enter this password to join your webinar.
  • Panelist password—Use the provided password or enter your own. Panelists must enter this password to be part of your webinar panel. If panelists don't enter this password when they join your webinar, they join as an attendee.


    If a panelist has an account on the same site where the webinar is hosted, they just have to sign in. If they don't have an account on the same site, a prompt appears to enter this panelist password.

    Check out Roles in Webex Webinars for information about the differences between the various roles.

  • Join before host—Allow panelists and attendees to join your webinar and panelists to connect their audio before the webinar starts.
  • Require account—If you want attendees to have a Webex account on this site to join the webinar, check this check box.

    Check Restrict webinar to invited attendees only if you want to restrict the webinar to invited attendees only. This turns off webinar registration options.

5

In the Audio connection options section, add the following information:

  • Audio connection type
    • Webex Audio—Choose to support call-in, call-back, and computer audio options. You can then also include toll-free and global call-in numbers and set entry and exit tones to hear when someone joins or leaves the webinar.

       
      When using Webex Audio with the Announce Name feature, panelists who select the Use computer for audio option can't record and announce their names
    • Use VoIP only—Limits all panelists to using computer audio.
    • Other teleconference service—Allows you to enter third-party teleconference information.
    • None—No audio.
  • Mute panelist
    • Allow the host and cohosts to unmute participants (moderated unmute mode)—Hosts and cohosts can unmute participants and SIP-based video devices directly without sending an unmute request.
    • Allow panelists to unmute themselves in the webinar—If you choose to mute panelists when they join, select this option to allow them to unmute themselves during the webinar.
      • Don't select this option if you want only the host or cohost to be able to unmute panelists.
    • Always mute panelists when they join the webinar—automatically mutes panelists when they join the webinar.
6

Click Advanced options to add a practice session, enable breakout sessions, add this webinar to an existing series or a new series you create, turn on simultaneous interpretation, require registration, send email reminders, and more.

7

Click Schedule to schedule your webinar.


When you schedule a webinar, attendees automatically receive email reminders using the default template. If you prefer to customize your email template and send reminders later, uncheck Automatically send email invitations to all participants after clicking Schedule, then follow the instructions in Customize email templates in Webex Webinars.

After you schedule the webinar, you can select it from your calendar and do one of the following:
8

After you schedule the webinar, you can click to download an .ics file, or add the webinar to your Google or Microsoft Office 365 Calendar.

9

You receive an email to forward to attendees to invite them to the webinar.

After you schedule your webinar, click Save as template to save these options as a template for future use.