- Home
- /
- Article

Thanks for your feedback.

Enable digital signage on Board, Desk, and Room Series devices
 In this article
 Feedback?
Digital signage allows you to show custom content on Board, Desk, and Room Series devices when they are in half-wake state. Digital signage is a great way to display advertising content and promote your brand, but also show visitor and internal employee information, dashboards or calendars.
Digital signage is available for Board, Desk, and Room Series devices.
To avoid the risk of early deterioration of the screen, we recommend keeping usage of digital signage under a maximum of 12 hours per day.
Read Best Practices For Using the Web Engine to learn more about the supported features and limitations of the web engine. If you encounter an issue with a web page, check the Troubleshooting section.
Set up from Control Hub
You can display web content on full screen on your Board, Desk, or Room Series device. Digital signage allows you to make web pages appear on your screen when your device is in half-wake state.
| 1 |
From the customer view in https://admin.webex.com, go to the Devices page and select your device from the list. Select several devices if you want to set up digital signage on multiple devices and click Edit Configurations in the toolbar. |
| 2 |
Go to Configurations and click Digital Signage. |
| 3 |
Toggle on Enable Digital signage and choose whether you want to enable Interactivity. 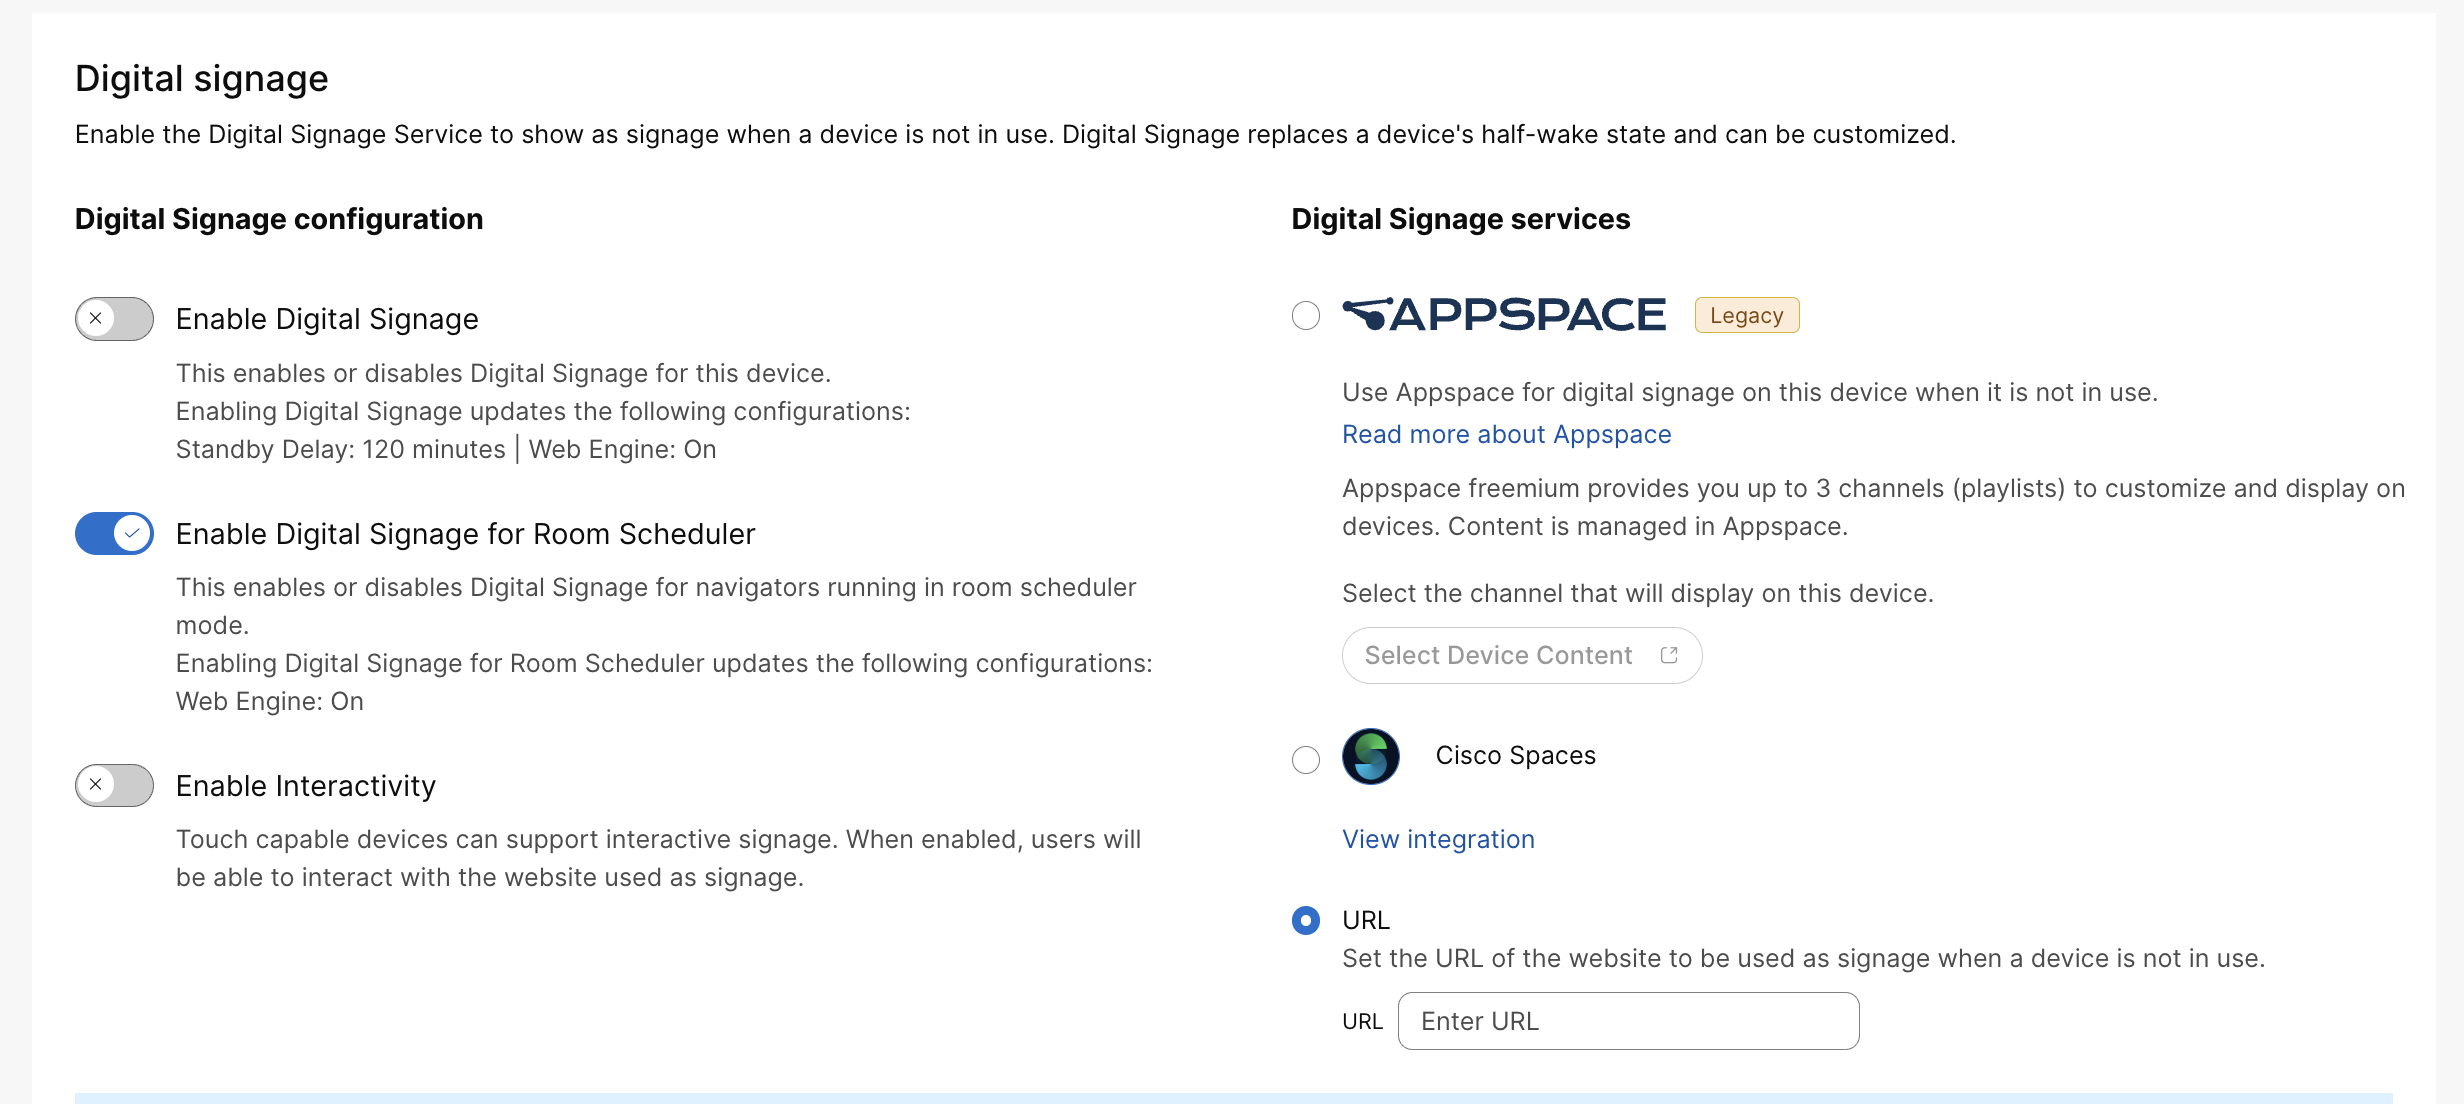
|
| 4 |
Enter the URL of the web page that you want to display. If your organization has an active Custom integration that provides digital signage, you can choose to use that for signage. Read more about Workspace integrations. |
| 5 |
Select Save. By default, the web page is displayed for 120 min before the device enters standby mode. |
Set up from the device web interface
You can also enable digital signage from the web portal of the device where you can set up more configurations. Read the Advanced Settings article for more information on how to access it.
First, select Settings from the menu on the left. Under Configurations, choose the following:
-
: Choose On to enable the web engine.
-
: RemoteDebugging allows you to run the Chrome developer console on your laptop. Make sure to turn off RemoteDebugging after use. For more information, read the Troubleshooting article.
Then, use the following configurations to set up digital signage:
-
: The audio is off by default, but you can turn it on by using this configuration. The volume follows the volume setting of the video system.
-
: Choose Interactive if you want to enable the ability to interact with the web page. By selecting NonInteractive, the users will be taken back to the home screen when tapping something on the web page.
-
: Turn on in order to enable the web view.
-
: The web view refreshes every N seconds. This setting is useful for web pages that are not able to update themselves. It is not recommended to use this setting with the interactive mode.
-
: Enter the URL of the web page that you want to display on the screen.
Because the web page appears on your screen before the device goes to Standby mode, it can be a good idea to set up the following Standby configurations:
-
: Turn on in order for the device to enter standby mode when the Standby Delay has timed out. When turned off, the device will not enter standby mode.
-
: Define how long (in minutes) the device waits before going into standby mode. We recommend setting the timer to 120.
-
: If set to off, the wake-up on motion detection is disabled. If set to on, the system wakes up automatically from standby when people walk into the room.
Displaying Digital Signage on Room Scheduler
Digital signage can be activated on Room Schedulers when they are not actively booked. This functionality supports both Cisco Room Booking and Microsoft Teams Panel modes. The digital signage URL configured for the room is reused for Room Schedulers and paired Navigators; no separate signage URL is required for these devices.
Digital signage for Room Schedulers can be enabled or disabled through Control Hub or using the following setting:
xConfiguration Standby Signage RoomScheduler Mode: <On, Off>To enable digital signage from Control Hub, follow the steps outlined in the Set up from Control Hub section and select the option Enable Digital Signage for Room Scheduler.
Other digital signage settings, such as interactivity, are shared with the existing digital signage configuration.
Unlike typical controllers, Room Schedulers are designed to remain visible most of the time except during out-of-office hours. Therefore, only the signage "half wake" mode applies to Room Schedulers, differing from the typical controller-based half wake.


