
Thanks for your feedback.
Stream Webex meetings, webinars, or events to Facebook Live
 Feedback?
Start streaming
As a host, you can now stream the contents of your meetings, webinars, or events to Facebook. All streams include the audio, video, and content that is shared while the meeting, webinar, or event is active.
Sharing a whiteboard and sharing a file using Share File, including sharing a video file, aren’t supported while live streaming.
When you stream a meeting, webinar, or event to Facebook, you continue to have full functionality of your Webex meeting, webinar, or event. At any time, you can start or stop your stream.
Streaming using Facebook Live must be enabled by your site administrator.
Microsoft has retired support for Internet Explorer. If your main web browser is Internet Explorer, you may be asked to install Microsoft Edge Chromium and Microsoft Edge WebView2 when streaming Webex meetings, webinars, or events to Facebook Live. You’ll need to install Edge Chromium, decide which WebView2 app to use, Evergreen recommended, and then install WebView2.
Before you begin
Applies to:
-
All active Meetings versions with the Meet, Business, and Enterprise plans
-
All Events (classic) and Webinars versions
Webex administrators must allow streaming of Meetings, Webinars, and Events (classic) to Facebook Live.
If you want to live stream to a Facebook group, the group admin must add the Meetings app to the group.
If you want to live stream to a Facebook Page, follow the instructions for Other streaming services at the bottom of Live stream your Webex meetings, webinars, or events. Enter the stream link and stream key from Facebook.
| 1 |
Sign in to your Webex site and start your meeting, webinar, or event. |
| 2 |
Go to More options
Live streaming isn't available during a practice session in a webinar or event. |
| 3 |
(Optional) Click Change streaming layouts to set the video layout of your stream. For more information about selecting your streaming video layout, see Live stream your Webex meetings, webinars, or events. 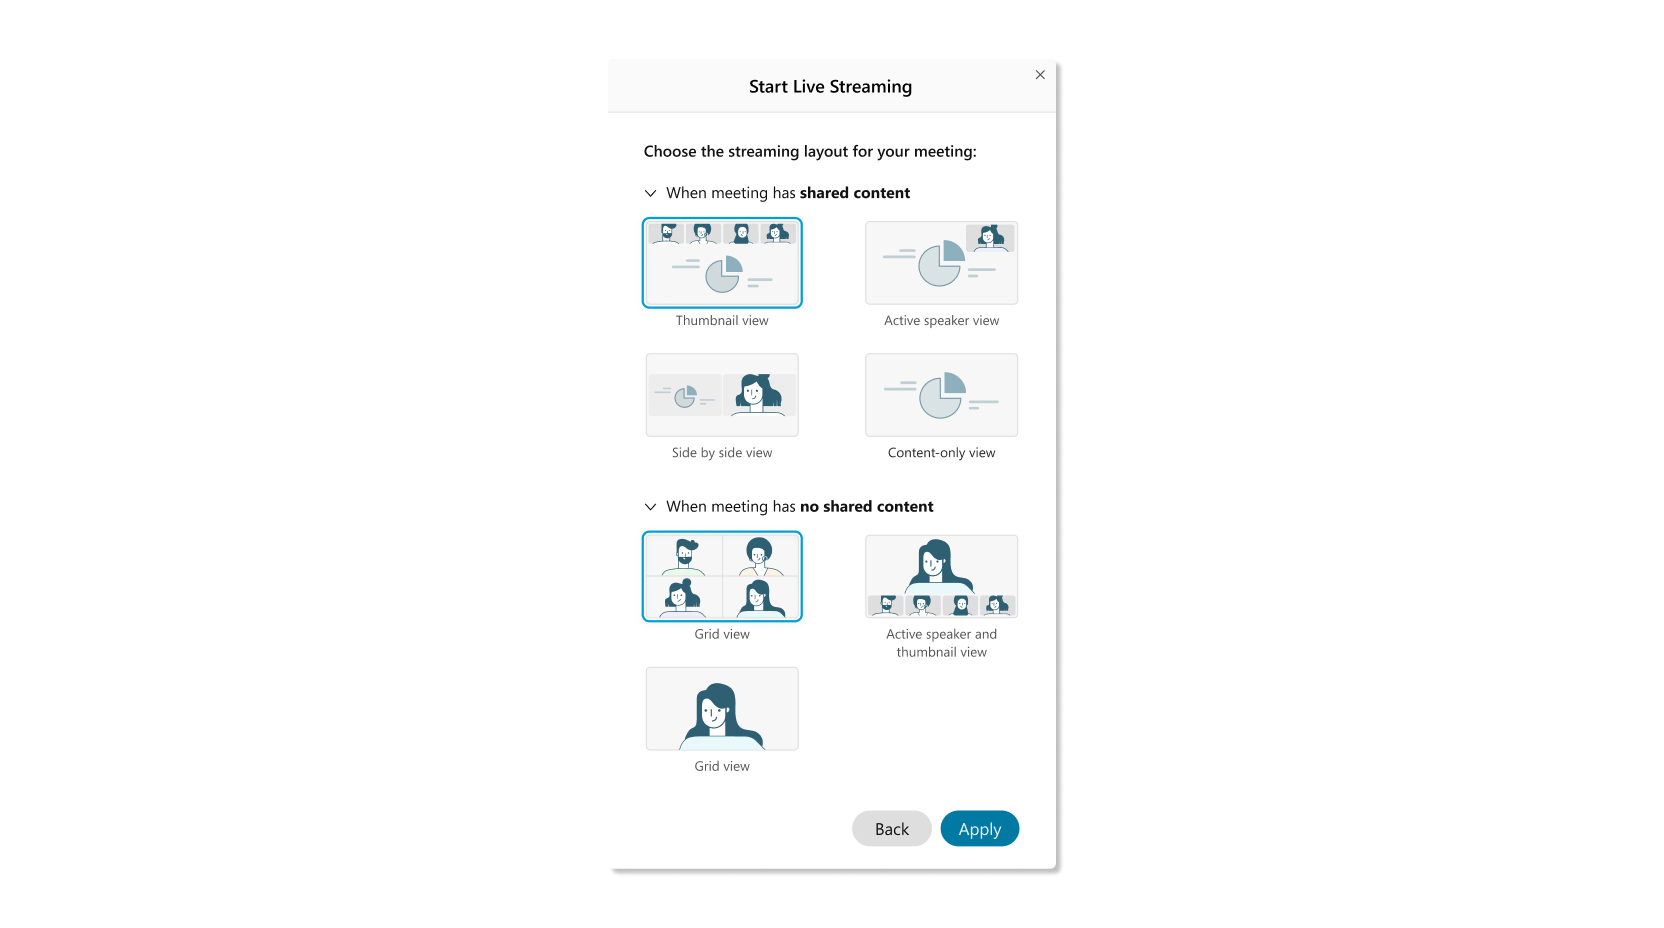 |
| 4 |
Select Facebook Live. |
| 5 |
Enter your Facebook account information and select Log In. Your Facebook account information is saved on the site that you use for your meeting, webinar, or event.
|
| 6 |
(Optional) Select Review the info you provide to see what Facebook information is shared with Webex. Select Continue. |
| 7 |
Decide who you want to view your stream. Choose from the following options:
|
| 8 |
(Optional) Select Choose what you allow to choose what information and capabilities the Webex app is allowed to access from your Facebook account. Select OK. |
| 9 |
On the Stream Webex Meeting to Facebook Live page, configure your settings, and select Start Streaming. |
| 10 |
Open the More options menu and select Stop Streaming to end your stream. |
 and select
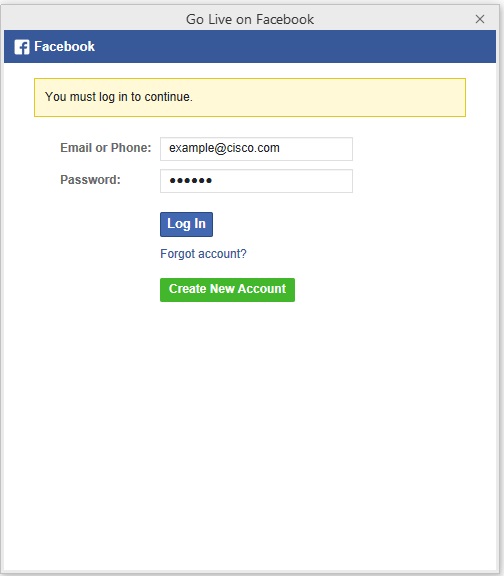
Before you begin
Applies to:
-
All active Meetings versions for Android and iOS with the Webex Starter, Plus, Business, and Enterprise plans.
-
Live streaming for Android and iOS currently only supports Meetings.
| 1 |
Sign in to your Webex site and start your meeting. |
| 2 |
Go to More options
|
| 3 |
Tap Facebook Live. |
| 4 |
Enter your Facebook account information and tap Log In. Your Facebook account information is saved on the site that you use for your meeting. |
| 5 |
(Optional) Tap Review the info you provide to see what Facebook information is shared with Webex. Tap Continue. |
| 6 |
Decide who you want to view your stream. Choose from the following options:
|
| 7 |
(Optional) Tap Choose what you allow to choose what information and capabilities the Webex app is allowed to access from your Facebook account. Tap OK. |
| 8 |
On the Stream Webex Meeting to Facebook Live page, configure your settings, and select Start Streaming. |
| 9 |
When you want to end the live stream, go back to your meeting, tap More options
|
Each meeting, webinar, or event that is streamed to Facebook can be viewed live or as a recording. Your stream automatically becomes available as a recording in your Facebook Timeline when it ends.
Depending on your Facebook settings, your viewers can respond to your stream by using the React and Comment buttons. Your viewers can also show your meeting to other Facebook users by using the Share button.

The following are the known limitations:
-
Streaming capabilities must be enabled for each host by the site administrator.
-
FedRAMP-authorized Webex sites must upgrade to Webex for Government in order to use streaming capabilities.


