- Home
- /
- Article

Thanks for your feedback.

Manually accept or reject meeting and webinar registration requests
 In this article
 Feedback?
If you, as the meeting or webinar host or cohost, require attendee registration and don't have registration requests automatically approved, manually accept or reject all registration requests.
Accept or reject registration requests for a meeting or webinar
| 1 |
Sign in to your Webex site and then select . |
| 2 |
Find the meeting or webinar, then select Registration.
|
| 3 |
Check the check box next to each registration, then click Accept or Reject. To accept or reject all the requests, check the check box next to
Status, then click Accept or
Reject.
|

You can change previously accepted or rejected registrations.
To accept a rejected registration, select it in either the Rejected or All list, then click Accept.
To reject an accepted registration, select it in either the Accepted or All list, then click Rejected.
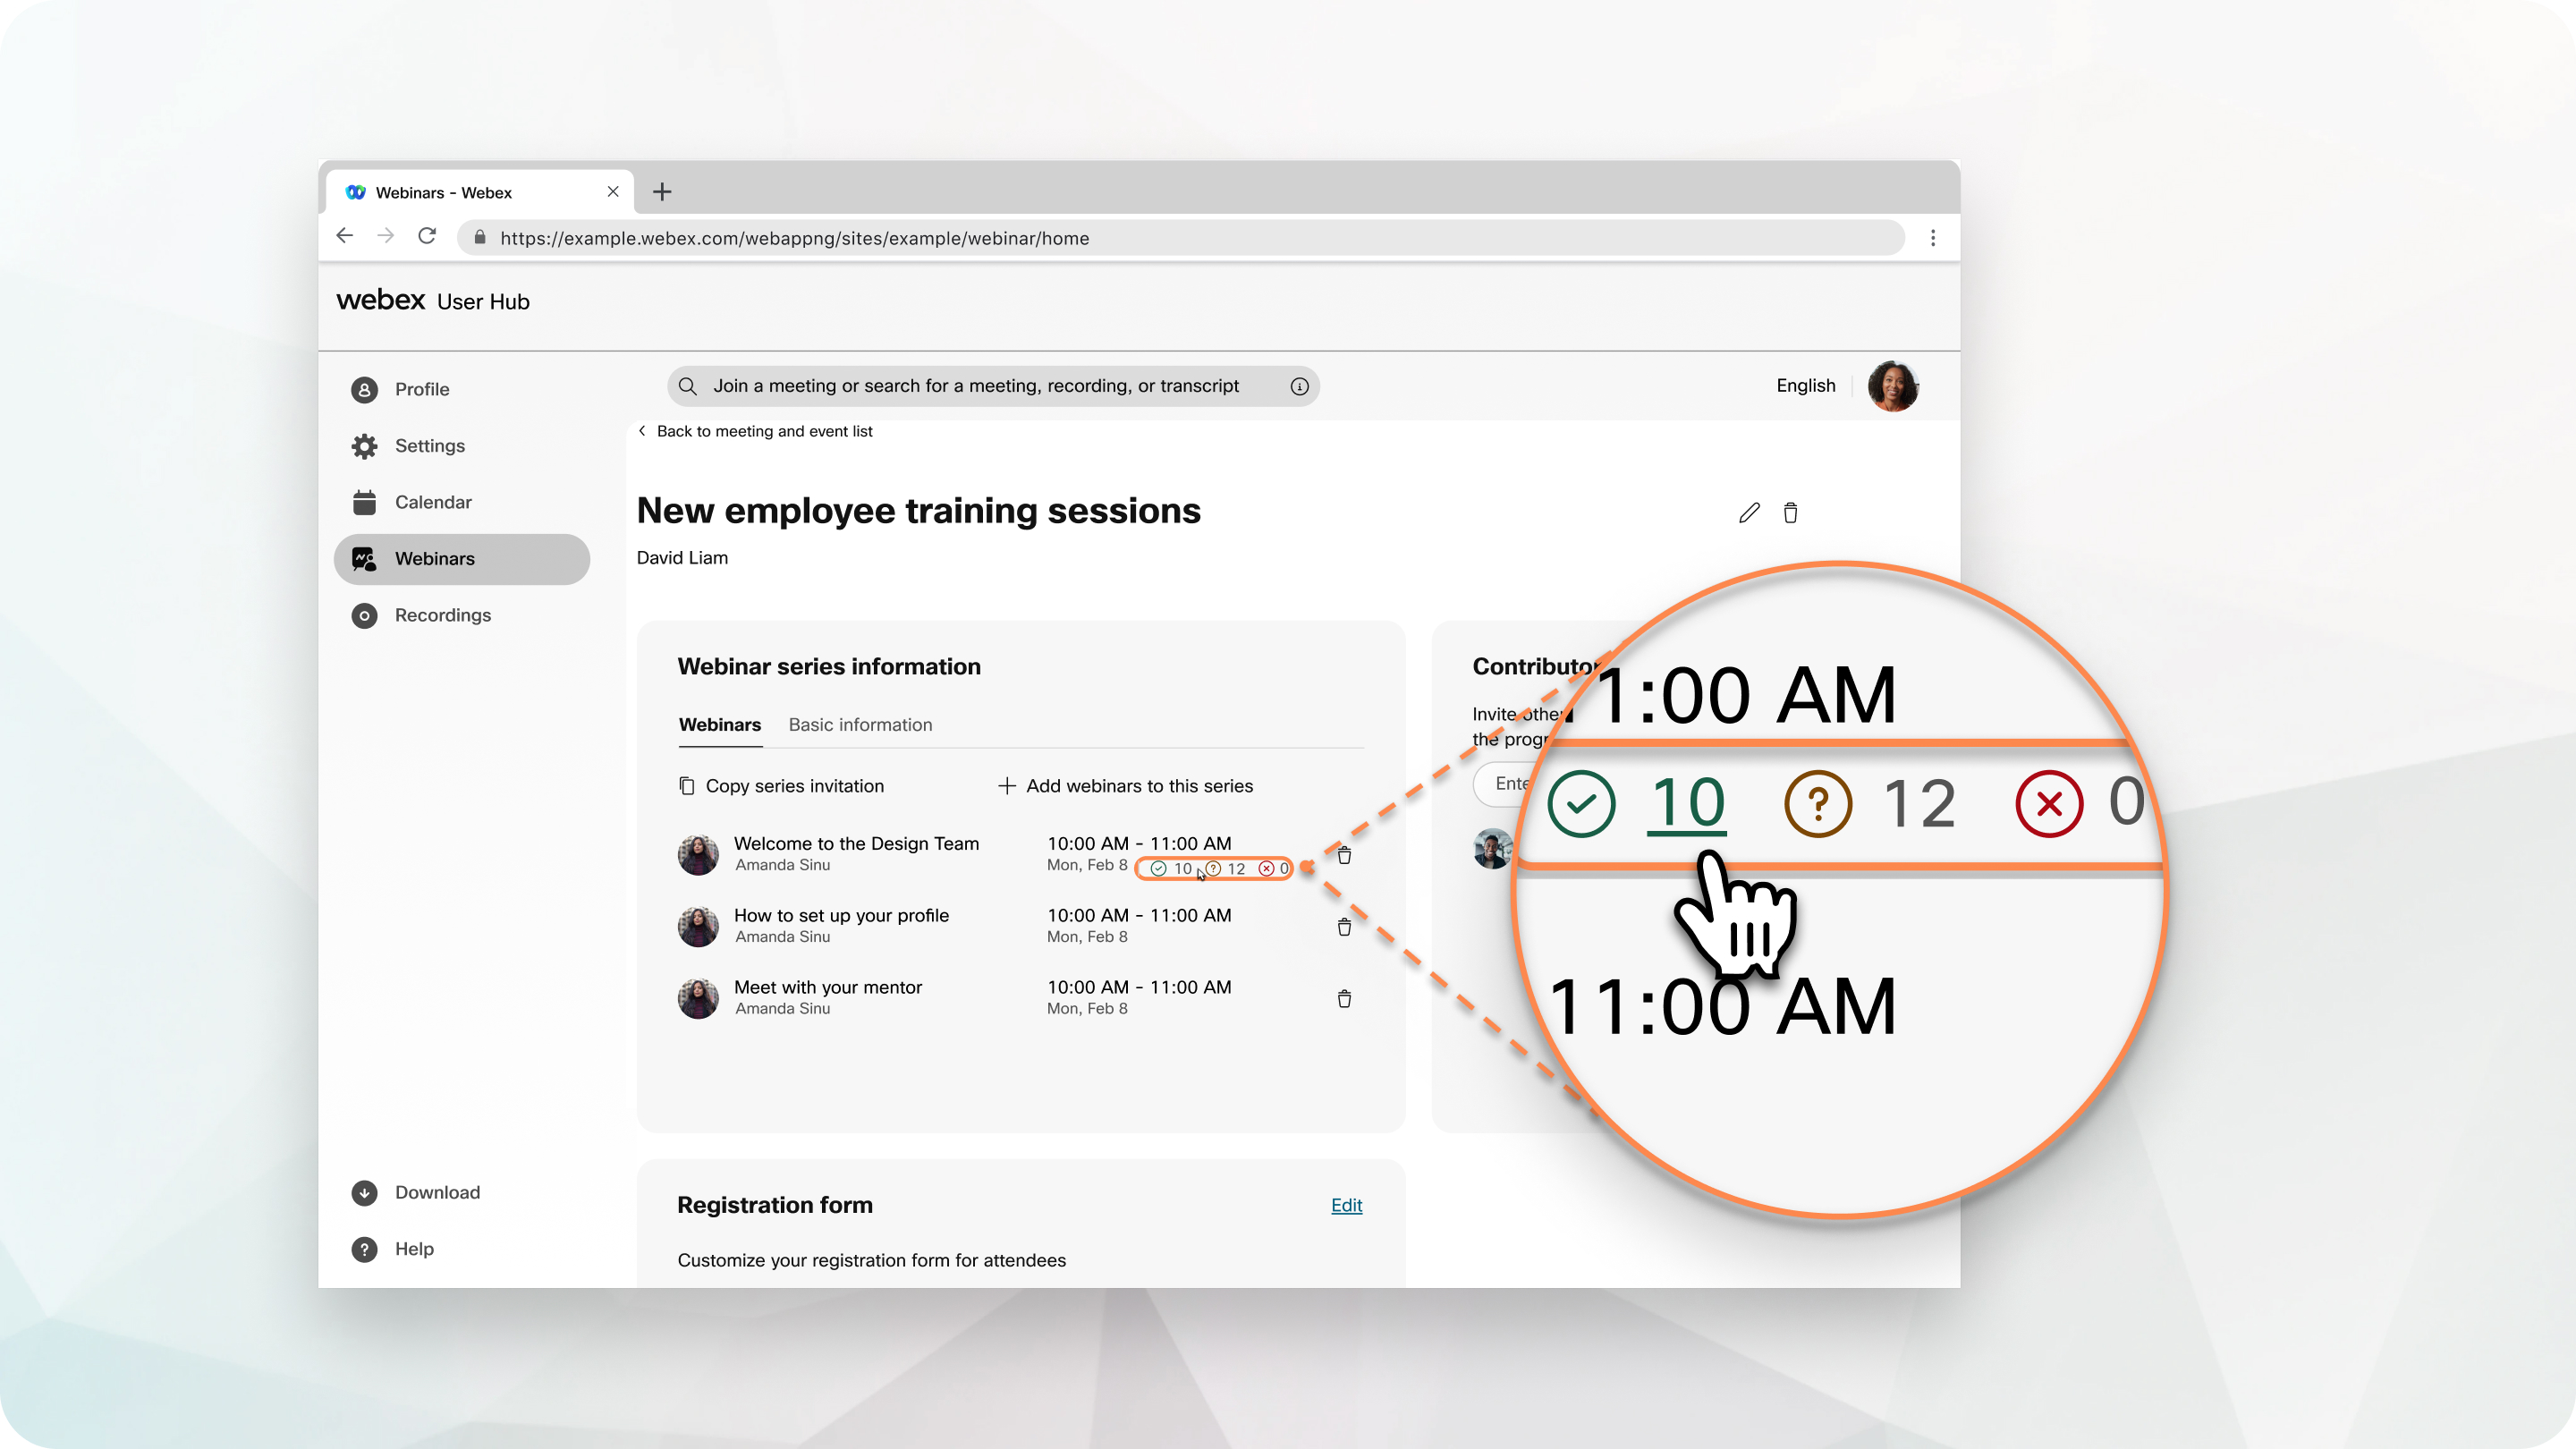
Accept or reject registration requests for a webinar series
Review the registration details for all the webinars in a series at the same time. The number of accepted, pending, and rejected requests appears next to each webinar in the series that requires registration.
| 1 |
Sign in to your Webex site and select Webinars. |
| 2 |
Click Webar series then select a webinar series. |
| 3 |
Select the Accepted, Pending, or Rejected icon of a webinar to review the registration requests with that status. |
| 4 |
To change the status of a registration request, check the check box next to a request, then select Accept, Change status to pending, or Reject. If you change the status of a registration request from accepted to pending, the invitee receives an email stating the cancelation of their invitation. To accept or reject all the requests, check the check box next to Status, then select the status. |


