
Thanks for your feedback.
 Feedback?
By selecting an automatic camera mode you'll get the best view for your device and meeting, without having to manually control the cameras yourself during meetings. You can change camera modes whether you're in a call or not.
Depending on the device you're using, there are a few different modes to choose from:
-
Group. The camera will adjust to show everyone, dynamically adapting to subtle changes in the group so that all participants are optimally framed.
-
Frames. The camera will zoom and show people individually or in smaller groups. Read this article for information and examples about how Frames mode works.
-
Speaker. The camera will follow the person speaking, automatically adjusting close-ups to follow the speaker's movements. The maximum distance for speaker tracking to work is 7.5 meters.
Virtual Lens for Room Bar Pro and Board Pro G2
The active speaker at the far end of a long table is now captured in higher quality. With the AI virtual lens, you'll experience a 60% boost in resolution and achieve close-up framing from 8 meters with the Room Bar Pro and Board Pro G2. RoomOS automatically uses the virtual lens in Speaker mode for higher quality capture of the active speaker. There is no configuration needed.
- Dynamic (RoomOS 26 on Boards and Room Series only). Let the system choose the camera mode best suited to the situation in the room. If up to four people are in the room, you'll get Frames mode. When a fifth person enters the room the camera mode switches to a cropped overview and then to Speaker or Group and Speaker mode.
When five or more people are in a room with a single-camera setup, Dynamic mode will automatically activate Split Speaker View. That shows the current active speaker alongside the most recent speaker together. If one of them speaks for a longer period, the framing will adjust to show only that person. On devices that support Group and Speaker mode, a group view of the full room is also shown alongside the two speakers.
In multi-camera configurations like cross-view, Dynamic mode will exclusively select Speaker mode to ensure all available cameras are used.
-
Portrait. The camera will adjust automatically so you are always in the center of the frame.
-
Group and Speaker. Remote participants will see two views at the same time: a group overview and a close-up of the active speaker. Read this article for information about how Group and Speaker mode works.
-
Manual. Adjust the camera yourself.
-
Custom preset modes may also be available, if any have been defined. Read this article about camera presets.
Which modes are available to you can also depend on software version and on configurations your administrator has set.
To select a camera mode:
| 1 |
Swipe from the right or tap the |
| 2 |
Tap Camera mode and then Auto. |
| 3 |
Choose a mode. 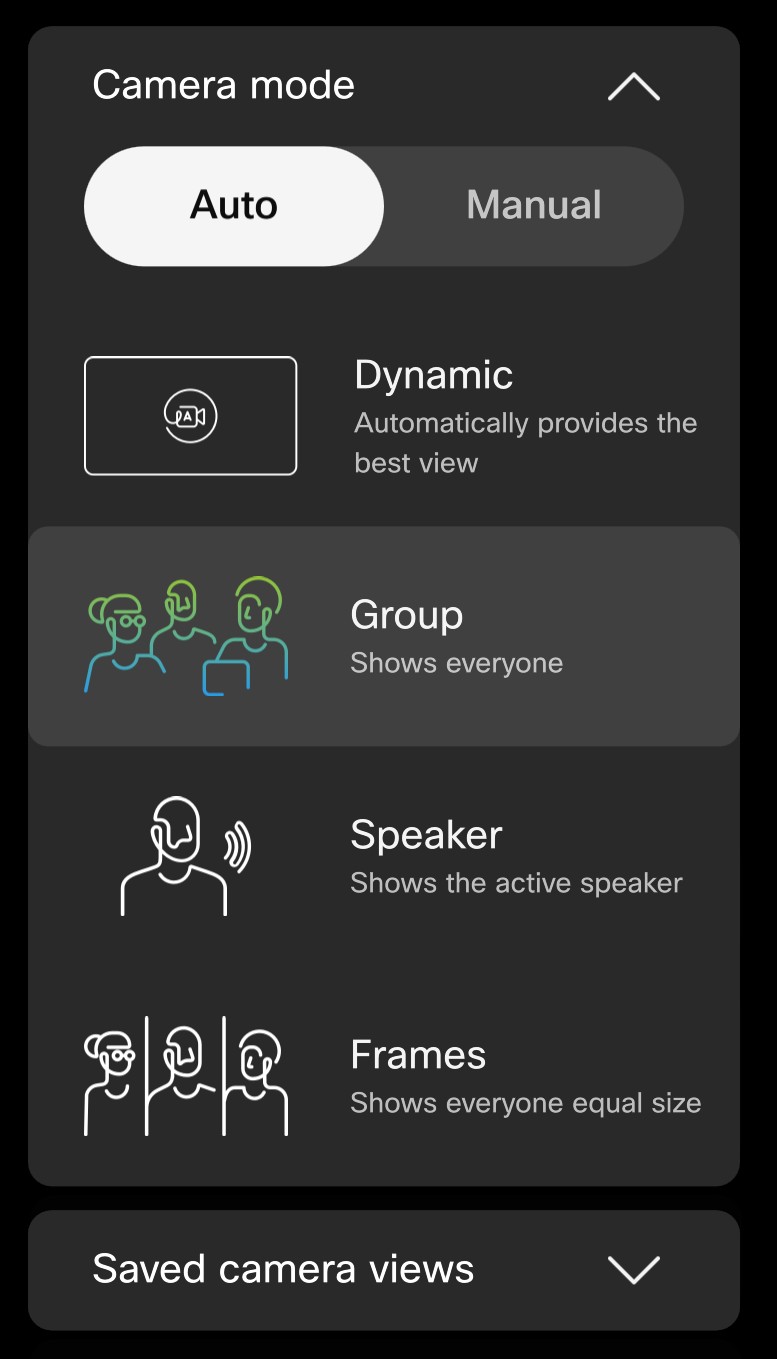
|
| 4 |
Or, tap Manual and adjust the camera yourself: 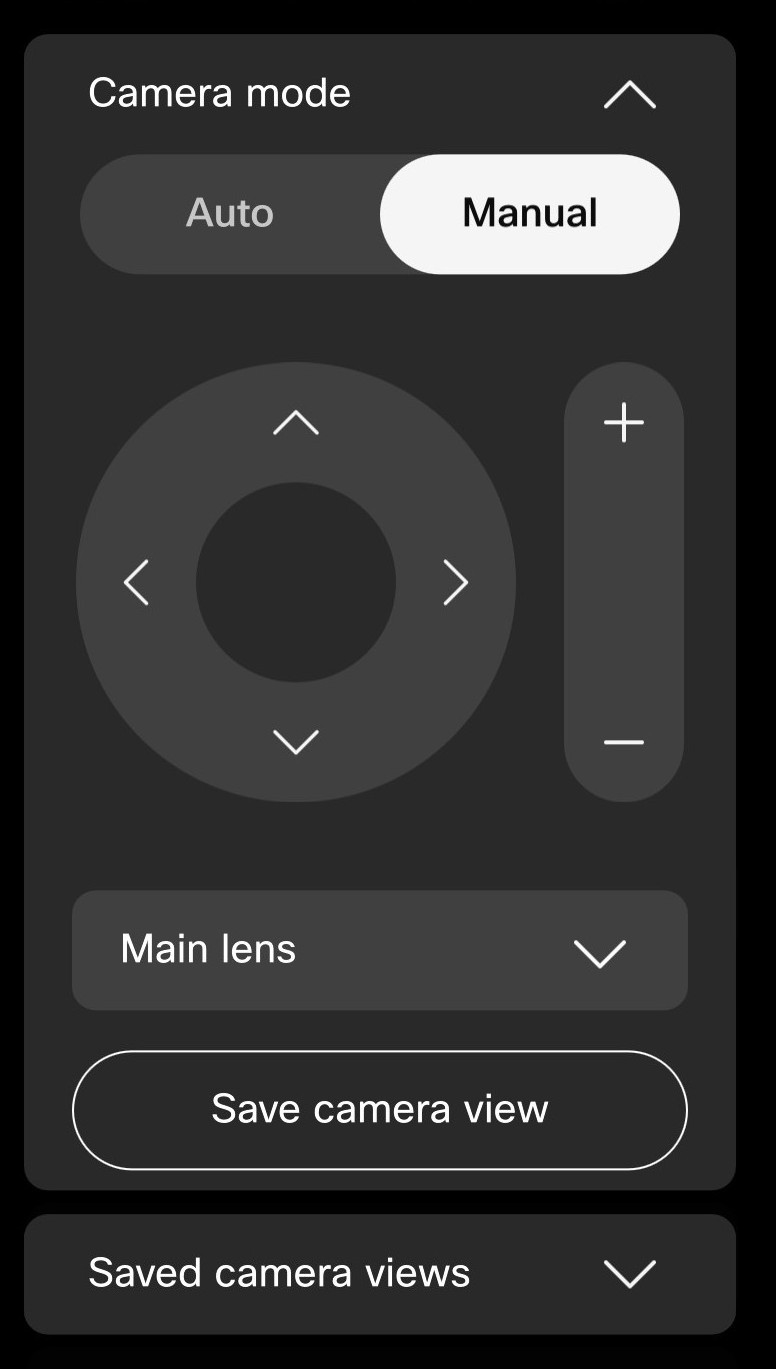
To read about manual camera control with a touch controller, and how to save camera presets, see this article. |
| 5 |
Tap anywhere outside the control panel to exit. You can also access and adjust the camera controls in or out of call by tapping the camera button on your selfview. |
This does not apply to DX80.
To select a camera mode:
| 1 |
Swipe from the right or tap the |
| 2 |
Tap Camera mode and then Auto. Select a mode. |
| 3 |
Or, tap Manual and use the controls to adjust the camera yourself. |
| 4 |
Tap anywhere outside the control panel to exit. You can also access and adjust the camera controls in or out of call by tapping the camera button on your selfview. |
To select a camera mode:
| 1 |
Swipe from the right, or tap the When you open the camera settings on a touch controller, you also get the Selfview settings. See this article about adjusting your selfview. |
| 2 |
Tap Camera control. Choose a mode. 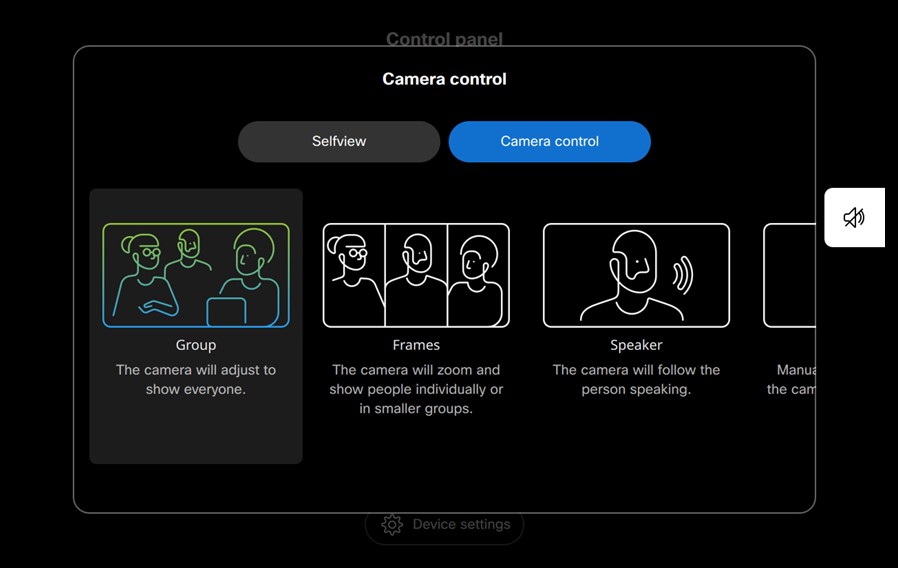
Speaker mode is not available on Room Kit Mini or Webex Room USB. |
| 3 |
Or, select Manual and adjust the camera yourself: 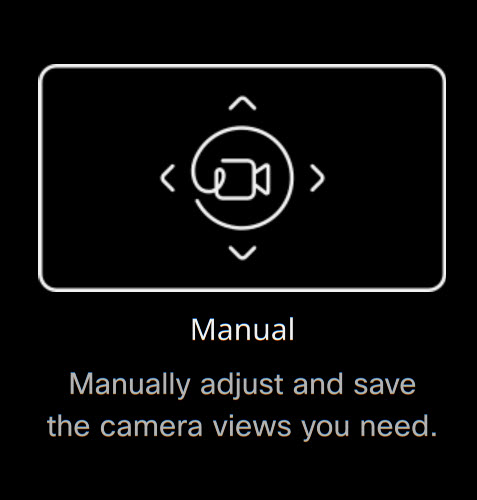
For more about manual camera control with a touch controller, and how to save camera presets, read this article. |
| 4 |
Tap the X in the upper right corner to exit. |


