- Home
- /
- Article

Thanks for your feedback.

Generate Assessment reports for Dedicated Instance migrations
 In this article
 Feedback?
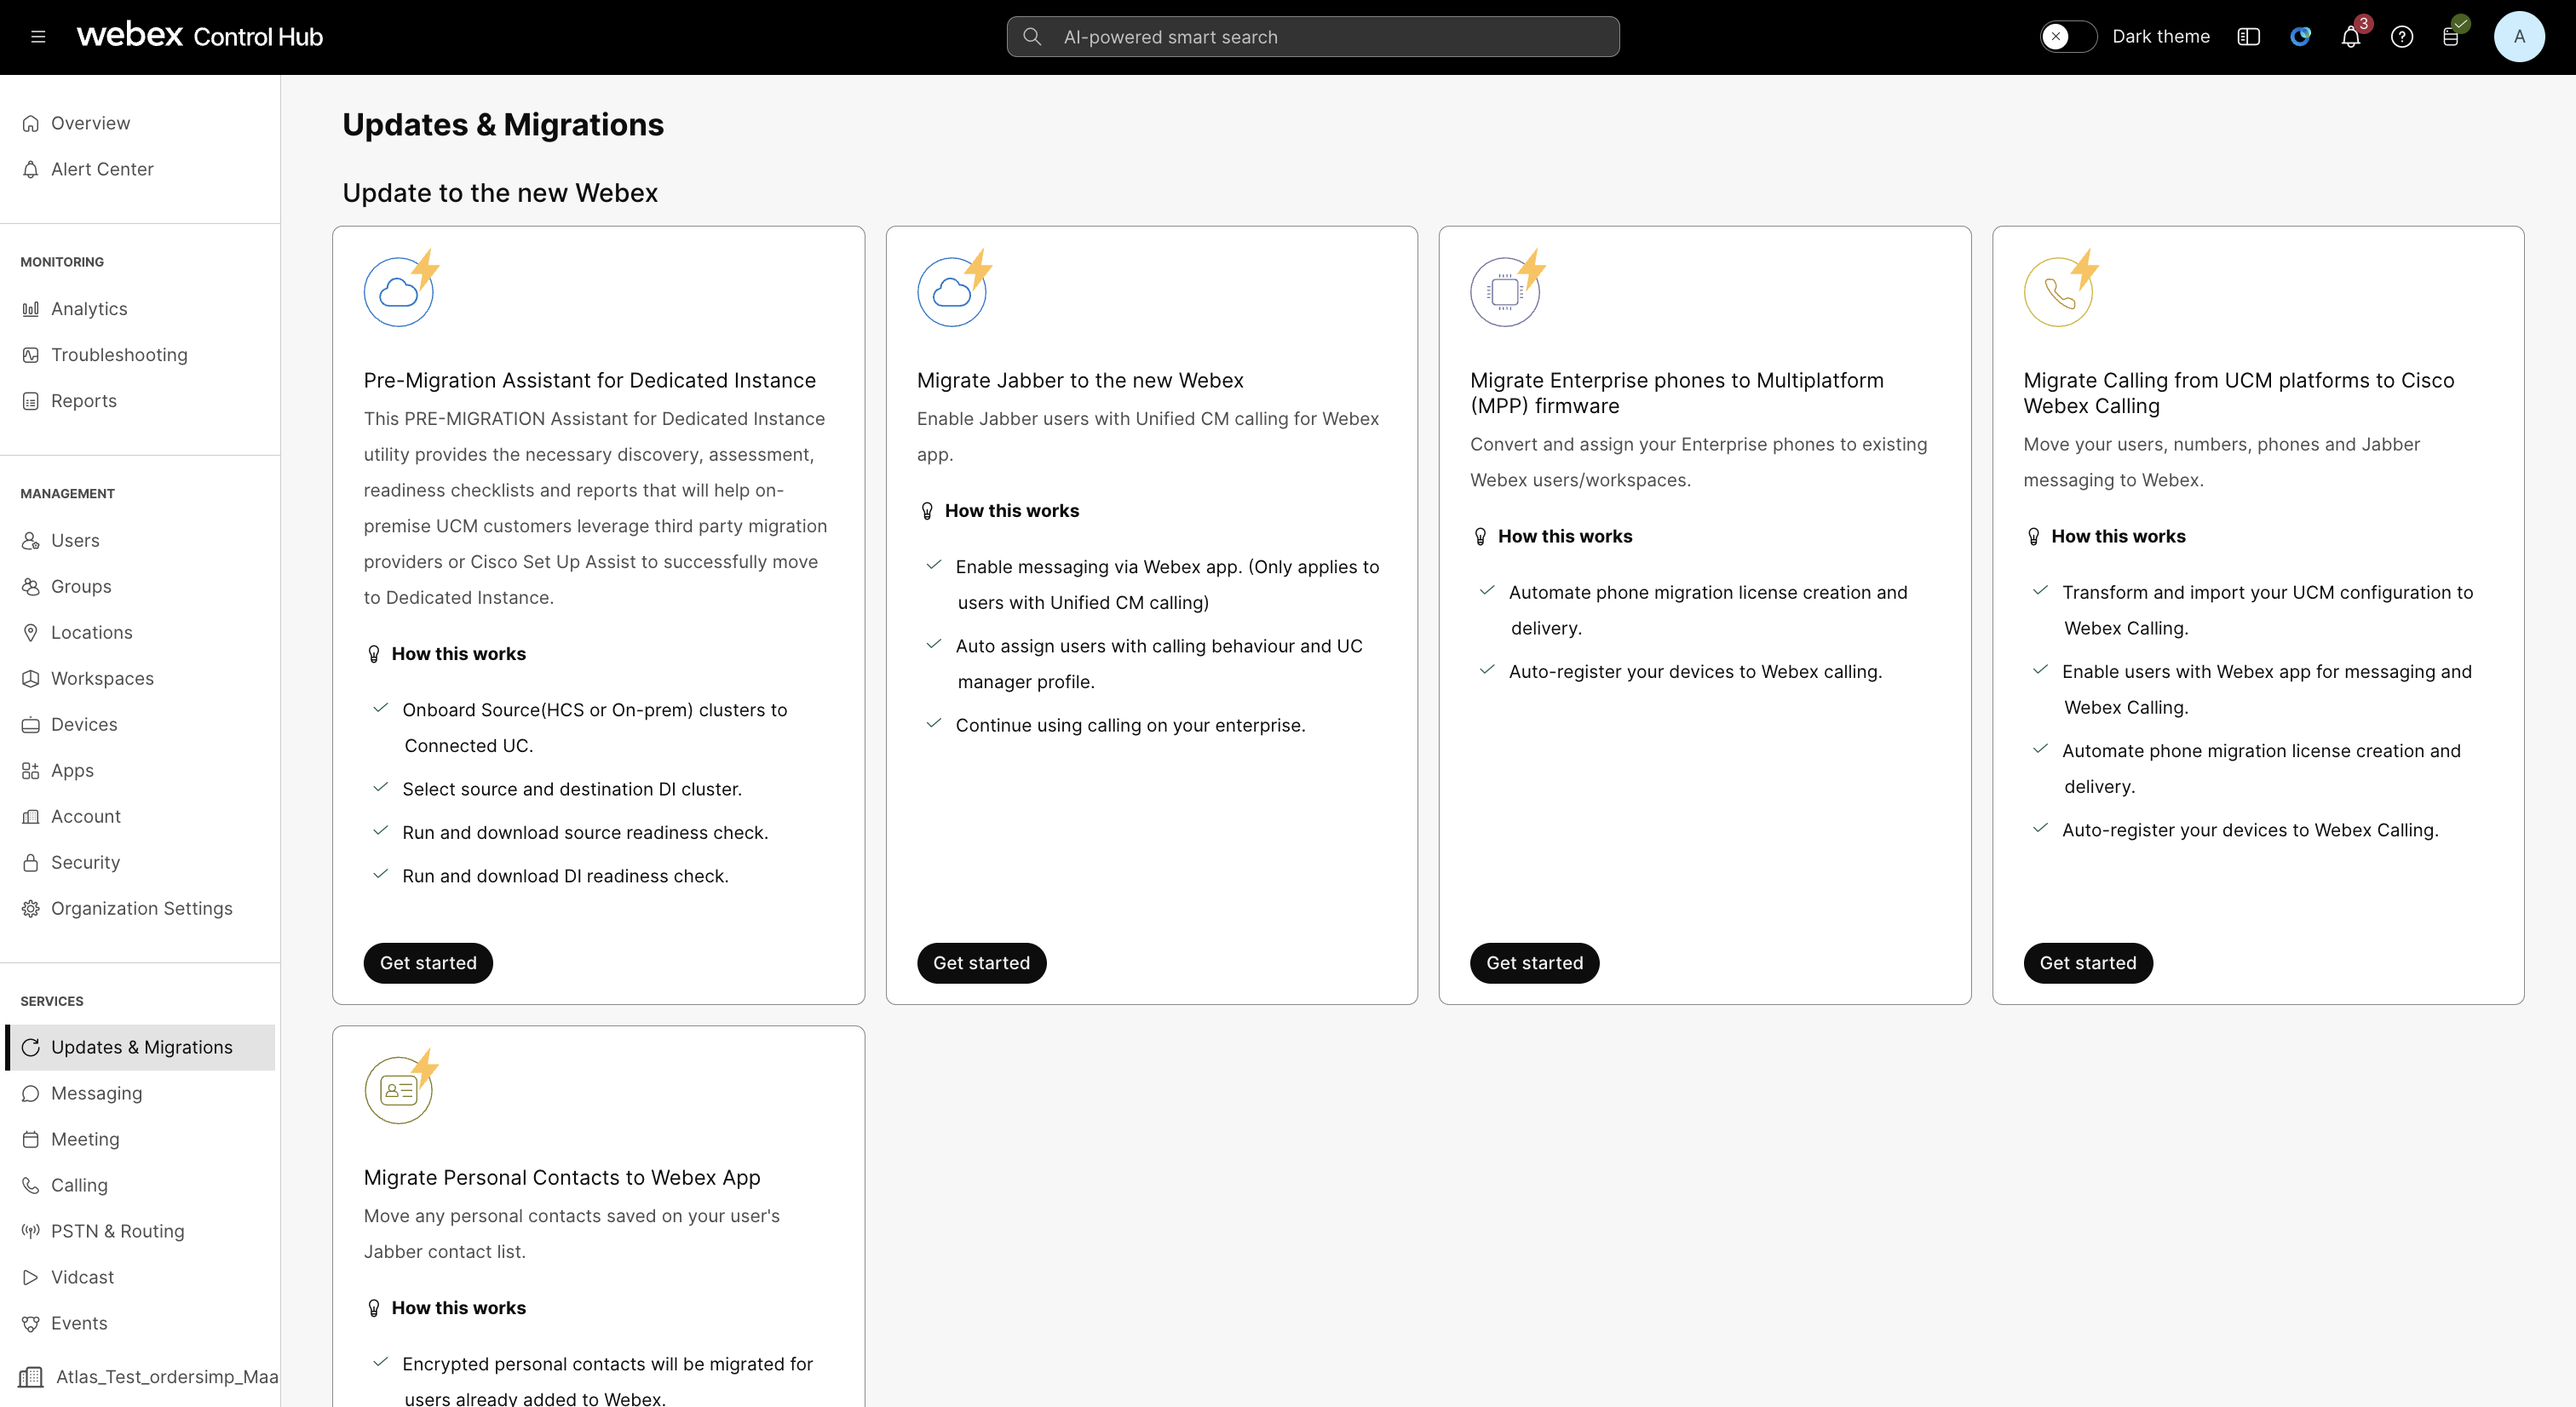
This Pre-migration Assistant for Dedicated Instance utility provides the necessary discovery, assessment, readiness checklists and reports that will help on-premise UCM customers leverage third party migration providers or Cisco Setup Assist to successfully move to Dedicated Instance. This tool uses the Webex Cloud Connect-UC agent to extract and retrieve the required information from the target UCM and UCM Clusters and offers full control, security, and flexibility.
Overview
The Pre-Migration Assistant in Control Hub helps you gather source data and check prerequisites for migrating from UCM to Dedicated Instance using a third-party tool. Before migration, it assesses readiness, provides checklists, and lets you compare data between your on-premises cluster and Dedicated Instance.
The Pre-Migration Assistant for Dedicated Instance does not perform actual migration. Customers work with a partner who provides full migration services using a Certified Migration Provider tool to successfully complete the migration journey.
Prerequisites
Before you start your migration, make sure that you meet the following requirements:
- Make sure you have an active subscription with Webex Calling Dedicated Instance as a cloud deployment option.
- Make sure to onboard your organization to Cisco Webex Cloud-connected UC. For more information, See Activate Webex Cloud-Connected UC for Organizations.
- Make sure to enable the Deployment Insights, For more information, See Enable or Disable Webex Cloud-Connected UC Services in Control Hub.
Steps in migration
| 1 |
Sign in to Control Hub. |
| 2 |
Go to Services -> Updates & Migrations in the left pane. In the Updates & Migrations, you can see the Pre-Migration Assistant for Dedicated Instance tile. |
| 3 |
Click Get started to start with migration.
|
Generate assessment reports
| 1 |
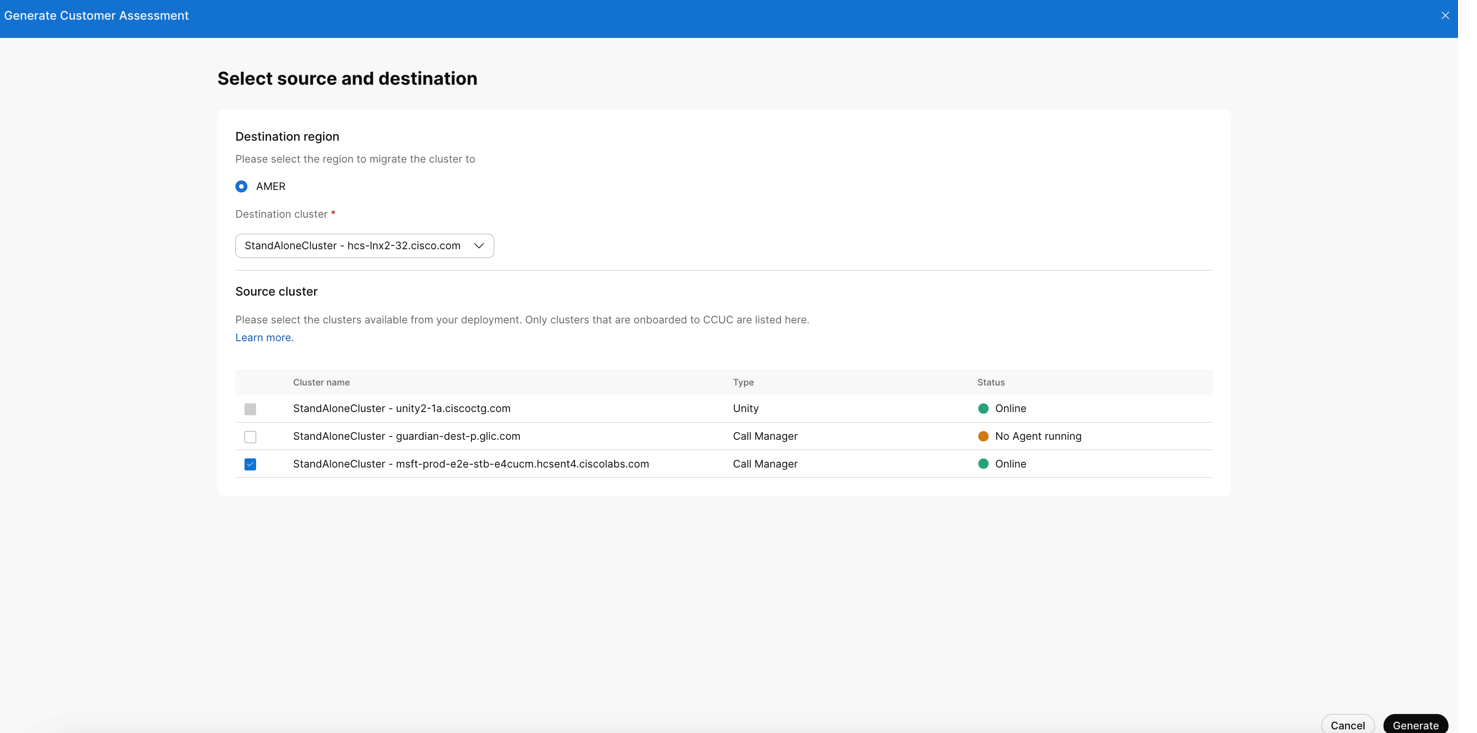
In the Migration Assistant pane, click Generate Customer Assessment.
|
| 2 |
From the Destination region, choose the region where you want to migrate the cluster from the active DI list.
|
| 3 |
From the Destination cluster, select the destination cluster to migrate to. |
| 4 |
Choose the source cluster from your deployment. You can see the list of clusters onboarded to CCUC. Make sure that the status of all cluster nodes is Online. |
| 5 |
Click Generate. |
| 6 |
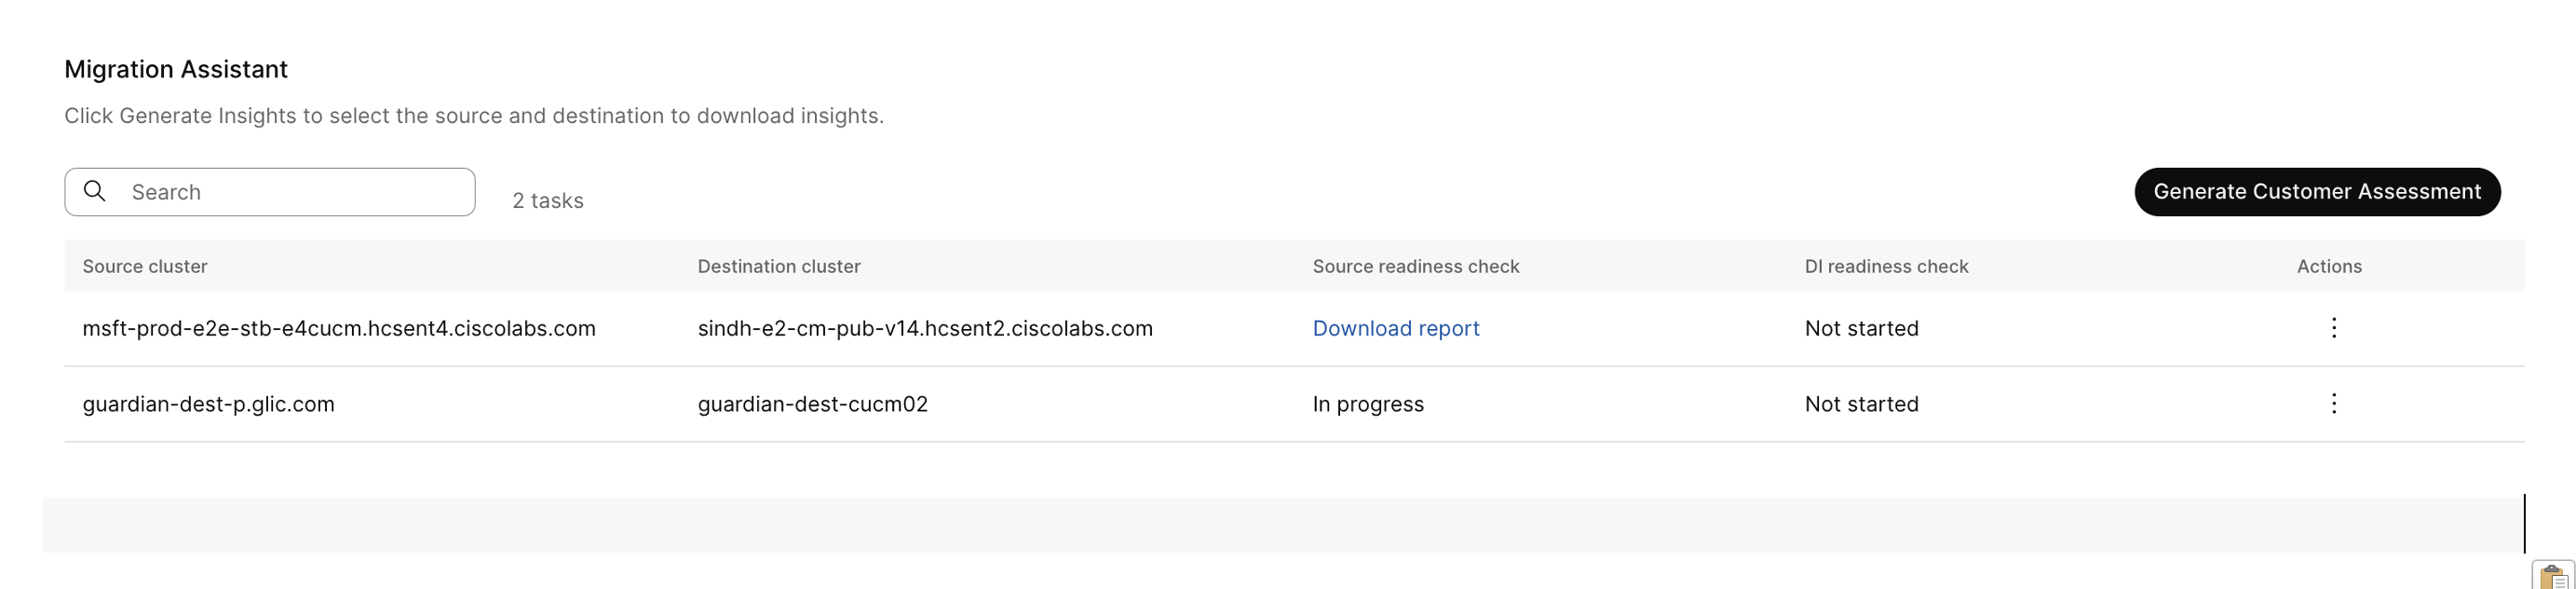
In the Migration assistant page, go to Action and click ⋮ to see the following fields:
|
| 7 |
Click Run source readiness checks. Once clicked, the status changes to In progress under source readiness check. After report generation, the status changes to Download report. The report contains the configuration of the selected source cluster, and recommendations before the actual migration. |
| 8 |
Click Run DI readiness checks . Once clicked, the status changes to In progress under source readiness check. After the report is generated, the status changes to Download report. Start the DI readiness checks report only after network peering with DI Datacenter is complete. |
| 9 |
Click Post-migration validation, to verify the migration data. Review the sample reports to know more about the Source readiness checks, DI readiness checks, and Post migration validation reports. |

Sample reports
The sample migration report includes readiness checks and recommendations for devices, users, and configurations before moving to Dedicated Instance. It also provides post-migration validation to ensure data was successfully transferred.
Source readiness checks
The following are the actions recommended to the customer admins before migrating to DI.
- Assessment Sheet — Lists the actions needed by customer admin and points to different sheets for details.
- Phone GW Recommendation — Lists the devices that need an upgrade.
- Credential Policy — Lists the credential policies that aren’t aligned with DI guidelines.
- Application Users — Lists the application users for which configuration isn’t aligned to DI guidelines.
DI readiness checks
The Device IP Connectivity lists the devices that aren’t reachable from the selected DI cluster and it is the recommended actions to the customer admins before migration to DI.
Post-migration validation
You must verify the migrated and compare the data configuration from the source cluster to the DI cluster.


