
Thanks for your feedback.
Configure your Cisco Desk Camera 4K on Webex App
 Feedback?
You can configure the camera settings on Webex App during a video session.
You can customize the camera settings so they meet your needs for Webex video calls and meetings.
Check your self-view image while making changes.
Before you begin
Make sure that you do the following actions before you configure the camera settings on Webex App:
-
Connect your camera to your computer and open the camera shutter.
-
Close any other apps that may use your camera.
| 1 |
Click your profile picture on Webex App and then perform one of the following actions:
| ||||||||||||||||||||||
| 2 |
Select your camera from the Camera drop‑down list. | ||||||||||||||||||||||
| 3 |
Click Advanced settings. 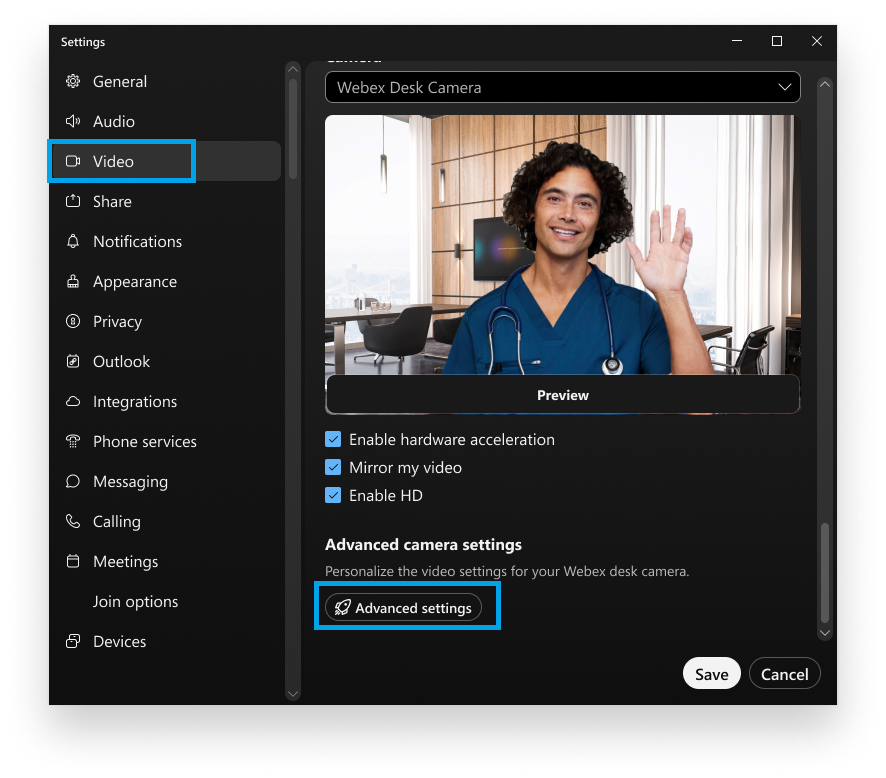
| ||||||||||||||||||||||
| 4 |
Change the following settings as needed from the Camera settings and Image settings tabs.
|
Presets of camera position enable you to quickly switch to the settings for video meeting in home office or in work spaces. You can use Webex App to configure camera pan, tilt, and zoom settings and save them as presets. You can save up to 3 presets for later use.
The presets don't save the Field of view settings.
Before you begin
Make sure that you are using Webex App 42.8 or a later version.
For information on how to update your Webex App, see Update the app to the latest release.
| 1 |
Click your profile picture on Webex App and then perform one of the following actions:
|
| 2 |
Select your camera in the Select accessory drop‑down list. |
| 3 |
Click Advanced settings. |
| 4 |
On the Camera settings tab, use the Camera control tool to change the pan, tilt, and zoom settings. |
| 5 |
Click Add preset and enter a name for the preset. |
| 6 |
Manage your presets as needed using the More menu
|
| 7 |
To remove all the presets, click Reset on the Camera settings tab. |
 :
:If you want to restore the camera to the original settings, you can reset the settings through Webex App. This can resolve some technical issues.
| 1 |
Click your profile picture on Webex App and do one of the following actions:
|
| 2 |
Select your camera from the Camera drop-down list. |
| 3 |
Click Advanced settings. |
| 4 |
Click Reset all and then click Continue when prompted. |
You may need to provide the camera firmware version and the serial number for support or guarantee services. You can easily get the camera information from Webex App.
| 1 |
Click your profile picture on Webex App and then
|
| 2 |
Select your camera from the Camera drop‑down list. |
| 3 |
Click Advanced settings. |
| 4 |
View the camera information on the Camera info tab. |


