- Home
- /
- Article

Thanks for your feedback.

Panelist Options in Events (classic)
 In this article
 Feedback?
As a panelist in Events (classic), you can assist the host with running an efficient and effective event.
Designate a Panelist
In Events (classic), panelists can assist the host and participate in the presentation. The host can designate any attendee as a panelist during an event. You can have up to 1000 panelists in your event.
Designate Panelists Before an Event
Before an event, you can designate a list of attendees as panelists:
-
Sign in to your Webex site, go to Webex Events (classic), and select Schedule an Event.
If you want to add a panelist to an event you already scheduled, select Site Events, choose the event you want to add a panelist to, and select Edit.
-
Under Presenters & Panelists, select Create invitation list.
-
In the Create Panelist Invitation List window, select Select Contacts to add panelists from your contact list. Or, enter their Full Name and Email Address, and select Add to Invitation List.
-
When all the panelists show on the Panelists to invite list, select Invite.
-
Set any other desired scheduling options and select Schedule this Event or Update this Event.
Designate Panelists During an Event
During an event, you can promote any attendee to panelist. You can change panelists at any time.
-
On the Participants panel, select View all attendees.
-
Select the name of the attendee whom you want to designate as a panelist, and then select Make Panelist.
Panelist Roles and Privileges
A panelist can do the following during an event:
-
Participate in discussions to which other attendees listen.
-
Serve as a subject matter expert in a Q & A session.
-
View and answer questions from attendees in a Q & A session.
-
Respond to public and private chat messages.
-
Participate in a practice session.
-
Annotate shared documents.
-
Annotate shared applications, web browsers, and desktops, if the presenter grants annotation control to the panelist.
-
Become a polling coordinator to manage polls.
-
View feedback.
-
Save chat messages to a file.
-
Download files that the presenter publishes.
A panelist cannot mute or unmute other participants.
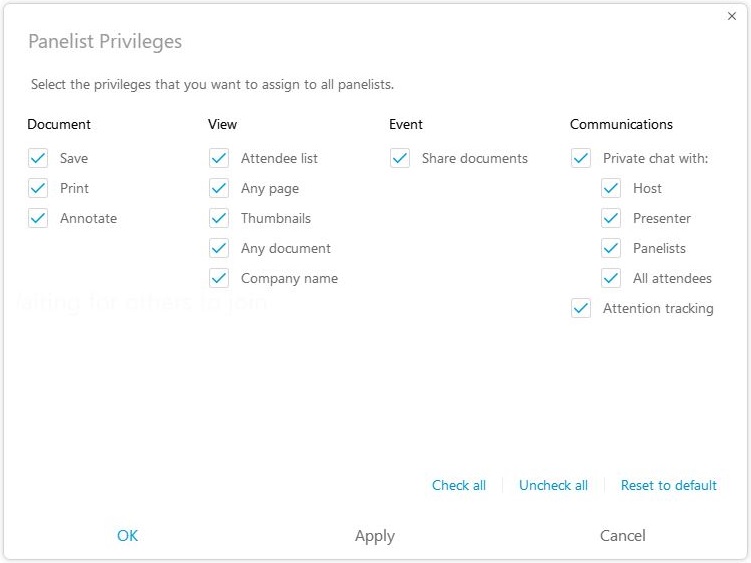
The host can change the panelist privileges during an event from the Panelist Privileges page.
Allow Panelists to Join through Video Systems
Events (classic) panelists can join events using video systems. Attendees can't join through a video system. Event attendees must be promoted to a panelist to share video. The event host and panelists can always share their video during an event. Up to 200 panelists can share their video during an event. To find out which version you’re using, see Find Your Cisco Webex Meetings Version Number.
-
Sign in to your Webex site, go to Webex Events (classic), and select Schedule an Event.
To edit a scheduled event, select Site Events, choose the event you want to allow panelists to join with a video device to, and select Edit
-
Go to and select Webex Audio.
Allow Panelists to Upload Documents
When scheduling an event, you can specify that panelists can provide you with documents or presentations by uploading them to the event. The files uploaded by panelists appear on your Event Information page.
To allow panelists to upload documents, do the following:
| 1 |
In the Events (classic) site, on the Schedule an Event or Edit Event page, go to Presenters & Panelists. |
| 2 |
Check Allow panelists to upload documents associated with the event. |


