
Thanks for your feedback.
Webex App | Mark up shared content with annotations
 Feedback?
If you're the host or cohost and want to keep the presentation focused, turn off annotation to prevent attendees from requesting to annotate.
This feature is available on our Webex Suite meeting platform. Find out if your meetings use the Webex Suite meeting platform.
Some calls in Webex App have these features too.
| 1 |
Do one of the following:
| ||||||||||||||||||||||||||||
| 2 |
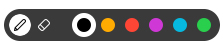
You can choose from the following annotation tools to start marking up the annotation:
|

 Annotate


This feature is available on our Webex Suite meeting platform. Find out if your meetings use the Webex Suite meeting platform.
Some calls in Webex App have these features too.
| 1 |
Do one of the following:
| ||||||||||||||||||||||||||||
| 2 |
You can choose from the following annotation tools to start marking up the annotation:
|
This feature is available on our Webex Suite meeting platform. Find out if your meetings use the Webex Suite meeting platform.
| 1 |
Do one of the following:
| ||||||||||||||||||||
| 2 |
You can choose from the following annotation tools to start marking up the annotation:
| ||||||||||||||||||||
| 3 |
To stop annotating, tap Leave Annotation. |


This feature is available on our Webex Suite meeting platform. Find out if your meetings use the Webex Suite meeting platform.
| 1 |
Do one of the following:
| ||||||||||||||||||||
| 2 |
You can choose from the following annotation tools to start marking up the annotation:
| ||||||||||||||||||||
| 3 |
To stop annotating, tap Leave annotation. You can Mute yourself while annotating content. |
 .
.You can't start an annotation in Webex Meetings web app. After someone starts annotating in Webex App for desktop or mobile, you can edit too.
| 1 |
To begin annotating, click You can change the pen color and width
 . . |
| 2 |
You can choose from the following tools:
|
| 3 |
When you're finished, click Leave annotation. |
 Pen Tool


