- Home
- /
- Article

Thanks for your feedback.

Configure call permissions in Control Hub
 In this article
 Feedback?
You can change the organization's default outgoing or incoming call permissions for a specific Webex Calling user, workspace, or virtual line. For example, you can allow a user to be able to receive incoming collect calls, while continuing to block collect calls for the rest of your organization.
Outgoing call permissions
Outbound call types
The following is a list of different outbound call types available for Webex Calling in the Control Hub:
-
Internal Calls—are calls within your own company. It includes calls to others within your own site and to other locations as well.
-
Toll Free Calls—are calls to a telephone number that is billed for all arriving calls instead of incurring charges to the originating caller, it is free of charge from a landline.
-
National Calls—are calls within your country of origin, both within and outside of your local area code.
-
International Calls—are calls to locations outside of your country that require an international calling code before the number is dialed. Calls between the US, Canada, and Puerto Rico are an exception as calls among these countries aren’t treated as international currently.
-
Operator Assistance Calls—are any calls starting requiring Operator Assistance.
-
Chargeable Directory Assistance Calls—are calls to Directory Assistant companies that require a charge to connect the call.
-
Special Services I and Special Services II—are calls to carrier-specific number assignments to special services or destinations.
-
Premium Services I and Premium Services II—provides information or entertainment for a fee charged directly to the caller.
For each of the call types, you can choose to Allow, Block, require an Authorization Code, or Auto-transfer to the first, second, or third number.
Allow transfer/ forwards determines if you’re allowed to transfer or forward a specific outgoing call type.
Configure outgoing call permissions for a user or a workspace
| 1 |
Sign in to Control Hub. |
| 2 |
Go to Management and click Users or Workspaces. |
| 3 |
Select the user or the workspace for which you wish to set the outgoing call permissions. To manage users, see Ways-to-add-users-to-your-Control-Hub-organization. To manage workspaces, see Configure and manage Webex Calling devices. |
| 4 |
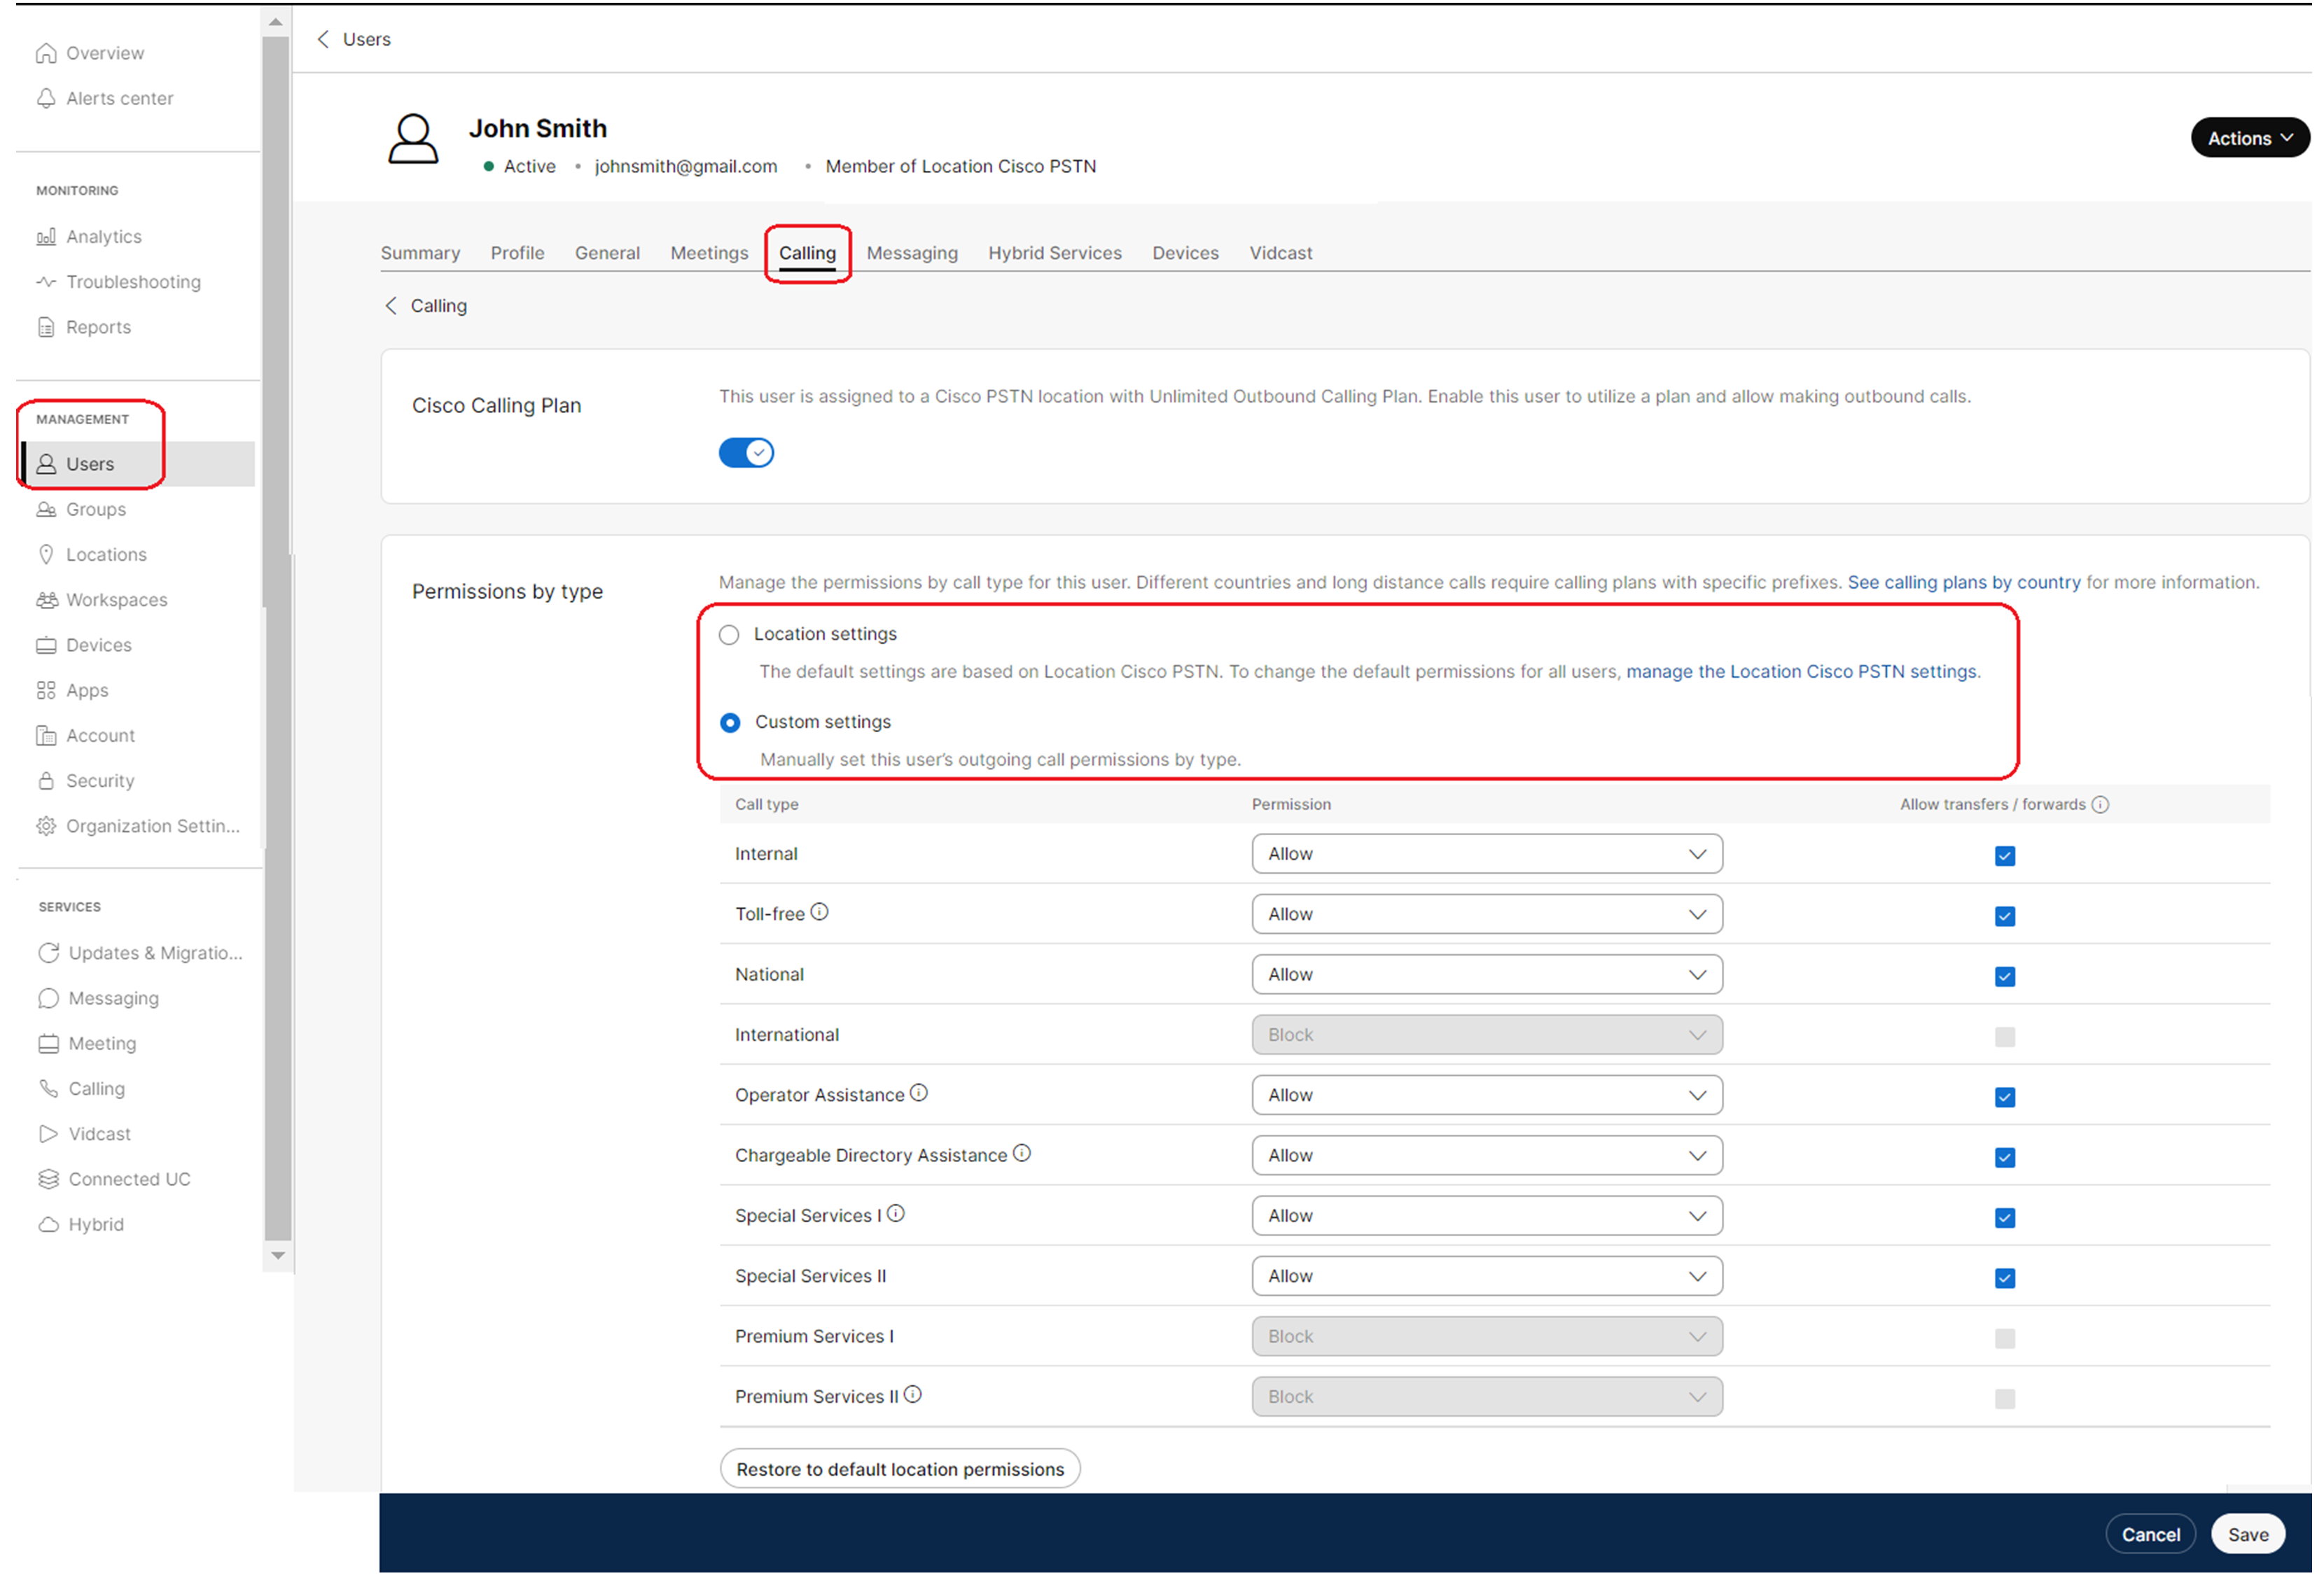
Select Calling, scroll down to Call Handling. Click to expand Outgoing Call Permissions. The following lists the outgoing permission types:
|
| 5 |
Click Permissions by type and navigate to the respective configuration page: For detailed permission type settings, see Outgoing call permissions for Webex Calling locations. |
| 6 |
Customize the Permissions by type and Auto-transfer numbers:
|
| 7 |
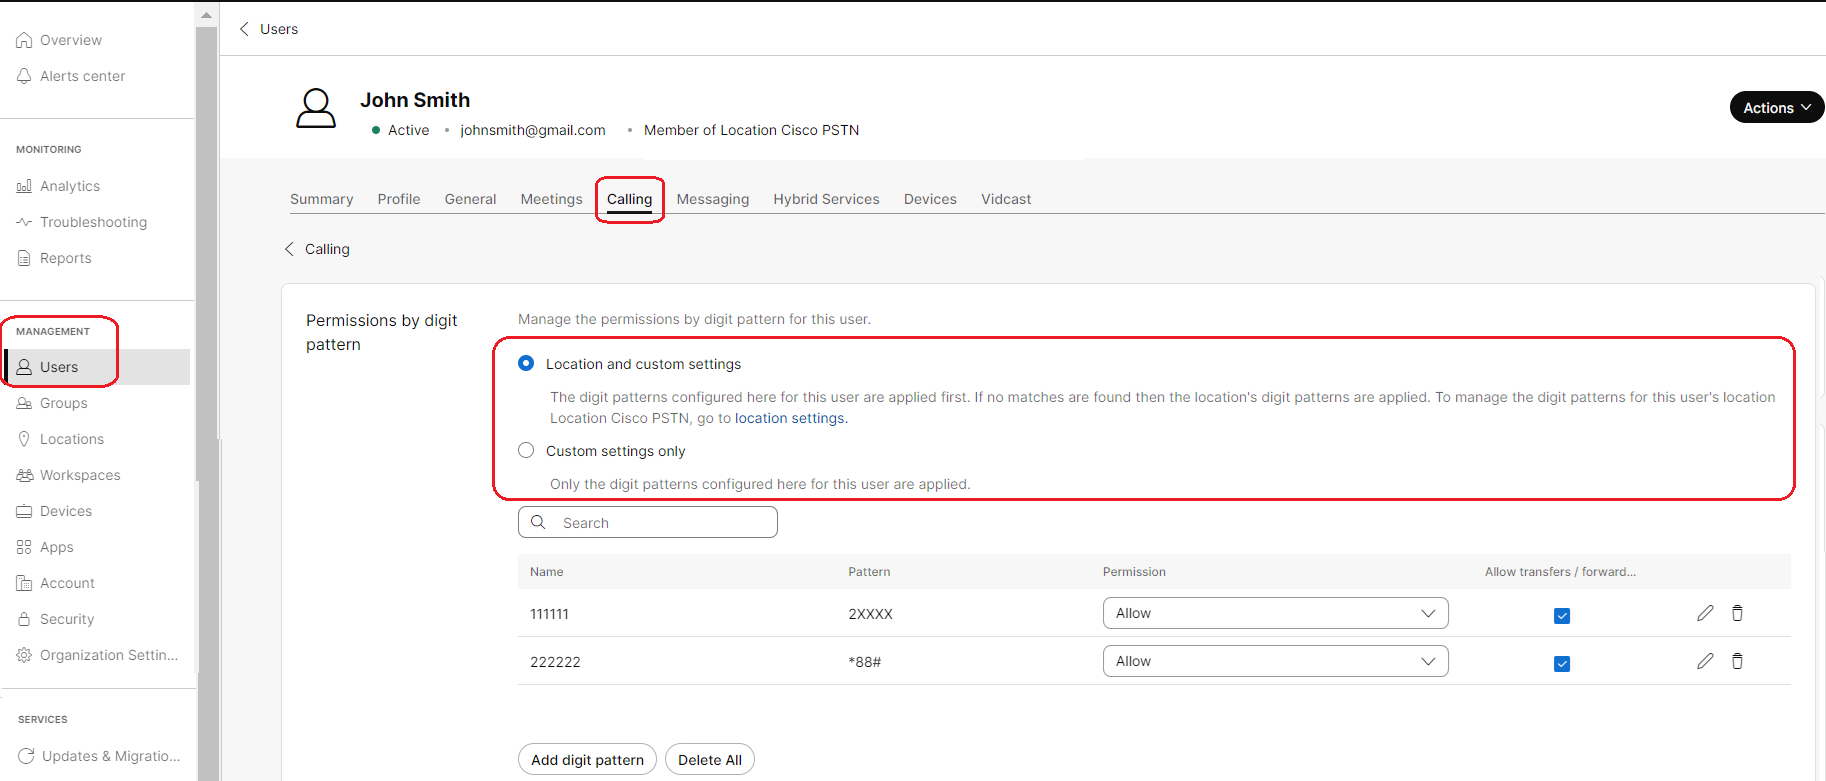
Customize the Permissions by digit patterns and Authorization codes:
|
| 8 |
Choose Custom settings only and customize the settings as required. Click Save. |
Configure outgoing call permissions for a virtual line
| 1 |
Sign in to Control Hub. |
| 2 |
Go to Services and click Calling. |
| 3 |
Select Virtual Lines. |
| 4 |
Select a virtual line from the list. To manage virtual lines, see Multi line support in Webex Calling using virtual lines. |
| 5 |
Select Calling. |
| 6 |
Scroll down to Call Handling. Click to expand Outgoing Call Permissions. The following lists the outgoing call permission types:
|
| 7 |
Click Permissions by type to navigate to the respective configuration page: For detailed permission type settings, see Outgoing call permissions for Webex Calling locations. |
| 8 |
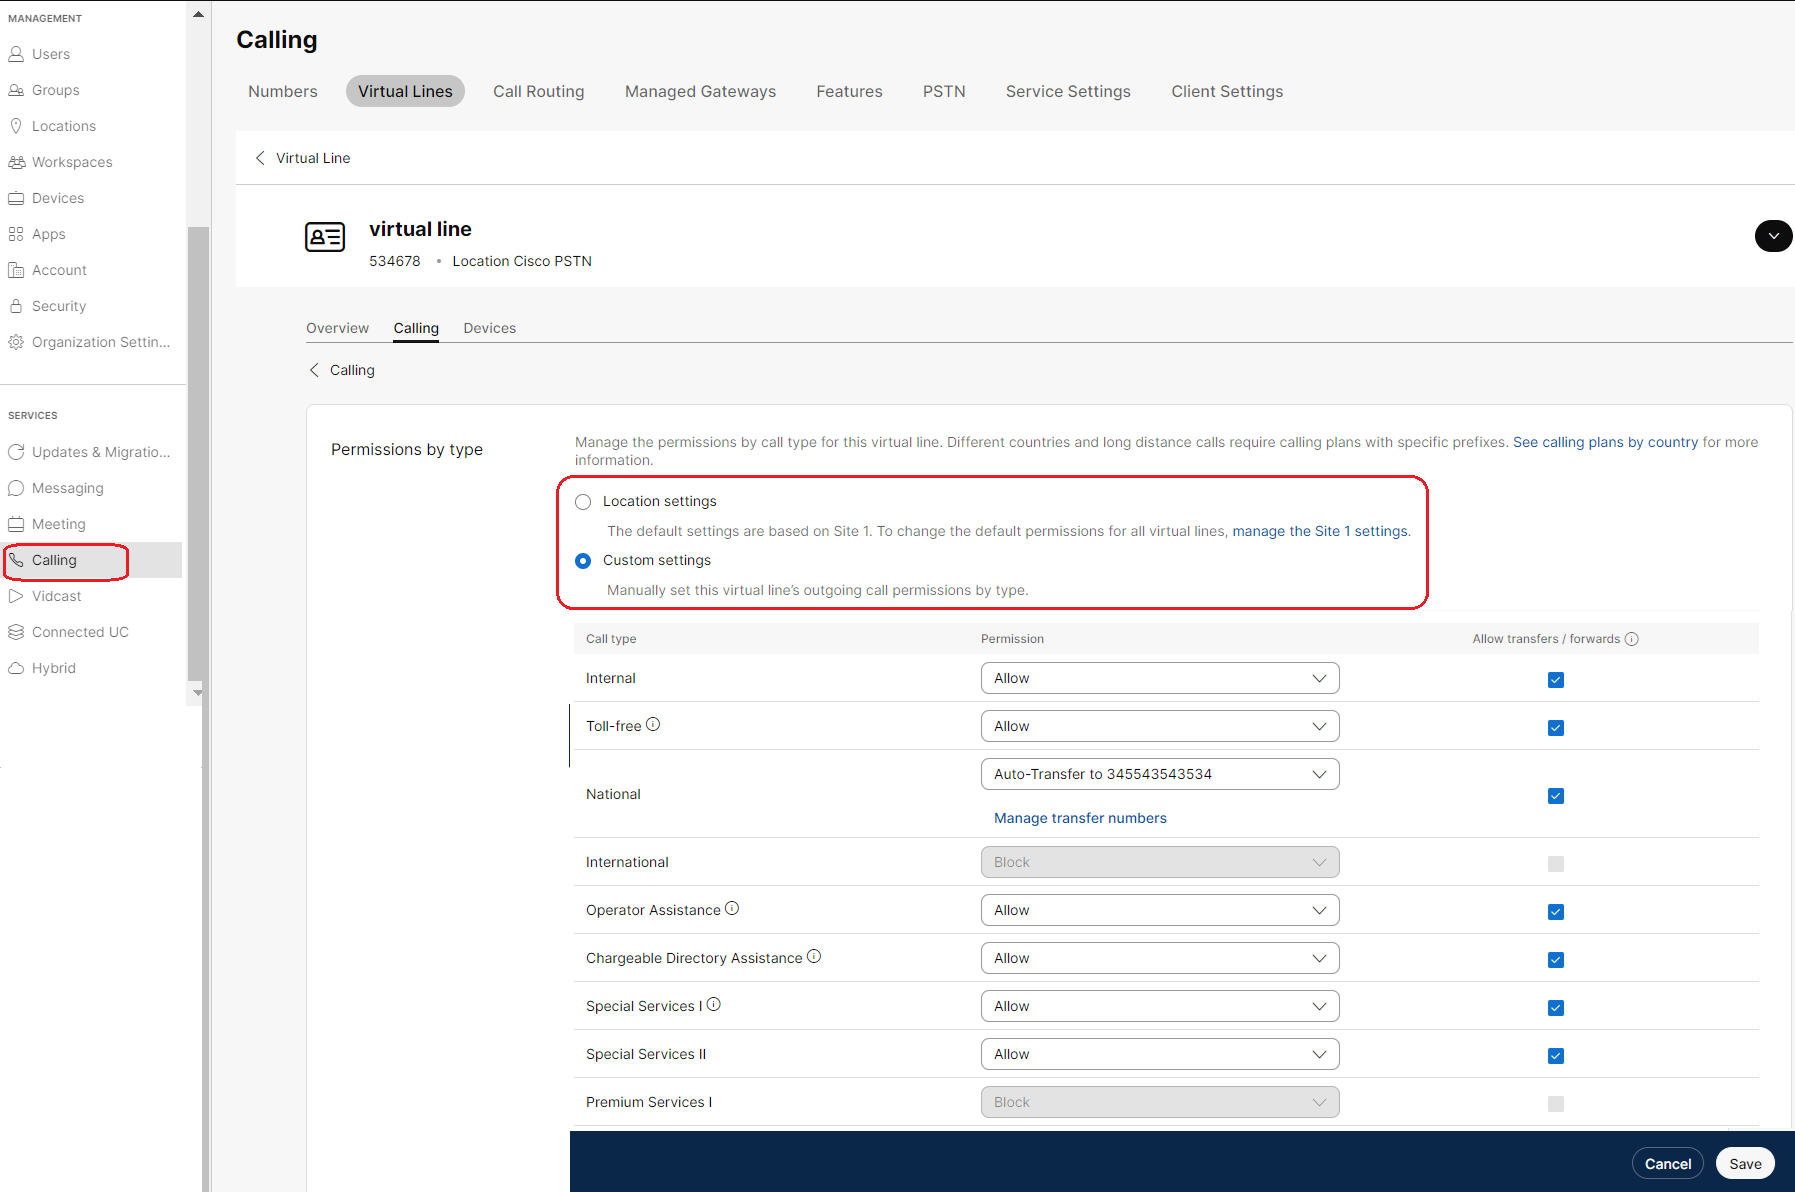
Customize Permissions by type and Auto-transfer numbers:
|
| 9 |
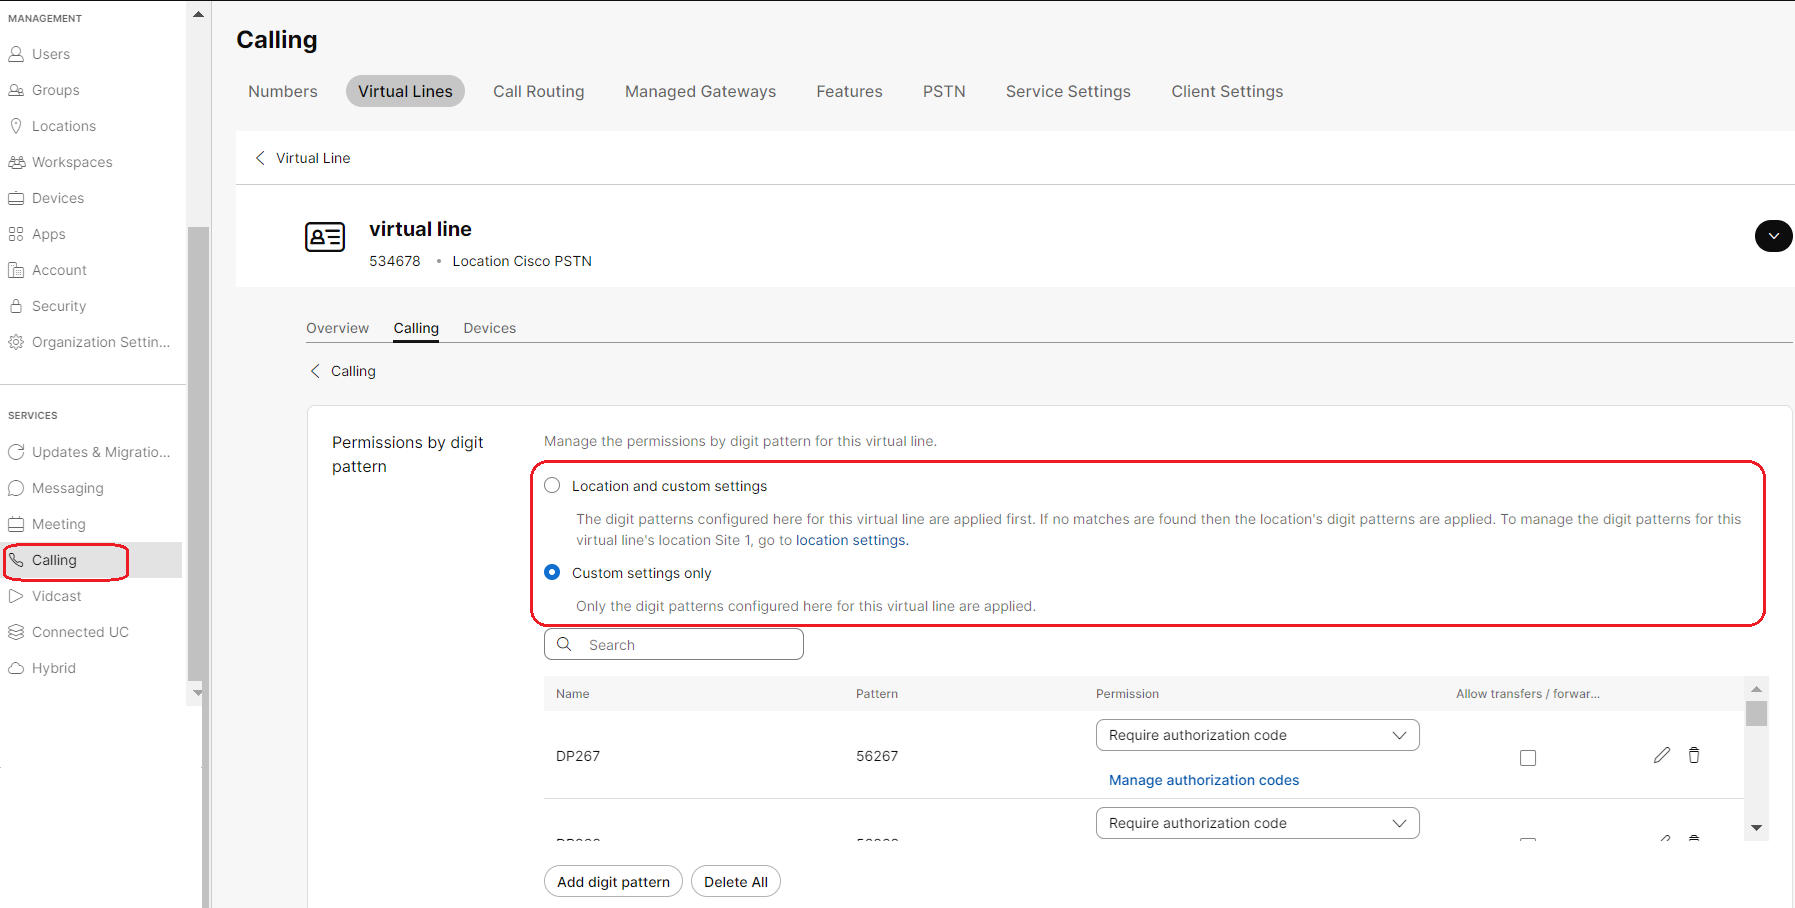
Customize Permissions by digit patterns and Authorization codes:
|
| 10 |
Choose Custom settings only and customize the settings as required. Click Save. |
Incoming call permissions
Configure incoming call permissions for a user or a workspace
| 1 |
Sign in to Control Hub. |
| 2 |
Go to Management and click Users or Workspaces. |
| 3 |
Select from the Call handling section. Incoming call permissions help to manage receiving call types (such as collect calls). The default settings are based on your organization’s or location’s incoming call permissions. When a call is blocked, callers are disconnected without hearing any announcement.
|
Configure incoming call permissions for a virtual line
| 1 |
Sign in to Control Hub. |
| 2 |
Go to and select the virtual line for which you want to configure incoming call permissions. |
| 3 |
Choose in the Call handling section. Incoming call permissions help to manage the receiving call types (such as collect calls) for the virtual line. The default settings are based on your organization’s or location’s incoming calling permissions. When a call is blocked, callers are disconnected without hearing any announcement.
|
| 4 |
Under the Custom Settings, choose the settings that you want to update and click Save. 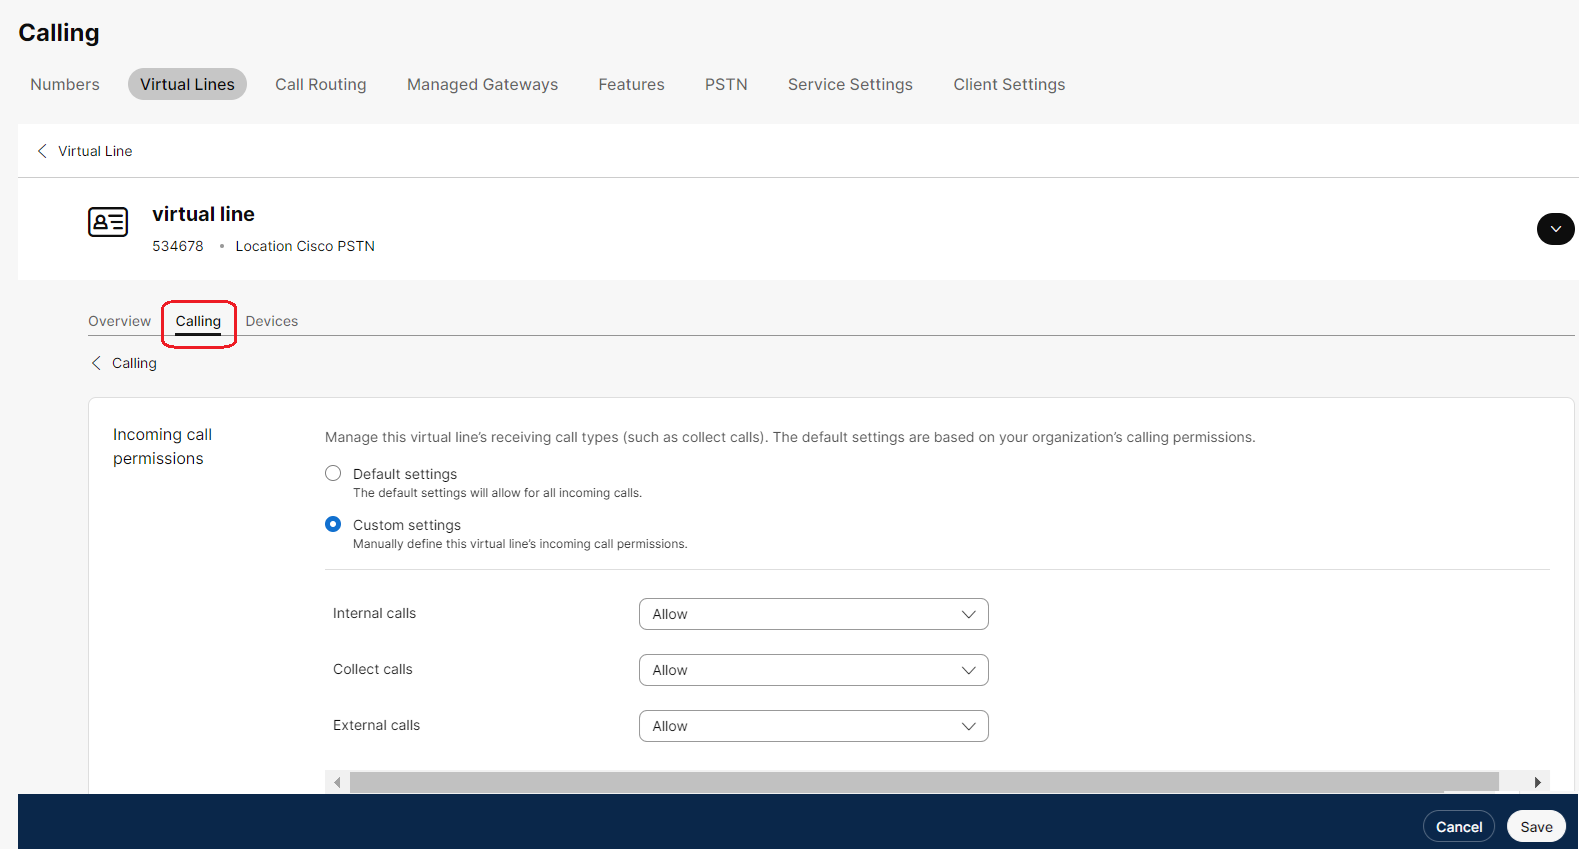
|


