
Thanks for your feedback.
Get started with your Cisco Desk Pro G2
 Feedback?
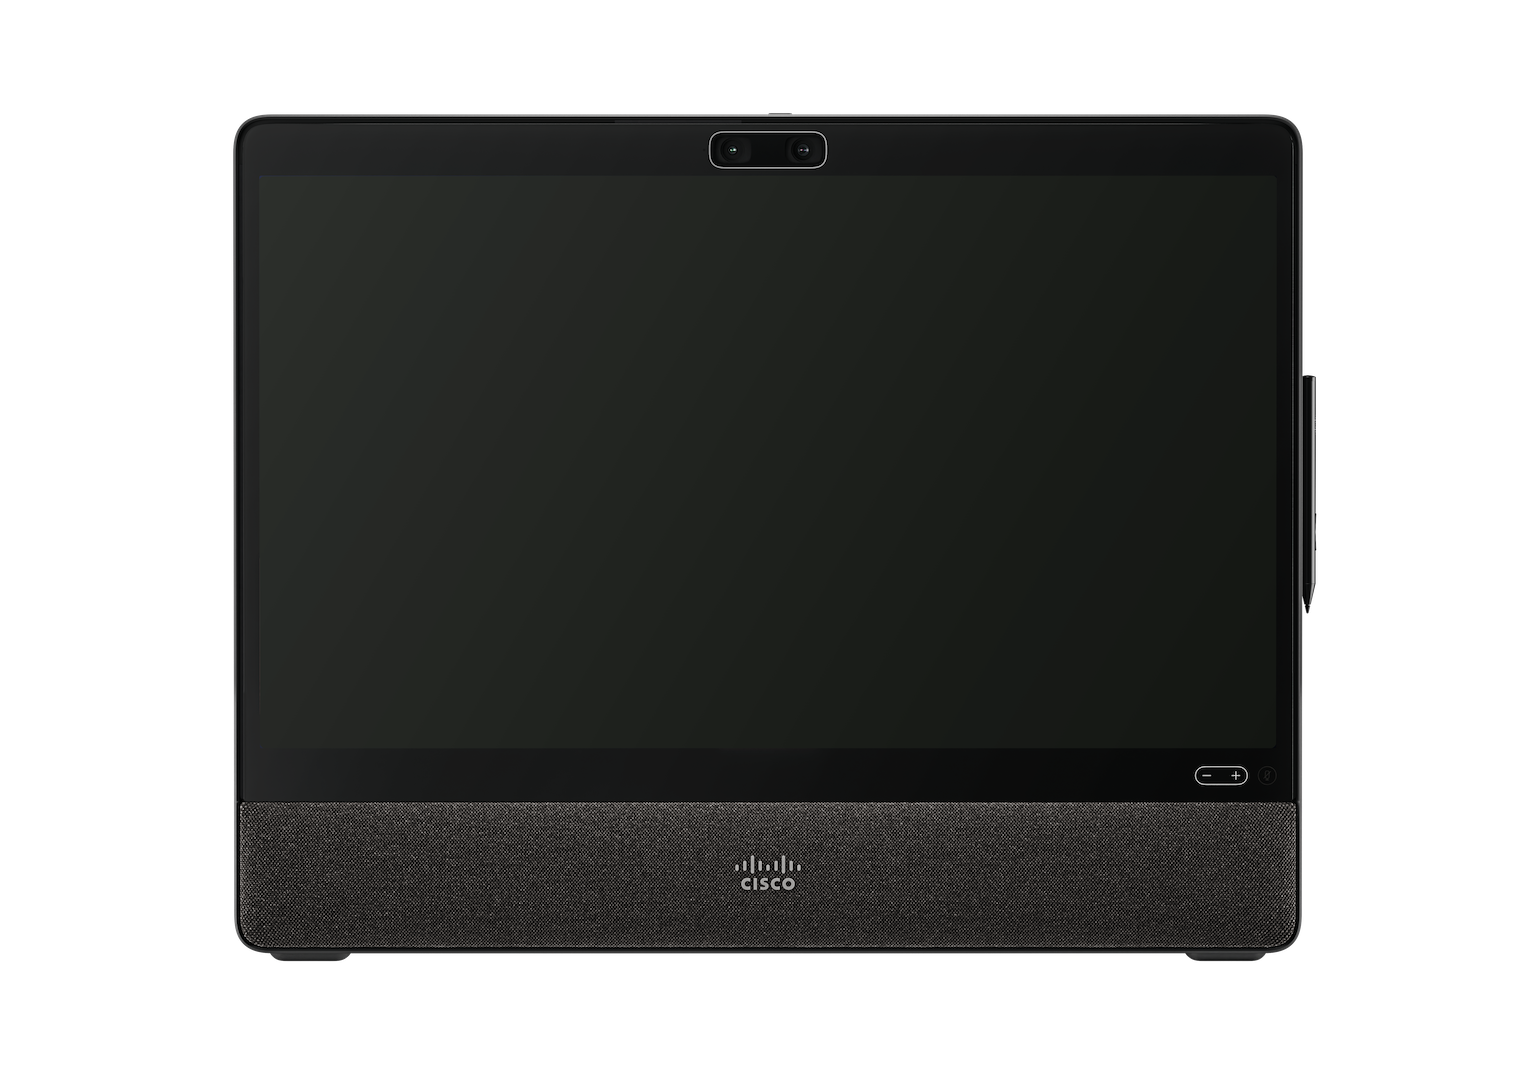
The Cisco Desk Pro G2 is designed to make your daily meetings easier and more effective, whether you are working from your personal desk or a small meeting room. It uses smart technology to automatically clear up your audio and adjust your video, allowing you to focus on the conversation without worrying about your setup.
The device features a high-quality camera system that works well for both individual calls and small group discussions of up to five people. It is simple to set up and provides a consistent, reliable experience that stays the same as you move between different workspaces throughout your day. By combining professional performance with a user-friendly design, the Desk Pro G2 helps you stay connected and collaborative in any environment.
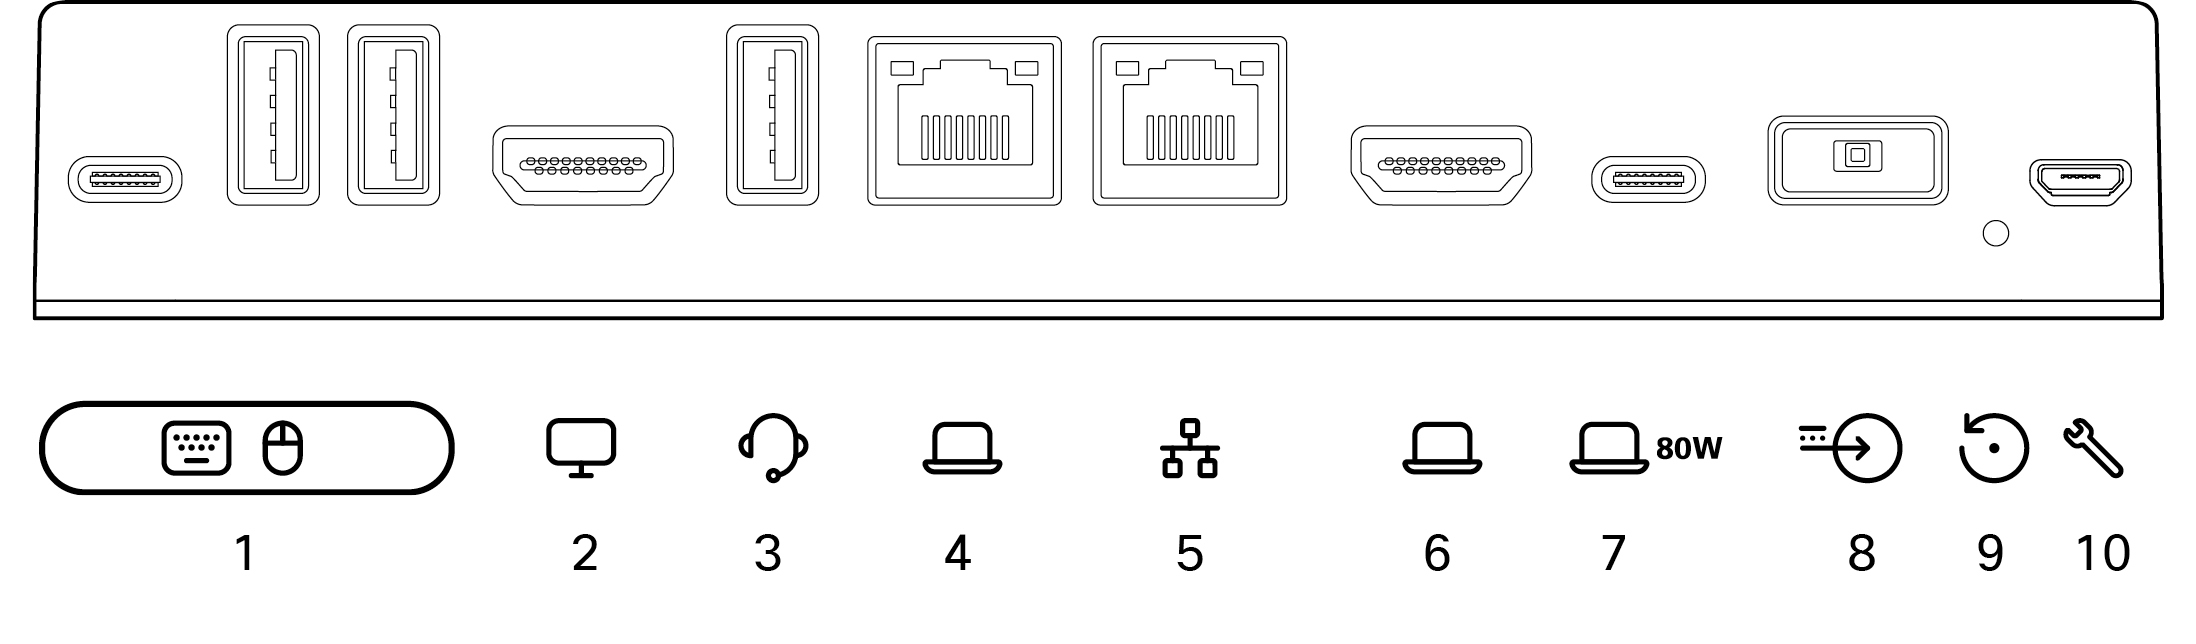
The Desk Pro G2 features multiple ports for expanded docking station setups. You can find the rear connector panel under a lid and the side connector panel on the right side of the device.
Rear connector panel
|
Connector number |
Connector type |
|---|---|
|
1 |
1 × USB-C, 2 × USB-A: Laptop port replicators to connect laptop-peripherals, such as keyboard, mouse, flash-drive. |
|
2 |
HDMI Out: External display |
|
3 |
USB-A: Video-peripherals, such as a headset or document camera |
|
4 |
Ethernet: Network forwarding to laptop |
|
5 |
Ethernet: Network |
|
6 |
HDMI In: For laptop |
|
7 |
USB-C: For laptop, charging (80 W) |
|
8 |
Power adapter |
|
9 |
Factory reset pinhole |
|
10 |
Micro-USB: Maintenance port |
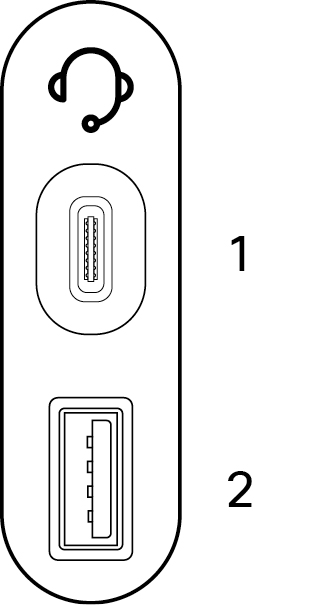
Side connector panel for headset and document camera
|
Connector number |
Connector type |
|---|---|
|
1 |
USB-C, charging (15 W) |
|
2 |
USB-A, charging (7.5 W) |
Looking for more information?
-
Find more help articles for end-users and administrators on the Desk Series get started page.
-
Find the Desk Pro G2 Installation Guide, and safety and compliance documentation here.
Plugged in? Then get started! The first time you start your device, you need a unique code to activate and register the device. You can generate this code yourself from User Hub or the Webex App. If you move on to something else before you get a chance to activate your device and lose track of the activation code, you can generate a new code anytime.
The steps below are for setting up your device in Personal Mode. If you're an Administrator and setting up devices for other people to use, read these articles about Getting started with Control Hub and Adding devices to workspaces.
Generate a code from User Hub
-
Go to User Hub.
-
Select My Devices and then click Generate Activation Code. You'll get a code on your screen and a QR code, and the same code will be sent to your email.
-
When you start your device for the first time, connect to the internet. Follow the setup wizard on the screen. When you reach Choose configuration, select Cisco Webex and type in the activation code.
-
Follow the activation steps and your device is ready for use.
Generate an activation code from the Webex App
-
Open the Webex App on your computer or mobile device.
-
Go to your profile picture and select Settings > Devices.
On a Mac, select Preferences > Devices.
-
Under My Devices, click Generate activation code.
On a PC or Mac, take note of the code and click OK.
-
When you start your device for the first time, connect to the internet. Follow the setup wizard on the screen. When you reach Choose configuration, select Cisco Webex and type in the activation code.
-
Follow the activation steps and your device is ready for use.
Use your device to meet and call, share content from your laptop, collaborate, and stay connected with your coworkers.
Make calls
You can start calls on your touchscreen or from your connected Webex App. To call from your device, tap the Call button on the home screen. You can either search for contacts in your directory, or use a video address to make a call. Tap the End Call button to hang up.
For more details, see this article about calling from Desk Series devices.
Connect to the Webex App
When you're in the same room as your device, your Webex App can automatically connect to it. The device's name shows up at the top of the app when it's connected. You can use the app to start calls on the Desk Mini and share your screen wirelessly.
When you turn off the app or leave the room, your app gets disconnected from the device.
For more details, see this article about making calls from a Desk Series device with the Webex app.
Share content
To double your screen real estate, connect your laptop to your device using the USB-C cable. Make sure that your laptop is switched on, and you'll see your screen automatically. Read this article about previewing on-screen content and sharing it in a call with others.
When your device is paired to the Webex App, you can share content wirelessly. Read these articles to learn about sharing content wirelessly in a call or sharing wirelessly outside a call.
Camera settings
Before calling somebody, you can check your self-view to see how you look. Swipe from the right side of the screen to open the control panel. As long as your camera is open, you'll see your self-view at the top. Tap Camera Settings to adjust the view.
Check out this article about self-view and other camera settings, for more information.
Get creative
Brainstorm, design, create and annotate on the device whiteboard - on your own and in meetings. Use the whiteboard on Board and Desk Series works just like it does on the other Desk Series devices.
And, you can add your favorite web apps and keep them a tap away on the home screen.


