
Дякуємо за відгук.
Створення розкладів для налаштувань викликів
 Надіслати відгук?
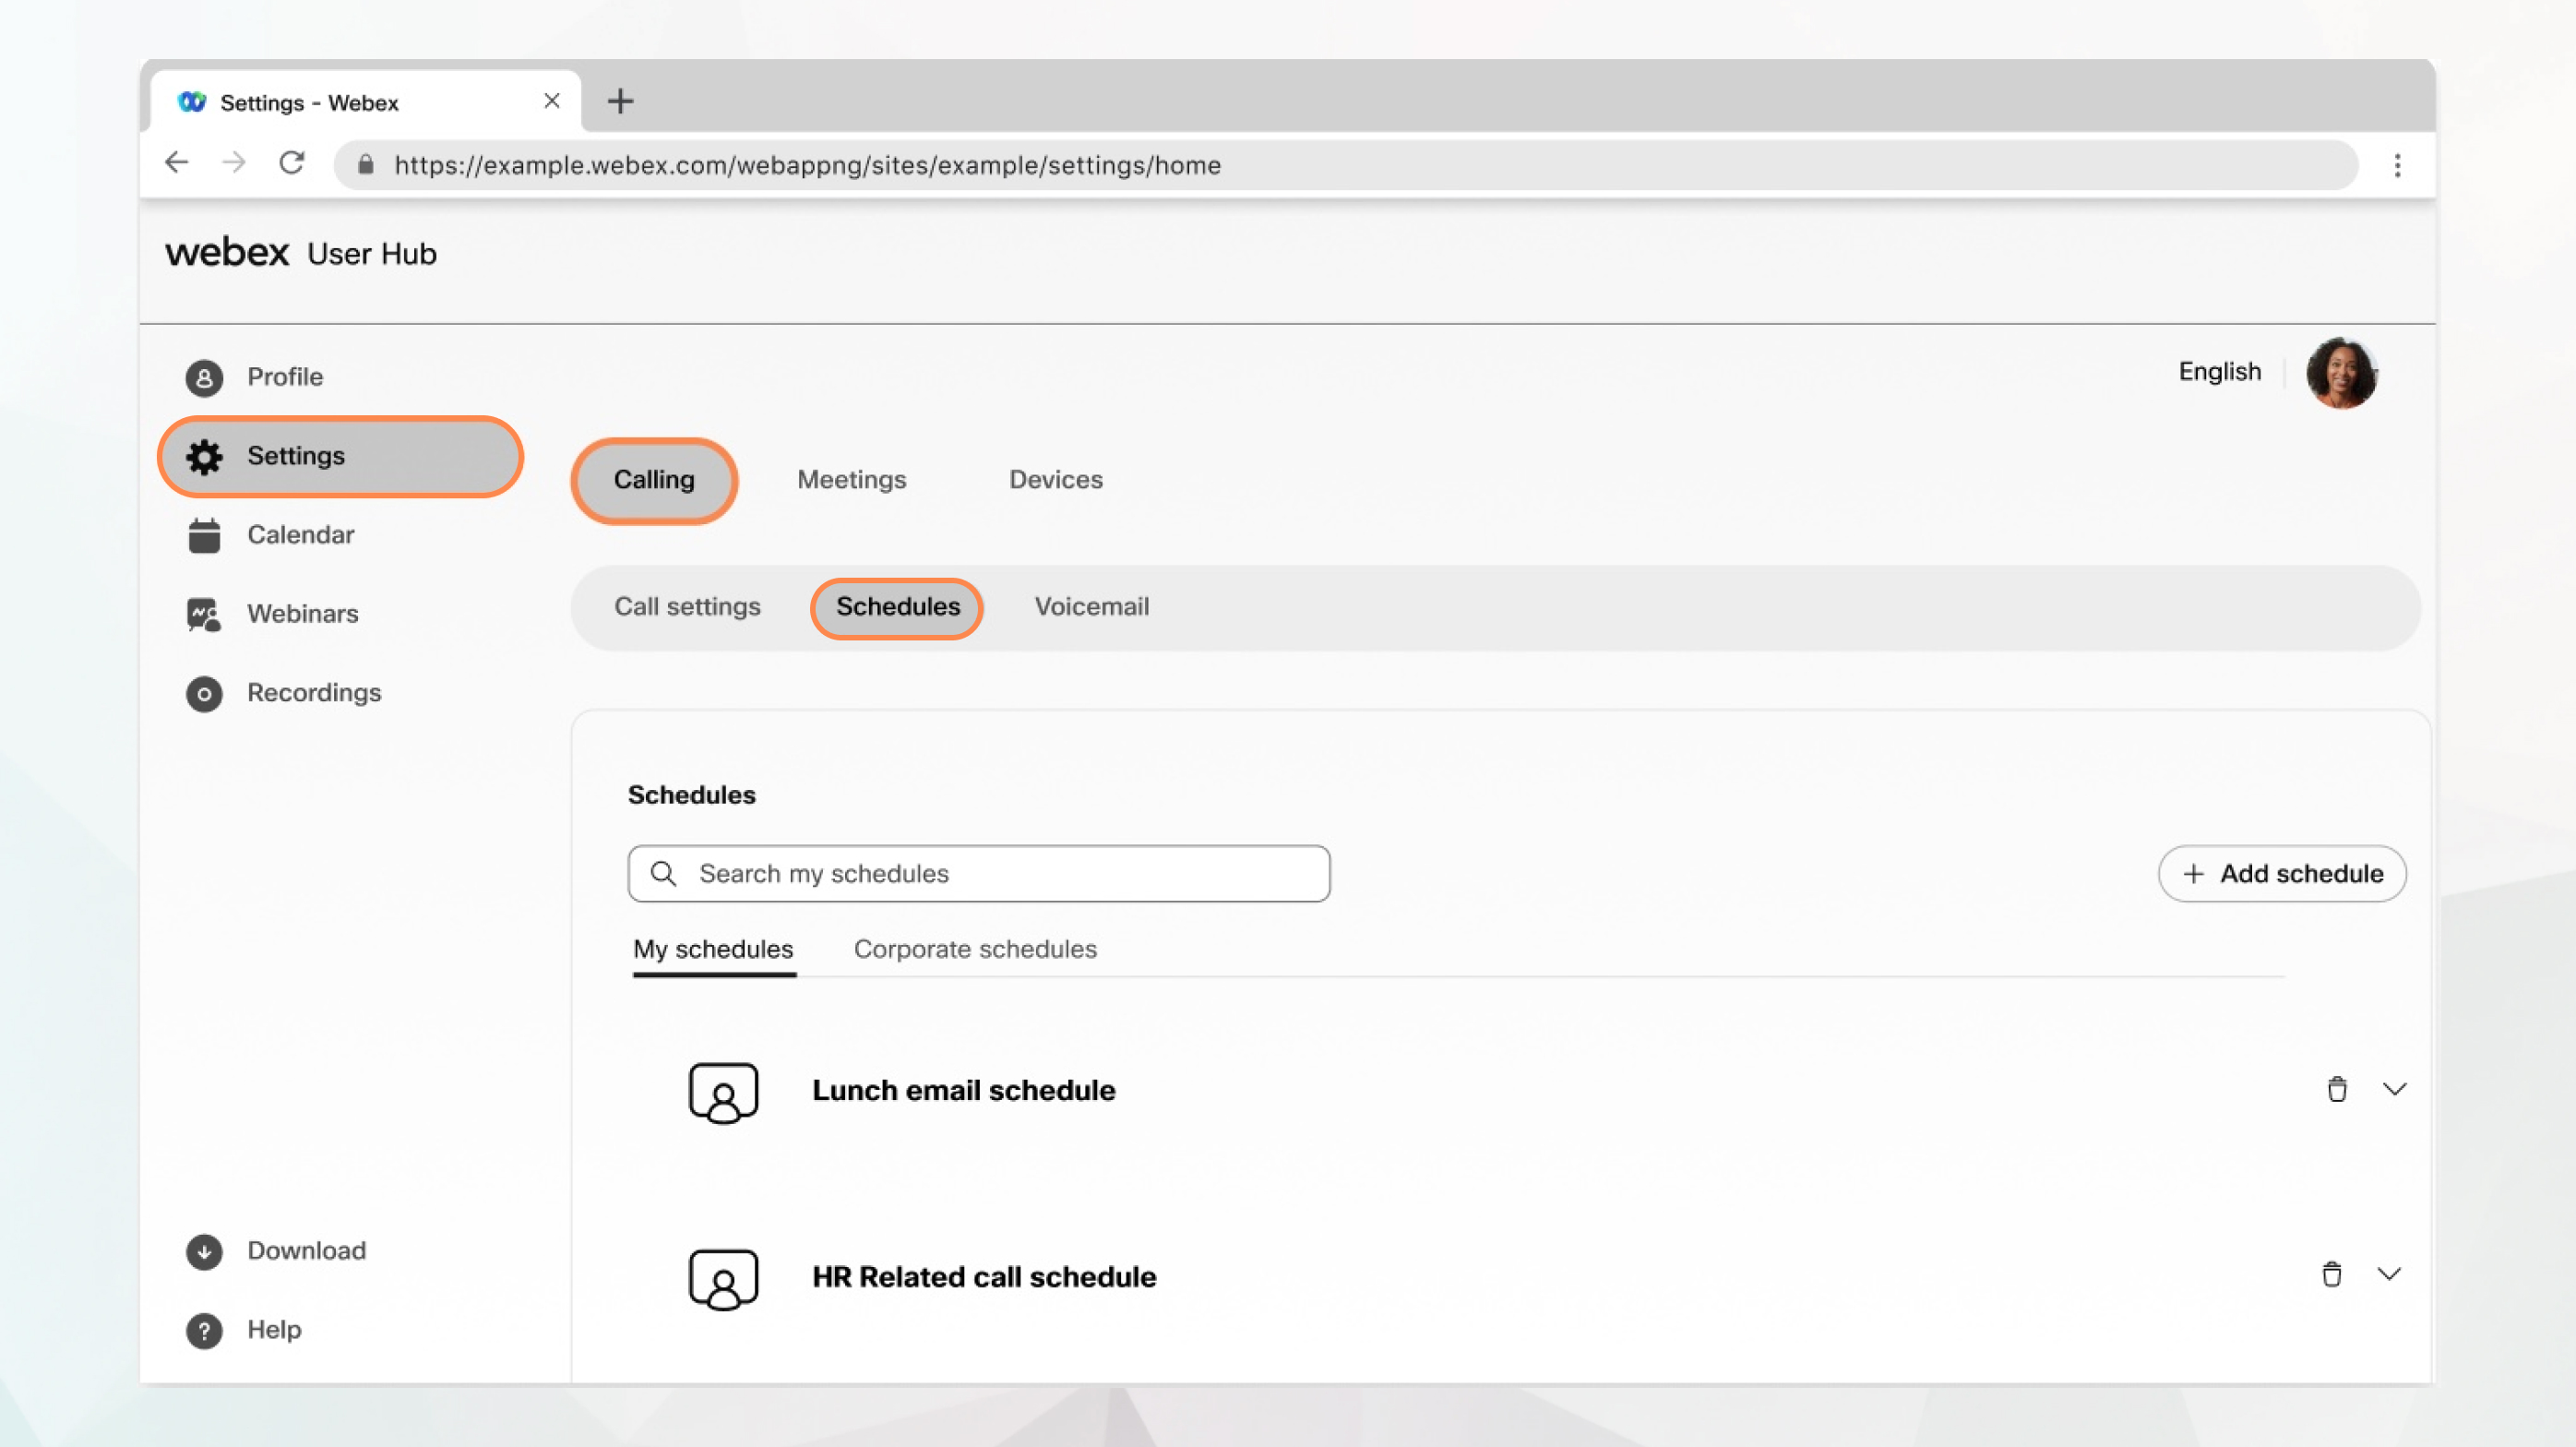
Перед початком
-
Адміністратор має ввімкнути цю функцію, щоб ви могли отримати доступ до неї й налаштувати її. Якщо це налаштування не відображається, зверніться до адміністратора.
-
Усі налаштування викликів можна налаштувати в користувацькому центрі, перейшовши до розділу .
Параметр Calling доступний лише користувачам із ліцензією Webex Calling. Якщо параметр Calling не відображається, це означає, що у вас немає ліцензії Webex Calling.
Щоб дізнатися, за допомогою якої служби викликів налаштовано, перегляньте програму Webex. Додаткову інформацію див. в розділі Дізнатися, яка у вас служба викликів.
| 1 |
Увійдіть у Користувацький центр. |
| 2 |
Перейдіть до розділу . З’являються два такі типи розкладу:
|
| 3 |
Перейдіть до розділу Мої розклади і клацніть Додати розклад , щоб створити розклад. |
| 4 |
Введіть назву розкладу. |
| 5 |
Виберіть відповідну дату/час початку та дату/час закінчення. |
| 6 |
Перевірте Подію на весь день або Повторення, якщо потрібно. |
| 7 |
Клацніть Зберегти. Створений розклад відображається в розділі Мої розклади. Можна розгорнути створений розклад і клацнути Додати подію , щоб додати до нього інші події. |
Що далі
Тепер, коли ваш розклад створено, його можна застосувати до своїх вибраних налаштувань викликів, як-от послідовний дзвінок, пріоритетні сповіщення та одночасний дзвінок.


