schedule a webinar

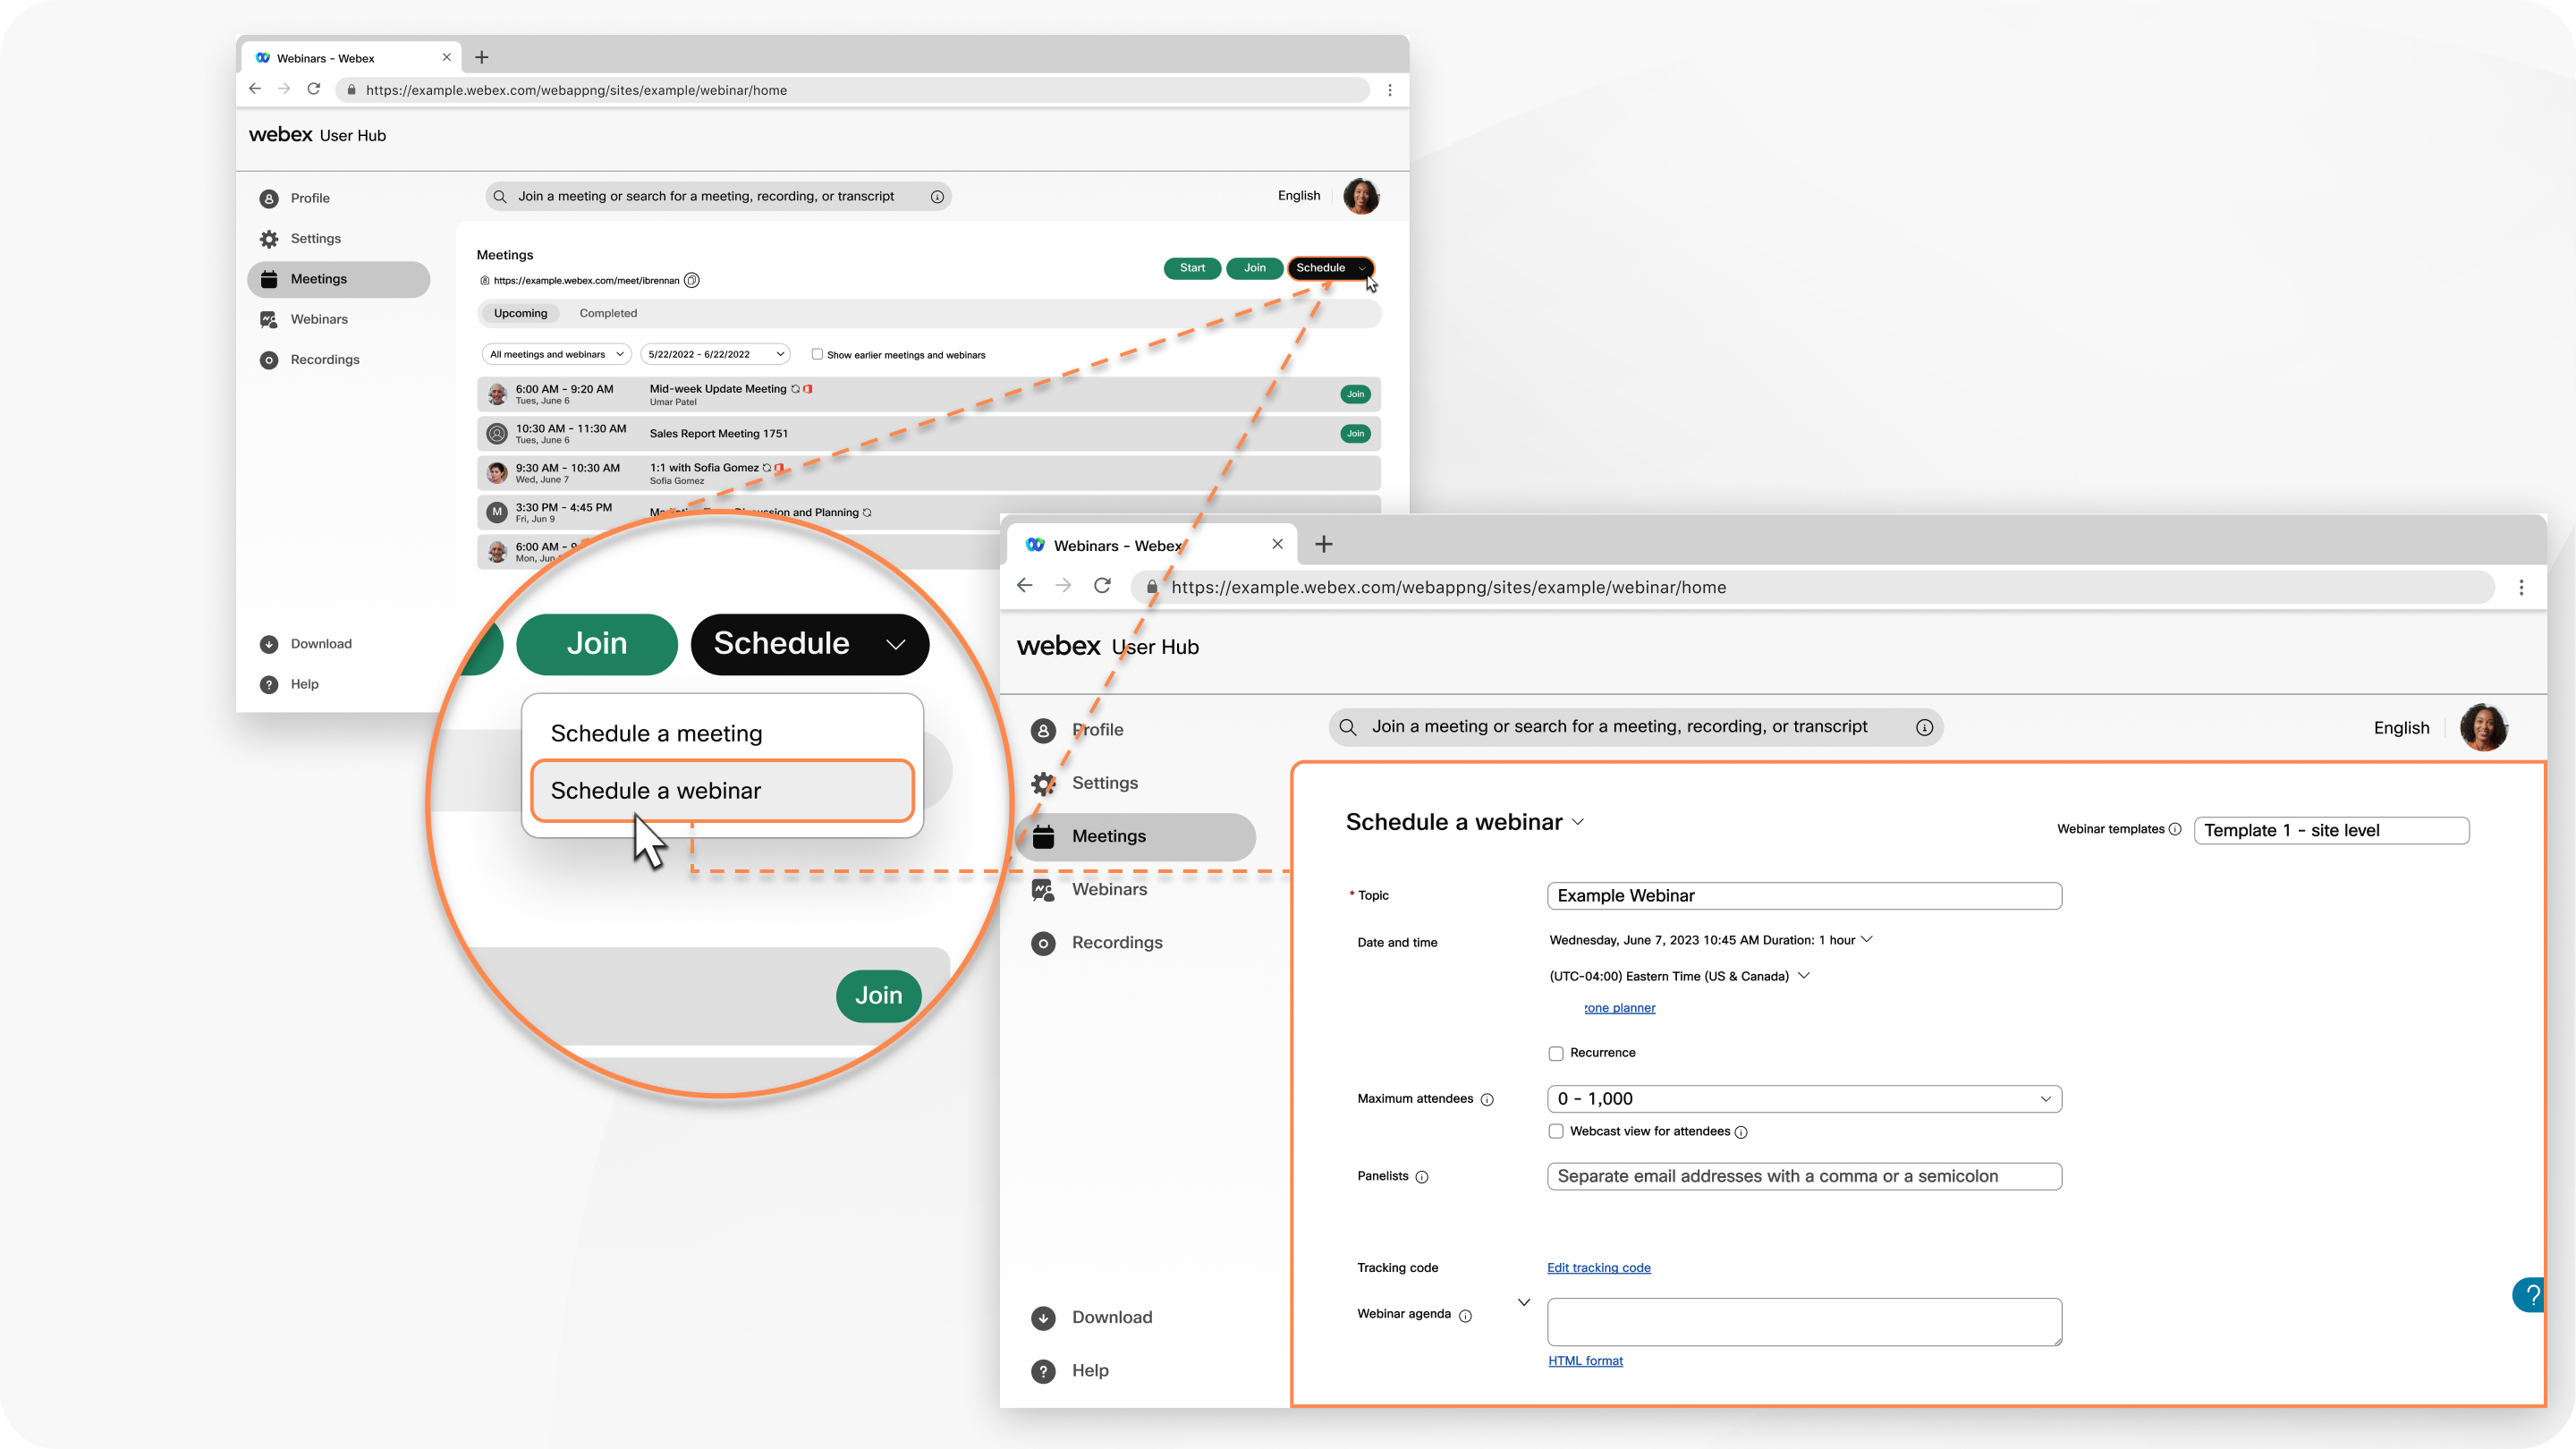
Die Anzahl der Personen, die Sie zu einem Webinar einladen können , hängt von der erworbenen Lizenz ab. Webinare können bis zu 10,000 Personen umfassen. Schedule a webinar in webcast view for more than 10,000 attendees.

Webinare in Webcast-Ansicht sind für die Regierung von Webex nicht verfügbar.

After you schedule a webinar, you get a confirmation email, and an email to forward to attendees.

1

Sign in to User Hub, click the Meetings tab, then click the Schedule drop-down menu and select Schedule a webinar.

2

(Optional) If you have any saved webinar templates, select one from the Webinar templates drop-down menu.

3

Fügen Sie die Grundlagen hinzu, indem Sie die folgenden Informationen bereitstellen:

  • Topic—Choose a topic that people recognize and get excited about.
  • Date and time—Indicate when the webinartakes place. Wenn Sie Personen aus verschiedenen Zeitzonen einladen, klicken Sie auf den Zeitzonenplaner, damit Sie eine Für jeden am besten geeignete Zeit finden.
  • Maximum attendees—Choose the maximum number of attendees and whether you want a webinar in webcast view. See Compare experiences in Webex Webinars for more information.
  • Panelists—Enter the email addresses of the people you’re inviting to help you run your webinar. An Ihrem Webinar können bis zu 500 Diskussions teilnehmer teilnehmen. Wenn sie über ein Konto auf dieser Site verfügen, können Sie neben ihrem Namen auswählen, wenn Sie möchten, dass sie ein Co-Host werden.
  • Webinar agenda—Add any context or details that you want your attendees to have about the upcoming webinar.
4

Fügen Sie im Abschnitt Sicherheit die folgenden Informationen hinzu:

  • Webinar password—Use the provided password or enter your own. Teilnehmer müssen dieses Passwort eingeben, um An Ihrem Webinar teilzunehmen .
  • Panelist password—Use the provided password or enter your own. Diskussions teilnehmer müssen dieses Passwort eingeben, um Teil Ihres Webinar-Panel zu sein. If panelists don't enter this password when they join your webinar, they join as an attendee.

    If a panelist has an account on the same site where the webinar is hosted, they just have to sign in. If they don't have an account on the same site, a prompt appears to enter this panelist password.

    Check out Roles in Webex Webinars for information about the differences between the various roles.

  • Join before host—Allow panelists and attendees to join your webinar and panelists to connect their audio before the webinar starts.
  • Require account—If you want attendees to have a Webex account on this site to join the webinar, check this check box.

    Check Restrict webinar to invited attendees only if you want to restrict the webinar to invited attendees only. This turns off webinar registration options.

5

Fügen Sie im Abschnitt Audioverbindungsoptionen die folgenden Informationen hinzu:

  • Audioverbindungstyp
    • Webex Audio: Wählen Sie die Option zur Unterstützung von Einwähl-, Rückruf- und Computer-Audio-Optionen. Anschließend können Sie gebührenfreie und globale Einrufnummern verwenden und Töne für Beitritt und Verlassen festlegen, wenn jemand dem Webinar beitritt oder es verlässt.
      When using Webex Audio with the Announce Name feature, panelists who select the Use computer for audio option can't record and announce their names
    • Nur VoIP: Beschränkt sich auf die Verwendung von Computeraudio für alle Diskussionslisten.
    • Weiterer Telefonkonferenz-Service: Hier können Sie Telefonkonferenz-Informationen von Drittanbietern eingeben.
    • Keine – Kein Audio.
  • Ton für Diskussionsteilnehmer ausschalten
    • Allow the host and cohosts to unmute participants (moderated unmute mode)—Hosts and cohosts can unmute participants and SIP-based video devices directly without sending an unmute request.
    • Allow panelists to unmute themselves in the webinar—If you choose to mute panelists when they join, select this option to allow them to unmute themselves during the webinar.
      • Wählen Sie diese Option nicht aus, wenn nur der Gastgeber oder Co-Host in der Lage sein soll, dieMut von Diskussionslisten wieder zu aktivieren.
    • Always mute panelists when they join the webinar—automatically mutes panelists when they join the webinar.
6

Klicken Sie auf Erweiterte Optionen, um eine Übungssitzung hinzuzufügen, Teilschreibsitzungen zu aktivieren, dieses Webinar zu einer bestehenden oder einer neuen Serie hinzuzufügen, die Sie erstellen, gleichzeitige Interpretation zu aktivieren, Registrierungen zu fordern, E-Mail-Erinnerungen zu senden und mehr.

7

Click Schedule to schedule your webinar.

When you schedule a webinar, attendees automatically receive email reminders using the default template. If you prefer to customize your email template and send reminders later, uncheck Automatically send email invitations to all participants after clicking Schedule, then follow the instructions in Customize email templates in Webex Webinars.

After you schedule the webinar, you can select it from your calendar and do one of the following:
8

After you schedule the webinar, you can click to download an .ics file, or add the webinar to your Google or Microsoft Office 365 Calendar.

9

You receive an email to forward to attendees to invite them to the webinar.

After you schedule your webinar, click Save as template to save these options as a template for future use.