- Home
- /
- Article

Thanks for your feedback.

Require your attendees to register for a meeting or webinar
 In this article
 Feedback?
Enhance security for your meeting or webinar by requiring attendees to register. By requiring registration, you can see which attendees registered, get information about them, and prevent unauthorized attendees from joining.
When you require attendees to register for a meeting or webinar, you can do the following before and during the session:
-
View a list of attendees to determine whether they have registered for the meeting or webinar.
-
Obtain attendees' names, email addresses, and other information before they can join the meeting or webinar.
-
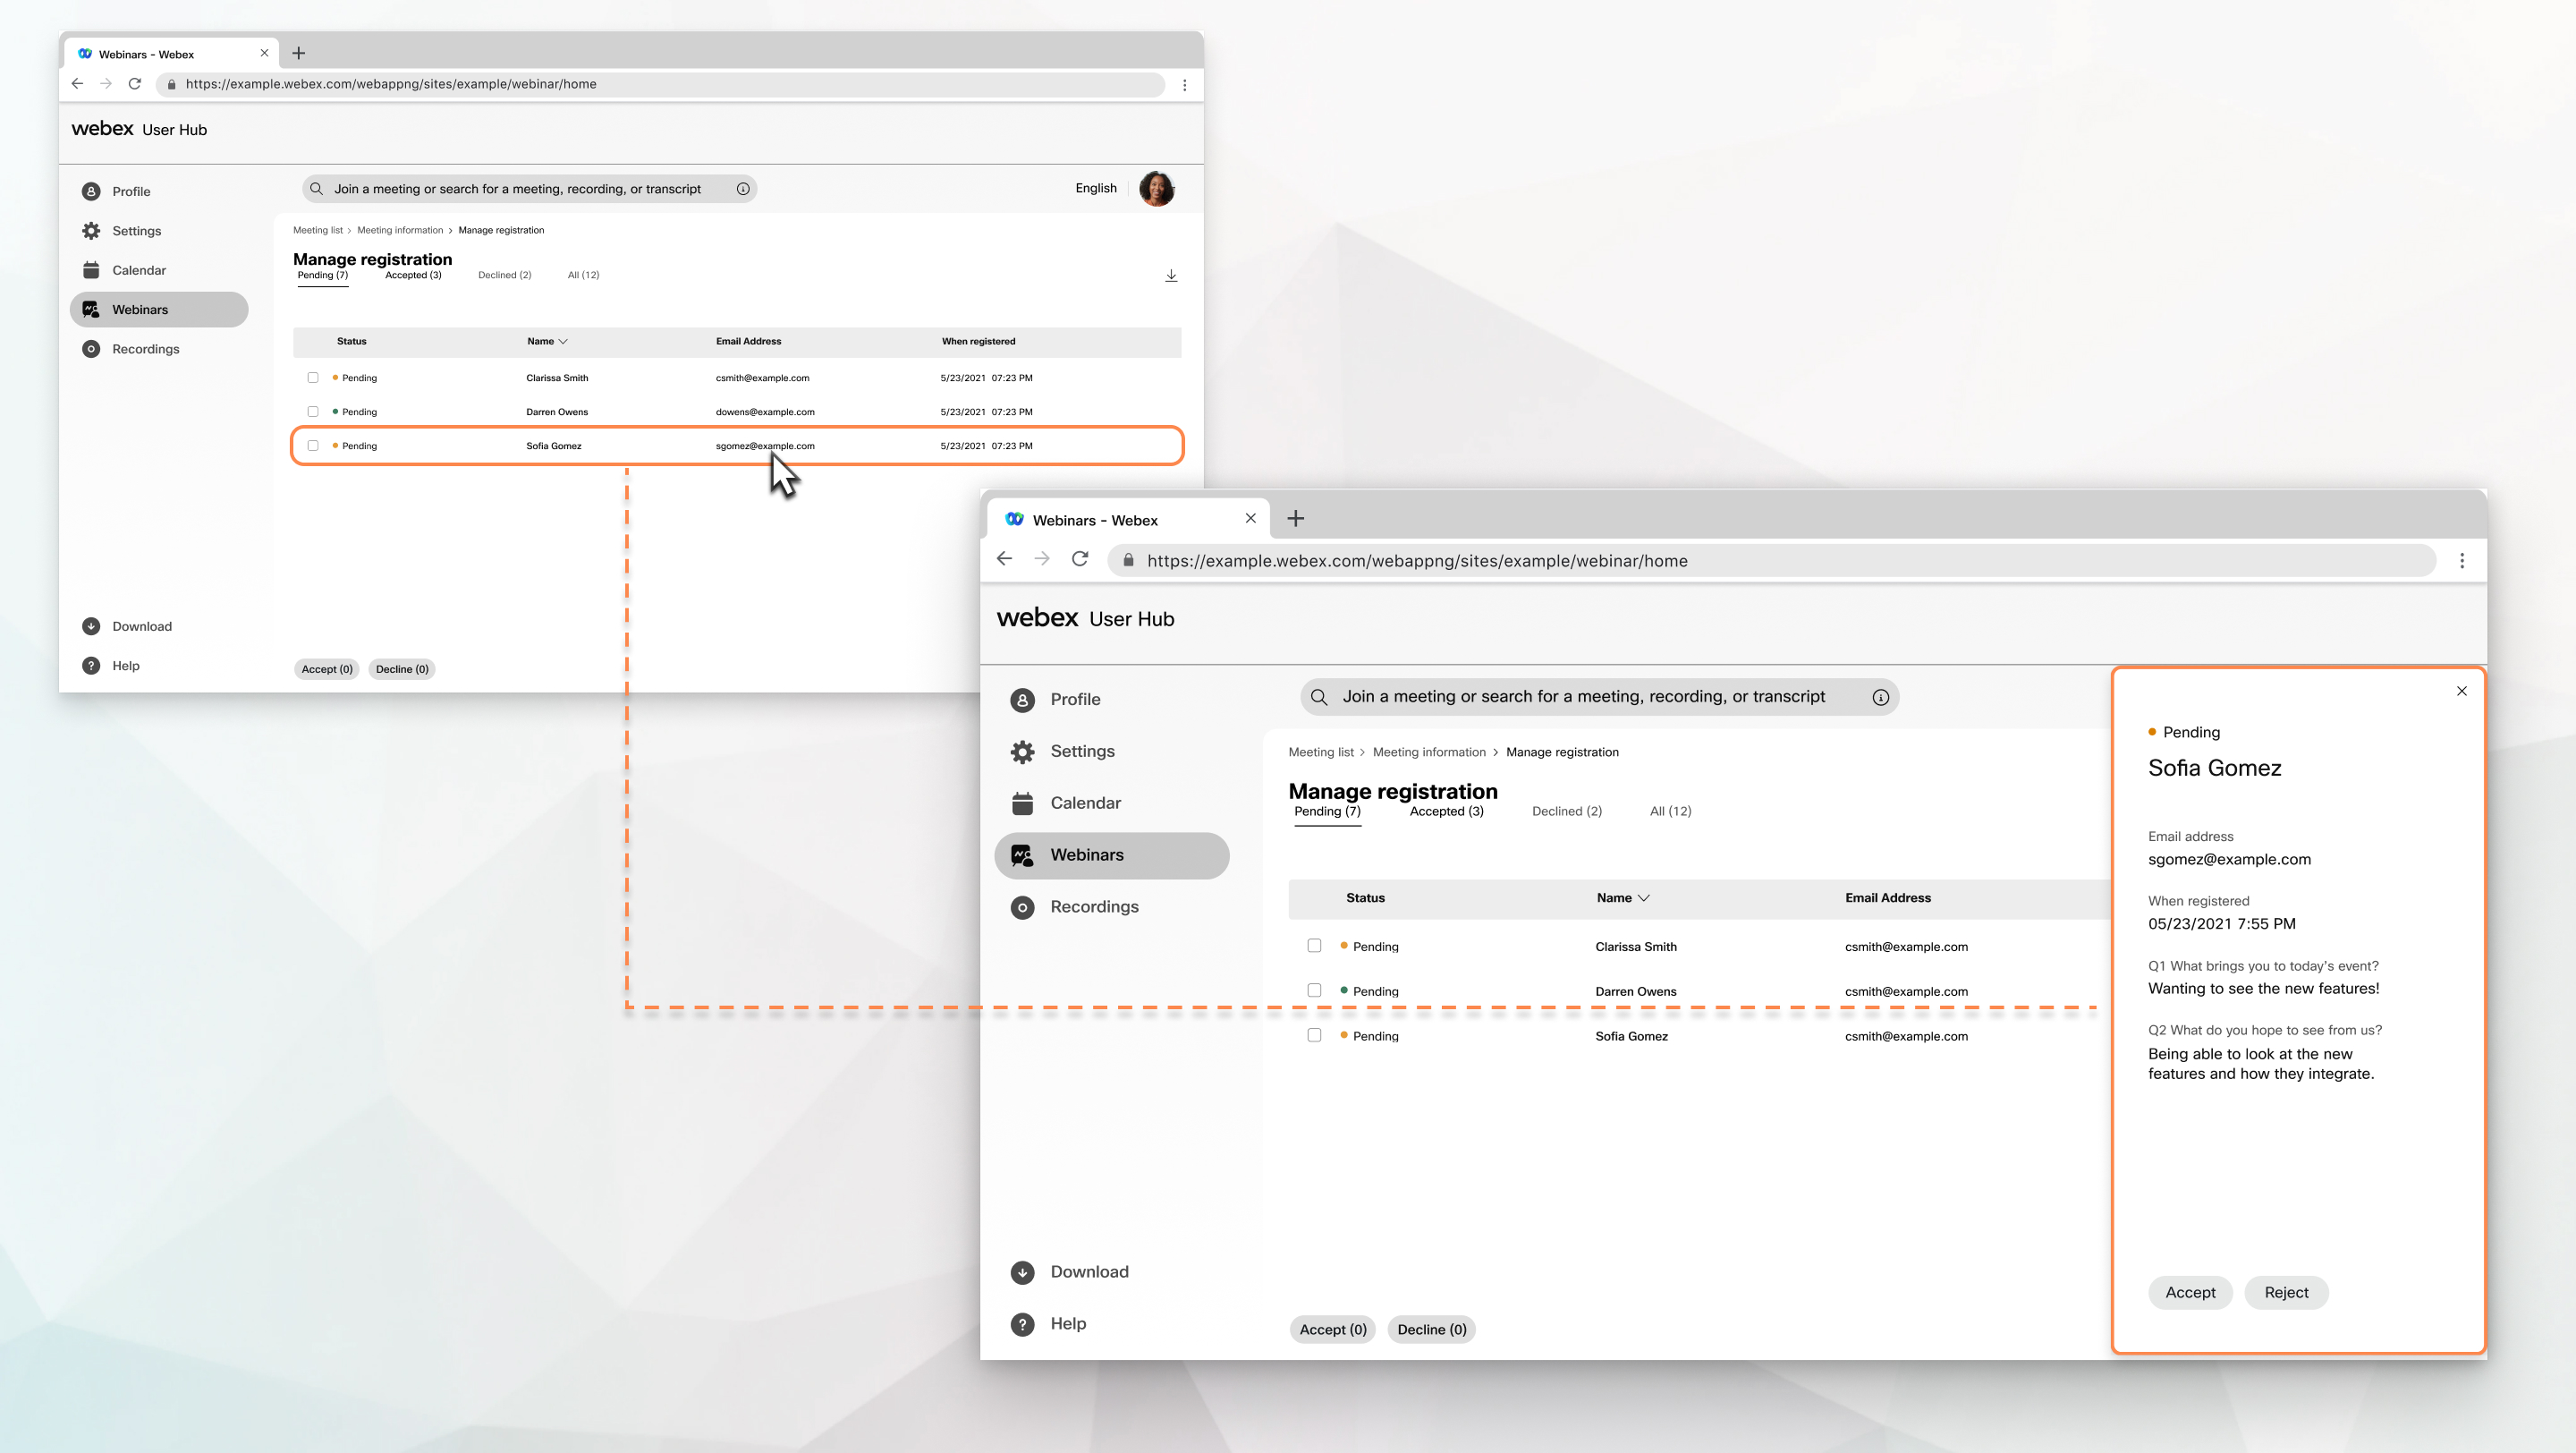
Accept or reject individual registration requests.
If you invite someone to a meeting or webinar that requires registration, they receive an email that includes the following:
-
Information about the meeting or webinar.
-
A link to register for the meeting or webinar.
-
A random registration ID for the webinar, if you selected this option.
Set up required registration for your meeting or webinar
| 1 |
Sign in to User Hub, then click the Schedule drop-down menu and select Schedule a meeting or Schedule a webinar. |
| 2 |
After entering your meeting or webinar information, select Advanced options. |
| 3 |
Under Registration, select Required. If you select Join before host for your meeting or webinar, registration doesn't work. Registration gets disabled for the meeting or webinar, and any previous attendee registrations get permanently deleted. To recover these attendee registrations, contact the Cisco Technical Assistance Center. For more information about these features, see Advanced scheduling options for Webex Meetings and Webex Webinars. If you required registration for a webinar and later add that webinar to a webinar series, the registration form for your webinar syncs with the series registration form. Any data collected for the webinar before you added it to a series gets retained, but any new registration information follows the series registration form. |
| 4 |
Choose the following options:
If someone tries to register for a meeting or webinar that's full, they receive an email with further information. |
| 5 |
(Optional) Customize the registration form to obtain additional information about each attendee. |
| 6 |
Click Schedule. If you uncheck Require attendee registration after one or more attendees have registered for the meeting or webinar, it deletes all registrations. If you check Require attendee registration again, the registration form defaults to the standard registration form with the attendee’s name and email address. |


