
Thanks for your feedback.
 Feedback?
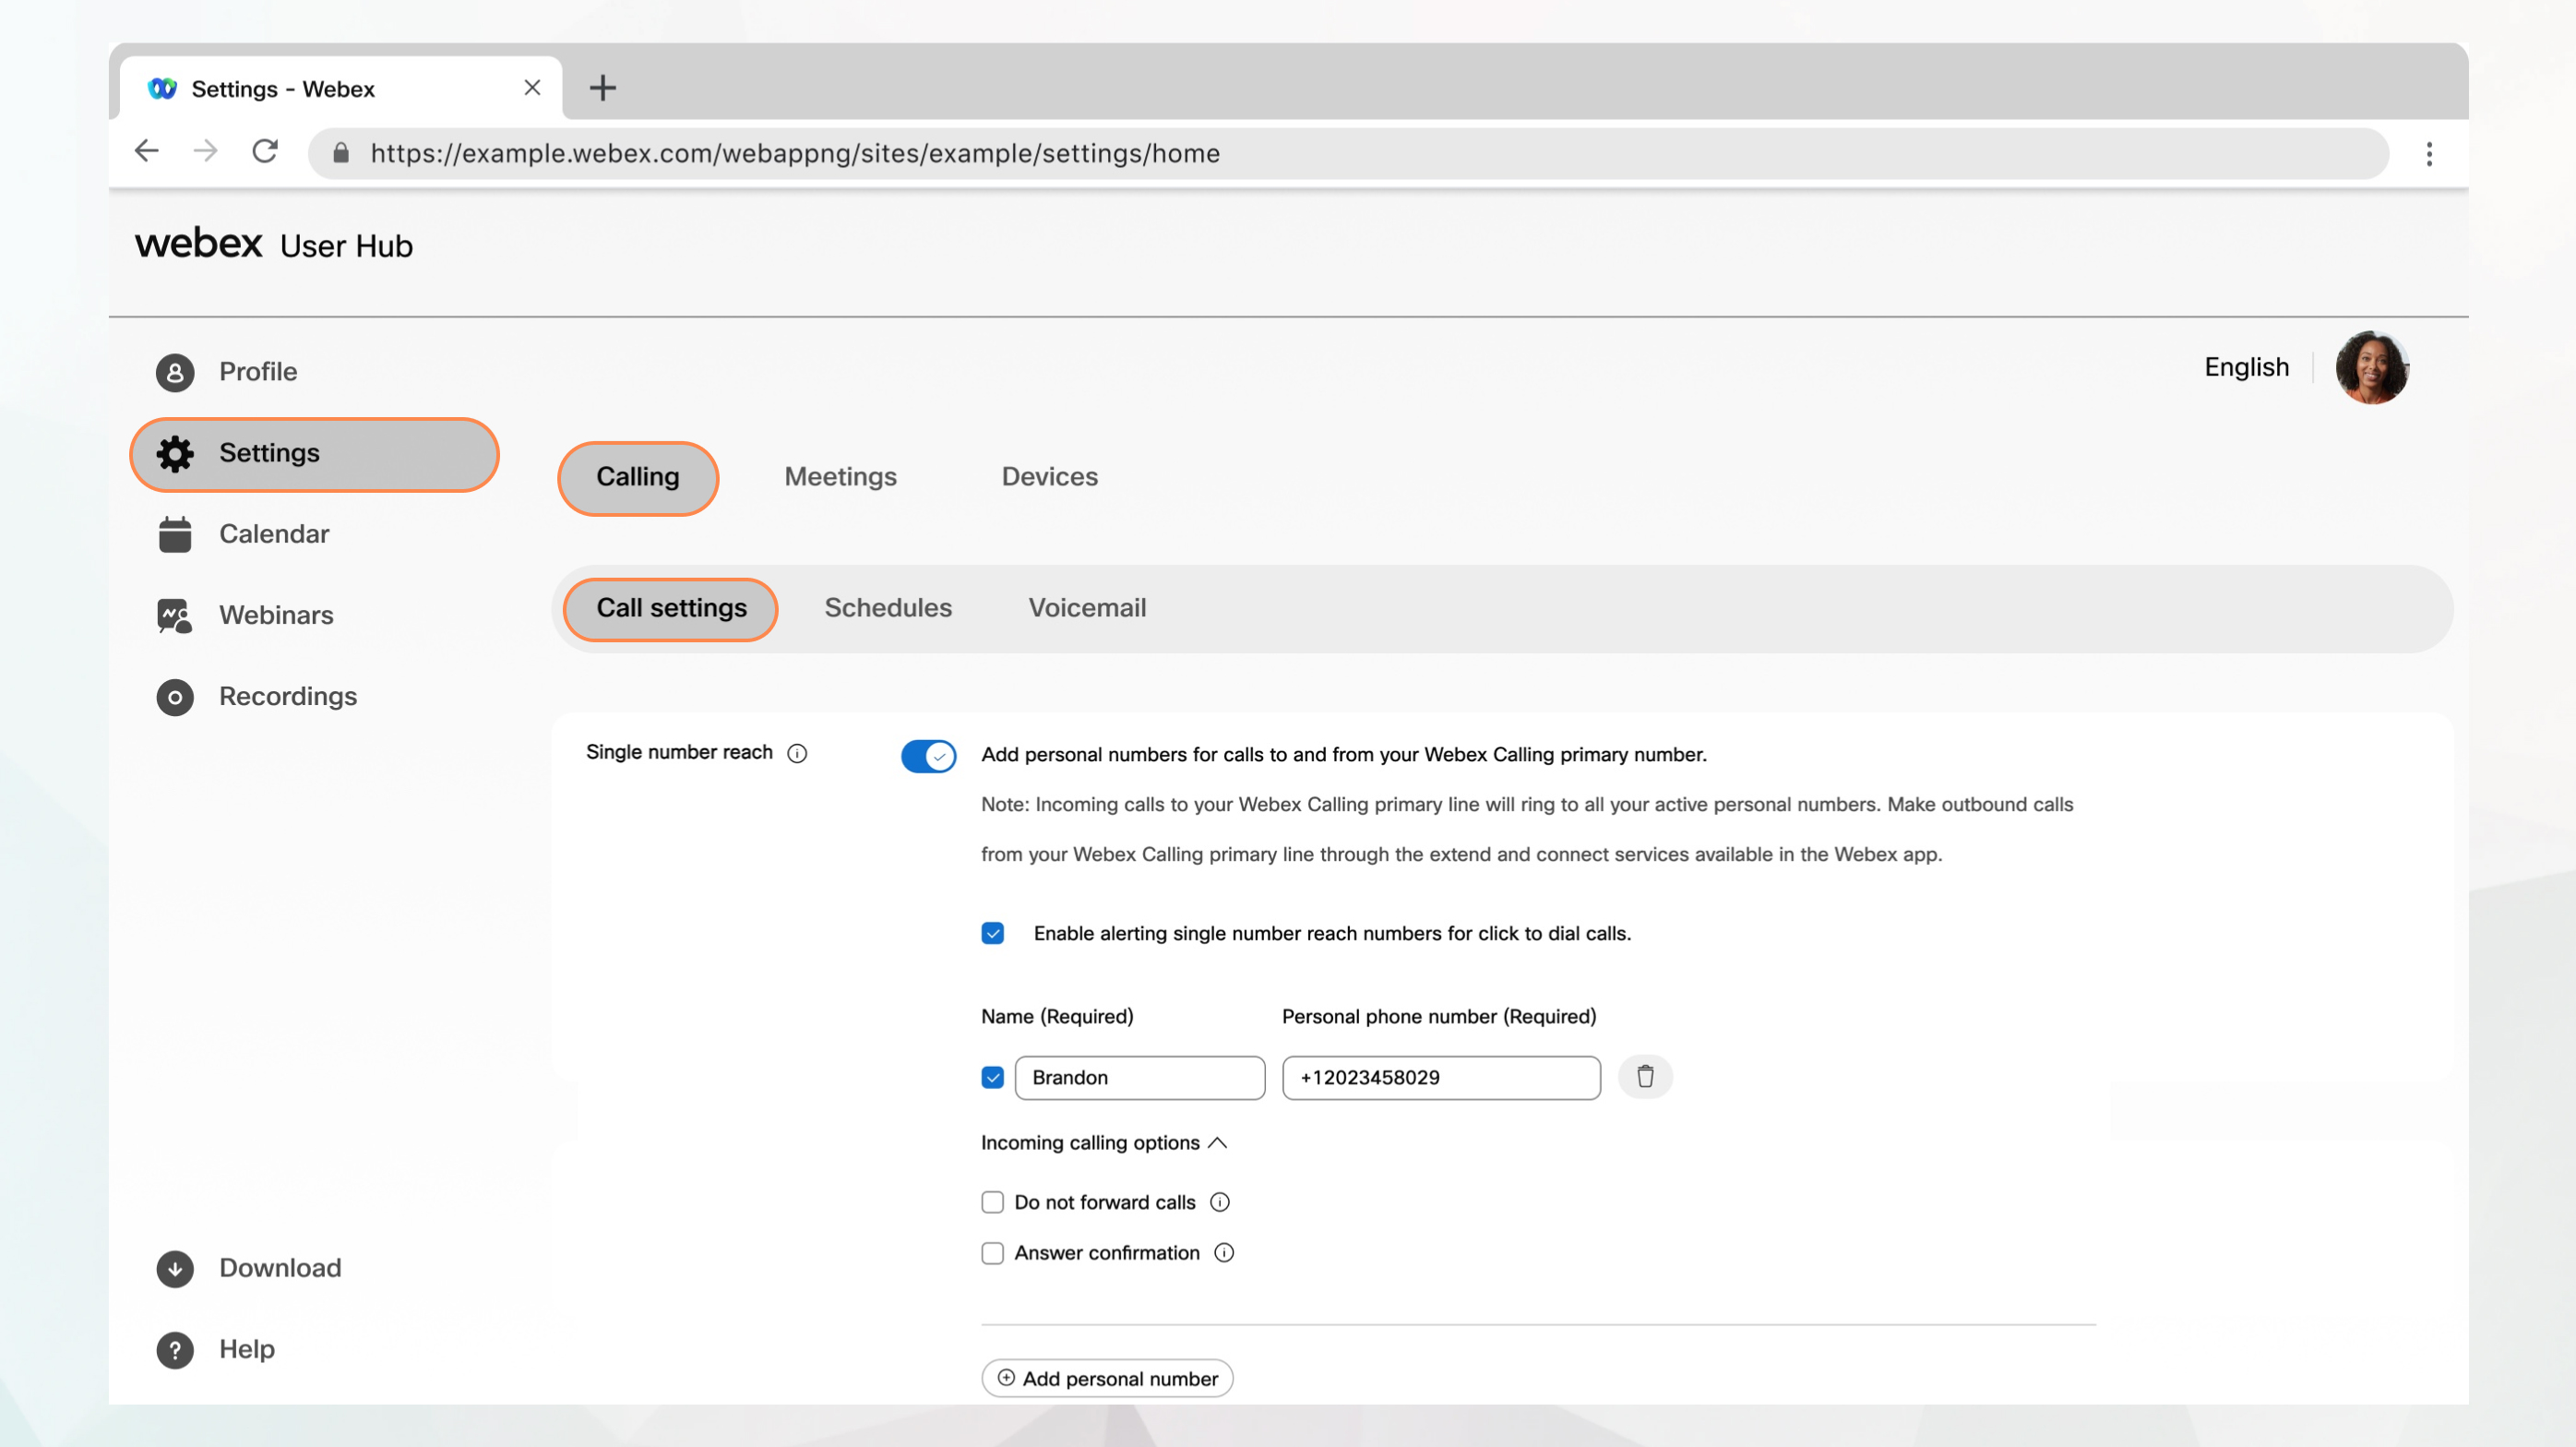
Before you begin
-
Single number reach (office anywhere) must be set up for your location by your administrator.
-
Your administrator must have enabled this feature for you to access and configure it. If you don’t see this setting, check with your administrator.
-
You can configure all the call settings from User Hub by navigating to .
The Calling option is available only for users with a Webex Calling license. If you don’t see the Calling option, it means you don’t have a Webex Calling license.
If you want to find out which calling service you’re set up with, you can check from Webex App. For more details, see Find out what calling service you have.
| 1 |
Sign in to User Hub. |
| 2 |
Go to . |
| 3 |
Go to the Single number reach (office anywhere) section and turn on the toggle. |
| 4 |
Select Name and Personal phone number to add a name and phone number to be used as your single number reach number. Once you add a phone number, the number gets activated. To deactivate, uncheck the box next to the phone number. |
| 5 |
Select any of the following Incoming calling options:
|
| 6 |
Click Save. You can add another personal number by clicking Add Another Personal Number and then following the previous steps. |


